How to Migrate Your Local WordPress Site to a Live Server

Some WordPress users opt to build their website in a local environment. There are multiple reasons as to why this approach to website building is better than starting to build on a live server. Firstly, the website development process is much faster as it is done in its entirety on your computer or laptop. Additionally, this method is cheaper as you won’t need the services of a hosting provider while you work. Furthermore, working in a local environment, i.e. localhost, is an excellent opportunity to explore the options of a new theme or plugin. And, more importantly, it can serve as a “sandbox” for learning more about WordPress or for creating and testing new custom codes.
But, after you develop your WordPress website in localhost, you will still need to move it, i.e. migrate it, to a live server for it to be available to the public. However, as this process could be quite stressful, it often deters WordPress users from building their websites locally in the first place. Therefore, in this article, we will show you how to properly move a WordPress localhost site to the live server. We will be covering two methods that you can use:
Qode Themes: Top Picks
View Collection


Before you start moving your WordPress localhost site to a live server
Both of the methods we’ll be covering—migrating your site with a plugin and migrating your site manually—have their pros and cons. You will have to choose which one to use based on your needs and existing WordPress knowledge. With that being said, let us quickly cover all the prerequisites that the migration process has.
Firstly, you will need to have a fully developed website in localhost. To build such a website, you will need to set up a local environment using software such as XAMPP, WAMP, or MAMP. After you create the website locally, you will need to acquire a good hosting service that supports WordPress for your live website. Lastly, you need to pick a suitable domain name that will support the brand you wish to create or already have. Once you’ve fulfilled all the prerequisites, you can continue to the next section.
Generally speaking, most WordPress users prefer using a WordPress plugin to move a local website. It is more convenient and easier since it requires less technical knowledge to be done. Thanks to an abundance of WordPress plugins, you can easily find suitable plugins to help with moving a WordPress localhost site to a live server. The plugins that you can explore are ones that are created for migration purposes specifically or ones that perform backups and have the migration feature included as well. One of the best plugins for this purpose, and the one we decided to cover in this article, is the All-in-One WP Migration plugin.
The All-in-One WP Migration plugin is a free plugin that is made specifically for website migrations. It works with a wide array of hosting providers, operating systems and supports all PHP versions from 5.2 onwards, as well as all WordPress versions from 3.3 onwards.
Please note, the free version of the plugin has an import limit of 512MB and doesn’t work for multisite WordPress installations. By paying for the Unlimited Extension of this plugin, you will remove the import limit, be able to restore backups from your server using this plugin, gain access to WP-CLI commands and premium support, as well as be able to migrate multisite networks. With that being said, let us explain how to use this plugin.
Apart from what we mentioned about migration preconditions earlier, there is an additional prerequisite for using this plugin on your local website – you need to install WordPress on your live server. Then, you will need to install the plugin both on your local website and your live server, to be able to use it for migration. After performing both tasks, navigate to the All-in-One WP Migration > Export section within your local WordPress website. Then, click on the Export to button and choose where you want to store your localhost site export.

Then, choose the File option, which will store your site within a file that you will be able to download onto your computer.

Additionally, we must mention that the plugin has options that let you edit the file you are going to export before doing so. They are shown after the appropriate option sections are expanded. Those options include performing a search and replace in the database for a given string or excluding a part of the content from the export file. The content that can be excluded is spam comments, post revisions, media files, themes, plugins and must-use plugins, the database itself, and the email domain.

These options are mostly intended for more advanced WordPress users that want to customize the migration process. And since some, like the search and replace feature could potentially damage your website, it’s best to skip them unless you are certain you know what you’re doing. We have opted to skip them in this tutorial as the instructions are intended for a broad audience. With that being said, let us continue with the export process.
Having selected the file option, you will have to wait until the export is done. On your screen, you will be able to monitor how far the process has come and what actions have been completed. When the export is ready, you should press the Download button to save the prepared file onto your computer.

By pressing this button, you will download a .wpress file that will be located in the folder you chose previously. This file is required for the following step, so make sure not to accidentally delete it.
Next, log in to your live WordPress website installation using your credentials.
We’ll be using a live website for this tutorial where we have a clean WordPress installation with no content whatsoever. This is a step we suggest to you as well, but it’s not required—you can migrate a local WordPress website onto an existing live website. However, in doing so, you will lose any content that was present on your live website, as its database and all its files will be overridden with the ones from your localhost site. With that being said, let us continue to the next step of the migration process—importing the .wpress file.
After logging into your live website, navigate to the All-in-One WP Migration > Import section and click the Import from button.

As we mentioned before, the free version of the All-in-One plugin allows you to migrate locally hosted websites that do not exceed 512MB in size. If the size of your website is larger than that, you will either need to use a different means of migration or consider paying for a premium version of this plugin.
Additionally, we suggest checking the upload file size limit on your server as having a low limit can further obstruct the import part of your migration process. Therefore, if the .wpress file size exceeds the upload file size limit on your live server, you need to contact your hosting provider about increasing that limit, if possible.
After resolving both potential obstacles to the import process, select the File option, and choose the .wpress file you downloaded previously from the file dialog window that opens.


Afterward, you will have to wait for the file to upload. A progress bar will let you keep track of how much of the file has been uploaded.
When the upload is done, you will be prompted with a warning that by proceeding further you will override all content that is currently on your live website. If you want to preserve any existing content, we advise making a backup of your live website before going any further. Afterward, you can press the Proceed button.
On the other hand, if you are fine with overriding your live site content or you simply don’t have any, you can press the button to Proceed without making a backup first.

When the import process is finished, you will be prompted with a success message. The only thing that remains is to refresh the permalinks structure by saving them. Click the Save permalinks structure link to do so.

As noted in the message, this link will open the Permalinks page in a new window. However, it will also log you out of the WordPress admin dashboard of your live website. To log back in, you will need to use the WordPress credentials that you used on your localhost website. This is because the import process has overridden the content of your database as well as your site. Therefore, any existing users and their information have been replaced with the ones found on your local WordPress website.

After you log in, you will be redirected to the Settings > Permalinks section. Simply scroll to the bottom of the page and press the Save Changes button.

Afterward, you should review your live website to confirm that everything was properly migrated.
If you weren’t able to move your local WordPress website using a migration plugin or you simply didn’t want to use an additional plugin, free or premium, then you should try to manually migrate your website. However, we need to point out that this method is more suitable for advanced WordPress users as it requires familiarity with using phpMyAdmin and FTP.
Since the process of manual migration is more technically challenging and lengthy, we have broken it down into steps, in the order that you need to perform them. Let us proceed.
-
Exporting the database of your local WordPress website
To manually migrate a local WordPress website to a live server, you will need to export your local database first. To do so, access phpMyAdmin found on your computer and log in using your local phpMyAdmin credentials. You can log in to phpMyAdmin by accessing a link that is created by appending phpmyadmin to the end of your hostname. In our case, the link is http://localhost/phpmyadmin. Depending on your setup, you might need to use an address with a port number, such as http//:localhost:portnumber/phpmyadmin. The portnumber is the number of the port you assigned for your web server if the default port (80) was being used by another application.

Afterward, find your local website’s database from the list of previously created databases and click on it. Then, click on the Export tab in the top section of your screen. Within this tab, you will be able to adjust the options related to exporting, i.e. the export method and format. For this article, we will select the Quick export method and make sure that the export format is set to SQL. Afterward, the only thing left to do is to press the Go button.

This will export a .sql file with the database name as the title. In our case, the file name was black.sql.
-
Uploading the WordPress files from your local website
The following step requires you to upload all the WordPress files from your local server onto the live one using FTP. However, you should know that by doing so, you will override all the corresponding files that are currently on your live server. This includes all the default WordPress files, server-related files like .htaccess, plugins, themes, media files, etc. As such, it is best if your root WordPress directory on the live server is empty. This is opposite to the plugin method where a WordPress installation was one of the prerequisites. Furthermore, you will need an FTP client and knowledge on how to use FTP.
When you’re ready, connect to your live server using your FTP credentials. Then, in the right panel, navigate to your root WordPress directory (often called public_html), and in the left panel, navigate to the folder on your computer which contains your site files. Select all the files within that folder, right-click on any one of the selected files, and select the Upload option from the dropdown menu.

Afterward, you will have to wait until the upload process ends. This can take quite a while, depending on the size of your local WordPress website. As such, you can proceed to the following step while the files are being uploaded.
-
Creating a MySQL database for the live website
To create a new MySQL database, login to cPanel and click on the MySQL Databases option within.

The MySQL Databases page will open shortly after and you should navigate to the Create New Database section near the top. To add a new database, simply set a name for the database in the New Database field and press the Create Database button.

Afterward, you will receive a success message, similar to the one shown below.

Following that, return to the previous page and scroll down to the Add User to Database section. Select the user and the database you just created and press the Add button.

In the following screen, tick the checkbox next to the All privileges option at the top and press the Make changes button.

As with the previous step, a success message will appear afterward.

By following the steps so far, you will have created a new MySQL database, assigned a previously created user to it, and given it all privileges.
If you don’t have an existing user, you need to first create one. You would do that using the Add New User section within the MySQL Databases page and by performing the remaining steps, as mentioned above.

-
Importing the database of the local WordPress website
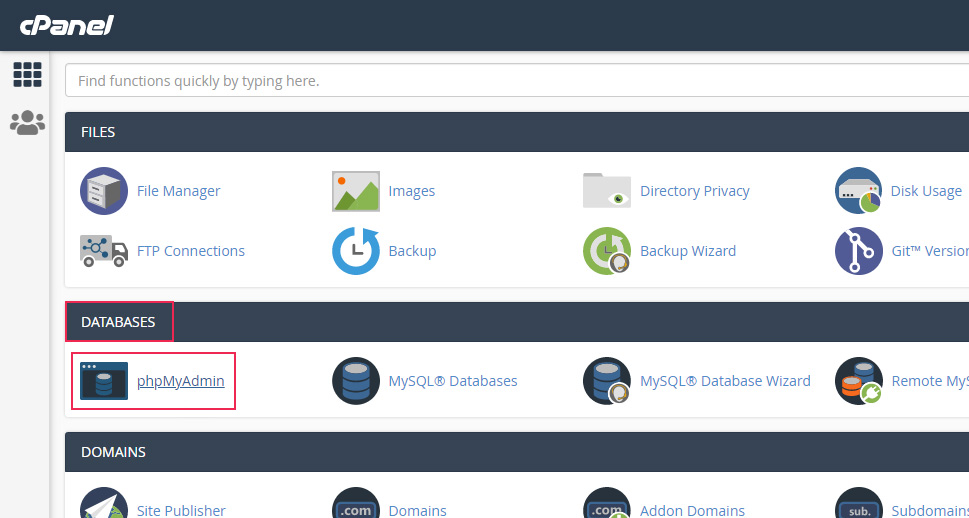
Once you’ve completed the previous steps, you need to import the database that you exported previously onto the live server. To do so, log in to the dashboard of your hosting provider’s control panel. In our case, that is cPanel. Then, click the phpMyAdmin option, located in the Databases section.
Shortly after, phpMyAdmin will open in a new tab. Locate the database you created in the previous step and click on the Import tab. Then, click on the Choose File button within.

Using the file dialog, select the .sql file you stored earlier and press the Go button.


You will have to wait until the .sql file is imported. Afterward, you will receive a success message similar to the one below.

-
Changing your WordPress URLs
After importing the database, you will need to manually edit the appropriate WordPress URLs. This is done to ensure your pages and posts are pointing to your live website, and not to your localhost one.
To change the WordPress URLs to match your live website, click on your database, look for the wp_options table within and click on it. If you have changed the default database prefix in the database you just imported, then you should look for yourprefix_options, where the yourprefix part should be replaced with the actual new prefix.

You will need to edit the values for siteurl and home within this table. They will be located near the top of your screen, as the first two options.

You should edit these options one at a time by clicking on the corresponding Edit button next to each option. Then, replace the localhost URL with the URL of your live website in the value fields for both options. Make sure not to put a trailing slash at the end of the URL. Afterward, press the Go button.


-
Properly setting the WordPress database on your live website
At this point, if you were to try to access your website, you will notice that your website is experiencing an error in establishing a database connection, as you will be able to see a similar error screen.

You shouldn’t worry, as this is completely normal at this point. The reason for this error is that by importing the WordPress files from our local website, we have also imported the local wp-config.php file. Among other things, this file is used for establishing a database connection by providing the appropriate MySQL settings. But, since we have imported the local wp-config.php file, there is a mismatch between the MySQL settings, which is causing the error.
To solve the error, we need to manually edit the MySQL settings to match the settings used for creating our live database. You can edit the wp-config.php file either by using an FTP client or by using the File Manager option within cPanel. We will opt for the latter.
Therefore, log in to cPanel using your credentials and click on the File Manager option located in the Files section.
Then, find your live website from the list on the left and navigate to its root WordPress directory, often called public_html. Locate the wp-config.php file within, right-click on it, and select the Edit option.

Locate the MySQL settings section within the file and edit the entries for the database name, user, and password. The database name should be the one that you created in one of the previous steps, and the user and password should be the ones associated with that database. When you’re done, press the Save Changes button in the top right corner.

Once you edit the wp-config.php file, the error will disappear. And then you will be able to log in to the admin dashboard of your live website using the credentials that you used on your local WordPress website. This is because by importing the database, you imported the locally hosted users and their login information, among other things.
Afterward, navigate to Settings > General, scroll to the bottom, and press the Save Changes button. This will rewrite the URLs to match your live website.

Additionally, you should refresh your permalinks, to ensure there are no permalink issues. To do so, navigate to Settings > Permalinks and press the Save Changes button again.

-
Fixing broken links
Even though most of the links will get updated by changing the WordPress URLs and saving the general settings, you may still have some leftover broken links or images that are missing. To change the remaining links, you will need to perform a search and replace in your database. This can be done either by executing SQL queries or by using a database-altering plugin like Better Search Replace. We will show the latter.
After installing the plugin, navigate to Tools > Better Search Replace. Insert the localhost domain in the Search for field and the live domain in the Replace with field. Select the tables where you wish to perform the search-replace operation. Usually, selecting the wp_posts table should be enough, as that table contains the information regarding your posts and pages. Check the Run as dry run option to see how many cells will be affected before the changes are made.

Then, you can run the search-replace operation once more with the same parameters, but with the dry run option unchecked. Afterward, all previously broken links or missing images will be fixed.
With that, the manual migration process is over. The only thing that remains is to review your live website and ensure everything is working as it should.
Final Thoughts
There are many benefits to setting up a local environment on your computer, but the most important ones in our case are the speed at which a local WordPress website can be created and the funds that are saved in the process. After creating a website locally, you will need to migrate it to a live server using one of the two methods we discussed in this article. Since we have carefully covered all the steps, we are confident that you will be successful in moving your WordPress localhost site to a live server using either method. And, even if something were to go wrong, you can always rely on your hosting provider’s help, as well as on the local version of your website acting as backup. With that being said, we suggest bookmarking this article in case you need to migrate a locally hosted WordPress website to a live server again in the future.
