How to Install WordPress Manually – The Famous 5 Minute Install

If you’ve decided to use WordPress for your next blog or website, one of the reasons for this choice was, most likely, it’s great ease of use. WordPress is a platform that comes with a modest learning curve, and one of the best things about it is that you can do everything yourself, without outside help, even if you’re no computer wiz.
Anyone can learn how to install WordPress all by themselves. In fact, in theory the process is so simple, it’s become known as the famous five minute install. And yet, for most users, especially novices, it usually ends up taking a bit longer than that.
Installing WordPress manually and getting your site up and running can actually be a pleasant and quick experience – provided you have proper guidance. And that’s precisely what we intend to provide today, step by step.
Some WordPress hosting providers offer their clients a handy WordPress installer that basically does all the work. However, this is not always an ideal solution. Sometimes, these automatic installers come in the form of packages that also install certain plugins or make certain modifications that you may not necessarily want. So either make sure that doesn’t happen, or simply opt for a manual install. That way, you will be in complete control over your website.
Now sit back, relax and let’s get started.
Before the Install
Before you start the installation process, there are a few things you need to take care of.
First of all, you will need hosting and a domain name. Choose your hosting provider wisely and make sure it’s a company that powers a lot of WordPress websites, because you might need some WordPress-related support and troubleshooting along the line.
As for the domain name, you will want to think this one through, as it is the name that is going to be associated with your business or blog and that your future visitors will recognize you by. Basically – your brand. If you need help, take a look at our article on choosing a great business name.
There are also a couple of tools you are going to need before you start your WordPress installation:
-
A web browser (any web browser, really).
-
An FTP client. A File Transfer Protocol (FTP) client is software that you use to upload, download and manage files on your server. Many FTP clients, such as FileZilla, are free and easy to install and use.
-
Database access. Most web hosting providers offer a database access tool such as phpMyAdmin.
After you have taken care of all this, it’s time to get down to the gist and install the platform.
How To Install WordPress Manually
Before the actual install, you will have to do two things: create a database and download your copy of WordPress.
If you’re more of a visual learner, you can also check out our video on how to install WordPress on your server. Note that in this video we don’t cover the steps for creating a database, so if you don’t have one yet, keep reading.
How to Create a Database
Control panels are a great asset for managing your web server and often offer an option for accessing and managing your database. One of the more popular ones out there is cPanel, which is the default control panel of most hosting providers.
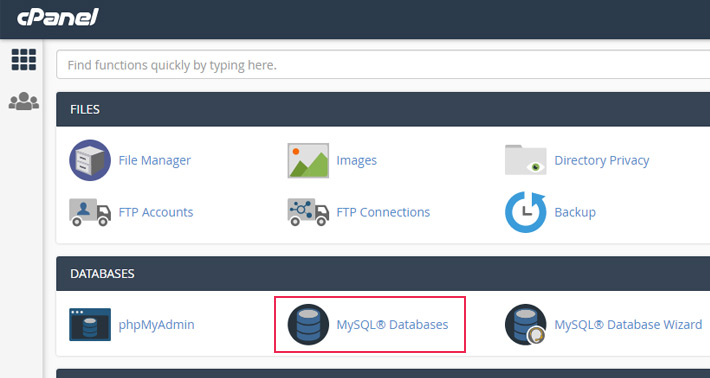
To create a database with cPanel, log in with your cPanel credentials, which may consist of your email address or user name and password, then click the “MySQL Databases” option, located in the section called “Databases”.
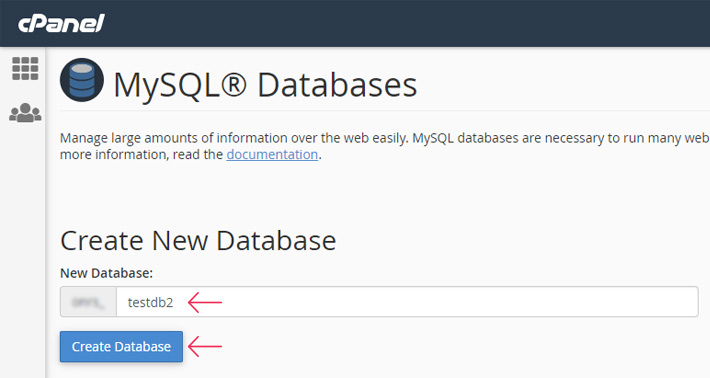
In the top section of your screen, insert the new SQL database name and press on the “Create Database” button.
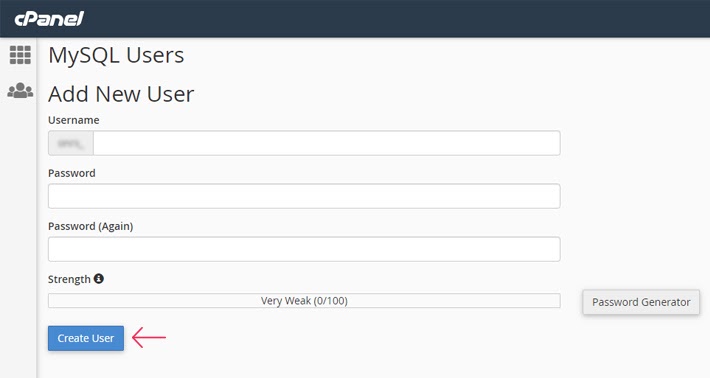
Then, further down the page in the MySQL Users section, fill in the necessary info in order to add a new user to your subdirectory. It is important that you remember or save the username and password you just entered somewhere, as it will be relevant in steps to come.
Then, make sure to add both the newly created MySQL database and user in the “Add User To Database” subsection.
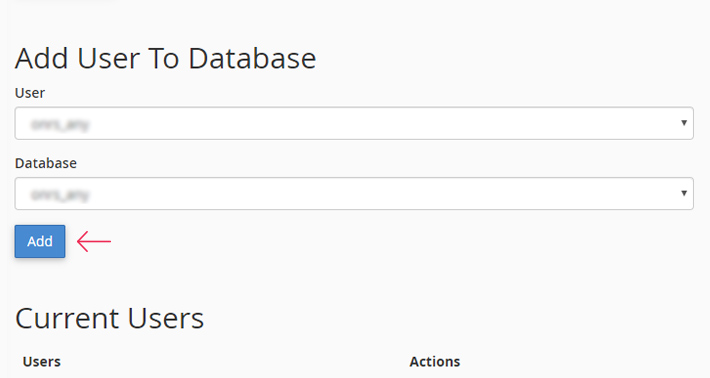
Afterward, assign the necessary user privileges to the newly created user and press “Make Changes”. These privileges restrict or allow certain tasks to be performed by the user on the said database.
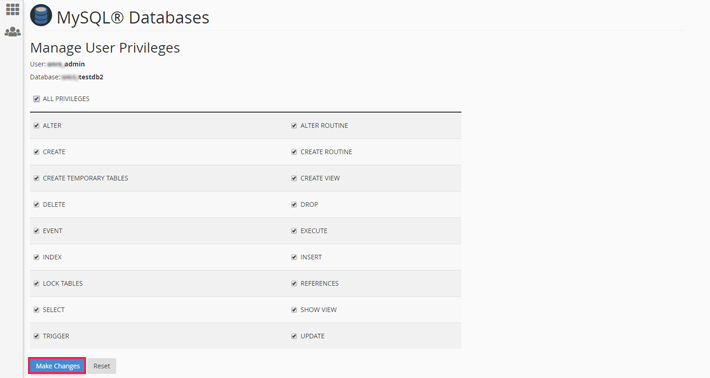
The given privileges can also be altered at a later time, either to extend or restrict certain ones.
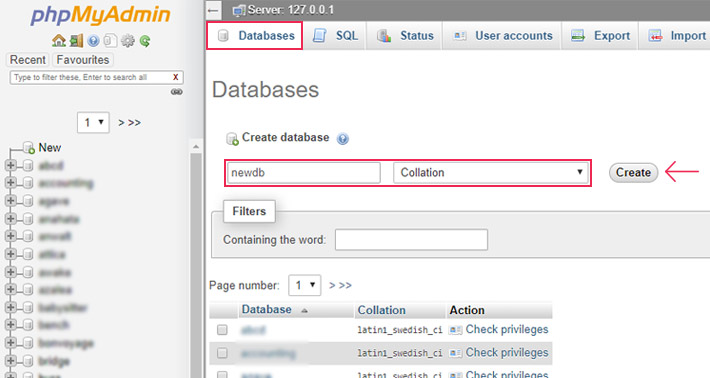
In case your hosting package doesn’t provide cPanel with your hosting account, you can create a database directly from phpMyAdmin. To do this, connect to phpMyAdmin using the credentials provided by your hosting provider and click on the Databases tab. Under “Create database” insert the name of your database, choose the type “Collation” and click on the “Create” button.
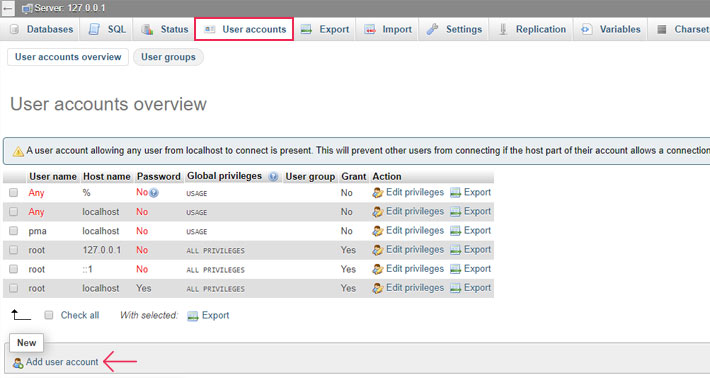
Now you need to create a new user. Navigate to the “User accounts” tab and click on “Add new account”.
In the following screen, add your user name, insert localhost as the host name and type your password 2 times, as noted in the screenshot below.
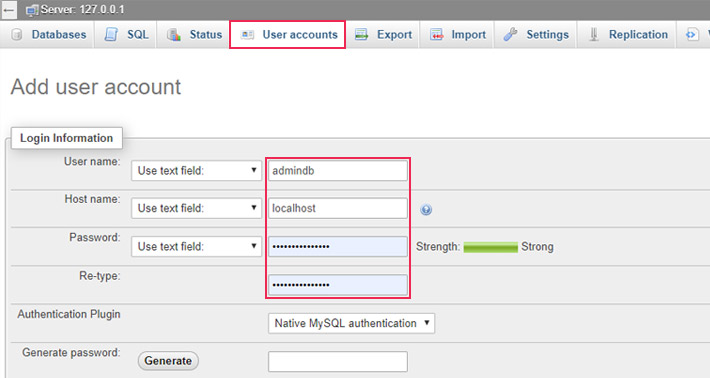
Scroll down and in the bottom-right part of your screen click the “Go” button.
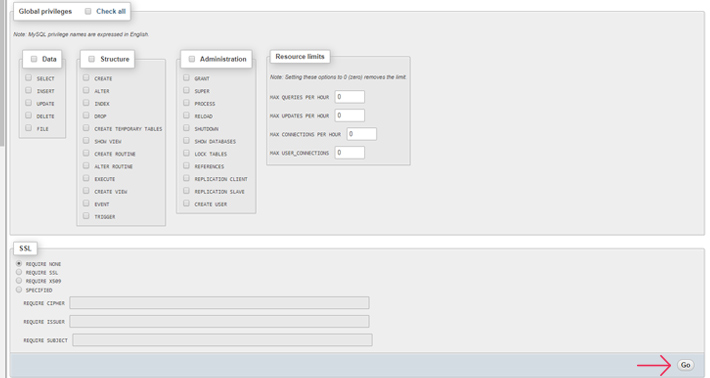
We have purposely neglected to assign any privileges, as the ones shown are global, giving the newly created user the ability to perform any task on all of the databases, which could be a security hazard. To manage this hazard, the final step is to assign user privileges for editing the previously created base only.
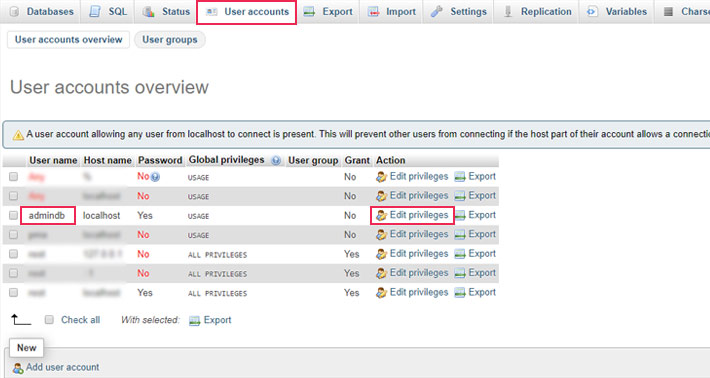
To do so, click the “User accounts” tab once more, locate the row with the new user name and press “Edit privileges”.
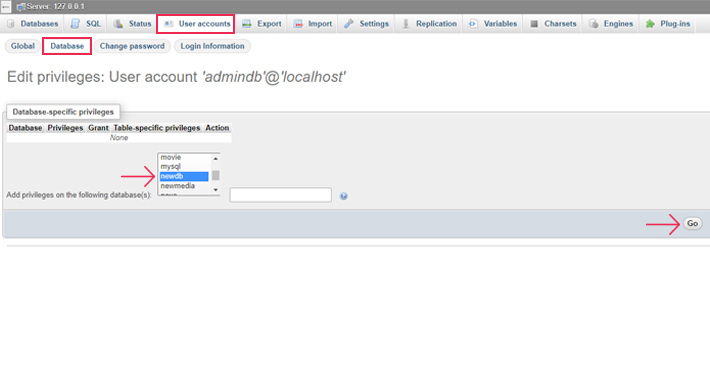
In the top-left part of the screen click the “Database” tab, select the database and click on “Go”.
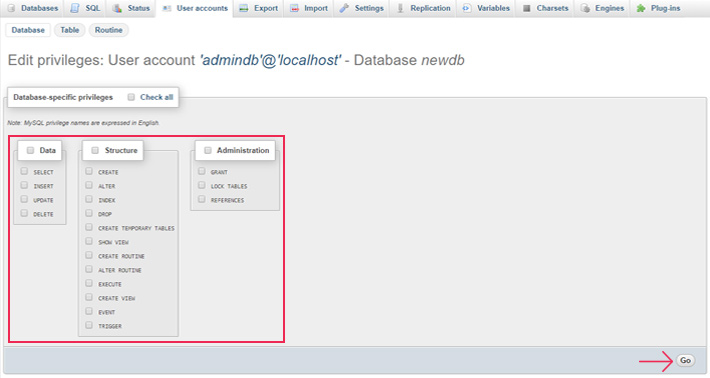
Afterward, assign the database-specific privileges and click on the “Go” button.
Now that you have created your database, you’re ready to continue with the WordPress installation process.
Qode WordPress Themes: Top Picks
View Collection


How to Download WordPress
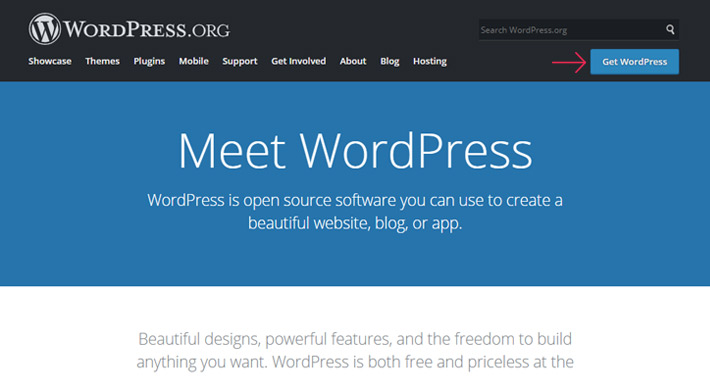
To get your copy of WordPress, go to WordPress.org. Please note that there’s a difference between WordPress.org and WordPress.com, so make sure you’re at the right one.
On the WordPress.org homepage, click the Get WordPress button.
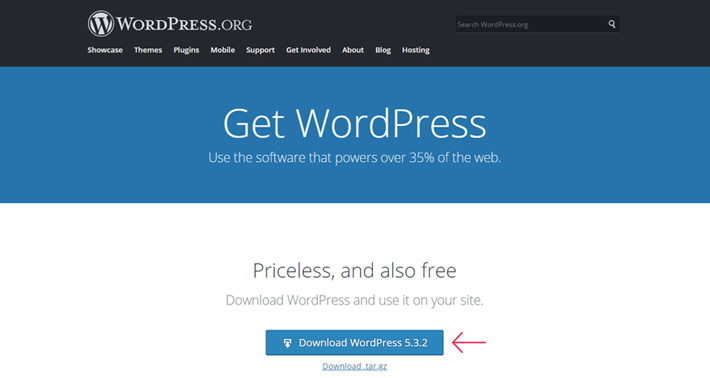
This will take you to the download page. Simply click on Download WordPress. The number on the button shows the latest version of the platform, the one you’re going to download and use.
Once the file is downloaded, you will need to unzip it.
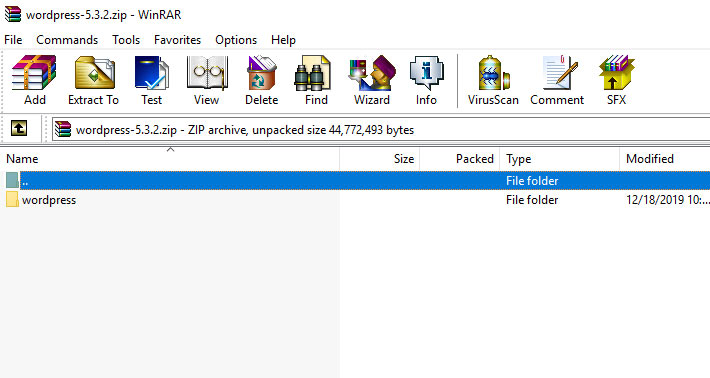
Unzipped, your WordPress folder will look something like this.

How to Upload the WordPress Files and Connect Your Database
All these files now have to be uploaded to your server. There are a couple of different ways to do this, most notably using the hosting provider’s control panel (cPanel) or using FTP. We are going to use the FTP method, using the FileZilla client software mentioned earlier.
The first thing to do after opening your FTP client is to connect to your server. For this, you will need to enter some information, specifically your host, your username and your password, which should be provided by your hosting company.
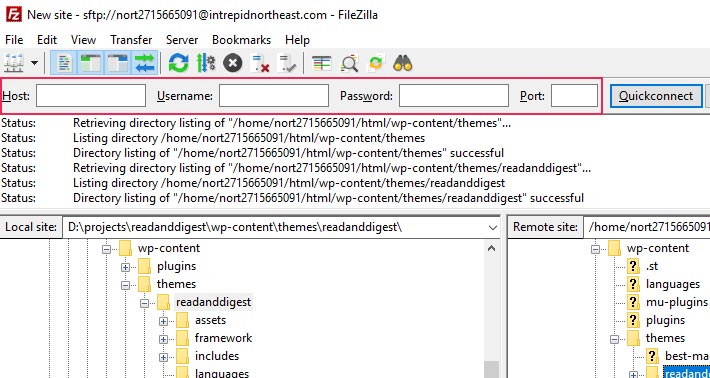
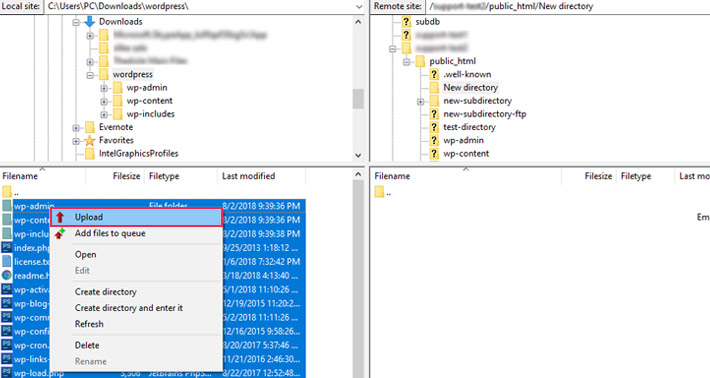
After connecting, the left side of the screen will show the location where you have extracted the WordPress files folder, and the right side of the screen will be reserved for your website’s root folder.
Bulk select all the files from the folder and select Upload from the right-click menu.
After the upload has finished, go to your website by entering its URL in the browser.
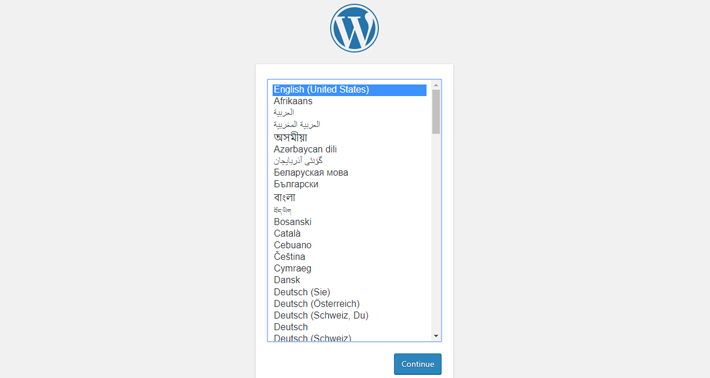
And finally, here we are – the WordPress installation screen. The very first thing you will be asked to do here is to choose the language. Pick one and click on Continue.
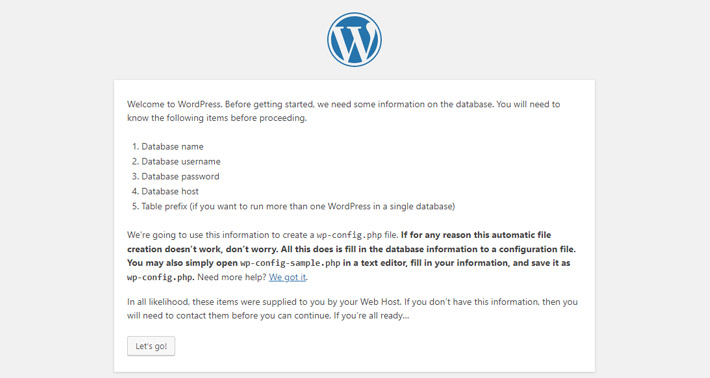
The next step is connecting your database, which you will do by simply clicking on the button that says Let’s go!
The next screen asks you to provide your database name, username and password, as well as the host.
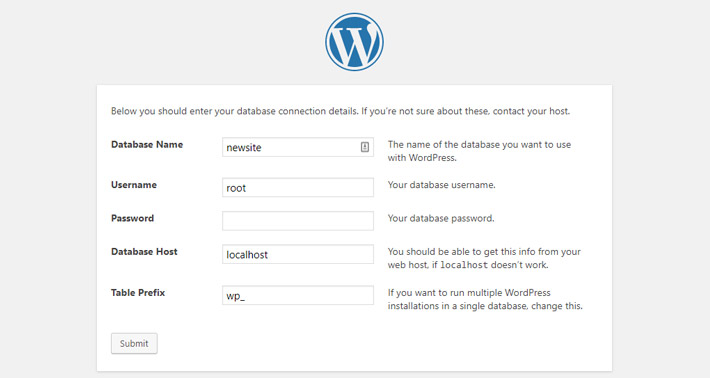
Enter the required information and click on Submit.
Note: these should be the same as the information of the database you have created previously. If you are not sure about any of these, contact your hosting provider to get the required info.
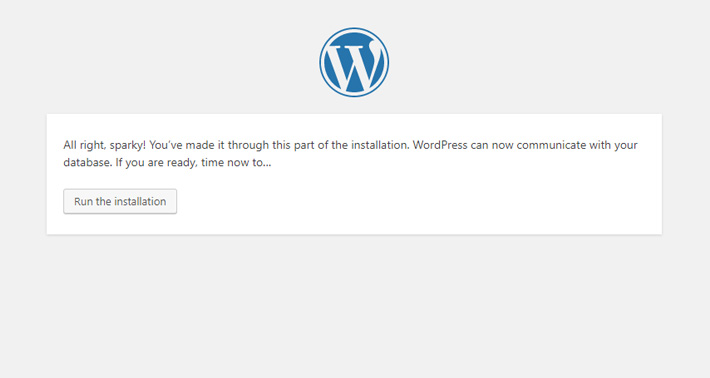
We’re almost there! Now that WordPress has established communication with your database, it’s time to Run the installation.
The Actual Five-Minute WordPress Installation Process
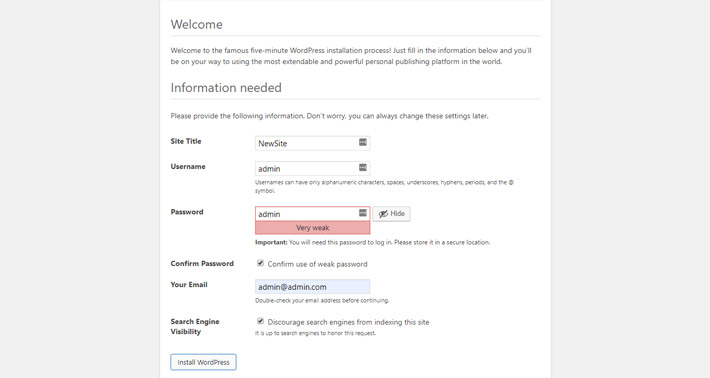
The first screen of the installation process is the Welcome screen. Here you will be asked to give your website a title and to provide a username and password for it. You will also need to enter your email and to set the search engine visibility (in some cases you don’t want the search engines to crawl and index your site before you’re good and ready).
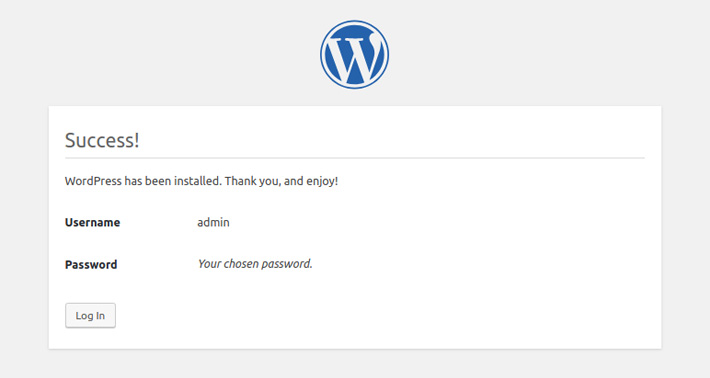
Success! As the next screen informs you, WordPress has now been installed on your website.
Click on Log in to access your website from its backend. Welcome to the WordPress Dashboard.
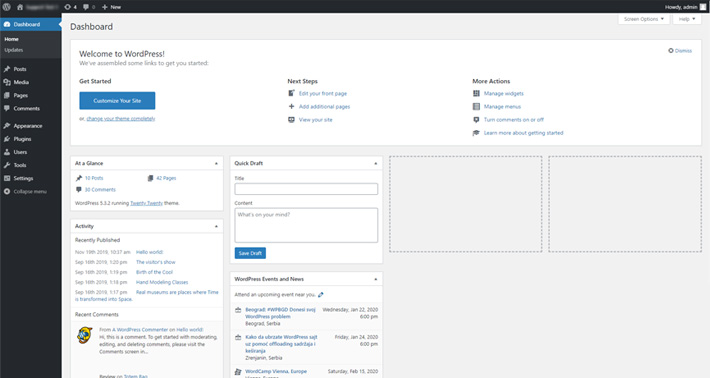
And that’s it. WordPress is now officially installed.
Your next step in setting up your website is to choose the perfect WordPress theme for your needs. If you’re not sure why you need a theme, take a look at our article on what WordPress themes are and why they are useful.
Final Thoughts
As you can see, although the famous five-minute install may sometimes take a bit longer than five minutes, it’s still a fairly simple and straightforward process. Following the steps described above, make sure, of course, to use the latest version of WordPress, and you will be able to get your new website up and running hassle-free.
