A Complete Guide to Setting Up Donations With the GiveWP Plugin

Every year, thousands of people and organizations around the world turn to their fellow human beings with a simple request – to donate some of their money in support of an organization, an individual, or a cause. There are as many reasons to ask for donations as there are reasons to donate. The ways to ask for a donation are also many.
If you or your organization plan to use a WordPress website in your donations run, then you’ve probably come across the GiveWP WordPress donations plugin. It certainly is one of the more popular and useful donations plugins out there, and it does a great job of not only enabling you to accept donations on your website but to set it all up in a jiffy.
Think you’ll need help doing it? Don’t worry. In this article, we’ll show you:
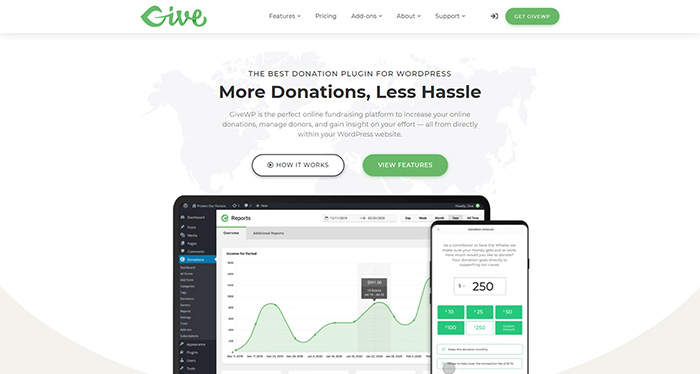
GiveWP is an incredibly popular donations plugin for WordPress – one of the most popular ones. It has over a hundred thousand active installations, it’s available in 21 languages, and it has 407 five-star ratings for an average 4.7 rating. There’s much to love about GiveWP.
The plugin is rich in features that make it easy for you to set up donations on your website and for the donors to donate. With just the basic plugin, you get to:
-
Create donation forms. This is the core functionality of the plugin and it’s how people can make donations to your website.
-
Make payments easy. You can use PayPal and Stripe right out of the gate, provided that you have accounts with the services. More processors are available, too.
-
Keep track of your forms’ performance. Thanks to built-in reporting, you’ll have easy access to all the relevant stats.
-
Keep track of your donors. The donor management tool that comes with the plugin makes it into a mini-CRM tool.
That’s just the beginning. Give, the makers of the plugin, have released free add-ons that let you do nifty things such as add a countdown to your form, add a pixel for Facebook retargeting, or connect to the Double the Donation platform for possible donation matching.
With paid add-ons, you can expand the number of payment options you can offer to your donors. You can set up recurring donations, integrate Mailchimp or Constant Contact with your forms, let donors give in their currency, send them tax-deductible receipts, recover credit card fees, and do lots and lots of other things. To sum it up, the reason to use GiveWP for donations is that it’s just such a great plugin.

Before you start raising funds, make sure you check with your local authorities about any legal prerequisites you might need to fulfill. If you need to register a charity on an NGO, make sure to do it. You don’t have to be a charity to use GiveWP, though. It is, however, best to stay on the right side of the law – and the tax code. With that taken care of, you can start working on the list of essentials.
WordPress Website
GiveWP is a WordPress plugin, and it needs a WordPress website to work. There are two “kinds” of WordPress websites – WordPress.com and WordPress.org. Although they sound like they should be almost the same, they are, in fact, quite different. So much so, that it’s much better to use the .org version than the .com version for your donation website.
In a nutshell, the .org version of WordPress lets you do all the cool things such as install plugins and use awesome nonprofit themes to expand how your website looks and what it can do. The .com version lets you do some of it, but only if you subscribe to a paid plan. And even then, you won’t have nearly as much freedom as you’d get with a .org website. If you insist, however, you can use GiveWP with WordPress.com if you have a Business plan with the platform.
Ideally, you’ll use WordPress 4.8.5 or newer. The minimum PHP version recommended is 5.6, although your host should provide the latest version possible. The minimum MySQL version required by the plugin is 5.5, and finally, the server where your website is located needs to support TLS and have an SSL certificate that passes at least TLS 1.2 tests.
Payment Processor
The free version of GiveWP comes with support for PayPal Standard, PayPal Donations, Stripe, and offline donations. Stripe comes with a 2% fee on every single donation – it doesn’t apply to recurring donations and it can be done away with if you get the Stripe paid add-on. PayPal Donations’ fee structure is a bit more complex, depending on whether you’re a charitable organization and the currency of the donation.
If you want to expand the payment gateway options at your disposal – or remove the 2% Stripe charge – you will need additional add-ons. Through them, you’ll get access to payment gateways including:
-
Authorize.Net
-
Mollie
-
CCAvenue
-
GoCardless
-
Square
-
Paymill
The full list is longer, and it will depend on your location – not all gateways provide their services in every country.
The Plugin
Finally, you’ll need the plugin itself. You can get it right from WordPress.org – GiveWP is free to use, after all. You’ll get access to a handful of add-ons for free, along with the core features for donor management, performance monitoring, and the basic payment options.
If you want something more out of the plugin, you have two ways to get it. You can find the add-ons that give you the exact thing you want and purchase them individually. You can also subscribe to one of three different plans which are often on sale and can start as low as $175 per year.
The more expensive the plan, the more perks it gives you. All paid plans give you access to all marketing add-ons, all payment gateways, PDF receipts, and faster support. The top two plans also give you access to the currency switcher, recurring donations, and the form field manager, among other options. Finally, the topmost plan gives you access to VIP support and five sites all-access license for automatic updates.
Donation WordPress Themes
View Collection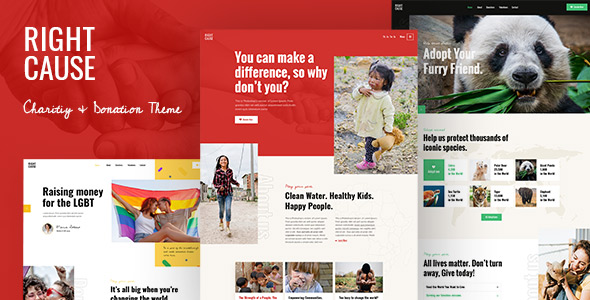
RightCause
Charity and Donation Theme
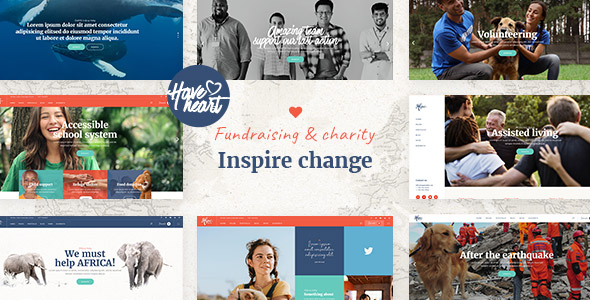
HaveHeart
Fundraising and Charity Theme

Goodwish
Charity & Nonprofit Theme
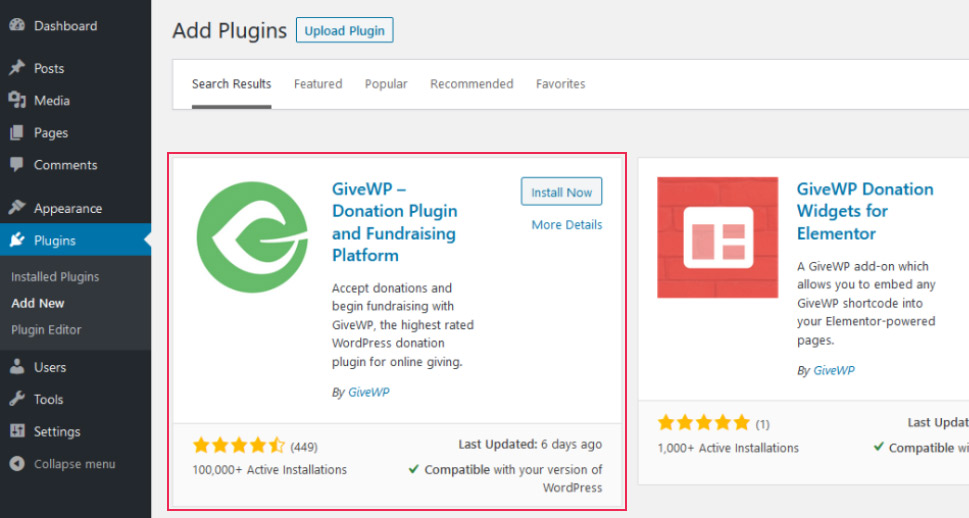
Once you’ve decided on the GiveWP plan, you’ve set up a website and decided which payment gateway you want to use, you can go ahead and install the plugin. Head over to Plugins > Add New, search for GiveWP, and install and activate the plugin.
With the plugin installed, you might decide to see the settings first. Head over to Donations > Settings. You’ll find six different tabs there, and each of them will have several subtabs under it. Don’t worry, however, as GiveWP has done a fine job of explaining what each option does.
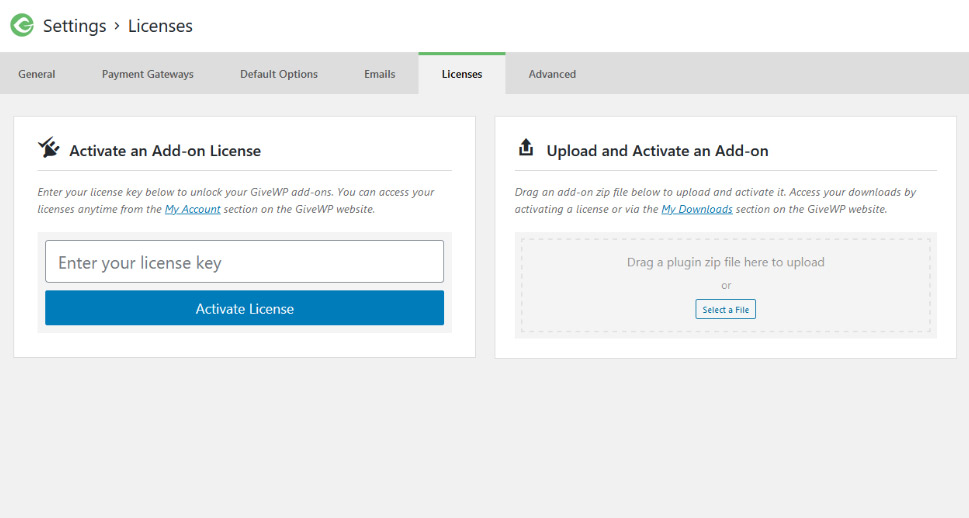
Licenses
Before you rush straight for the first tab in the settings, the General tab, you might visit the Licenses tab first. This is where you can enter the license key for the add-ons you plan to use, and it’s also where you can upload and activate them.
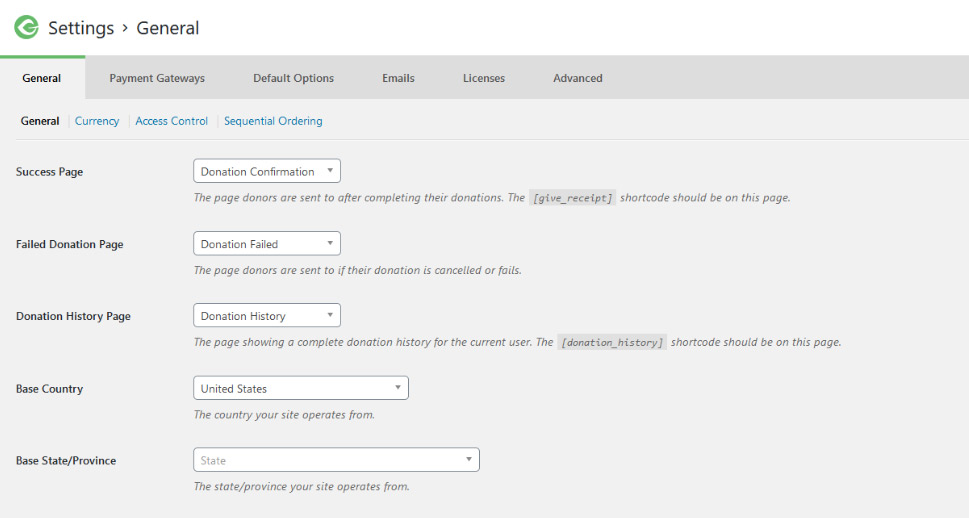
General
The first subtab of the General tab carries the same name. In this subtab, you’ll be able to set the pages to which the donors are sent when their donation succeeds or fails, as well as the page that contains the donations history. You don’t have to worry about making those pages – the plugin will do it for you. The base country and state your website operates from are also set on this page.
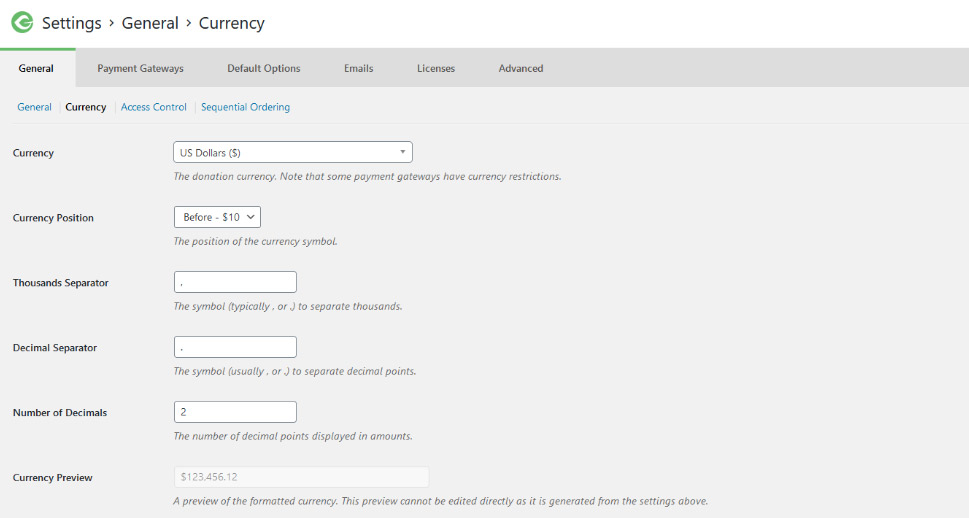
The next subtab is Currency, and it’s where you set the currency of the donation, the position of the currency symbol, the thousands and decimal separators, as well as the number of decimal points displayed.
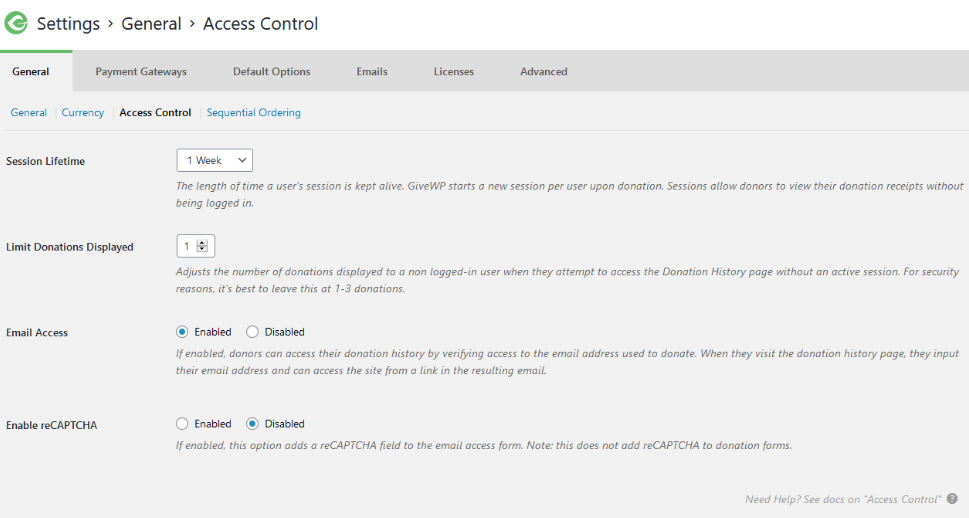
In the Access Control subtab, you can set the length of each session’s lifetime. When someone donates, the plugin starts a session, and while it lasts, the donor can see their donation without logging in. You can limit the number of donations displayed to a user that’s not logged in, and you can also set that donors can visit their history using the email address from their donation. This subtab is also where you can enable reCAPTCHA.
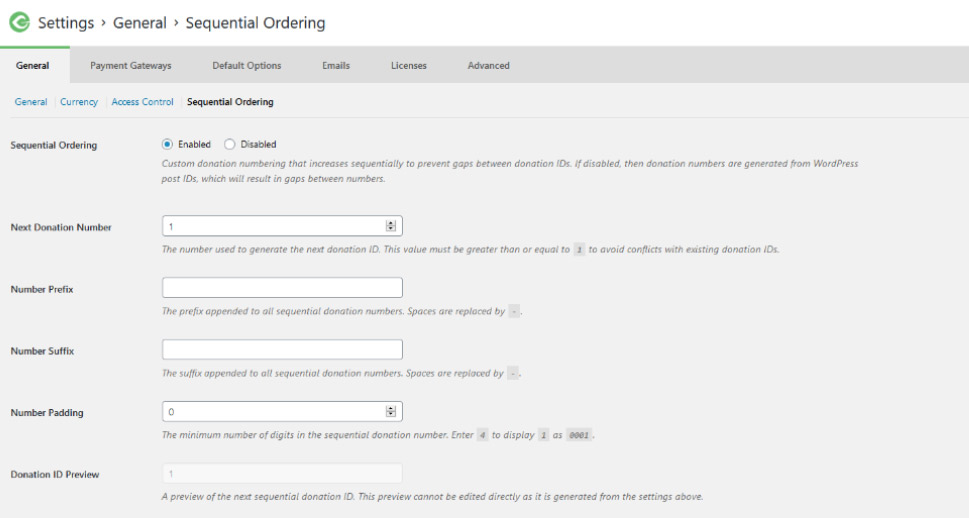
Sequential ordering is where you can set donation numbering so that there are no gaps in the sequence. This is important because some countries require donation IDs to be sequential in order. If this is the case with your country, you don’t want to let WordPress handle donation IDs for you – you can come here and set the next donation number, the number prefix and suffix – both of which support date-related tags, and the minimum number of digits in the sequential number – the number padding.
Payment Gateways
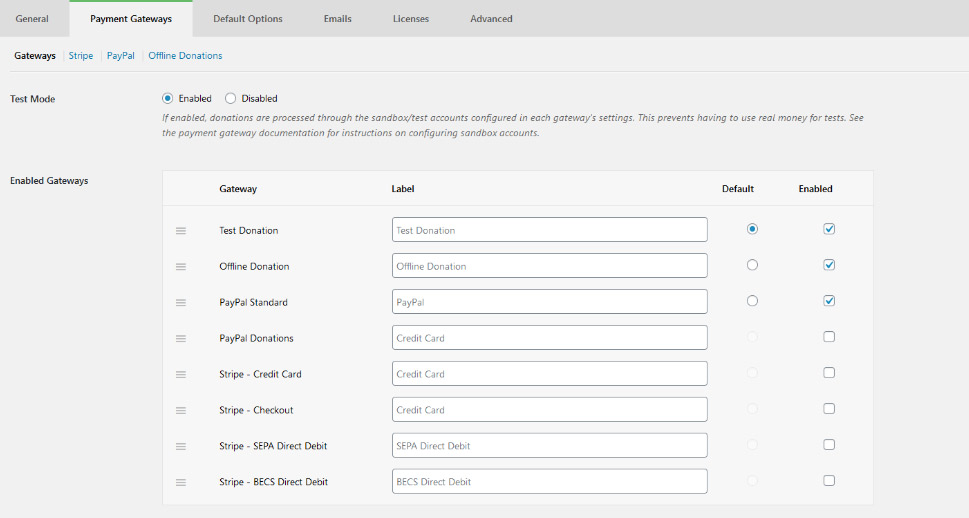
The Gateways subtab of the Payment Gateways tab is the place where you can enable or disable the Test Mode – an invaluable feature that lets you use the test accounts to process test payments. It’s also the place where you can enable the gateways you want to use and select the default one.
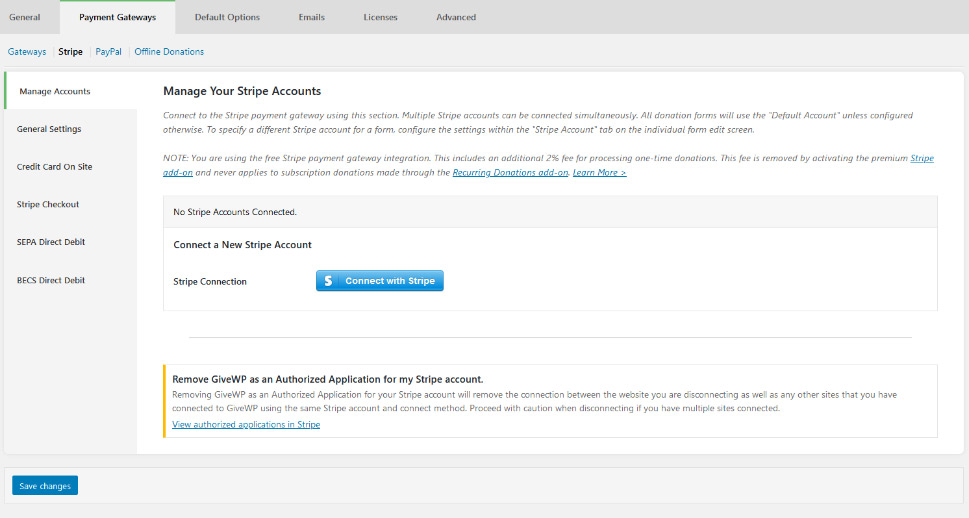
Next is a set of options that enables you to connect your Stripe account with the plugin. Connecting the Stripe account is done easily through a series of steps that start when you click on the blue “Connect with Stripe” button. A series of prompts will help you connect accounts or sign up for a new Stripe account if you’ve skipped that step.
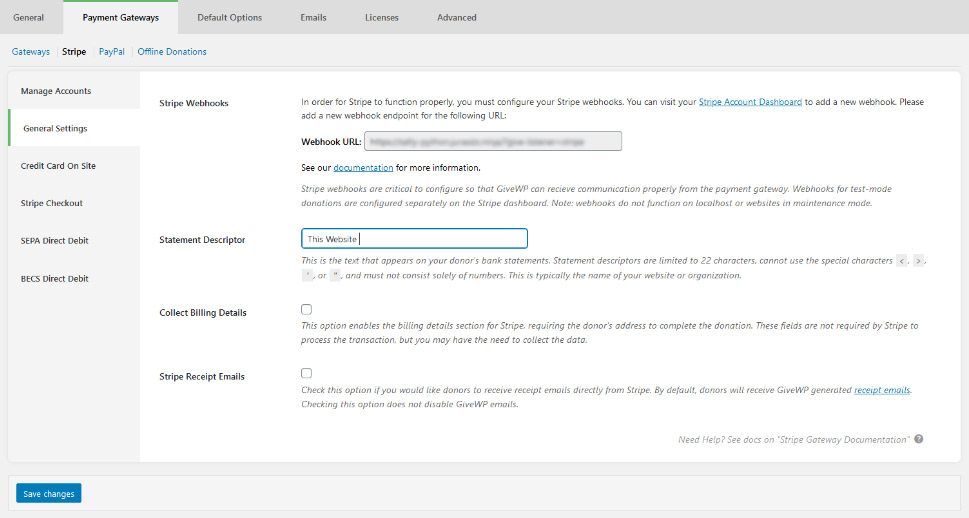
In the Stripe General Settings, you’ll configure the Stripe Webhooks – a crucial step in establishing communication between the plugin and Stripe. The Statement Descriptor is where you can put the name of your website or organization, and you can choose whether to collect billing details and send receipt emails to donors.
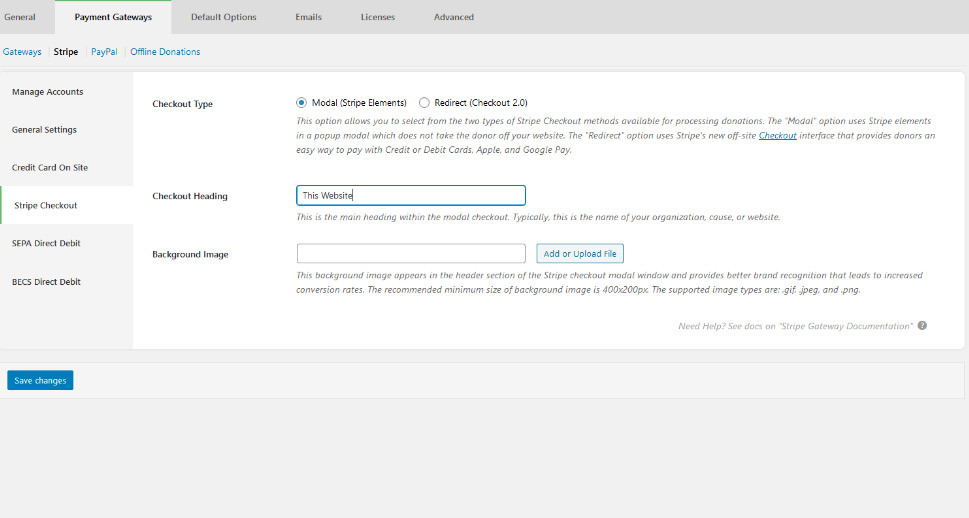
In Credit Card on Site options, you can choose to show single or multiple credit card fields on the donation forms. The Stripe Checkout option lets you choose the type of checkout method, select the checkout heading – the name of your website or organization or cause, and select a background image to appear in the header section of the Stripe modal window. It can help with conversion rates.
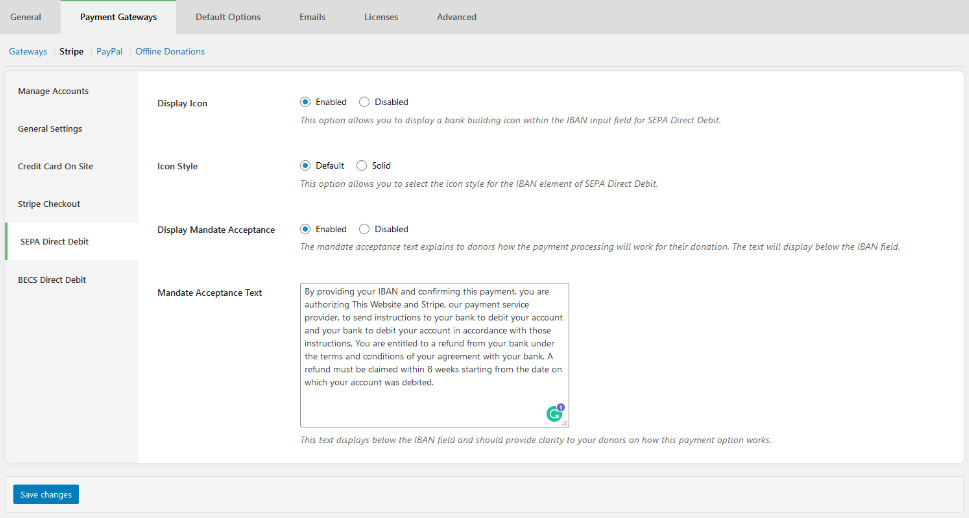
Finally, the SEPA and BECS Direct Debit options each contain the settings to display a bank building icon, choose the style of the icon, display the mandate acceptance text, and write the text.
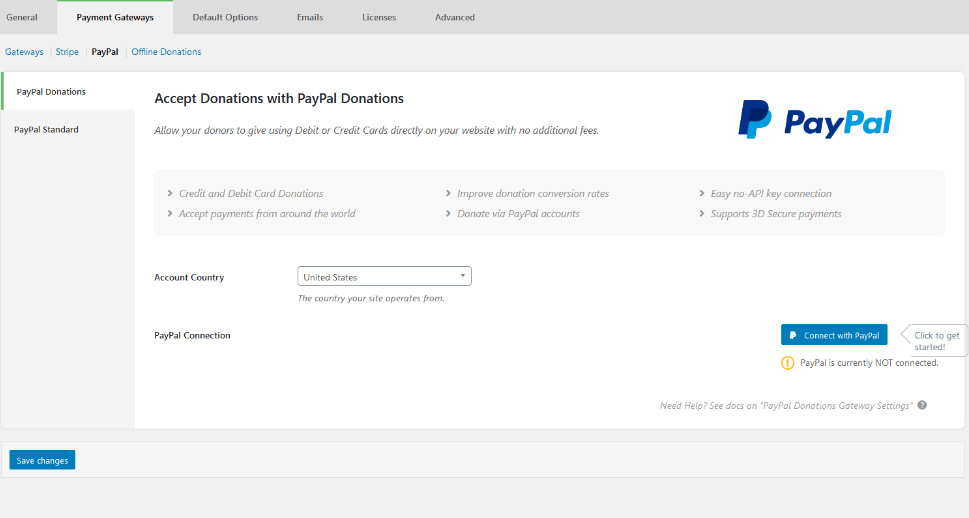
Next are the PayPal options. First you have PayPal Donations – the preferred method of payment you can enable by choosing your country and clicking the blue “Connect with PayPal” button. You will need a business account with PayPal for this to work. You might also be eligible to pay slightly lower fees if you can prove to PayPal if you have a charitable organization. Either way, clicking the button will let you connect the plugin to your PayPal Business account, or create a new one if you don’t have one already.
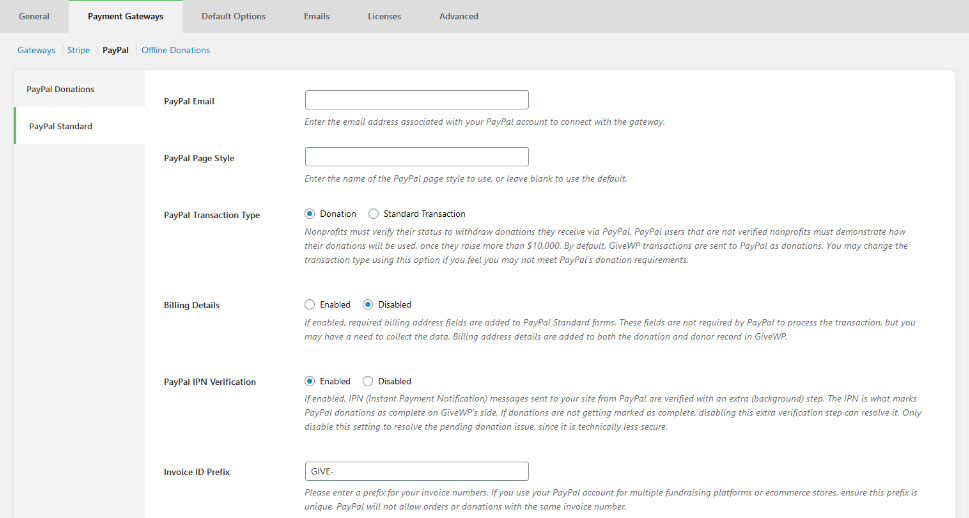
PayPal Standard might still be available, but it’s deprecated by PayPal which is why GiveWP encourages its users to use PayPal Donations. If you still want to try the Standard version out, you’ll need little more than an email address connected to a Business account. The other options you’ll be able to set include page style, transaction type, billing details requirements, IPN verification, and the invoice ID prefix.
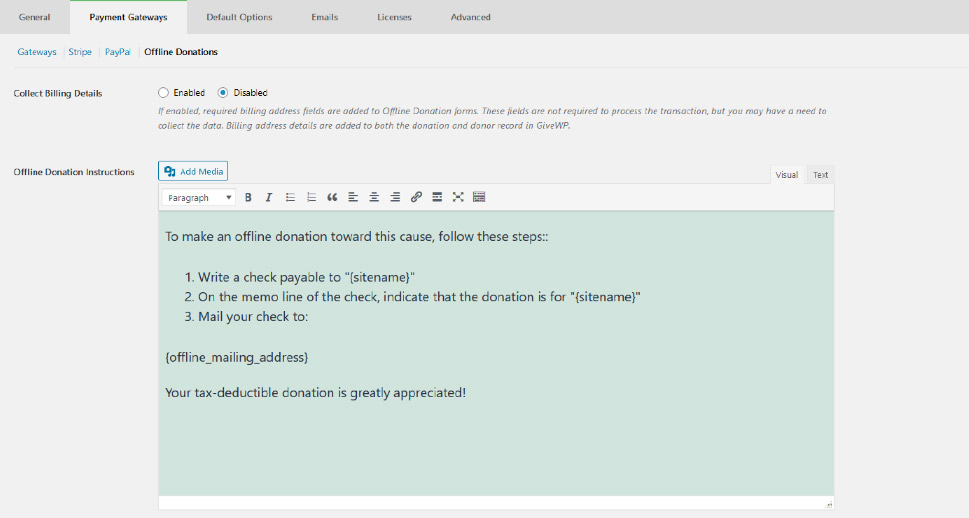
In the Offline Donations subtab, you’ll be able to decide whether to collect the billing information or not. It’s also the place where you’ll write the instructions for offline donations that will be sent to donors who choose to give offline.
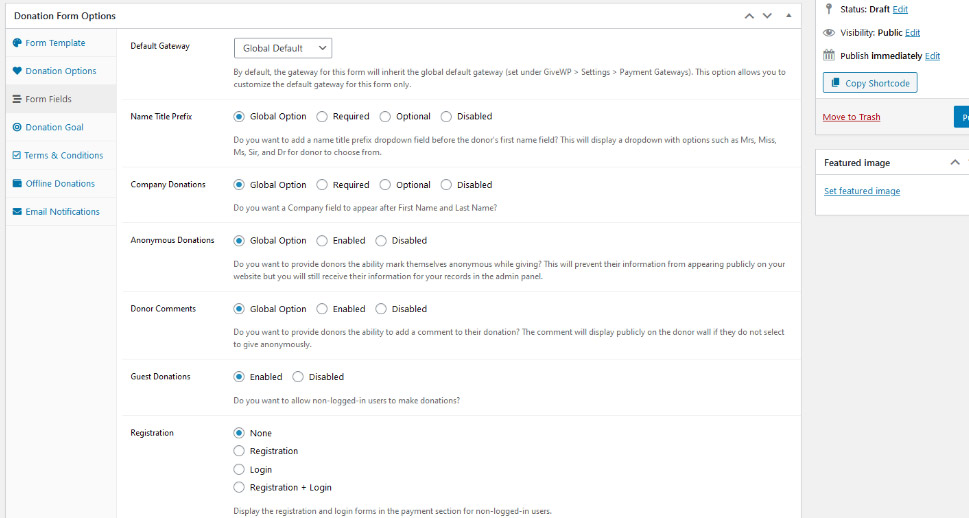
Default Options
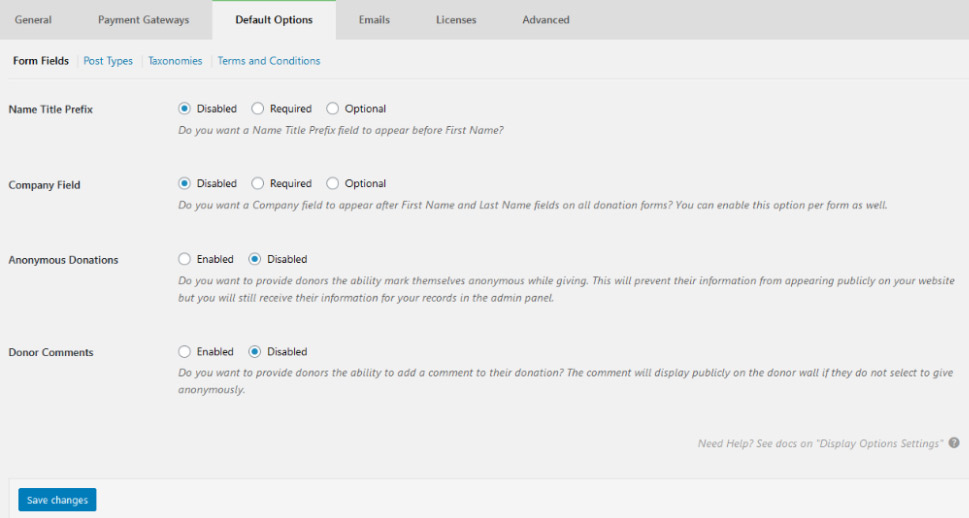
The Form Fields subtab is concerned with adding name title prefixes and company fields. However, it’s also the place where you can enable anonymous donations and allow donors to add a comment. Both of these can choose what you can and cannot display on your website later, in the Donor Wall.
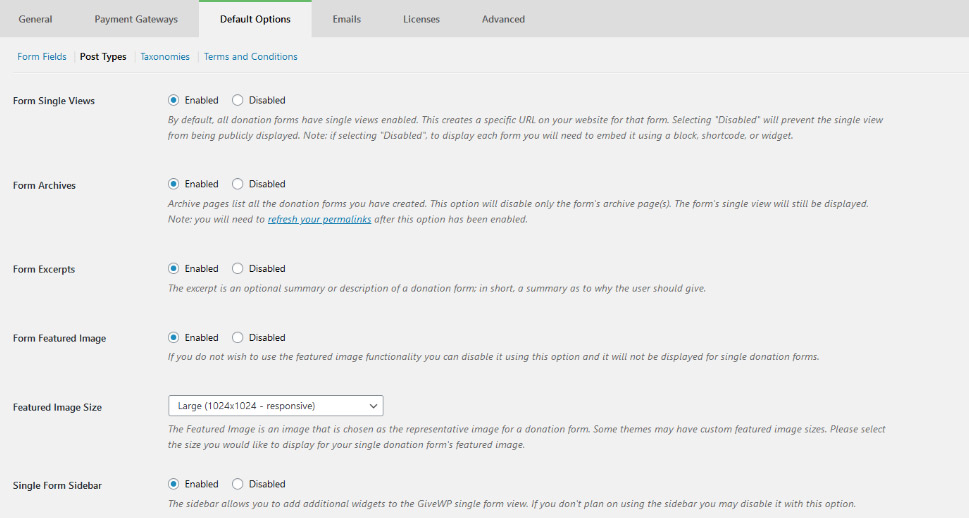
Under Post Types, you’ll have the option to enable or disable Form Single Views, deciding whether or not to assign your form a URL on your website. You’ll also be able to enable or disable form archives, pages that display all the forms you’ve created. Form excerpts and featured images are also enabled in this subtab, and you’ll be able to set the image size.
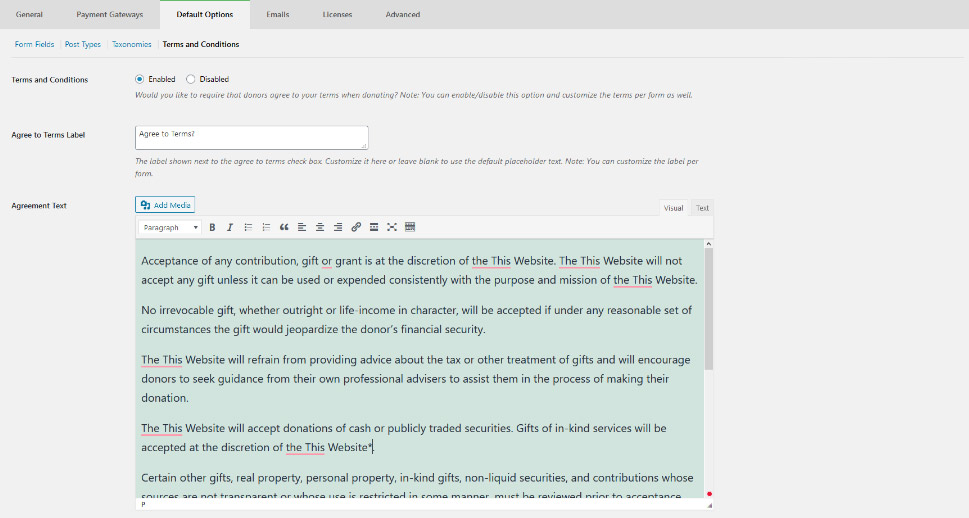
Under Taxonomies, you will be able to choose whether to enable categories and tags for forms. Finally, in Terms and Conditions, you’ll be able to choose whether you need the donors to agree with your terms and conditions, and you’ll also be able to provide the text of the agreement.
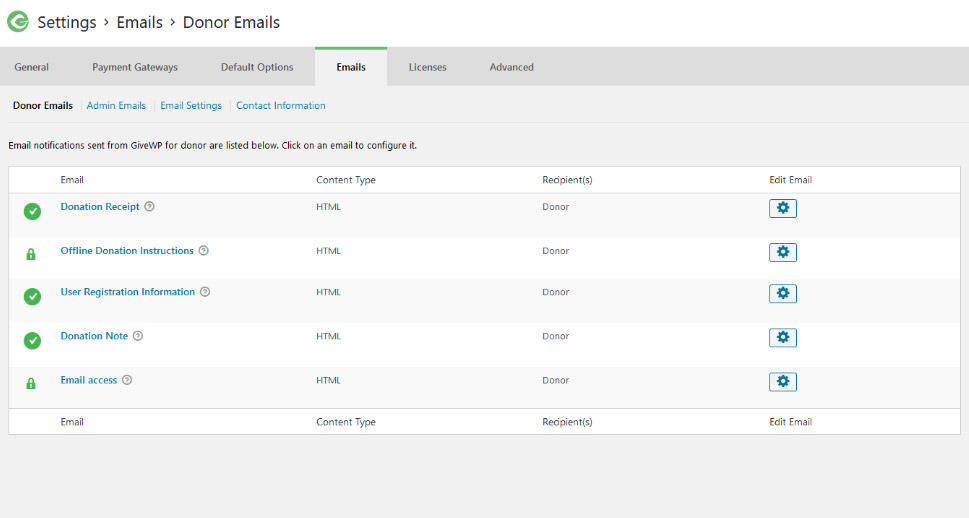
Emails
Under the Emails tab, you will find options for both donor and admin emails, sorted by the action that triggers them. You’ll have the option to disable each of the email types, choose their subjects, headers, the body of the message, the type of the content, and the email recipients where applicable.
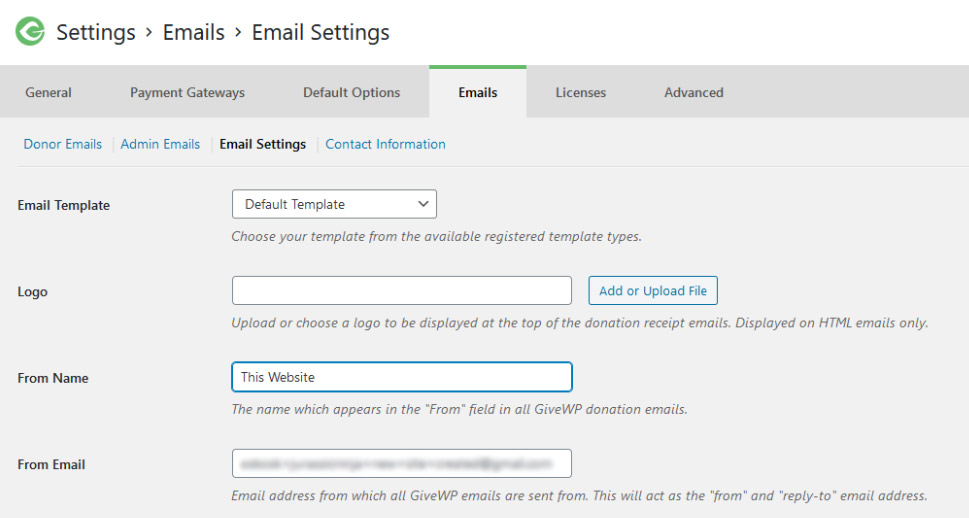
Under Email Settings, you’ll be able to choose the email template, add a logo to the email, choose the name that appears in the “From” field, as well as the email address of the sender. The Contact Information is where you enter the admin email address, as well as the offline mailing address.
After you’ve set everything up, the next step would be to create your very first donation form. Head straight for Donations > Add Form and face the first choice – which form template to use. The multistep donation form guides the donor through the donation process in four steps. The legacy donation form has it all laid out in a single field. The choice is aesthetic, sure, but it might also come down to compatibility with your theme – so make sure to test whatever you choose.
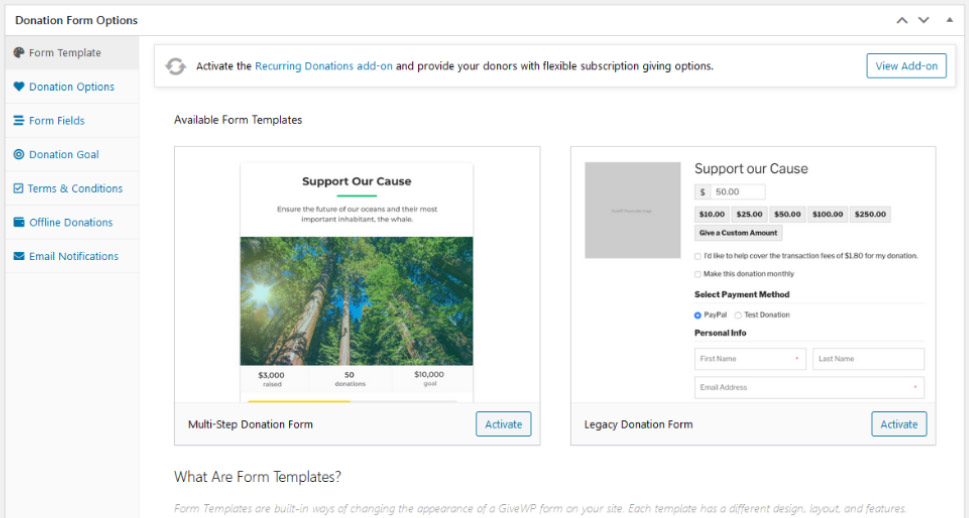
Whichever template you choose, click on the “Activate” button near it to see the options for that specific template. We’ll use the multistep form.
Form Template
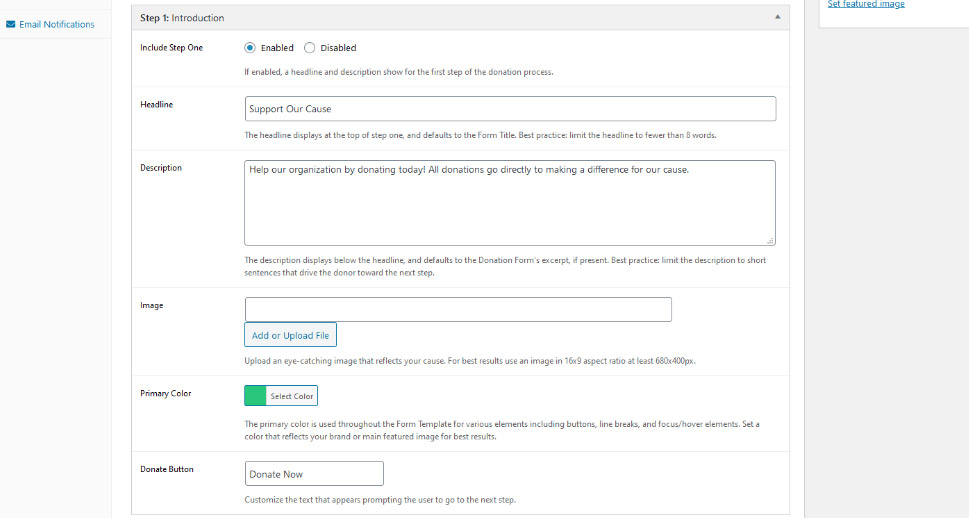
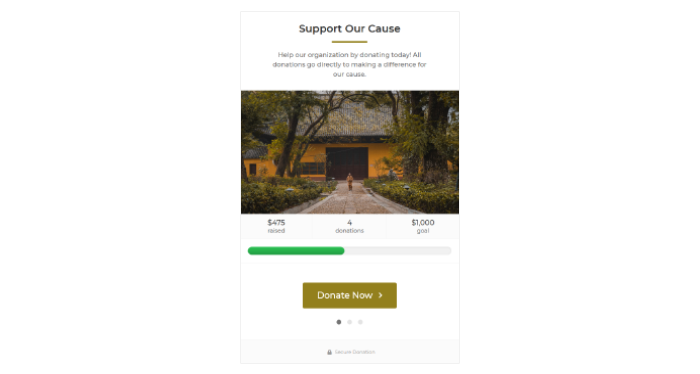
The first step is the introduction – it’s not a mandatory step so you can disable it if you want to. However, leaving it in gives you a chance to use your words and visuals to bring your cause closer to the donor.
If you have a dedicated landing page for the form, it makes perfect sense to skip this step. If you decide to keep it in, make sure you write a captivating headline, a good description, choose an appropriate image and pick a good primary color – one of the only styling options at your disposal from within the plugin.
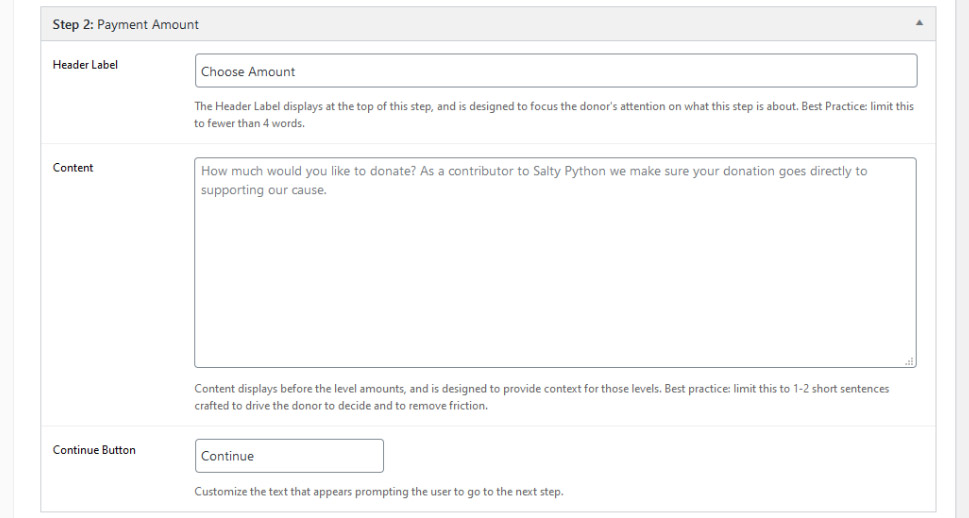
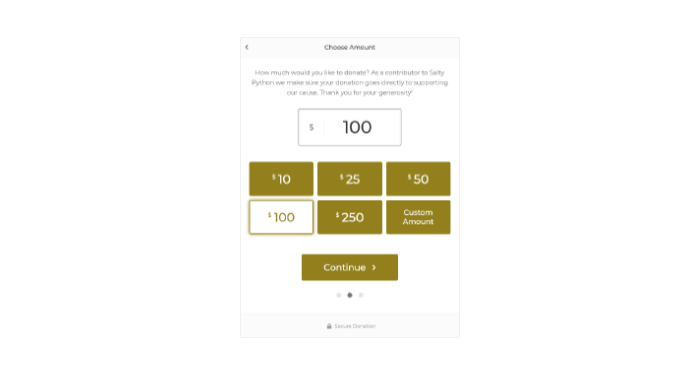
The second step is where people will get to choose the amount of money to donate. You’ll have the option of writing a header label, content, and choosing the text on the button that moves the donor on to the next step.
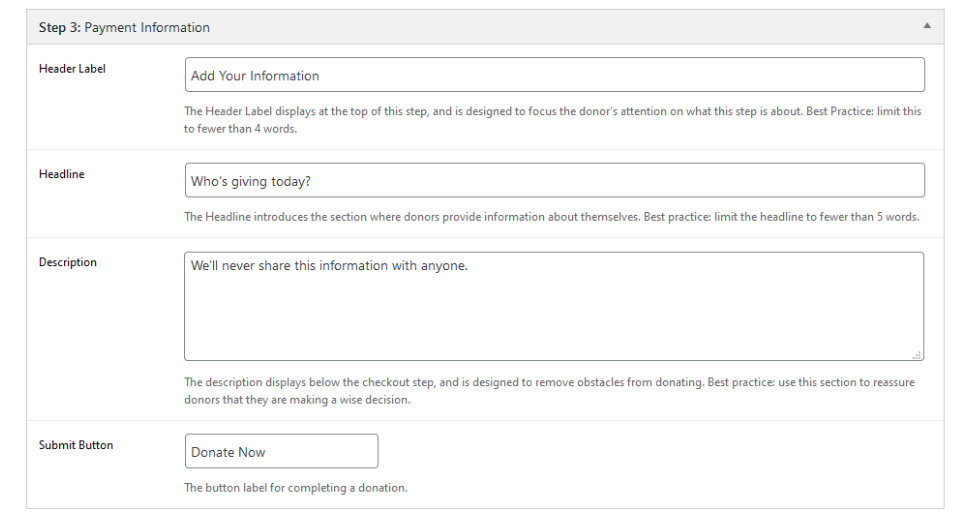
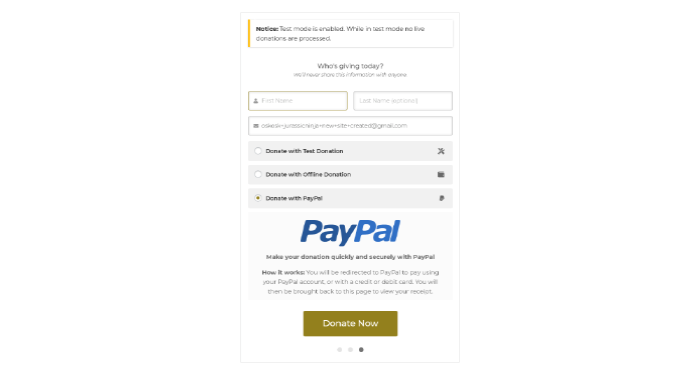
The third step is concerned with payment information. Customize it with the text for the header label, headline, content, and the submit button.
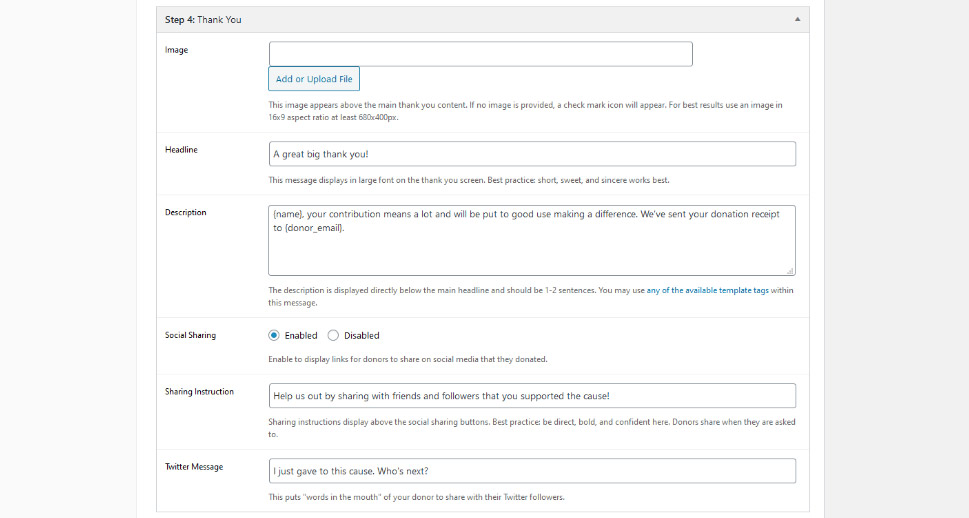
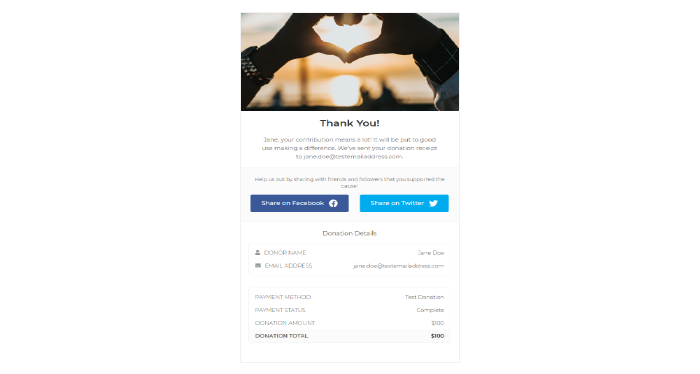
The final step is the thank-you step. Use it to show appreciation of the person donating to your cause and choose whether you want to enable social sharing. Underneath the form, you’ll be able to fill out an excerpt and choose the author.
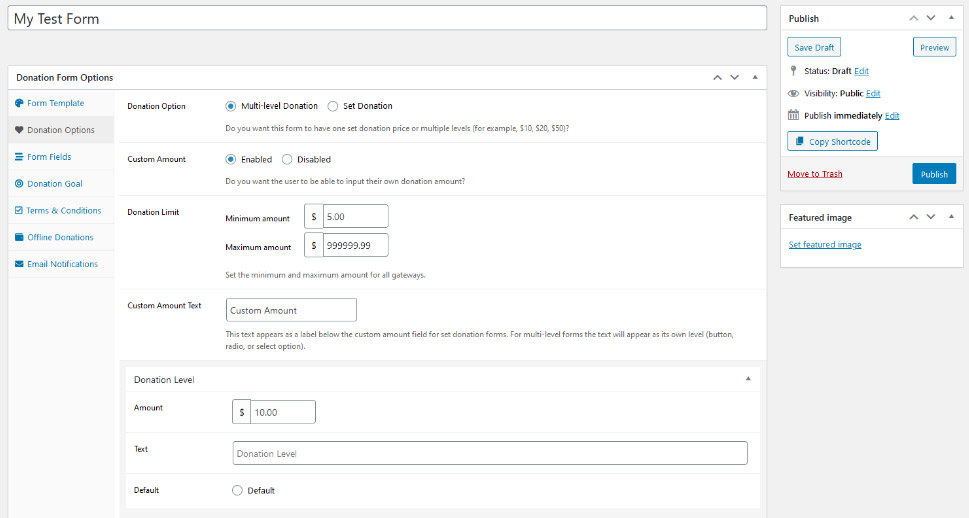
Donation Options
In the Donation Options, you’ll be able to choose whether you want the donation to be multilevel or set. You can disable the custom amount and set donation limits. If you choose multilevel donation, you’ll be able to set the amount for each level, as well as the text that follows it. You’ll also be able to pick the level that will be viewed as default.
Form Fields
Form Fields deal with options you’ve probably already set. For starters, you can choose the default gateway for this form, or use the one that’s been set as default globally. You’ll see familiar options such as the name title prefix, anonymous donations, and donor comments. You can choose to give them values specific to this form, or you can use the global setting you’ve already made.
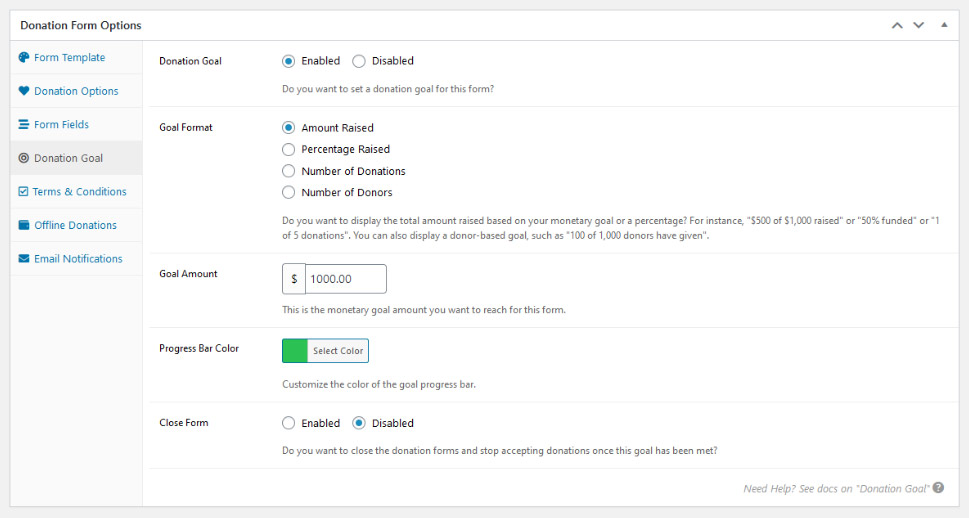
Donation Goal
If you want, you can enable a donation goal. It can be amount raised, percentage raised, number of donations, or number of donors. You can set the limit, choose the color of the progress bar, and pick whether you want to use a close form or not.
The remaining options – Terms and Conditions, Offline Donations, Email Notifications – are the same options you’ve already had the chance to set in the Settings. If you want to do something different than what you’ve already set – disable them, enable them, change them – you can do so here. If you’re happy with the global settings, you can skip them altogether.
As soon as you press the “publish” button, your first donation form will go live! It will have its permalink if you want to use it as a standalone page, and it will also have a shortcode you can use to insert it into a page.
Adding the Form to a Post
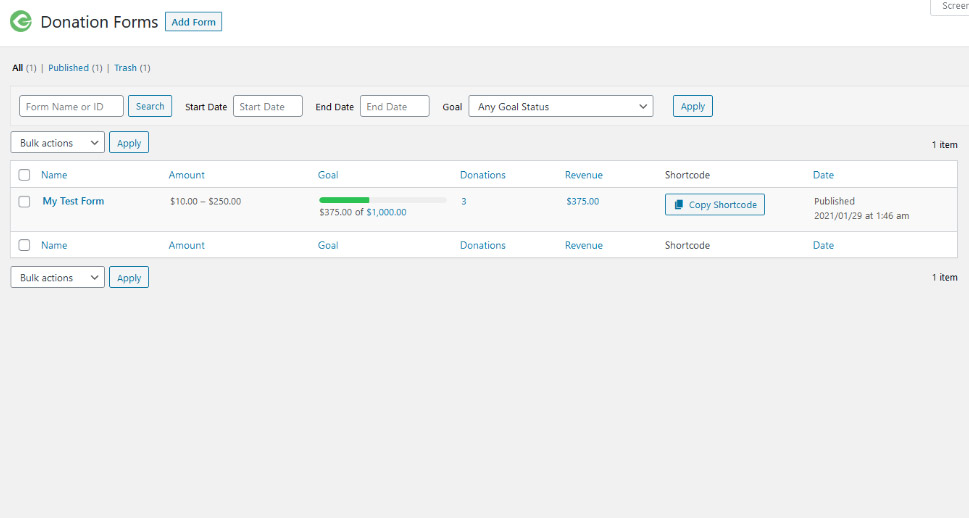
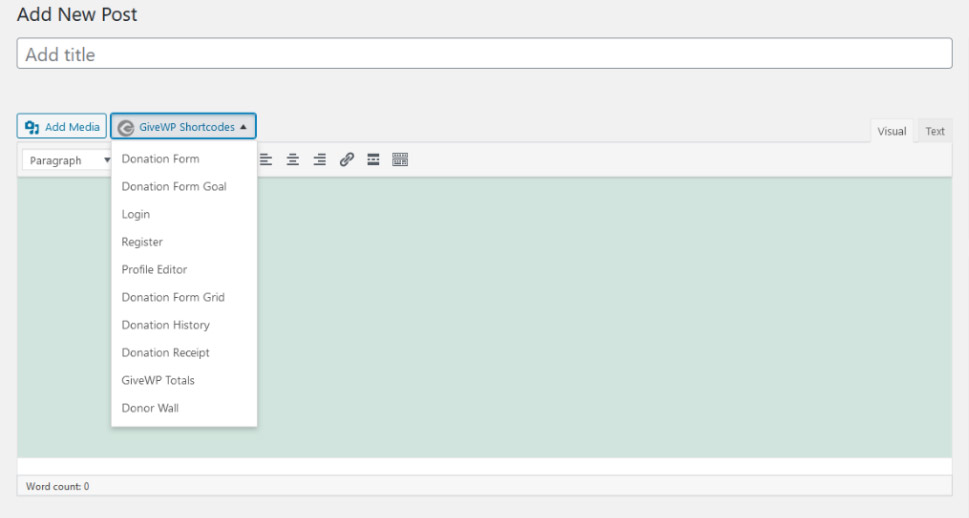
If you head over to Donations > All Forms, you’ll find your form. Click on the “Copy Shortcode” button, and you’ll be able to insert your form on any post or page on your website.
When using the block editor, you’ll notice that GiveWP has added a couple of new blocks, including the donation form block. Add it to a post, and use the dropdown menu to choose the form you want to add.

You’ll see how the donation form looks in your post. You’ll also be able to test it, if you’re still in test mode, to see if you’ve connected everything well. If all goes according to the plan, you’ll be able to go through all the steps and see the thank you page.
Make a Test Donation
The next thing you should probably do is check whether you’ve configured everything well. While still in test mode, head over to a page or a post that contains your form and see whether you can create a couple of test payments. You can connect to Stripe while its test mode is toggled on to test it. PayPal Standard doesn’t have a test mode – if you see a page where you can make a payment, everything’s connected well, no need to finish the payment. Test donations and offline donations don’t need any other settings, either.
Create a couple of donations, and then head over to Donations > Donations, and check out your donations and donors. The offline donation will be marked as Pending, but that’s by design. You’ll have to manually switch offline donations to “completed” in the future once you receive them.
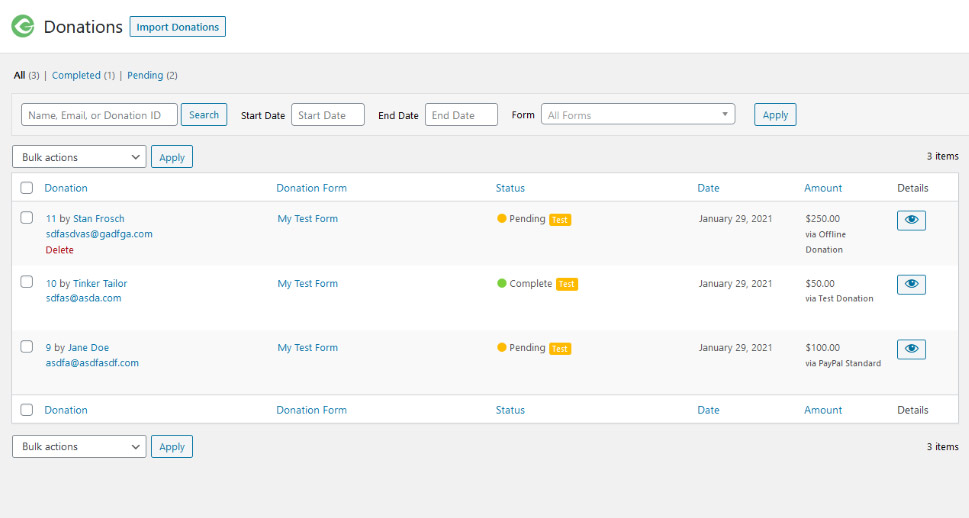
But now that you have a couple of donations, you’ll also have a couple of donors. Head over to Donations > Donors, and you’ll see a list of your donors. Clicking on any of their names will open their profile.

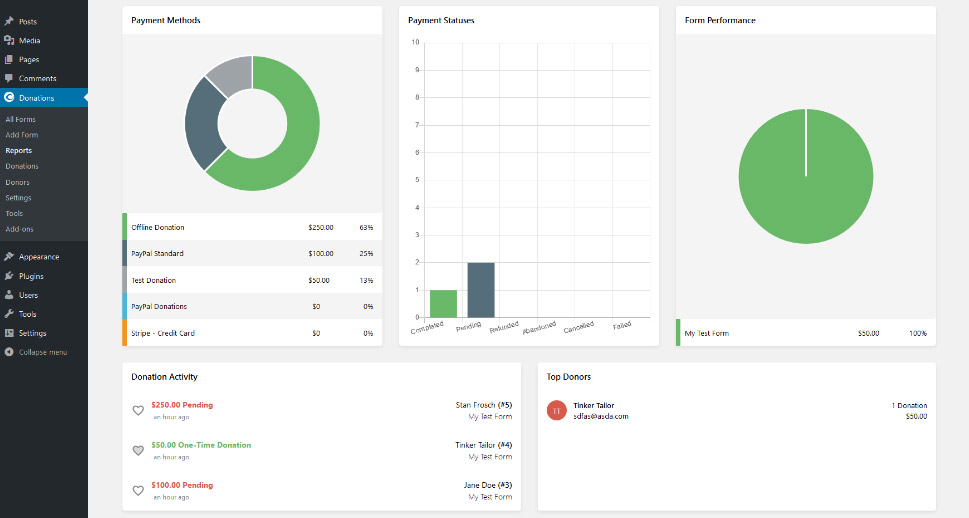
If you head over to Donations > Reports, you’ll start seeing some statistics for your forms, too. These will get better and more useful the more data there is in them.
From there on, you can explore the plugin a bit more. You can see what other blocks the plugin lets you add using the block editor – you don’t have to add the whole form to a post, for example. You can add just a block that will serve as a link that takes the donor to the form. You can also add the donor wall – a block with names of all the donors who didn’t want to be anonymous. And if you have the classic editor, you can play around with the shortcode builder, which doesn’t work with the new block editor.
And then, when you think you’ve set up the plugin well and you’ve tested it thoroughly to provide it, you can go back to Donations > Settings > Payment Gateways, and under Gateways turn the Test Mode off. Your website and GiveWP will be in business then.
Change the Way Your Forms Look
You might have noticed that GiveWP gives you very limited customization options when it comes to how the forms look. There’s no add-on that can help with styling, either – you will have to do it the old fashioned way. So get ready to add some custom CSS to your website. At least that’s how you style the legacy form.
Styling the multistep form is slightly different. This type of form loads on your page as an iframe, which is a document within your page. That way, it’s loaded independently from your WordPress theme, which is great for avoiding conflicts, but it also means that you’ll have to add custom code to your website in order to change the way this form looks.
Let’s Wrap It Up!
Want to raise funds for a local animal shelter? Looking for ways to help people stricken with specific illnesses? Or are you trying to save the planet by bringing green technologies into communities that desperately need them?
Unfortunately, the world is full of causes worthy of your time and your donators’ money. You probably won’t have a problem picking one that’s closest to your heart – or one where you can make the biggest impact. Thanks to WordPress and GiveWP, you won’t have much trouble giving people a way to donate to your cause.
