A Beginner’s Guide to WordPress Settings and Configuring Your Website

Nothing beats the feeling of having a fresh WordPress website installation waiting for your eager fingertips to give it shape and contents. Granted, you won’t have to do all the shaping and provisioning with content on your own – there are things like WordPress themes, plugins, and content writing services to help you out. However, unless you plan to outsource every single aspect of propping up your website and launching it on the road to greatness, you’ll need to know your way around some of the WordPress basics. That includes WordPress settings and using them to configure your website.
You don’t have to worry, though – most of the settings you’ll find under Settings in your WordPress backend are pretty self-explanatory. Still, if you need a companion while you’re figuring it out for yourself, this article will do the job pretty well. Keep it around, as it will show you all you need to know about:
Qode Themes: Top Picks
View Collection


What better place to start configuring your website than General Settings? That’s where you can give your website a name, after all, and set up what time zone it operates in – pretty important stuff. So when you feel you’re ready to get started, navigate over to Settings > General.
Site Title and Tagline
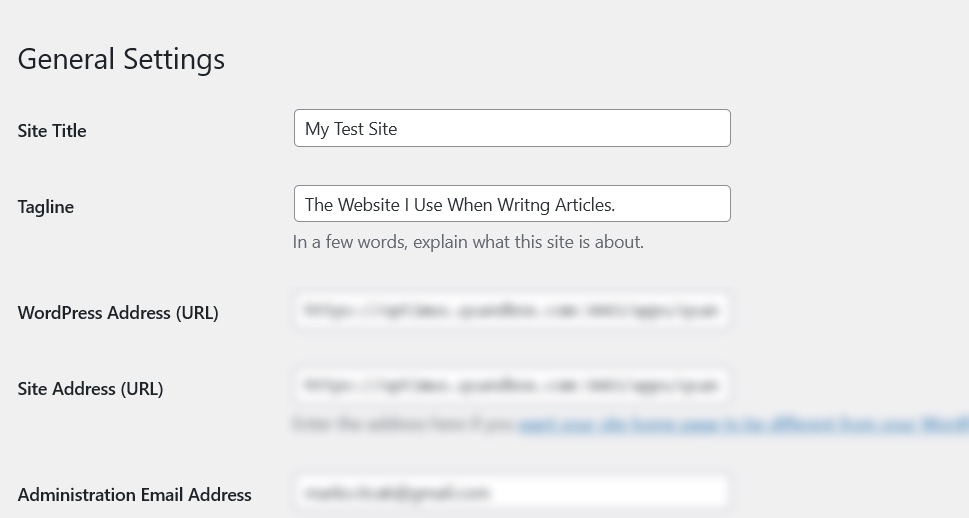
The site title and the tagline are two very important elements of your website’s identity. The site title is like the name of your website – not to be confused with its domain name, though – while the tagline is like a short sentence you would use to describe to someone what your website is all about.
The fact that you can change the title and the tagline so easily shouldn’t make you think they’re not important and deserving of some time to make sure they’re the best they can be. Keep in mind also that WordPress uses your website’s title for identification purposes for your syndication feed.
The Addresses
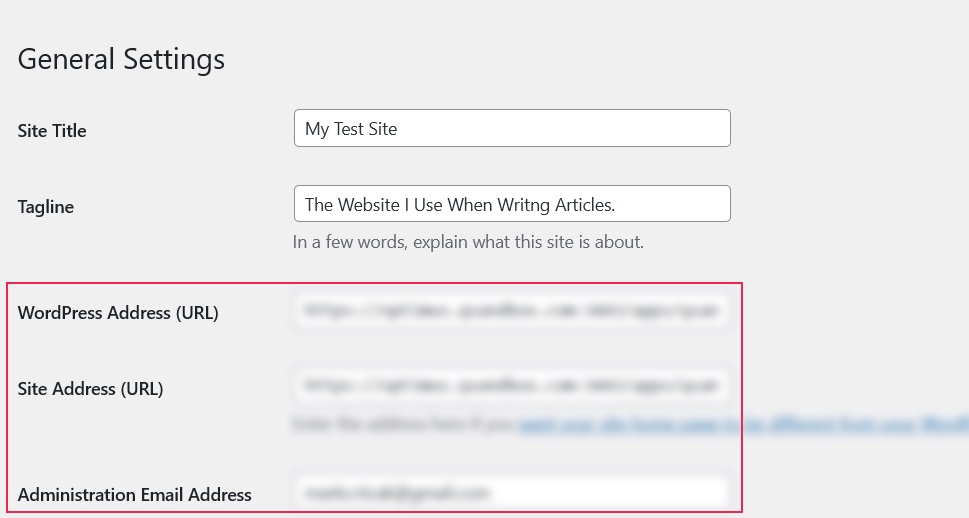
The Addresses section is where you need to put in three of the most important addresses for your website’s regular functioning. Your WordPress Address is the URL of the directory that contains all of the core WordPress files and folders for your website.
The Site Address is the URL with your domain name and everything else people will need to enter into their web browser’s address bar to reach your website. It’s fairly common for the Site Address and WordPress address to be the same – they aren’t when you want to move the core files to their own directory. If you don’t know what the move entails, chances are you don’t need it, either.
The final address of the three is the admin email address. That’s the address where you, the admin, will get all the email notifications you set up the website to set your way.
Setting User Roles

The General Settings provide you with a simple checkbox where you can toggle on and off whether you want to make registration open to everyone, or not. Right beneath the checkbox, you can choose the default user role a new user can have. The choice is between the standard WordPress user roles – subscriber, contributor, author, editor, and administrator.
Language, Date, and Time Settings
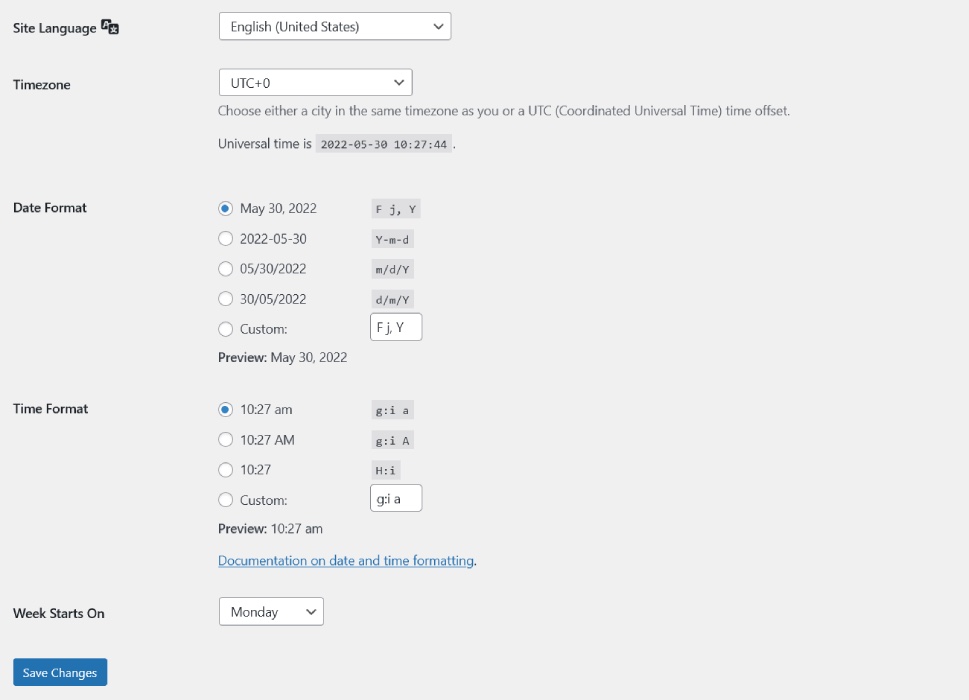
The remaining options in the General Settings deal with site language and time. WordPress supports many different languages, so feel free to choose the one that’s easiest for you and your colleagues to use. Keep in mind, though, that this setting affects only the dashboard.
Next, you’ll be able to choose the time zone for the website. The dropdown list contains many different cities, which can come in handy if you’re not versed with UTC zones and related time offsets. If you know the correct offset for your time zone, you can choose it from the list, too.
The time and date format are where you can change how your website displays the date and time. Note that both give you the option to set a custom format. Finally, you’ll also be able to choose what you consider to be the start of the week. All that’s left is the Save Changes button, which you shouldn’t forget to press when you’re done with the General Settings.
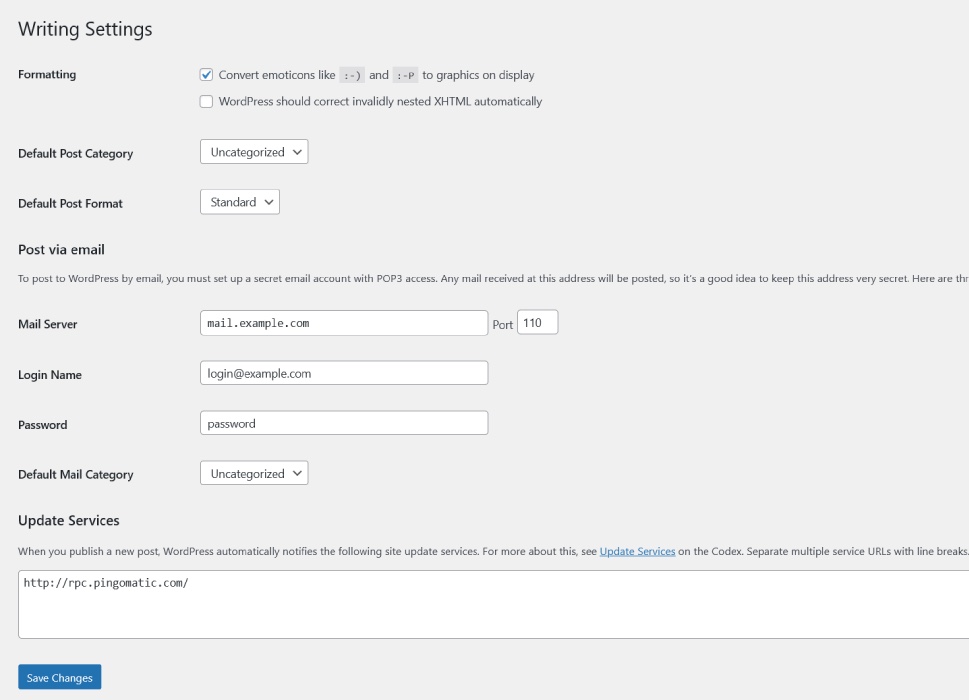
The Writings Settings – Settings > Writing – is where you can choose some of the finer nuances and writing options on your website. For example, this is where you can set whether you want WordPress to convert emoticons to graphics – not the same as adding emojis or disabling them, but still quite useful.
You’ll also be able to set the default post category and format. Even more interestingly, you’ll be able to set up an email address where every email you receive is automatically posted on your website. Finally, this is also where you can list the websites WordPress lets know when you release a new post.
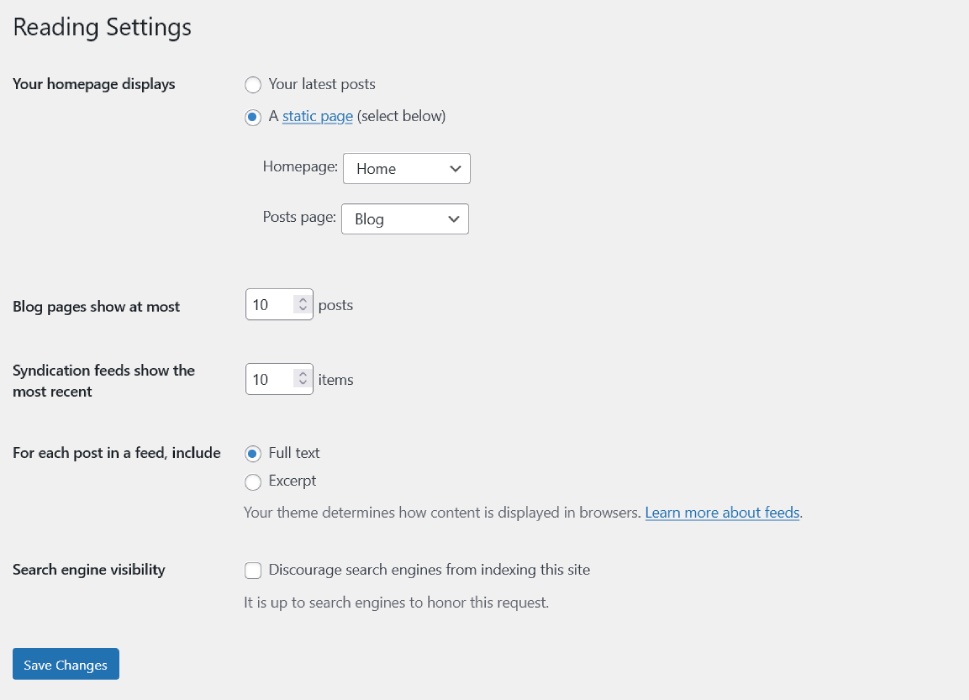
The Reading Settings is a section of your website’s settings where you can, for starters, decide what appears on your site’s homepage. You’ll have a choice between a static page – in which case you can choose separate pages to serve as home and posts page – and a list of the latest posts you’ve published on your website.
The remaining settings include the number of posts and items that appear on blog pages and syndication feeds, respectively, as well as the amount of content from posts in feeds that should be included. Finally, you can opt to “discourage” search engines from indexing your website, potentially affecting your website’s search engine visibility significantly.
For better or worse, comments are still one of the best ways to let your website visitors interact with your content. WordPress allows you to do a ton of different things with comments – you can disable them, for example, if you’ve given up on trying to moderate comments. Then again, you can also add Facebook comments to your website if the native comment capabilities aren’t to your liking, or pick from a myriad of comment management plugins if you just need help staying on top of them. It’s possible to enable user subscription to comments, enable comments with images, highlight authors’ comments on their posts, or simply delete all comments. The Discussion Setting is where you do some of those things.
Default Post and Other Comment Settings
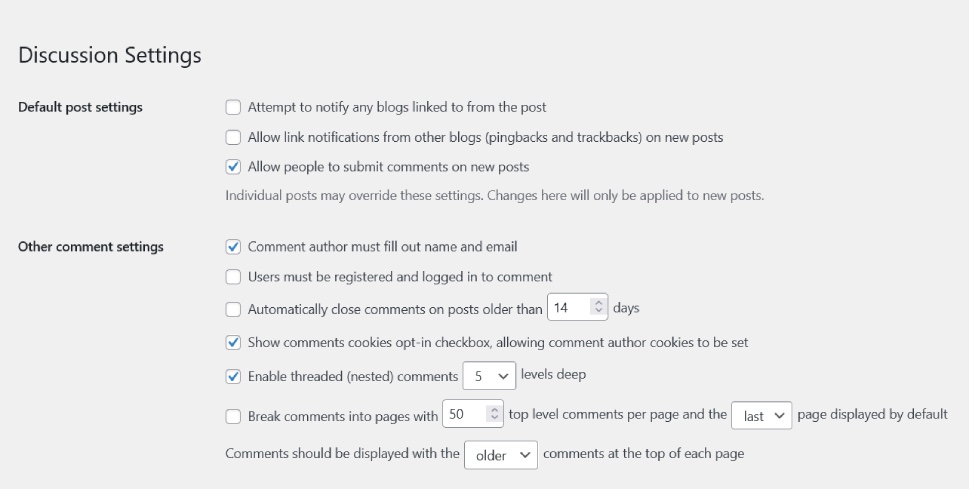
The first couple of batches of discussion settings are the settings that apply to posts and comments. In the post settings, you can set pingback and trackback options and enable or disable comment submission on new posts globally – subject to further moderation on specific posts.
The comment settings include setting the amount of information requested from comment authors, whether comment sections get closed automatically and when, enabling nested comments, and the order in which the comments are displayed.
Comment Moderation Settings
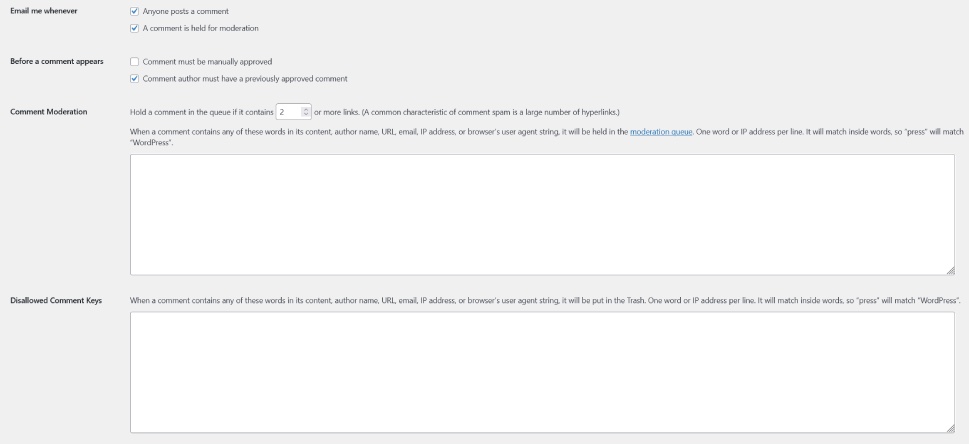
Moving on, you’ll come across the settings that allow you to choose the rules for sending you emails on comments, as well as whether comments are subject to manual approval, and whether authors need to have previously approved comments.
A very useful setting here is the one that lets you choose a filter for comments that contain links, which can be great for weeding out spam comments. You’ll also be able to list the trigger words that can cause the comment to automatically go to the moderation queue, as well as the trigger words that will move the comment straight to the trash.
Avatar Options
Finally, WordPress lets you choose a couple of different options for comment avatars. First of all, you can choose whether or not you want avatars to appear on your website. You can pick the maximum rating for the avatar, which can come in handy if you want to have a clean, kid-friendly website. If the comment posted doesn’t have an avatar, it can be issued with one from the avatar service you specify.
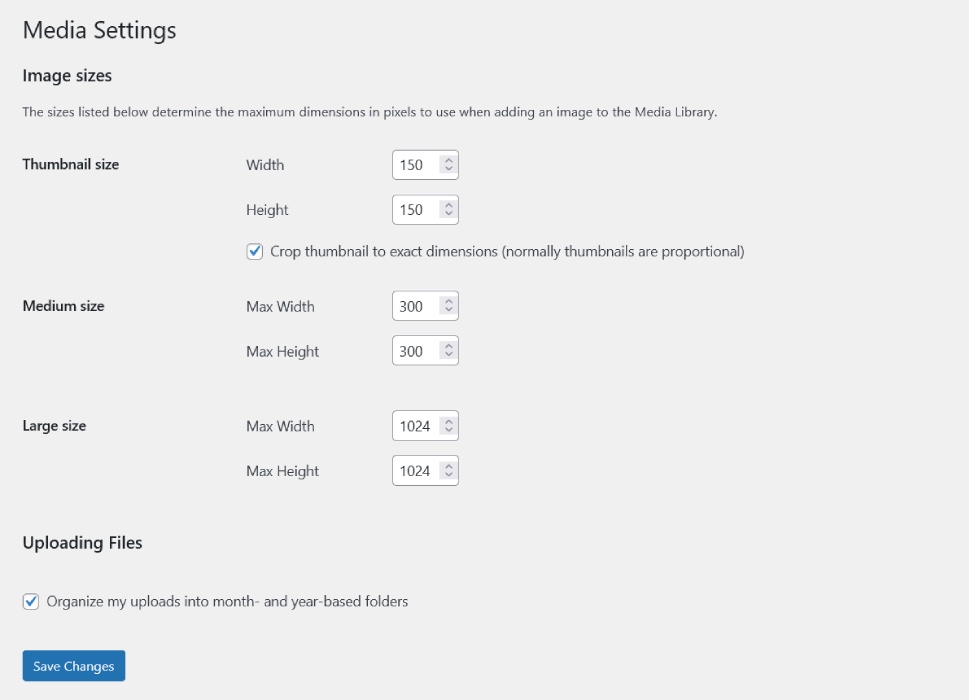
The Media Settings section is where you can fine-tune the size of images used when adding them to the Media Library. You’ll be able to set the width and height for the thumbnail size, as well as the maximum width and height for medium and large image sizes.
You can also decide whether you want WordPress to organize your media uploads into monthly and yearly folders. If you’re struggling to find the time to organize the media library on your own, this option can do some of the heavy lifting for you.
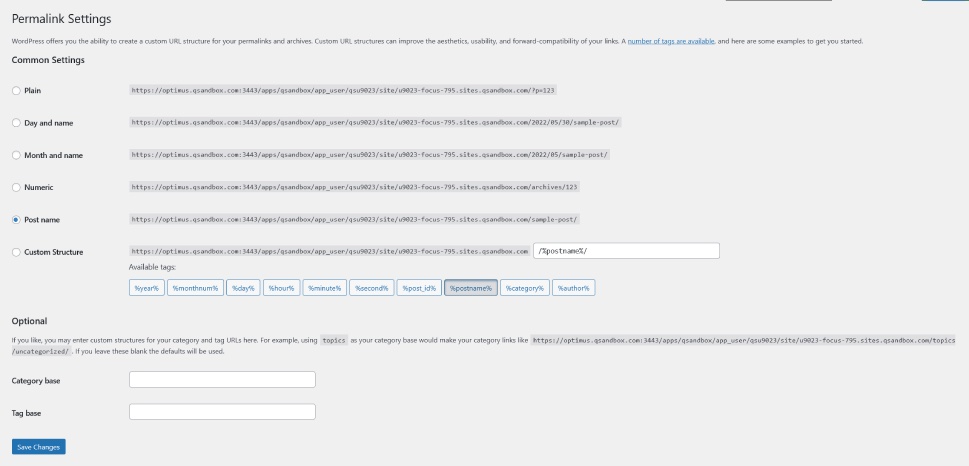
Just how your website’s permalinks should be structured and what information they should contain is a matter of some importance, and you should consider it carefully and apply it consistently when you come up with the solution.
To help you out, WordPress has given you a couple of common permalink structure choices in this section, as well as the ability to not use any of them and create custom permalinks. There’s also the option to set the category and tag base to appear in the category and base permalinks.
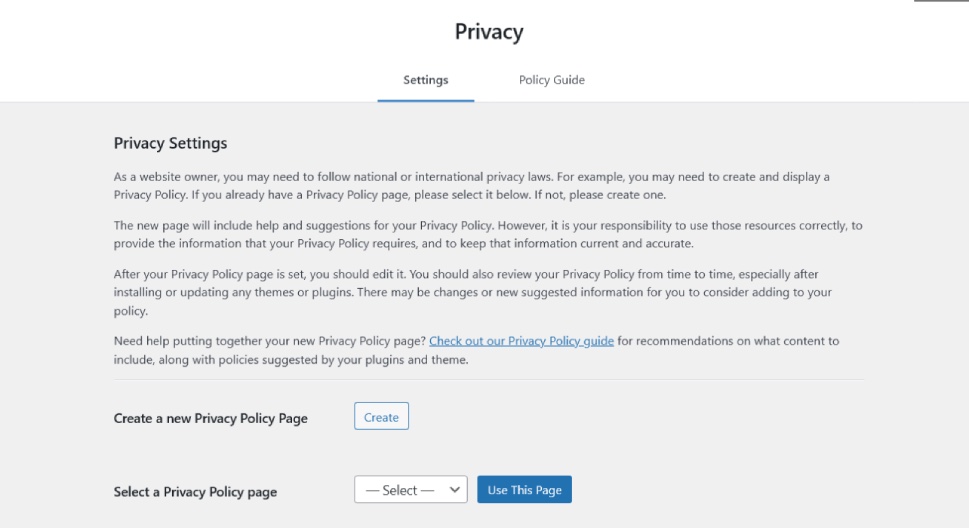
Every website needs a privacy policy, right? Well, maybe not need it, but it sure doesn’t hurt to have one even if it’s not the most pressing addition your website needs. Especially when WordPress has made it easy to create a policy and set up a page for it. That’s what you can do at Settings > Privacy.
From these settings, you can either let WordPress create a new Privacy Policy Page for you or choose an existing page to serve as it. Next, you can use WordPress’ policy guide to get a sense of what a Privacy Policy should contain, and craft one that applies to your website perfectly.
Let’s Wrap It Up!
When you’re first creating a website, you’ll have your hands full trying to set everything up and make sure that it launches well and start catching people’s attention as soon as possible. The WordPress settings available from the settings section of the dashboard might cover only the basics, but it’s those basics that will affect how people and search engines alike see your website. So make sure you look through these options and settings and stay at it until you’re happy with your choices.
