10 Things to Do After Installing the Bridge Theme

When you decide to build your own website, your go-to solution is probably going to be WordPress. And why wouldn’t it be? For one, you can download it for free, and two, you don’t need any coding knowledge to use it. Others already did all the work, which means that you’re just a few mouse clicks away from setting the cornerstone of your web empire.
All you have to do to get started is download WordPress from wordpress.org, and install it on your server. If you need help on that regard, this tutorial will be of great help:
The next, and perhaps most important step in creating your website is deciding which theme to go with. There are tons of great premium WordPress themes to choose from. But if you want a truly versatile solution, a theme you can use to create any type of website imaginable, the Bridge creative multipurpose theme is a pretty good option, even if we do say so ourselves. You can find out more about Bridge and all it has to offer in the video below:
If you’d prefer an unbiased opinion, you can check out Collective Ray’s review of the Bridge theme.
If you’ve already purchased Bridge and are ready to build your beautiful website, this article will help get you off to a quick start. Here, we list the 10 things you should do right after installing the Bridge theme.
There’s pretty much nothing you can’t do with this creative bestseller. It’s been making waves since the day it was released, and for good reason. So stick around, and learn how to make the most of it.
1. Install and Activate Plugins
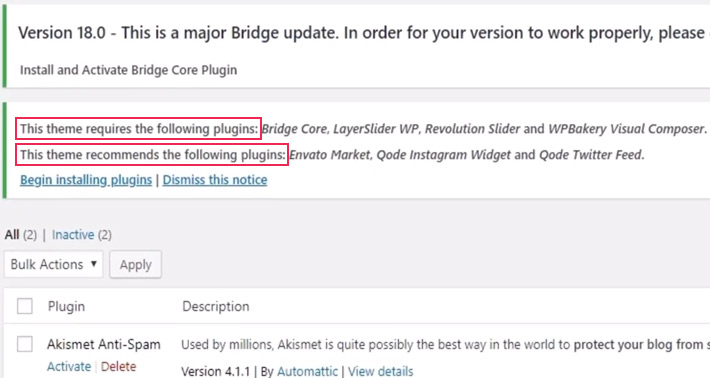
As soon as you install and activate the theme, the first thing you should do is choose Plugins from the menu on the left and activate installed plugins. Some are optional, whereas others simply must be activated in order for the theme to function in its full glory.
When it comes to choosing which optional plugins to go with, activate those that are of use to you and your business. For instance, if you don’t have Twitter, there’s probably no point in activating the Qode Twitter Feed plugin. Or, if you don’t have the intention of running an online shop, you won’t need the WooCommerce plugin either. If that should ever change, you can always go back to Plugins and apply the changes as per your requirements.
While Bridge is compatible with the Gutenberg editor, you can also install the Classic Editor Plugin, if you’re already used to working with it.
However, you are required to activate either WPBakery Page Builder plugin or Elementor, which come bundled free with Bridge. These drag-and-drop page builders give you access to all the custom shortcodes the Bridge theme comes with and makes creating a stunning website both easier and faster.
2. Import a Bridge Demo
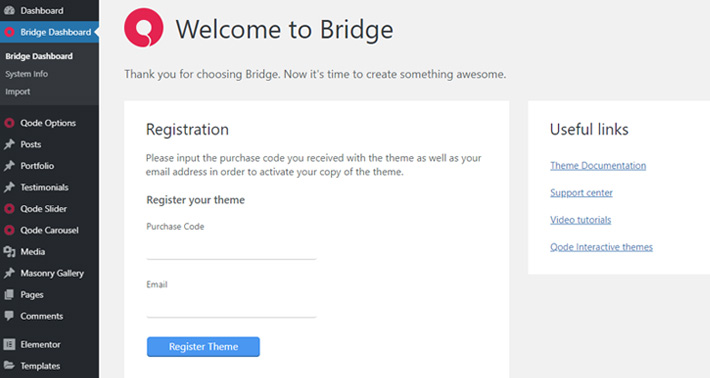
Before importing a demo, you need to register your Bridge theme first. To do that, make sure the Bridge Core plugin is active. If you don’t have it installed, go to Appearance > Install Plugins to add and activate the plugin.
Then, select Bridge Dashboard from your admin menu. A Registration form will then appear and you’ll be asked to enter your purchase code and your email address to register your copy of Bridge.
Please note that one license works for one domain only. If you’d like to use your copy of Bridge on some other website, you first need to deregister your theme on the old website, and then register it again for the new one.
Take a look at this video for a step-by-step guide on how to register a Bridge theme .
Now that you’ve activated all the required plugins and you’ve registered your copy of Bridge, the next step to take is to import a demo. The Bridge demos are great starting points for your website. Just choose the demo that best fits the type of site you’re going for, import it, and then customize it to your taste and make it your own.
There are two types of Bridge demos: the ones that use the Elementor page builder, and the ones that use the WPBakery page builder plugin. Only the original Bridge demo is available for both Elementor and WPBakery.
Just keep in mind that once you decide which page builder you’re going to use, you should stick with it. So, if you start creating a website with WPBakery, we recommend you keep on using that page builder. But you can easily switch to Elementor for your next project.
To better understand the difference between Elementor and WPBakery in Bridge, check out the following video:
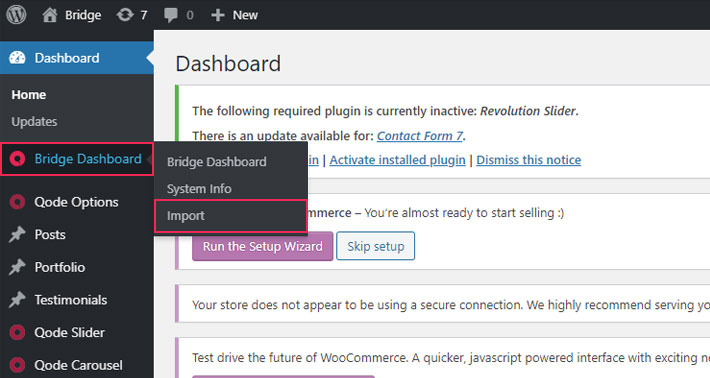
To import a demo with Bridge, head over to the menu on the left and go to Bridge Dashboard.
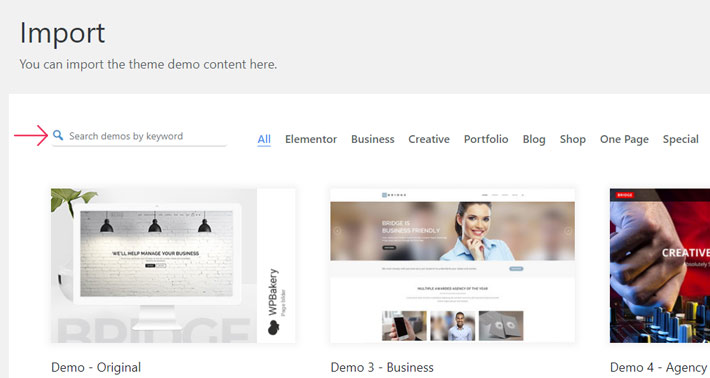
This is where you’ll find all the available Bridge demos. You can search them by entering a keyword in the Search field, or browse them by category. To find demos that were built using Elementor, select the Elementor category.
If you want to learn which page builder was used to build a specific demo, click on the demo. A pop up window will appear, and under Following plugins should be installed and activated before a demo import you’ll see which plugin was used to build it.
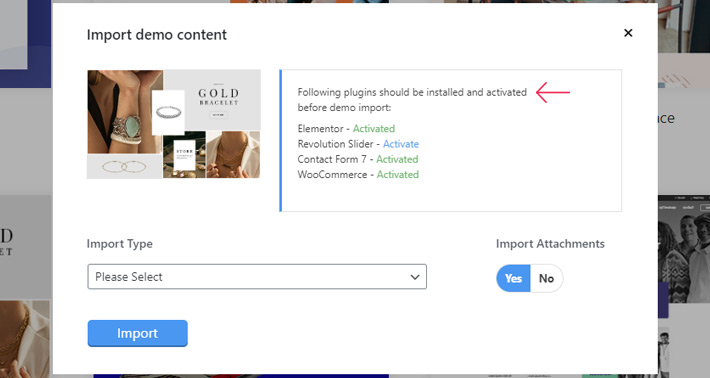
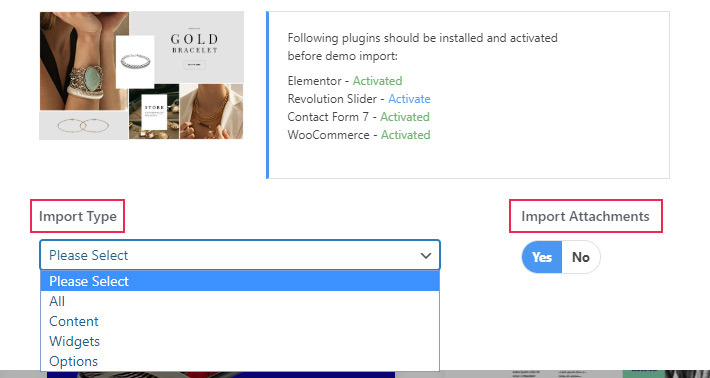
Here you can also choose the content you’d like to import, as well as decide if you want to import media files along with the demo. If you’d like to import the full demo, choose “All” under Import Type and set Import Attachments to “Yes.”
Once you’ve set all the options and installed the required plugins, just click the Import button and your demo will be imported.
To guide you through the demo import process, we’ve made two video tutorials – one for each page builder. The following video will teach you how to how to import demos made with Elementor:
And this one will show you how to import demos made using WPBakery:
Just remember that if you choose to import an Elementor demo, you should deactivate the WPBakery plugin and vice versa.
3. Add Your Logo
A logo is probably one of the first things we notice when we visit a website. In most cases it’s located in the top-left corner of a website. Having a logo is indispensable for anyone who’s serious about their brand. A well designed logo will capture people’s attention and help make your brand memorable and unique.
To add a logo to your website using Bridge, go to Qode Options (this is where you’ll find all the global settings related to the theme) from the menu, and then select Logo.
Here you’ll see a bunch of logo-related options. Not only can you add a default image that will be displayed as the logo, but you also get to choose between a dark or light logo variant.
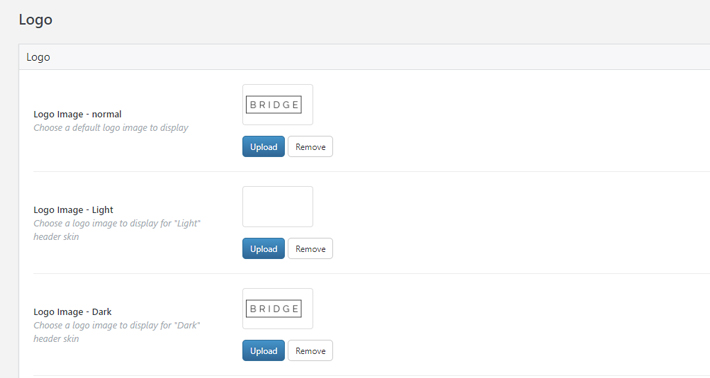
Also, it’s possible to use a different logo for each header type (sticky, mobile, or fixed), as well as to set the Logo Height for Mobile.
Once you’re done with all the settings, don’t forget to click Save Changes.
4. Change the Favicon
Favicons are those tiny icons you see in tabs when browsing, as well as in bookmark lists, search results, etc. They’re normally displayed on the left side of the web browser’s tab, and are super useful, because as petite as they are, they help others identify your brand. Favicons can contain your logo, or anything else that represents your business. They usually measure 16 x 16px, though in some cases they can go up to 32 x 32px in size. In the image below, you can see the favicon of the Qode Interactive website.

Many people actually tend to overlook this step and completely forget to set a favicon for their website. This is a simple task when you’re using the Bridge theme.
Once again, hover over to the menu on the left, and under Qode Options select General.

Press Ctrl + F (or Command + F on Mac) and type in “favicon” to quickly find the Favicon Image option.
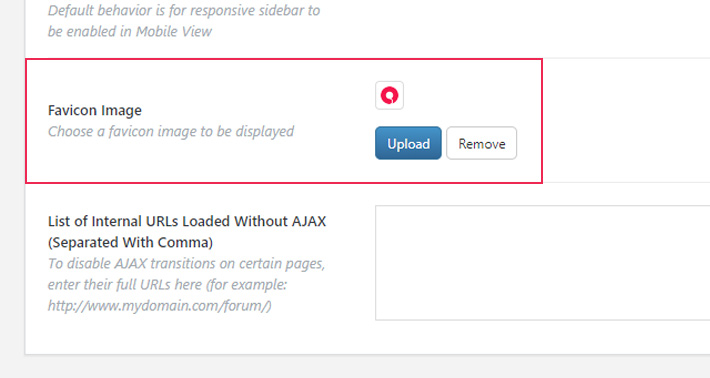
The only thing left to do now is to choose an image that you’d like to use as your favicon.
5. Connect to Social Media
We’re all aware of just how important social media is for brand marketing. There’s nothing better in terms of ensuring greater exposure for your business and spreading the word about the services you provide. You get to share your content in a cost-effective way and directly communicate with your audience all over the world. Satisfied customers are one of the most important factors that greatly contribute to your professional success.
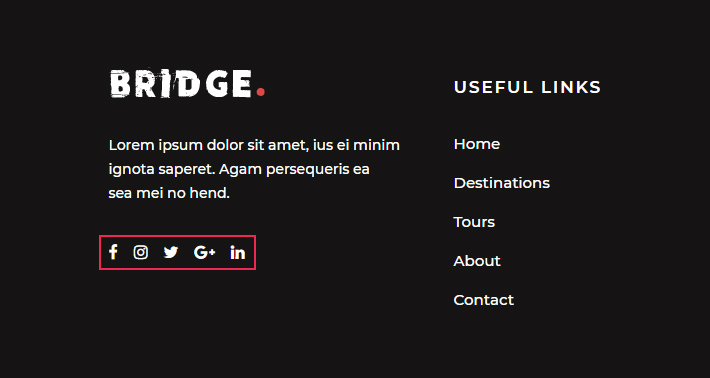
There are two ways in which you can integrate social media on your website. One is by using Bridge’s Social Icons shortcode and the other is by using the Qode Social Icons widget.
Let’s start off by showing you how to use the Social Icons shortcode.
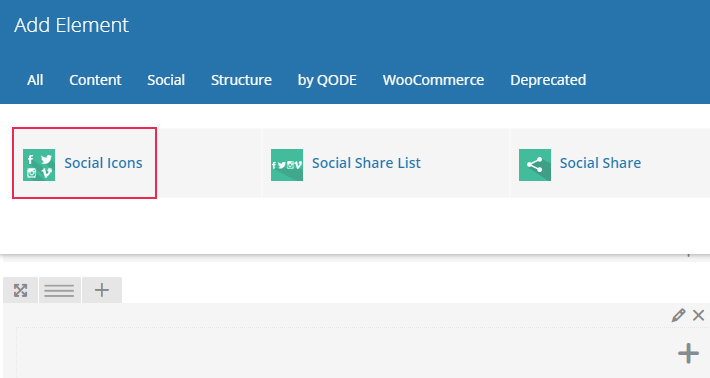
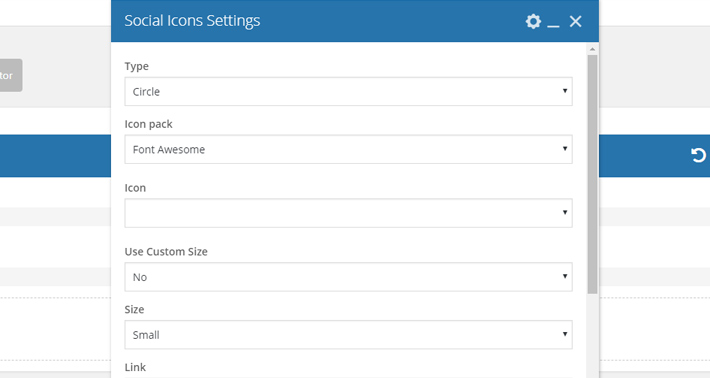
This shortcode comes with numerous options, from choosing social icons which will be added to your website, to setting the icon type, size, icon pack, icon color, border color, etc. Since you want icons to lead to your social media pages, don’t forget to input the appropriate URL in the Link field. By using the Social Icons shortcode, you have the possibility to display social icons anywhere on a page.
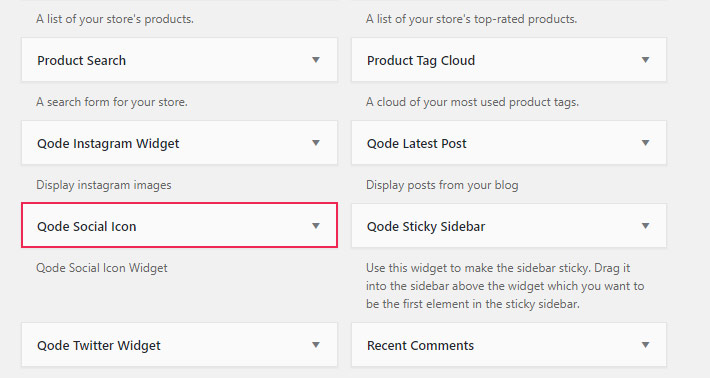
When it comes to adding social icons to a widget area, there are two ways to do this. The first is by pasting the social icon shortcode into a Text widget, while the second is by using the Qode Social Icon widget.
It’s important to note here that some Bridge demos were created before the Qode Social Icon Widget. In those demos, social icons were added to widget areas using a combination of the social icon shortcode and the Text widget.
In this case, if you want to use exactly the same social icons in the widget area as in the demo, all you have to do is to change the link to your social media accounts. To do this, from the menu on the left select Appearance > Widgets.

On the right hand side of the screen you’ll see every single widget area available. What you want to do is find the ones which contain said social icons, so you can make the modifications as per your needs.

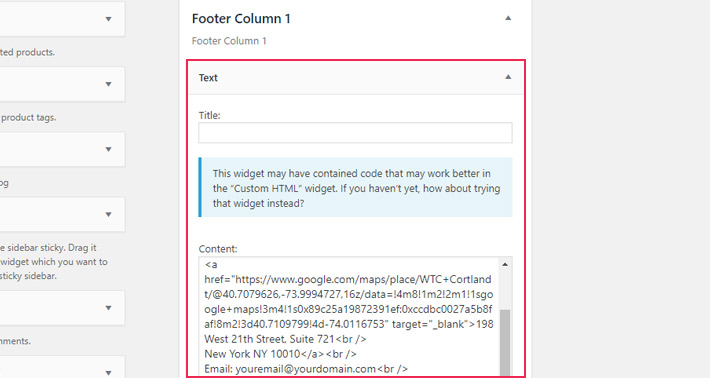
Open the widget area with the social icons, and then open the Text widget within.
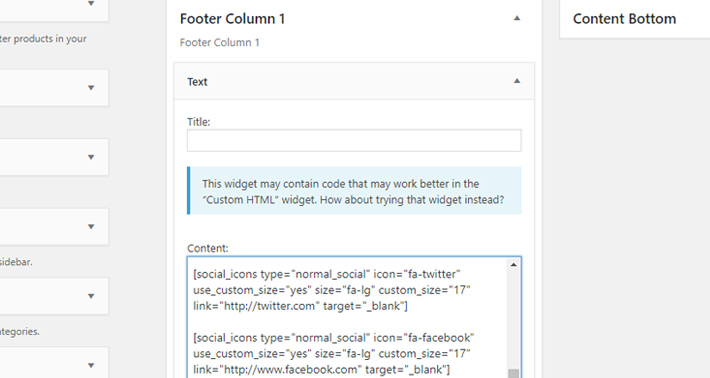
As you can see in the image above, in our example the Footer Column 1 widget area has a Text widget with the social icon shortcode inside it. It’s quite easy to recognize this shortcode, since it starts with social_icons.
Here’s an example of the social icon shortcode for Twitter:
[social_icons type="normal_social" icon="fa-twitter" use_custom_size="yes" size="fa-lg" custom_size="17" link="http://twitter.com" target="_blank"]
Once you find the Text widget with these social icons, all you need to do is insert the link that leads to your Twitter feed between the quotation marks after link=. In the example above, we’d replace the http://twitter.com link with the link to our twitter feed.
The same applies to all social icons, regardless of the widget area they’re placed in. If some of the icons are superfluous, simply delete the entire shortcode, along with the box brackets – [ ].
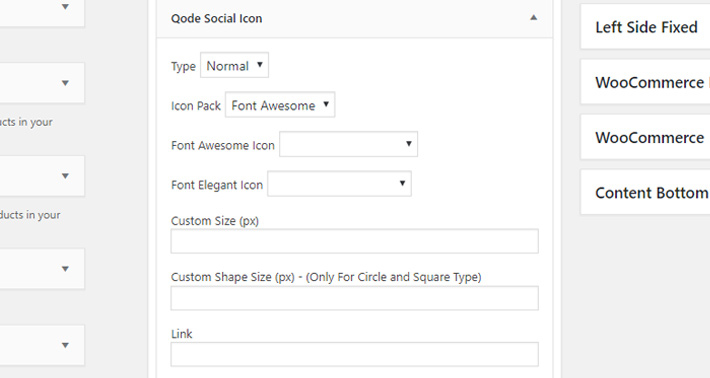
The Qode Social Icon widget, on the other hand, is the easiest way to add new social icons to the various widget areas of your website.
All you need to do is decide which widget area you’d like to display the social icon in and then drag and drop the Qode Social Icon widget into that widget area. The widget has a variety of options that let you modify the type and size of the social icons, choose the font icon pack, the icon color, add the link, set the hover color, etc.
And that’s all there is to it. Just remember to save the widget settings once you’re done setting up your social icon.
We also have a useful video that explains how to add and customize social icons both via the Qode Social Icon widget and by using the combination of the Social Icon shortcode and the Text widget. Check it out below:
6. Add/Change Contact Information in Your Footer
If you import a demo, it will come with some placeholder links, addresses, and phone numbers in the footer area. Of course, you’ll want to change all of this information to correspond to your business. Luckily, doing so is quite simple.

All the information in the footer is placed in the Footer Column widget areas. In our example, we’ll explain how you can change the address, email, and phone number located in the first footer column.
Head over to the menu on the left side of the screen and select Appearance > Widgets. Then, under Footer Column 1 choose the Text block.
First, let’s take care of the address. If it’s not there already, use Google maps or a similar app to determine your precise location.
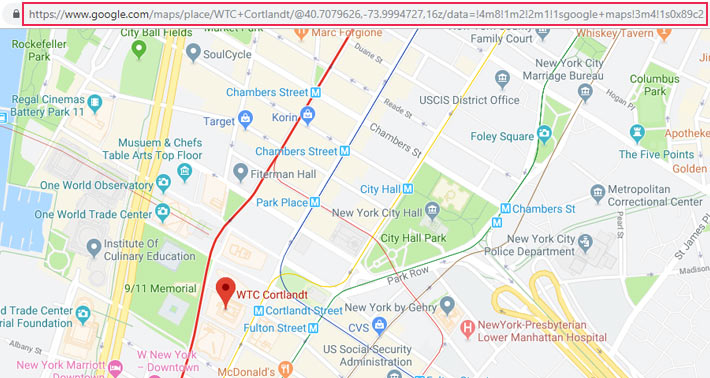
The copy the URL and paste it within the quotation marks after the href atribute.
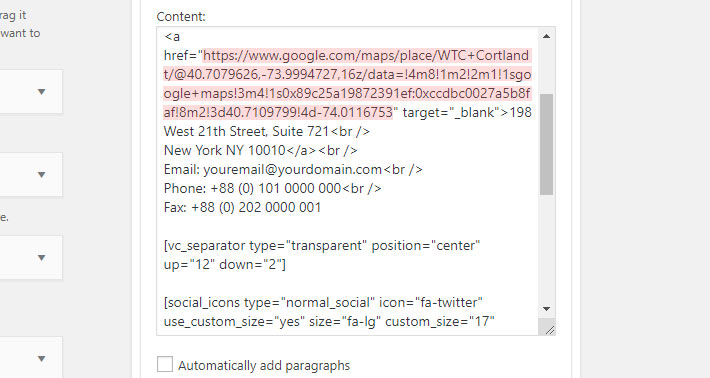
Don’t forget to also change the actual address text. The address is always placed between the <a> and </a> tags.
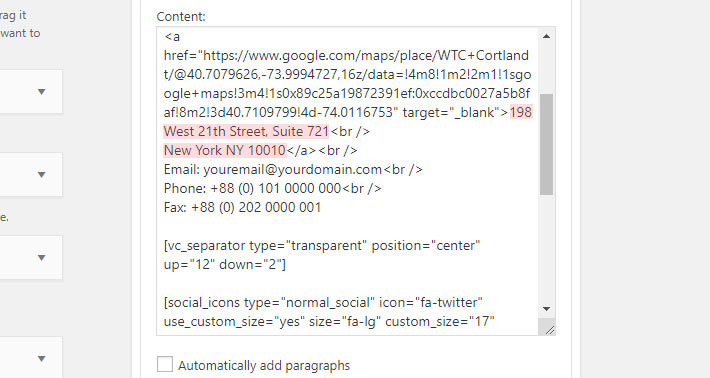
The target attribute is set as blank because we want the map to open in a new tab. However, if you wish for it to load in the same tab, just delete this attribute. The <br> tags are useful when you’re writing an address, as they signify a line break. In our case, the address breaks in two lines and each is linked.
To make sure nothing is linked as in the demo you’ve imported, it’s important not to forget to change all the href attributes in all <a> tags. That’s where you place hyperlinks to other web locations.
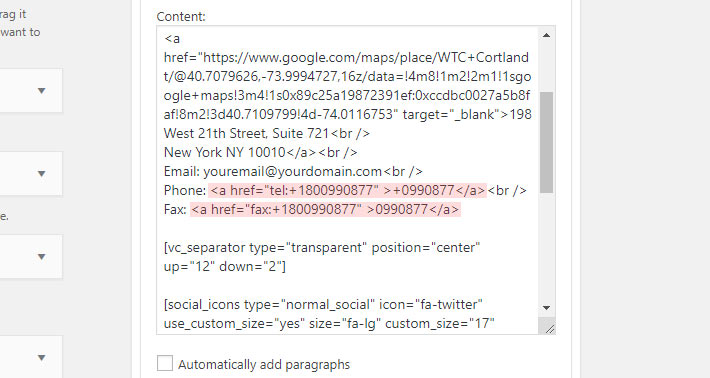
When it comes to the phone number that you wish to display in the footer, you should do pretty much the same as with the address. The only difference is that, instead of the address, you’ll now paste the phone and fax number between the <a> and </a> tags, and you’ll use the tel: and fax: markers in the href attribute.
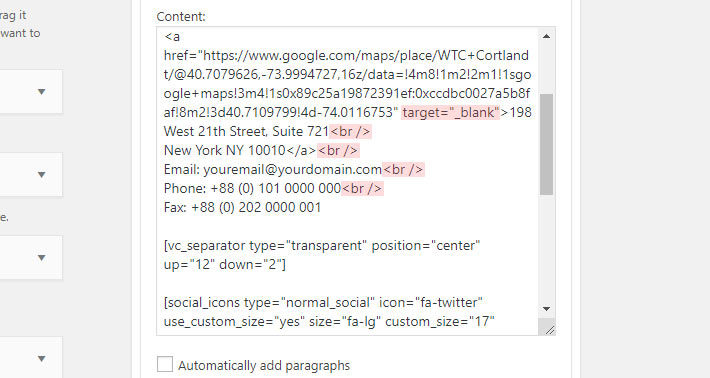
To add the email address, paste it between the <a> and </a> tags. Just remember to use the mailto: marker within the href attribute if you’d like the link to open the user’s default mail client.

If no address and contact details have been linked in the demo you imported, you can use the following codes and change the appropriate information as explained in the text above:
<a href="https://www.google.com/maps/place/WTC+Cortlandt/@40.7079626,-73.9994727,16z/data=!4m8!1m2!2m1!1sgoogle+maps!3m4!1s0x89c25a19872391ef:0xccdbc0027a5b8faf!8m2!3d40.7109799!4d-74.0116753" target="_blank">198 West 21th Street, Suite 721<br />
New York NY 10010</a><br />
Email:<a href=”mailto:[email protected]”> [email protected]</a><br />
Phone: <a href="tel:+1800990877" >+0990877</a><br />
Fax: <a href="fax:+1800990877" >0990877</a>
Regarding the website link in the footer (which is usually located in the bottom footer widget area), if it’s already included in the demo, you can just change the text between the <a> </a> tags and the href attribute to correspond to your website. However, if there is no website link in the footer of the demo you imported, you can use the following code to add it:
<a href=”site_url”>the name of your website</a>
Once again, to ensure no links remain from the demo itself, make sure you check all widget areas and modify all the href tag.
Learn more about setting up and customizing your website footer in this video tutorial:
7. Customize the Colors
There are several places where you can alter the colors of your website, depending on which colors you’d like to change. Some settings are global, whereas others refer to pages only. To better understand global and page settings in Bridge, feel free to check out this video tutorial:
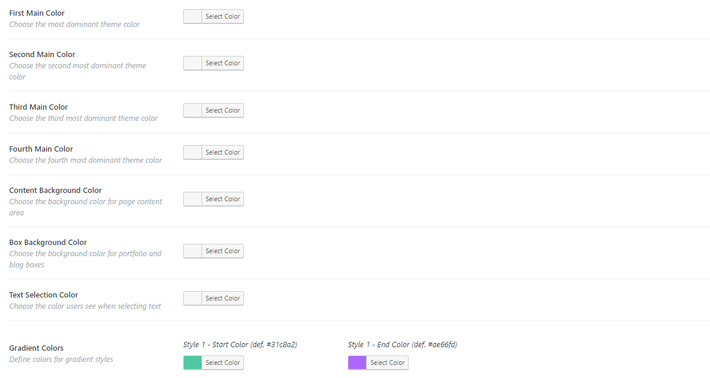
To change the colors throughout your website, go to the menu, and select Qode Options > General.
This is where you can set the first main color (the most dominant color on your website), as well as the second, third, and fourth main color. You can also play around a bit and modify the content and box background colors, the text selection color, and gradient colors.
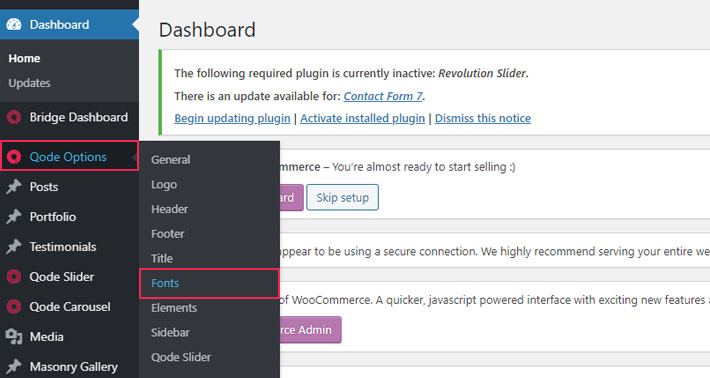
To change the colors of the header, footer, sidebar, as well as the title, fonts, blog, and portfolio colors, just go to the menu and under Qode Options find the corresponding section. For instance, if you wish to alter your font colors, go to Qode Options > Fonts.
As we mentioned earlier, the color changes can also be applied to only one page or post. You can modify the background color, the color of the header and the title area, and various other options. The modifications will be visible only on the specific page or post you set those options on.
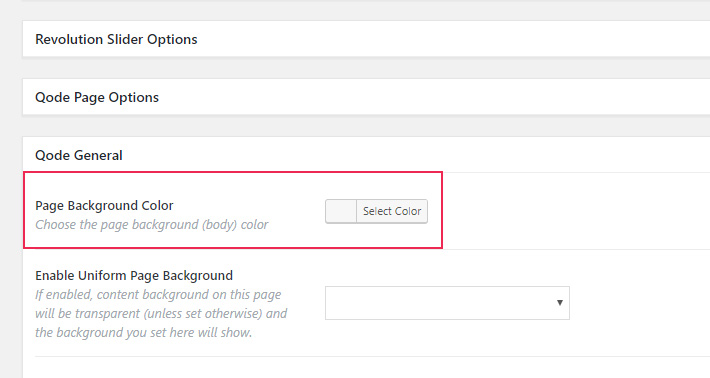
To change the colors on a page or a post, just open that post in your WrodPress admin. As you scroll, you’ll see options which let you change the colors of various elements of a page.
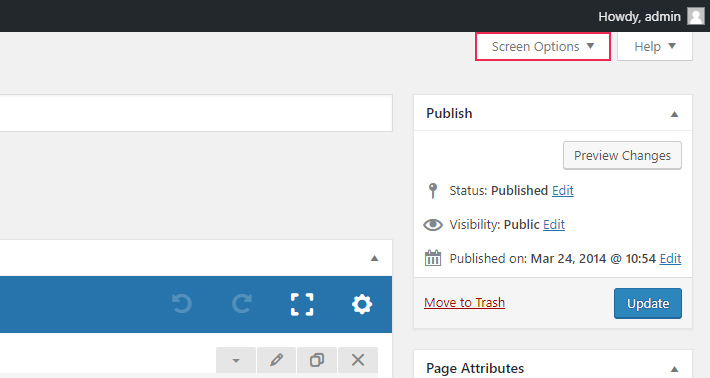
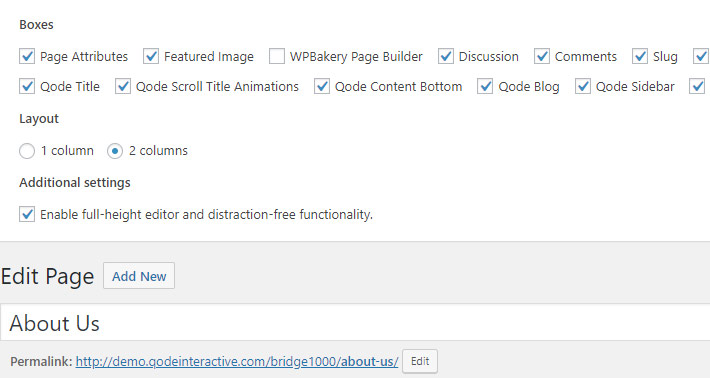
If you notice that some options are not active, go to Screen Option at the upper right corner of your admin dashboard. A lot of check boxes that you can tick will appear, just choose the sections you’d like to display on that particular page.
Qode WordPress Themes: Top Picks
View Collection


8. Change Fonts
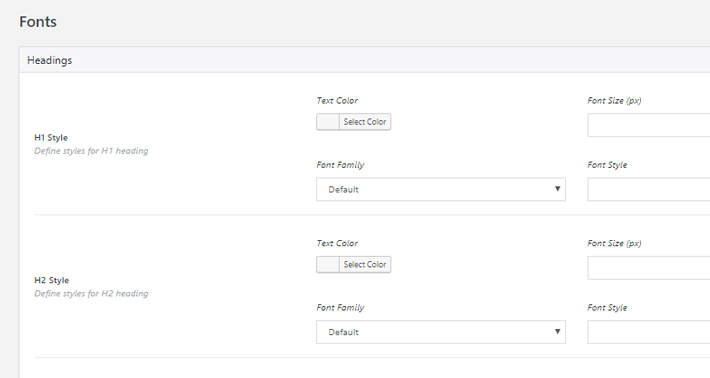
To take care of the font settings on your website, go to Qode Options > Fonts.
There’s a whole bunch of options here allowing you to go into great detail font-wise. You can choose different heading styles (from H1 to H6), set fonts for both the header and footer, as well as for links, menus, etc. Aside from deciding on fonts, you can also set the appropriate responsiveness for each style and font you choose.
9. Menu Settings
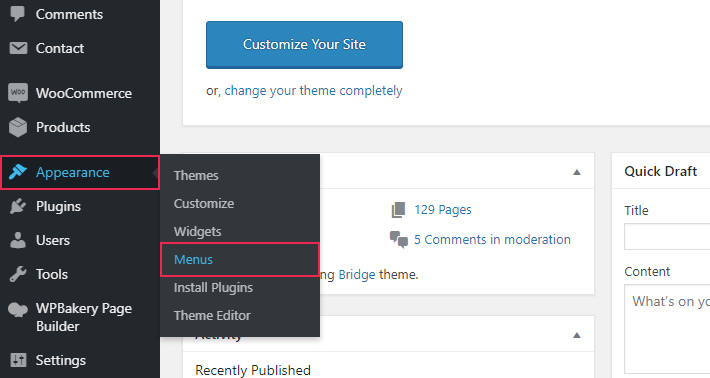
When it comes to customizing your menu, all the settings are placed in Appearance > Menu.
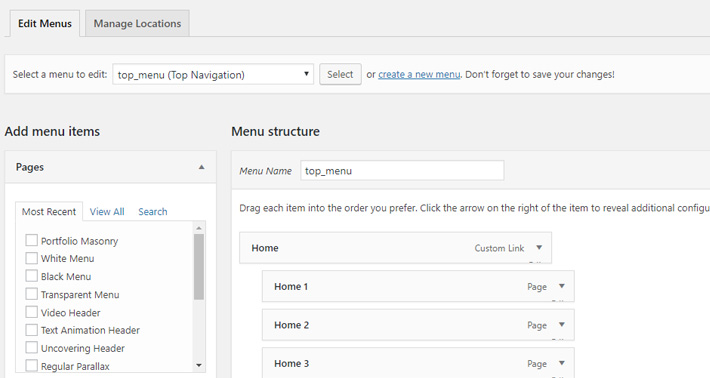
This is where you can create a new menu or modify the one that you imported with the demo.
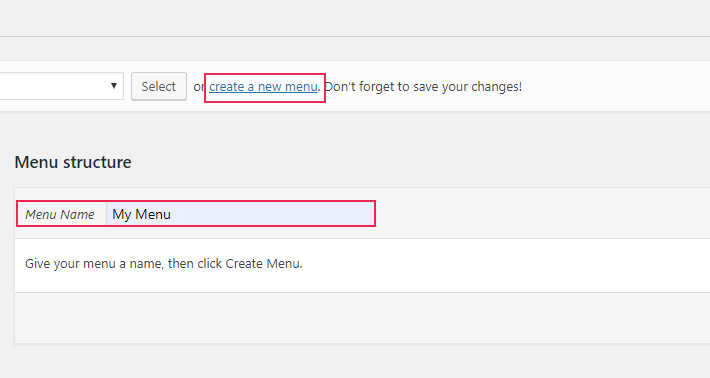
To create a brand new menu, click on Create new menu and then name it. Once you’re done, don’t forget to click Create Menu.
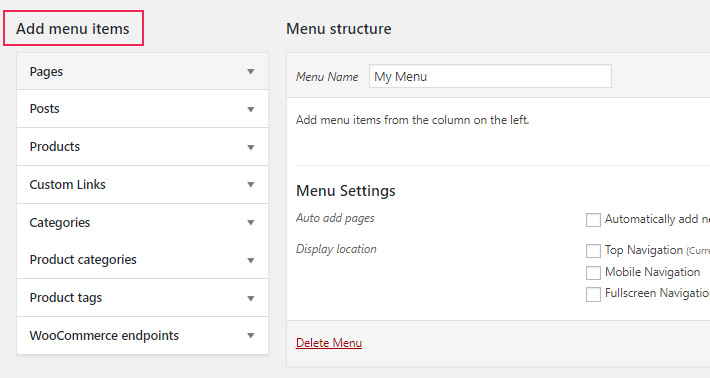
Under Add menu items you’ll be able to find all the pages, posts, categories, etc. that you’ve created. Choose which elements you’d like to add to your menu by checking the box next to its name. What’s also handy is that you can add custom links. Just go to Custom Links and paste the URL that you like. Don’t forget to enter the link text, though.
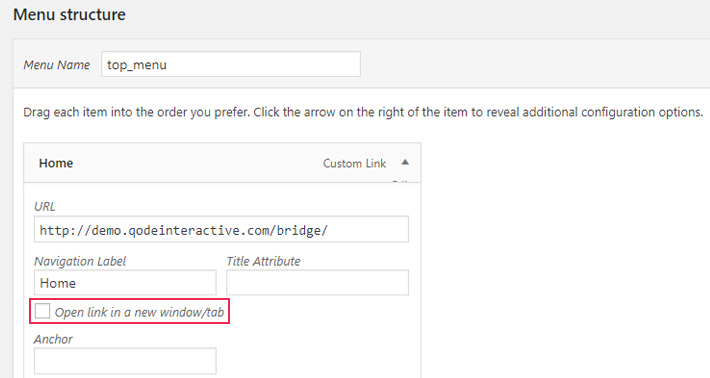
If you want your link to open in a new tab upon being clicked (and this refers not only to Custom Links, but also to other menu content), go to Screen Options, and under Show advanced menu properties tick the Link Target box.

Now, when you click on a link, you’ll have the option to check the Open link in a new window/tab box.
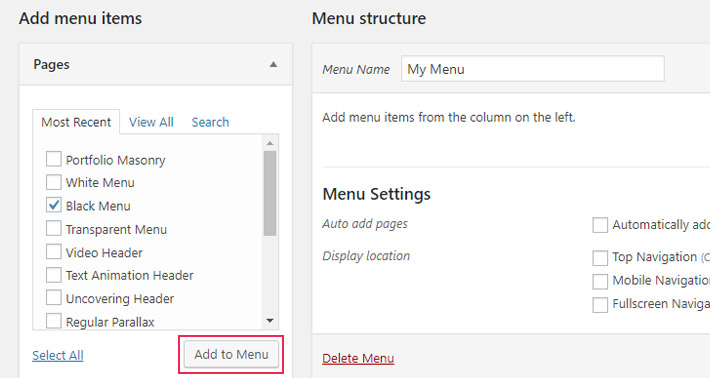
Once you’ve decided which elements will be a part of your menu, click on Add to menu.
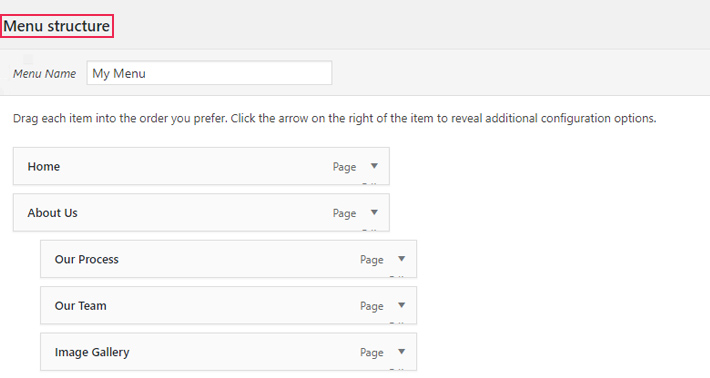
As you start adding pages to a menu, you’ll see them appear under the Menu Structure. Feel free to drag and drop the content to arrange the menu items the way you like it best, and to create multi-level menus.
At the bottom of the page, under Menu Settings, you get to add the menu you created to your website. You can choose where you’d like it to appear.
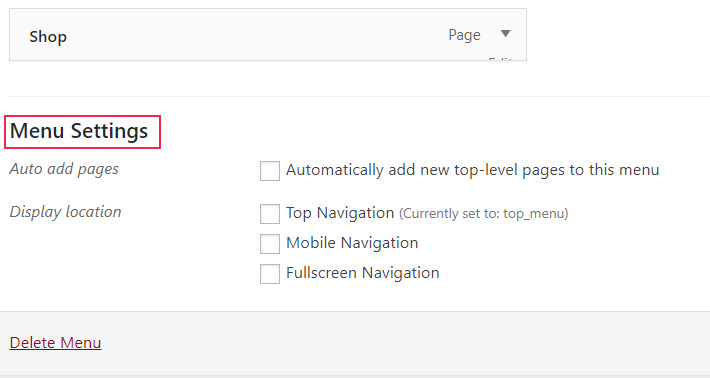
Once you’re happy with the way everything looks, hit the Save Menu button.
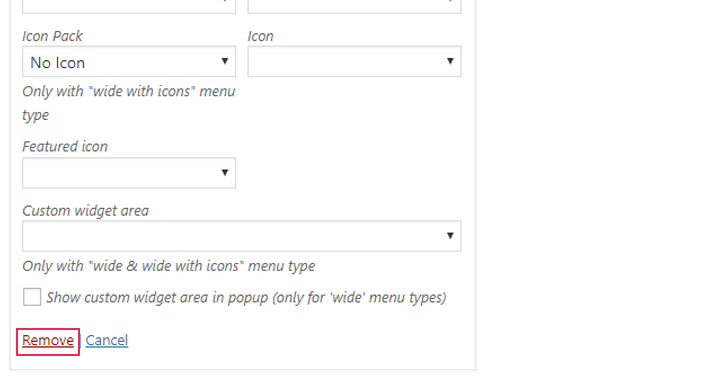
Should you, at some point, decide to remove some elements from the menu, you can do it by simply clicking the Remove button.
10. Arrange the Widgets
Widgets let you further customize your website. You can add a widget to any available widget area on your website and it’ll appear on all pages that have that widget area in them. To access your widgets, navigate to Appearance > Widgets in the main menu.
Bridge comes packed with some stellar widgets that can enhance the functionality of your pages.
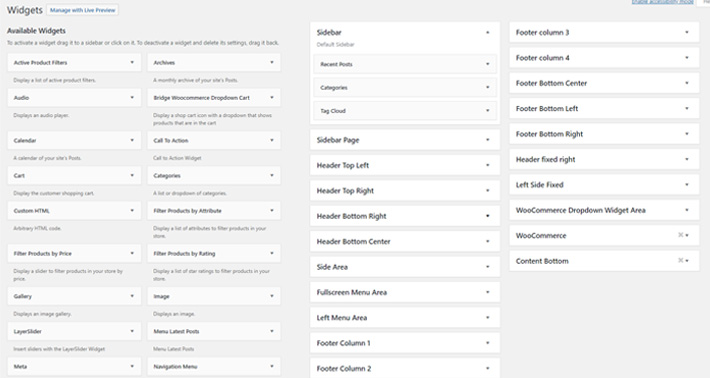
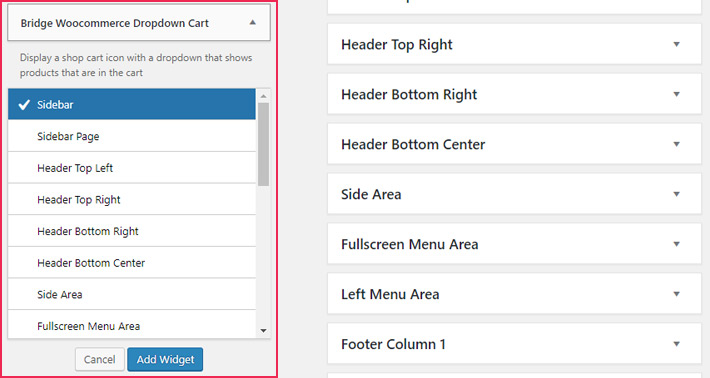
There are two ways of adding widgets to a widget area. You can drag and drop them to the desired widget area, or you can click the arrow next to the widget’s name and then choose the widget area from the dropdown menu. When you’re done, click the Add Widget button.
It’s also important to note that this is the area where you can create and build your footer, as well as add various widgets to your header.
Bridge is full of great widgets. For instance, there’s a variety of handy product and store-related widgets, as well as the Qode Instagram and Qode Social Icon widgets, to name just a few. Add the ones that best fit your requirements and enhance the overall functionality of your website without having to write a single line of code.
What’s also great is that each widget can be further customized. To edit them to your liking, click on the arrow next to the name of the widget. You’ll see that all options available are pretty much self-explanatory.
In case you want to delete a widget, again, click on the arrow next to its name. At the very bottom, you’ll see the Delete option. Click on it to remove the chosen widget.
Conclusion
The Bridge theme is so versatile that it turns WordPress into your virtual playground. It enables you to build websites for literally all kinds of businesses. From agencies, jewelry shops, to language schools and construction companies, Bridge has got you covered. In this article we’ve suggested what to do once you install the theme, but feel free to explore its features on your own as well. Combine features from different demos, tweak them as you like, and use all that Bridge has to offer to craft some unparalleled websites.
