How to Install WordPress Locally on Mac Using MAMP

Working on your website locally is a very common practice among WordPress developers. It is quite easy to set up and it optimizes the development process. For the less WordPress-savvy, it can be a great tool for exploring and improving your existing knowledge. Luckily, there are several free web development tools that can be used. Within this article, we will cover one called MAMP.
MAMP was originally designed for Macintosh (i.e. macOS) but has since expanded to Windows, whilst keeping the name. MAMP stands for Macintosh, Apache, MySQL, and PHP. Apache is an open-source web server, MySQL is an open-source relational database management system, and PHP is a server-side coding language that WordPress is built on. As such, using MAMP can be useful for numerous WordPress users, as you will soon find out. We will explore it further in the next section. Then, we will show the exact steps one must take to set up both MAMP and WordPress within it:
Why You Should install WordPress Locally on Mac Using MAMP
There are a great many reasons why having a local WordPress installation using MAMP can be beneficial. The first and the most common one is wanting a safe environment to test updates before applying them to a live site. As mistakes can be quite costly, i.e. your website can break, it is important to fully test any code changes, self-made or not, beforehand. On the same note, a local installation can also serve as a sort of backup for your actual site. Additionally, working locally is quicker as it circumvents the problem of internet accessibility and connection issues, as well as server issues. Finally, local installations have a reduced risk of acquiring malware or being hacked.
How to Install WordPress Locally on Mac Using MAMP
Now that we’ve touched on the many advantages of having a local WordPress installation using MAMP, we proceed with the how-to part of the article. We divided the installation process into four parts and carefully and thoroughly explained each one. The step-by-step explanations are accompanied by screenshots so you can easily follow along.
The first step is to download the MAMP software and install it on your computer. To do so, simply go to the MAMP Info website and click on the Free Download link.

Once the download is finished, you will need to double click the downloaded file to start the installation. Next, simply follow the on-screen instructions. For the most part, you will just have to click on the Continue button and agree with the license agreement.
When you get to the final window, click the Close button to finish the installation of MAMP on your device.

Please note that the download packet includes MAMP and MAMP Pro (paid version), so both will be installed on your computer. So, when you proceed to launch MAMP after the installation you need to make sure to open and use the free version.
You can do that by going to Applications > MAMP folder on your computer.

After opening the MAMP folder, find the elephant icon within and click it to start the MAMP application.

*Bonus tip
Before continuing further, we wanted to mention that there are a few changes to MAMP settings you can make now so working in MAMP will be easier for you in the long run. The first of those changes is switching the Apache port. Open the Preferences menu under MAMP and then click on the ports tab.
In the field for the Apache port, type in 80, and then click OK to save the change. Alternatively, you can press the button with Set Web & MySQL ports to 80 & 3306 to change the Apache port along with the MySQL port.
By changing the Apache port to 80 you will be able to access your local websites using http://localhost as the link instead of http://localhost:8888. However, this also means that each time you start MAMP servers, you will have to provide the admin password for your device.
Another thing you can change to make the user experience better is to pick the root directory for your documents. This is where your local websites will be stored. The default location MAMP uses the is /Applications/MAMP/htdocs/ folder. However, you can easily change that if you want. Navigate to the Preferences menu, click on the Web Server tab, and then Select a folder that you will have easy access to for installing MAMP. This will help you in the long term because you will be keeping all your site files within MAMP’s subdirectory htdocs. Ideally, you should store each of your websites in a new folder within that subdirectory.
On our end, we’re going to keep the default file path.


Once you’ve adjusted these options to fit your preferences, you can proceed with installing WordPress locally by starting the server. Click the Start Servers button within the MAMP application window. If you changed the Apache Port to 80 earlier, you will be prompted to enter your computer’s admin password.

Now that MAMP is installed and working, we need to add WordPress to the localhost website. Download the latest version of WordPress from the official website by clicking the Download WordPress button in the middle of the screen. At the time the article was written the latest version was 5.3.2, so yours might differ.

Once the download is complete you will have to navigate to the folder where you have installed MAMP and access the htdocs subfolder within it—in our case, we used the default path /Applications/MAMP/htdocs/. If this is different for you, navigate to the folder you previously specified for MAMP and then access the htdocs subfolder. You should create a new folder for your site here. As mentioned previously, you should store each of your website files in a new folder within the htdocs directory. This folder’s name will become part of the URL used to access your site. For example, if you name the folder mysite, you’ll access your site by going to http://localhost/mysite within your preferred browser.

Once you have created the folder, open it, and extract the contents of the WordPress installation file that you downloaded earlier within it.


Open your browser and navigate to http://localhost/MAMP/.

Click on the TOOLS tab, followed by a click on the PHPMYADMIN option from the dropdown menu.

The phpMyAdmin is a web-based application used for the administration and management of MySQL databases. When you open it, you need to click on Databases and then create a new database. You can name this database anything you want, but make sure to remember the name because you’ll need it in the next step. We will name our database mydb. Additionally, make sure to choose Collation from the dropdown before clicking the Create button.

And that’s it—you now have a database for your site.
After creating the database, open your browser, and navigate to http://localhost/mysite/ to start the WordPress installation. The first thing you’ll have to do is choose the language you will be using.

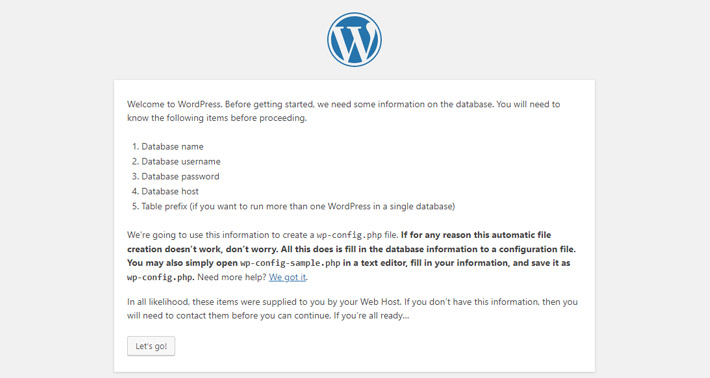
On the next screen, WordPress will list the required information you need to complete the installation. Click on the Let’s go button.
Then you will be asked to enter your WordPress database information. Here you should enter the following information exactly
-
Database Name = name of the database you created in phpMyAdmin (ours is called mydb)
-
Username = root
-
Password = root
You can leave the last two fields as they are.

Once you click Submit you will be able to see a notification stating that the first part is through. Clicking on the Run the installation button will start the famous five minute WordPress installation process.

When the installation is done, you will need to fill in the Information needed form, and click the Install WordPress button at the bottom. You don’t have to tick the checkbox to Discourage search engines from indexing this site as search engines can’t index a site made in a local environment.

After WordPress has been installed, a Success! message will appear. Click on the Log In button to proceed to the login page.

Now you need to insert the username and password you chose earlier and press the Log In button once more.

After successfully logging in, you should see the dashboard panel which concludes the installation process.

You can now proceed to work on your site using a local environment. Please note that when you want to work on your site, MAMP must be running in order for localhost to work.
Final Thoughts
As you’ve seen, installing WordPress locally on Mac using MAMP requires only a few steps and can be completed in a short amount of time. Using MAMP for WordPress will let you work on your site in a safe and controlled environment. You will be able to practice your WordPress skills, develop sites for clients, test tricky changes, and much more. Overall, this is a very valuable asset for creating stunning websites quickly as well as maintaining the functionality of existing websites. So, whatever you aim to do with your website and MAMP, we hope that you found this tutorial helpful and will use it in the future.
