5 Ways to Drive Extra Engagement and Sales in WooCommerce Using Sellkit

Studies show that some 70% of users abandon their e-commerce shopping cart without finishing their purchase. To prevent losing a potential customer, you should do everything you can to not only increase their engagement, but also to increase their order size and encourage them to return for more purchases in future.
Order bumps, upselling and downselling offers, and checkout offer notices like free shipping or discounts for a higher cart value are some proven methods to increase order size during checkout.
On the other hand, promotions such as discounts and coupons trigger a sense of reciprocity and drive engagement and loyalty in the long term.
However, WooCommerce itself doesn’t offer these solutions, meaning that you’ll have to spend time and money to buy and familiarize yourself with separate plugins if you want to add these functionalities to your site.
In this post, we’ll walk you through key optimization techniques and how to implement them in your Bridge WooCommerce store using SellKit. SellKit is a funnel builder and checkout optimization suite for WooCommerce. It offers essential tools such as sales funnels, checkout optimization and personalized promotions within one unified tool.
eCommerce WordPress Themes
View Collection


Using SellKit with Bridge Theme
In order to perform the optimization methods explained in this article, make sure SellKit has been installed and activated on your Bridge-based website. SellKit will be automatically installed when you import any Shop template in the Bridge theme. Otherwise, you can install it manually from the plugins section in WordPress admin.
SellKit is a freemium plugin. If you are a Bridge user, you can enjoy a 50% discount off the SellKit Pro plan for one year using the coupon BRIDGE50 and get access to all SellKit’s pro features to boost your WooCommerce store.
In this post we will learn how to do the following to increase engagement and sales in WooCommerce:
A small increase in average order value (AOV) can have a big impact on your profit margin, which is why you see chewing gum, drinks and chocolate near the checkout counter at supermarkets.
An order bump is a type of a cross-sell offer displayed in a recognizable box on the checkout page that increases the value of the customer’s order when selected. An order bump can increase AOV by 10-30%.
Generally, the product that is offered via order bump complements the original product and can be bought on impulse; for example, offering a lens cleaner when the original item is a camera. Some more ideas would be to offer maintenance or support service, exclusive delivery, protection or warranties.
How to Create an Order Bump in the Bridge Theme Using SellKit
Let’s take a look at how to implement an order bump within your Bridge-based online shop. In this example we are building an order bump for an iPhone shop.
1. Go to your WordPress dashboard and navigate to SellKit > Funnels.
2. Click on the Add New button.
3. Pick one of the pre-made funnels. Here we chose the Product template.
4. On the upper right corner of the page, click Get Funnel.
5. You will see three different steps including a landing page, checkout and a thank you page in the current funnel flow.
6. You can edit your landing page using Elementor and adjust the design and content to match the product (iPhone).
7. Click on the Checkout step (a modal will be shown with four different tabs).
8. In the Products tab, choose your WooCommerce product. Here we chose Apple iPhone 14 Pro 256GB as the main product.
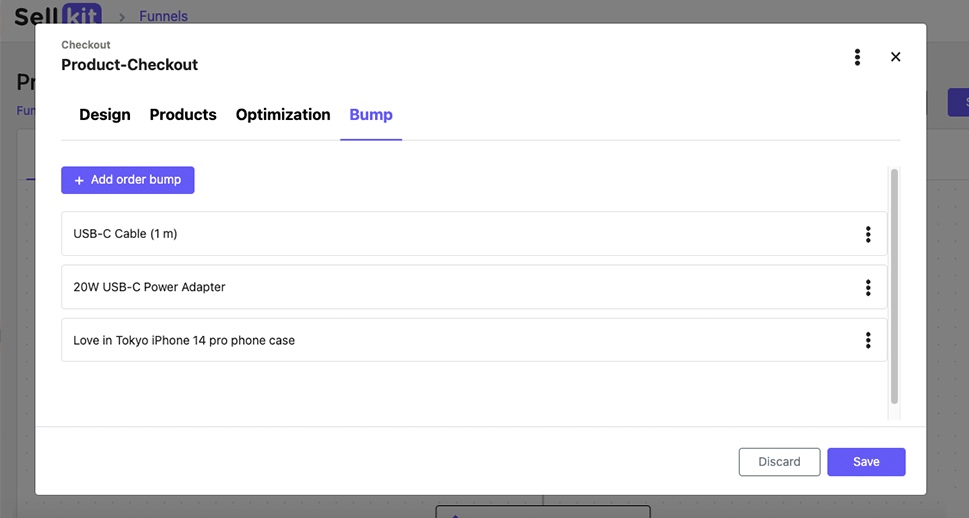
9. Open the Bump tab and click on the + Add Order Bump button.
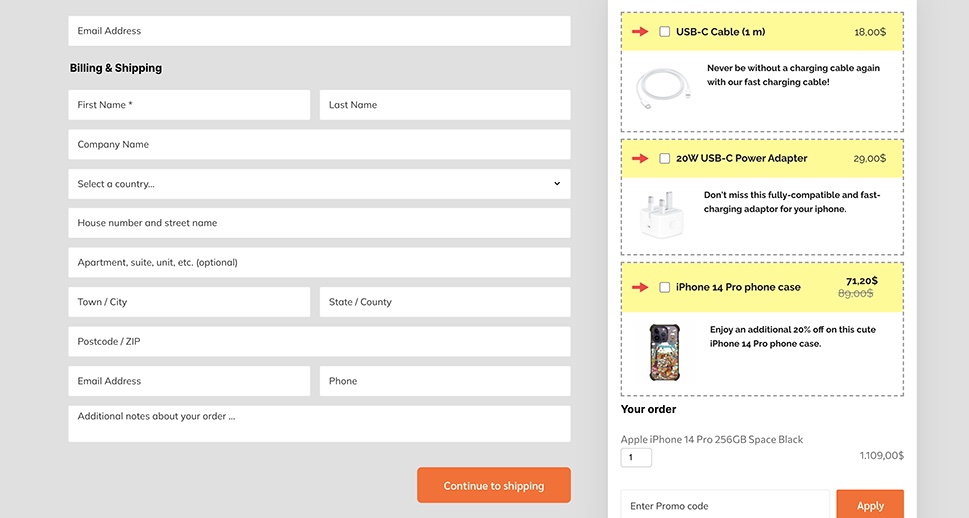
10. Give a name to the order bump and hit Create. As seen in the following image, we added three different order bumps including a USB-C cable, an adapter and a phone case, as seen in the following image.
11. Clicking on each order bump shows you a new modal where you can customize the design, product and conditions.
12. On the Design tab, we added a checkbox label, a description and set the position as “Above the order summary”. Additionally, we toggled on the Active Product Image to show the phone case image in the checkout.
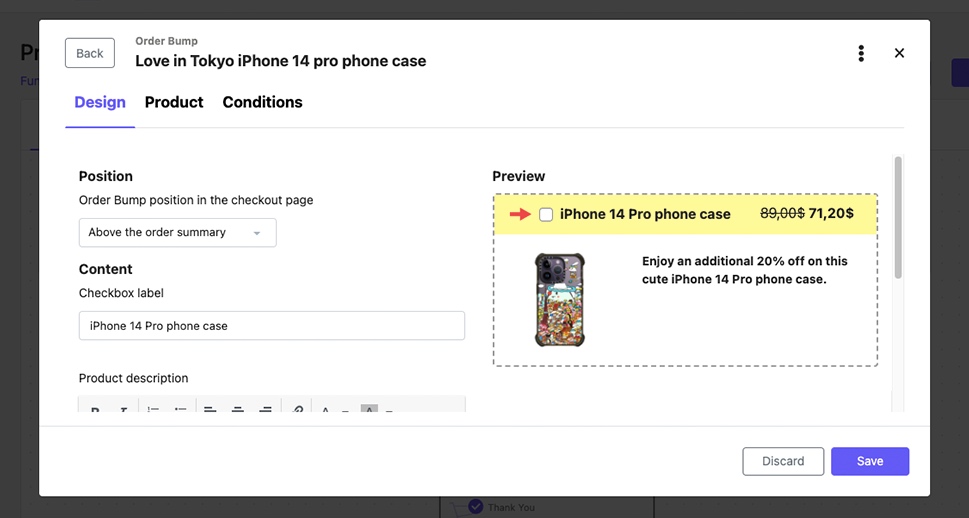
13. Via the Product tab, pick a related product for each order bump. You can also include a discount percentage in this step. Here, we offered a 20% discount on the regular price for the Love-in-Tokyo phone case.
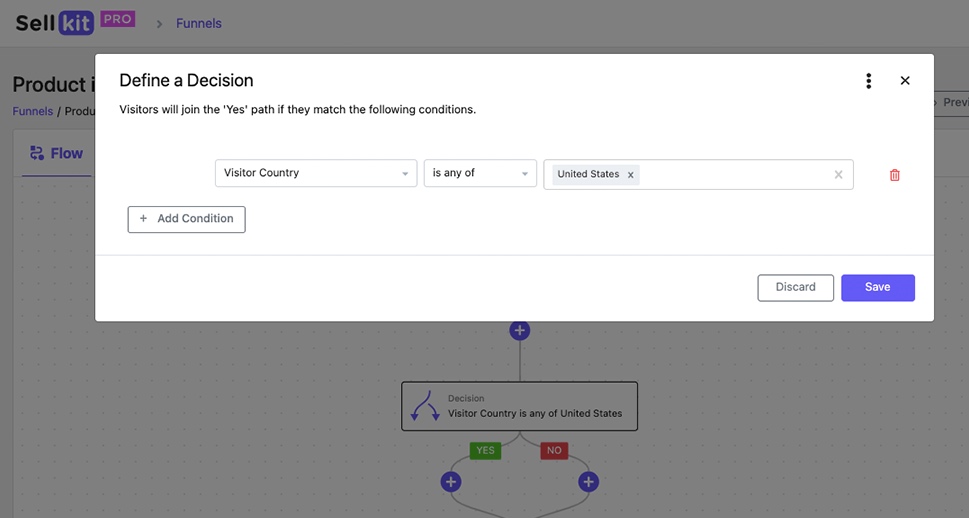
14. Wouldn’t it be great if we could display the phone case only to those who previously viewed the Phone Case category?
The Conditions tab allows you to display the order bump based on +30 options. You’re able to add multiple conditions if needed by clicking + Add Condition. In this example, we displayed the iPhone cable and adapter to everyone who entered the funnel, but we displayed the phone case only to those who were more likely to buy a phone case and had previously showed interest in the phone case category.

15. Finally, you can save the changes by clicking Save Changes.
Another sales technique to increase order value with WooCommerce checkout optimization is upselling/downselling. Marketers add upsell and downsell to sales funnels to increase AOV and maximize profits. Upsell involves offering an upgraded version of a product or service a customer has shown interest in – naturally at a higher price – whereas downsell involves offering a low-cost alternative to the product or service the customer is considering purchasing.
What Are Sales Funnels?
In order to understand upselling you should be familiar with the concept of the sales funnel. A sales funnel is a series of steps that leads potential customers to purchase. For example, a visitor finds a Google ad for a camera and clicks on the link to get more details about the product. They then enter a series of connected pages:
-
A landing page (sales page)
-
A checkout page where the customer enters their billing and shipping information
-
An upsell page where you display a one-time offer to your customers to be added to their main purchase once they click on the Pay Now button.
-
A downsell page to offer a more affordable alternative to the upsell offer in case it was rejected
-
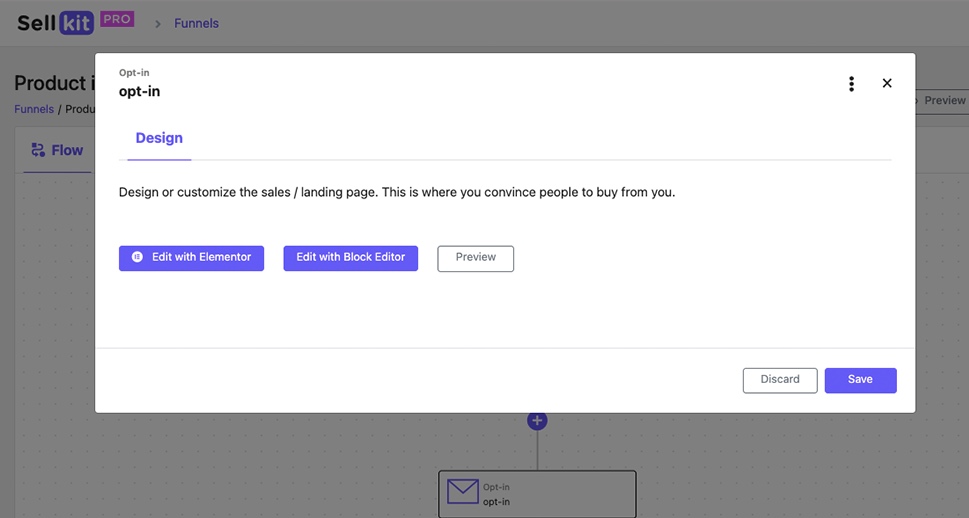
A thank you page to show your appreciation to the customer or put a opt-in form to collect customer’s email for your future marketing campaigns
As mentioned above, upselling occurs after the checkout page and before the thank you page. It’s important to note that personalizing your offers based on customer behavior, referral details or geolocational details will increase customer engagement.
By making your offers time sensitive, you will create a sense of urgency and persuade the customer to place their order faster.
Some funnels may also include these extra steps:
-
Decision steps that direct customers to different upselling and downselling offers based on their reaction to the initial steps.
-
An opt-in step helps you collect emails from your prospects. It can be placed anywhere in the funnel to collect leads that can be nurtured with your email campaigns.
How to Create a WooCommerce Upsell Offer in Bridge Theme Using SellKit
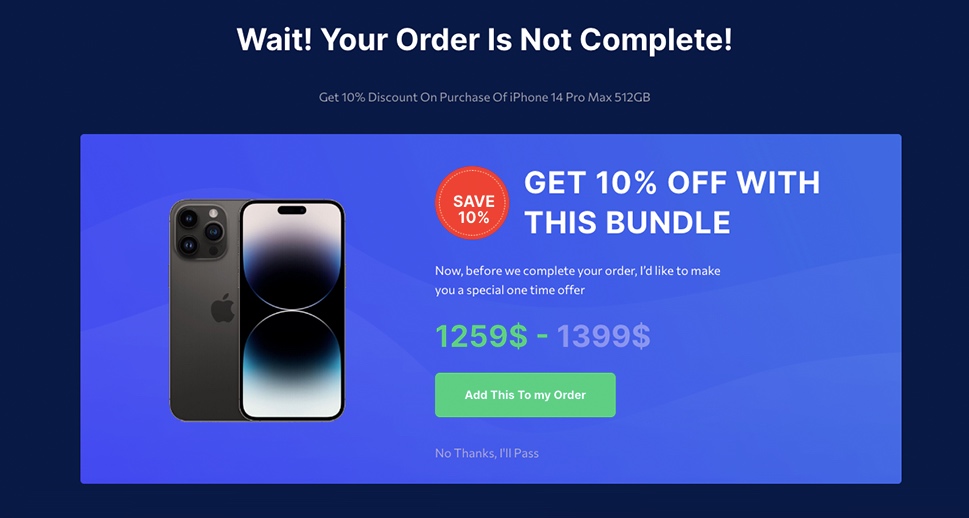
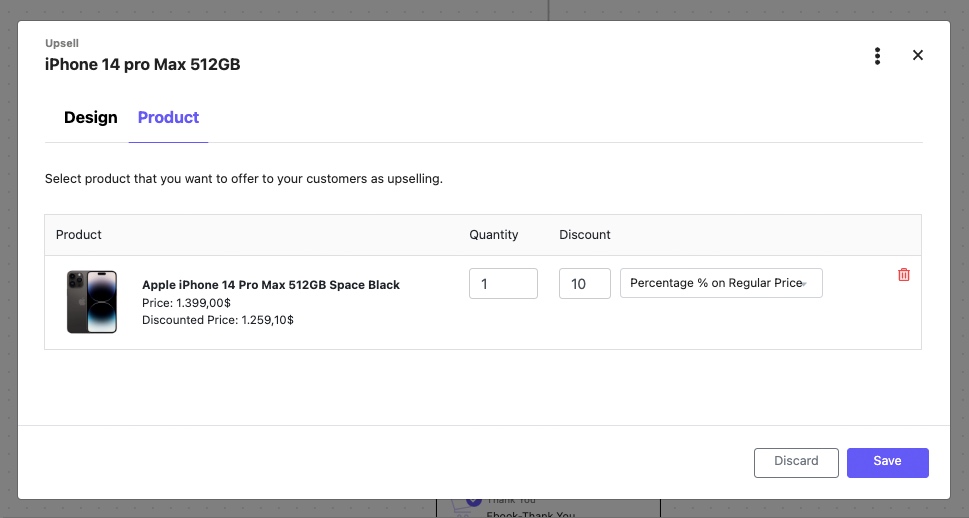
Now that we know how to create a funnel, let’s add an upsell to our existing funnel and try selling iPhone 14 pro Max 512GB for about $1400 instead.
1. In the funnel flow, click on the + icon underneath the checkout step.
2. On the opened modal, choose Upsell.
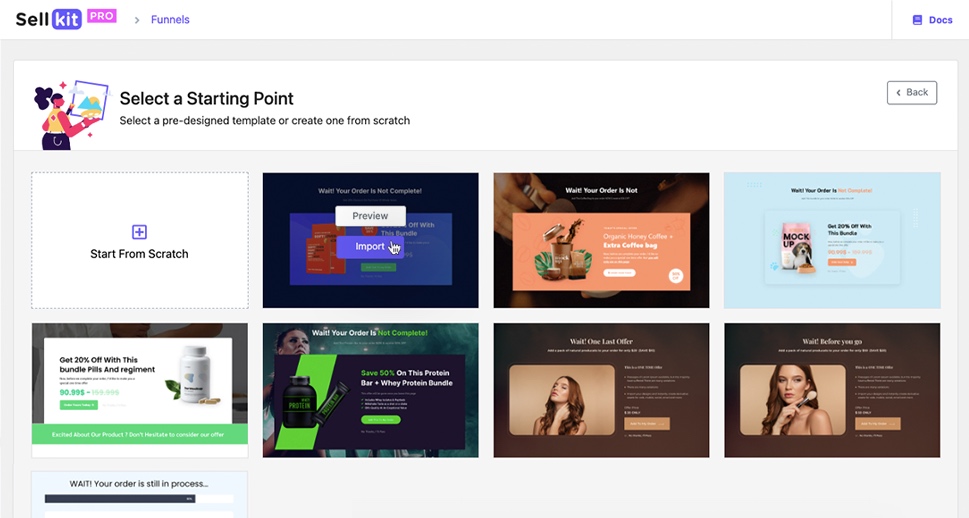
3. Pick a pre-designed template and import it by clicking on the Import button.
4. In the modal, click the three-dot icon in the upper right corner and change the name and slug of the upsell step.
5. You can also edit and customize the look of the upsell using the design tab.
6. When adding an iPhone 14 Pro Max 512GB as the product, it’s good to consider applying a discount to entice users to buy it.
7. Click on the Save button and done.
If users reject this upsell offer, they will be redirected to the thank you page; if they accept it, the order will be updated.
This is another way to increase engagement and average order value in WooCommerce. Checkout notices can help your store trigger cognitive biases such as FOMO (fear of missing out), loss aversion, hyperbolic discounting and more to reduce checkout friction and increase the chances of bigger and faster conversions.
A smart notice is a personalized message in a recognizable box that can be displayed anywhere on your website. A smart notice should be displayed based on specific criteria that you define and offer exclusive offers to trigger a sense of privilege and urgency for the customer.
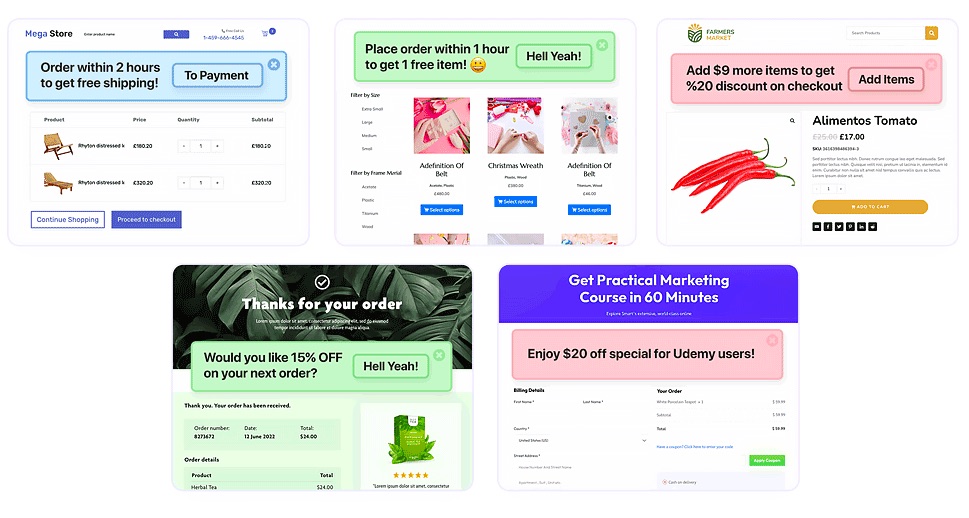
For example, a smart notice on top of the checkout or upsell page can state that if the customer places an order within two hours, an exclusive 15%-off coupon will be unlocked, or if they order above $100 they can enjoy free shipping.
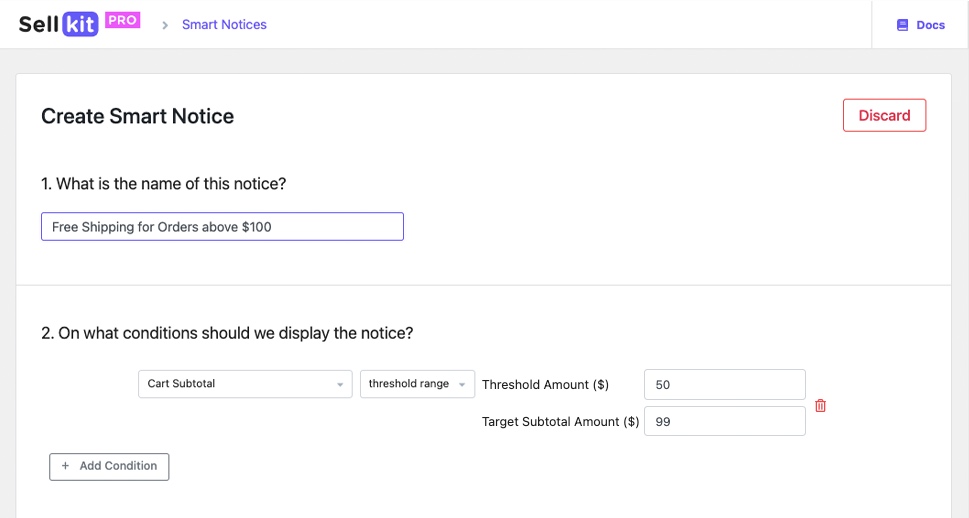
Let’s make a smart checkout notice together. Our goal is to inform customers who have a cart subtotal between $50 and $99 on the checkout page that they will qualify for free shipping if their order value exceeds $100. Let’s see how.
Go to WordPress dashboard > SellKit > Notices and follow these steps:
1. Click on the Add Smart Notice button and specify a name for the notice.
2. From the Conditions drop down menu, select Cart Subtotal and then select Threshold range. Set the Threshold amount to 50 and the Target Subtotal Amount to 99.
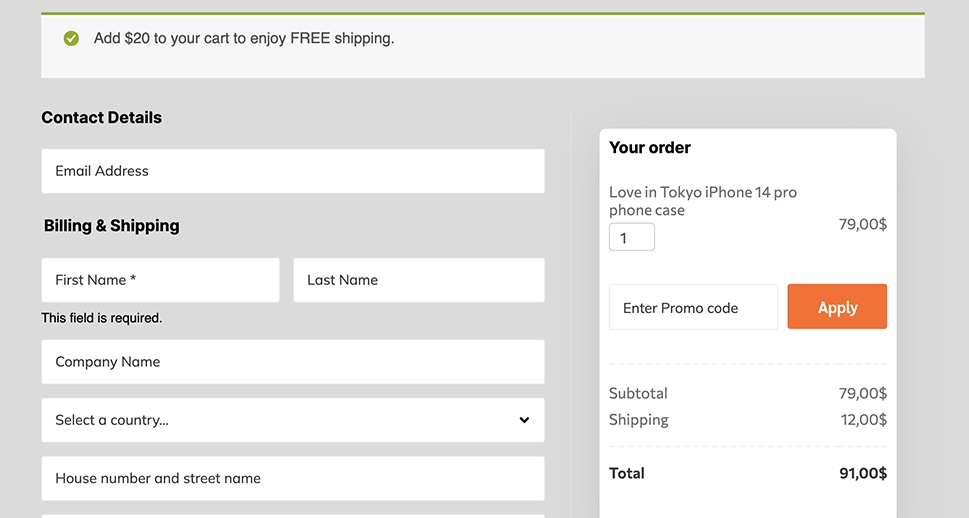
3. Write the message you want to be displayed in the smart notice from the message section. You can personalize and motivate the customer by showing the actual remaining subtotal amount in the message. Simply add “Remaining Subtotal Amount” from the list of dynamic keywords to your message. The final message will read:
“Add $[sellkit-remaining-subtotal-amount] to your cart to enjoy FREE shipping.”
4. Assign a priority value to the notification rule, such as the checkout option to display the notice in the checkout page, and activate it.
A potential customer likely sees countless advertisements, websites and offers every day. The key to getting noticed is not about being louder, but about being more relevant. Automated discounts can help increase customer engagement by showcasing your products and offers and effectively increasing the conversion rate.
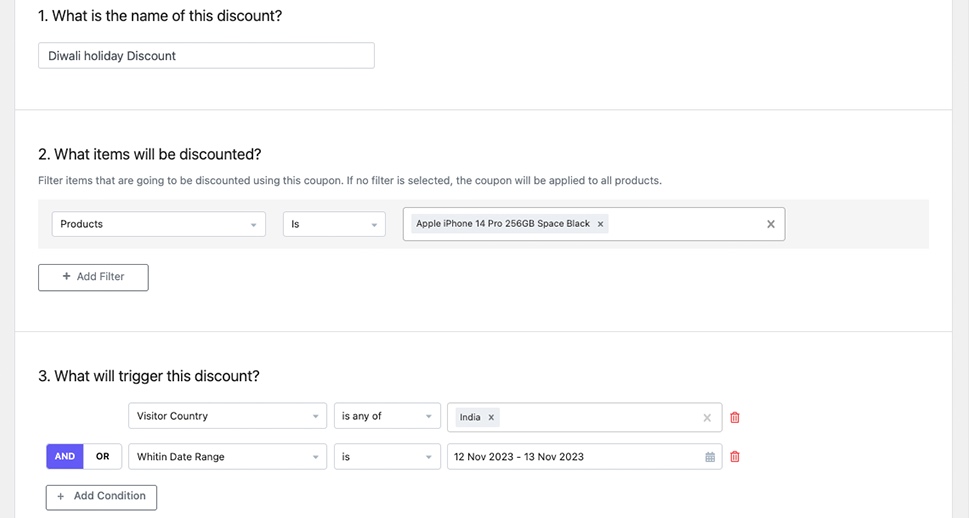
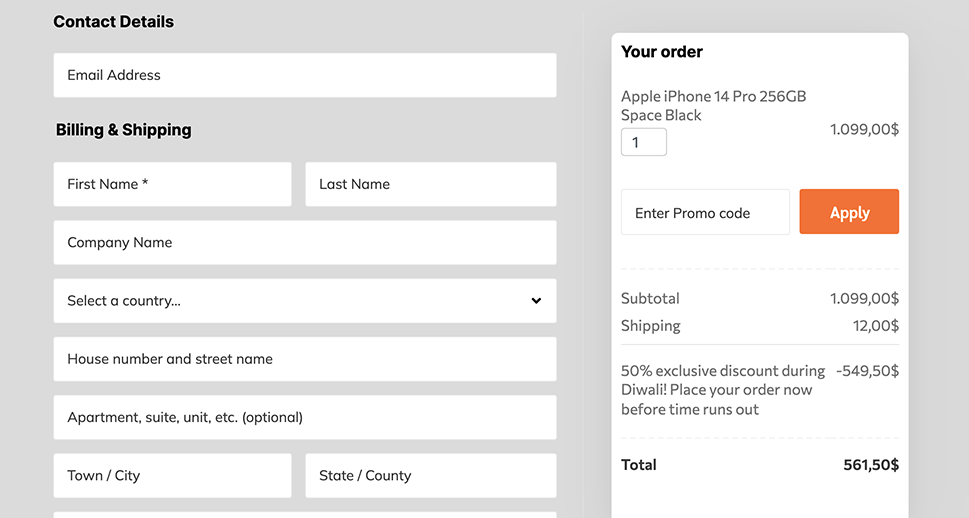
In the following example we will define a 50% automated discount for those visiting your website from India during the Diwali holiday (November 12-13)
1. From your WordPress dashboard, click on SellKit > Discounts and select the Add Dynamic Discount button.
2. Enter a name for your discount and select the product(s) or category you want to be discounted.
3. The most important step is to define the condition(s) that trigger the discount. For example, visiting from India (Condition Visitor Country) and during November 12-13 (Within Date Range).
4. Set the discount amount type (percentage), discount amount (50%) and discount label. A good discount label can make it even more engaging. For example:
“Enjoy an exclusive 50% discount during Diwali! Place your order now before time runs out”
5. Set a priority level of 1 to this discount.
6. To activate your discount and make it live, toggle “Activate this discount rule immediately after it is created” and click on the Create button.
While the probability of selling to a new customer is 5-20%, the probability of selling to an existing customer is 60-70%. Personalized shopping experiences foster a good relationship, generate loyalty and drive repeat purchases over the lifetime of a customer.
Personalized coupons are a great way to engage a lead, show appreciation to loyal customers and re-engage the slipping customers.
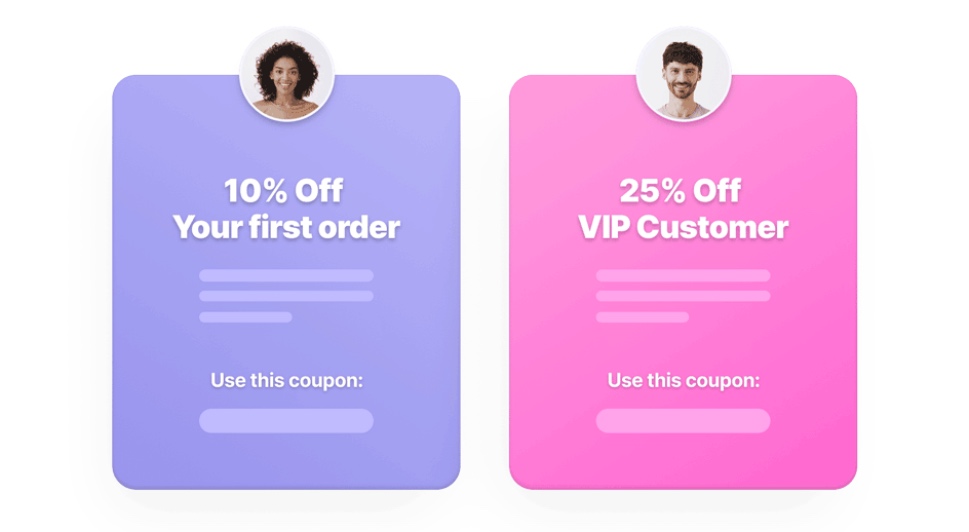
A customer-facing coupon is an effective example of personalized coupons in WooCommerce. Using SellKit you can define the conditions to target different customer types and the relevant coupon will be displayed to the customer anywhere you want in your website (such as landing page, cart or checkout).
For example, if you want to display a timeboxed coupon for a Valentine’s Day sale in your WooCommerce store:
1. Select Coupons from the SellKit menu in the left sidebar of your WordPress dashboard and then click on the Add Smart Coupon button.
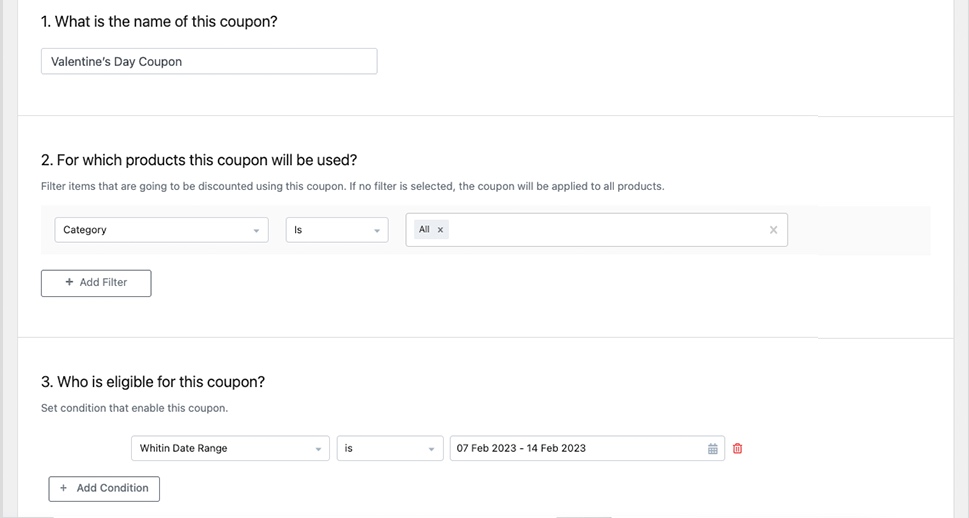
2. Name your coupon, select the target products and define the conditions to offer the coupon for those who qualify.
3. Select all product categories and set the condition “Within date range” to “ February 7-February 14”
4. Set your coupon type and amount.
5. Assign a priority level of 1 to the coupon.
6. Toggle the “Add to the content in a page/post” and “Activate this coupon immediately” and then click on the Create button.
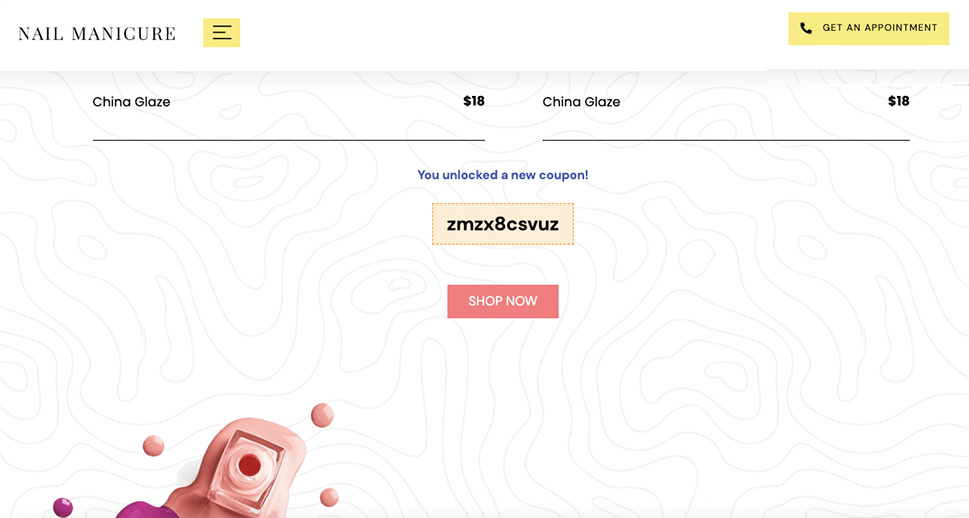
7. Finally, go to the page you want to display the coupon and simply add the “Smart Coupon” widget in Elementor editor.
Wrapping up
Revenue in the eCommerce market is projected to reach $4.1 trillion in 2023. Those who know the art and science of optimization will win the competition to get a bigger chunk of this pie!
In this post we introduced the most critical techniques to optimizing your store using a handy WooCommerce checkout optimization suit called SellKit. With such optimization methods in place, you will not only reduce your customer acquisition cost and increase your ROI but also enhance your relationship with your customers and increase their lifetime value. Sounds like all we need to make an online business successful and sustainable, right?
