How to Create a Review Website Using WordPress

It seems like we are spoiled for content these days. There has never been so much to see, read, do, or buy, it‘s no wonder we feel overwhelmed by advertisers trying to sell us stuff. This is why many of us find ourselves perusing reviews. Reviews help shoppers (or readers, or listeners, or viewers) make up their mind about where to invest their precious time and money. And while there is no shortage of review websites, a second opinion doesn‘t hurt, does it? If the reviews are coming from a trustworthy source, then they save time: you don‘t have to spend a great deal of time researching each individual manufacturer, published, or product: if website-i-trust.com says something‘s worth my time and money, it likely is.
Creating any kind of website seems like a daunting prospect, especially for people without a strong technical background. Starting from a blank slate tends to open questions you haven‘t even considered and are unprepared to deal with. Still, the central principle of WordPress is that everybody should be able to create a website, after all. And you don‘t have to learn everything the hard way, all by your lonesome. We will walk you through creating a review website using WordPress.
These are the topics we will be discussing in this article:

All websites have content which needs to be hosted on a server, and an address used to reach said content. You need to sort out your hosting situation and domain name before you can get started on building the website proper.
Your choice of blogging platform can affect your choice of host, though, but let‘s assume you want to start a WordPress review website. It‘s in the title, after all.
WordPress.com has its own hosting options. But let‘s clear something up right away: when people talk about WordPress, chances are they are referring to WordPress.org, the open source software used to create websites. WordPress.com, though, is a platform designed to make simple blogs. You have access to some basic themes and functions, but you can‘t install plugins nor monetize your website in any way. You do get your own domain name and hosting, which may be a good starting point for you. But that‘s only the gist of it: if you want to know more, check out our article on the differences between WordPress.com and WordPress.org.
WordPress.org, on the other hand, is just software one uses to create a website. This is why you often hear it referred to as “self-hosted WordPress”. You can host your WordPress website anywhere, but there are advantages and disadvantages to any potential host you should be aware of.
If you are not using WordPress.com‘s hosting service, you also need to register a domain name. Your hosting provider will often offer domain registration as part of the hosting package deal, but there is still a lot of thought you need to put into choosing one. If you are not sure what a domain name is, we have an in-depth article on domain names and how to register them.

Once you have your hosting and your domain sorted, you need to add some more tools to your toolkit. First up, there‘s a web browser. Any web browser will do. Next, you need an FTP client (many are free) and a database access tool (most often offered as part of a hosting package deal).
Next, you need to download your copy of WordPress and install it on your server, and connect it to your database. This all may sound like a load of unnecessarily complicated technobabble, but it really isn‘t – it just takes a little time to explain it properly. Just take a look at our step-by-step guide to installing WordPress. Or you could just watch the video below:
The whole thing lasts little more than five minutes – about as long as your installation is going to take.

Now that the skeleton of your website is set up, you‘ll need to install a theme. A theme is basically just a layout you populate with the content you create.
What makes a good review website in our opinion is ease of use and legibility. That‘s really all you need. Whether you review products, films, books, businesses or whatever else, you‘ll want your visitors to be able to find what they want with ease. Ease of use is difficult to quantify, but legibility is an accessibility issue, and there are ways you can improve your website’s accessibility.
A theme with an in-built popular category and tag functionality, for instance, will work great for a product review website or a business directory provided you organize your content efficiently. There are great themes for any look, from a classic newspaper style, through business directories, all the way to gaming magazines, and that‘s just what we can think of off the top of our head.
It is really up to your preference: let the subject and tone of your reviews (and your budget) choose the theme for you. Once you have done that, you will have to install your theme in order for your website to function.
Qode Themes: Top Picks
View Collection


The core functionality of a review website is, well, a review. In its most basic form, a review article is just like any article: the reviewer presents their opinions, analysis, and impressions to a reader. You could just run a review blog, without any extra bells and whistles. If you are new to WordPress or simply want to know more, we have an article on how to create a WordPress blog post.
However, in order for search engines to perceive your posts as reviews and present them to your visitors as such, you need to go a step further. 4 out of 5 most popular search engines use a functionality called a schema to provide more information on results to query submitters. This additional information is called a rich snippet, and you can add a rich snippet to your post or page using a plugin.
This way, your search result, whenever it appears to a search engine user, will have more information than just a title and an URL: a star or percentile rating, price of unit, content rating (e. g. U, PG, and so on, by an official agency), authorship data, and all manner of other information which could draw people to your website in order to actually read the review.
You could also use a plugin like WP Product Review Lite, Reviewer, or Taqyeem to add more detail to your reviews. Each of these will give you the option to rate anything – products, films, books, services – in different formats (stars, points, bars, percentiles) and on different criteria. This makes your reviews much more nuanced, and therefore much more trustworthy than a simple number or thumbs up rating. This goes doubly when you review products or services which can be easily thought of as having discrete aspects (value for money, ambience, and quality of service of a restaurant, for instance). Your reviews are, therefore, of far greater use to your visitors, which means better UX, and, fingers crossed, more visitors.
We will show you how to use WP Product Review Lite, a free plugin which allows you to turn any post into a review. We won’t go into the details, but we will show you the basics.
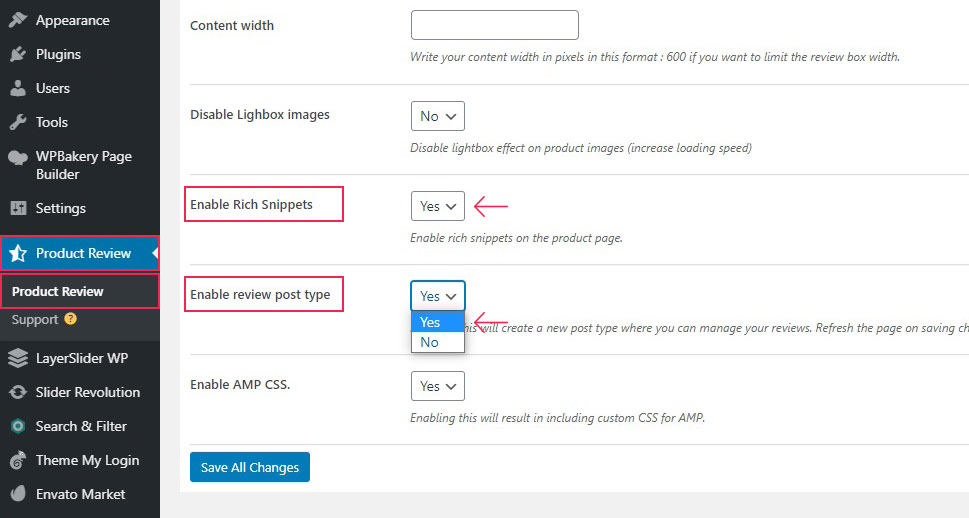
Once you have installed and activated the plugin, find its settings from your WordPress dashboard (Product Review > Product Review). In the General tab, make sure the Rich Snippet and Review Post Type are enabled before saving your changes.
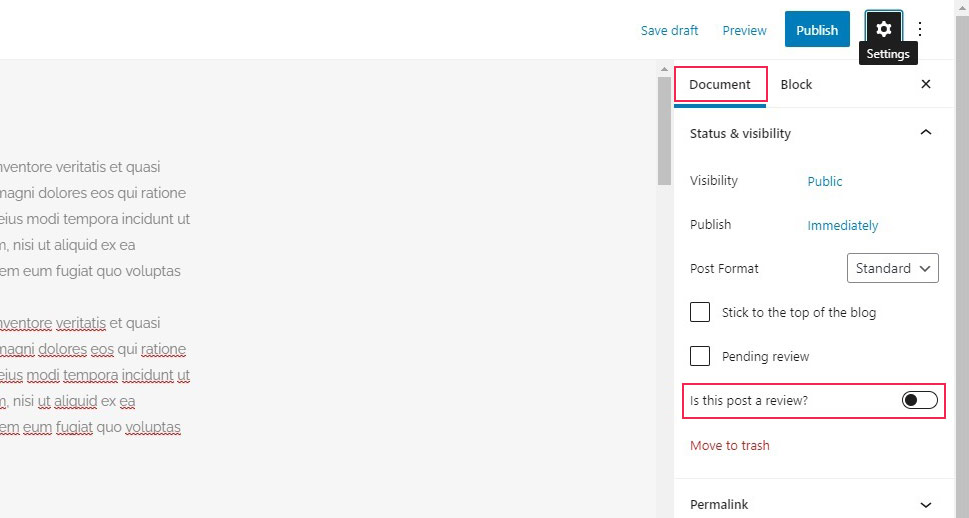
Next, create a review. It works just like any post. Now, before you click the Publish button, click the Document Settings button, where you will see a toggle and a prompt: Is this post a review? You need to slide that toggle to the right.
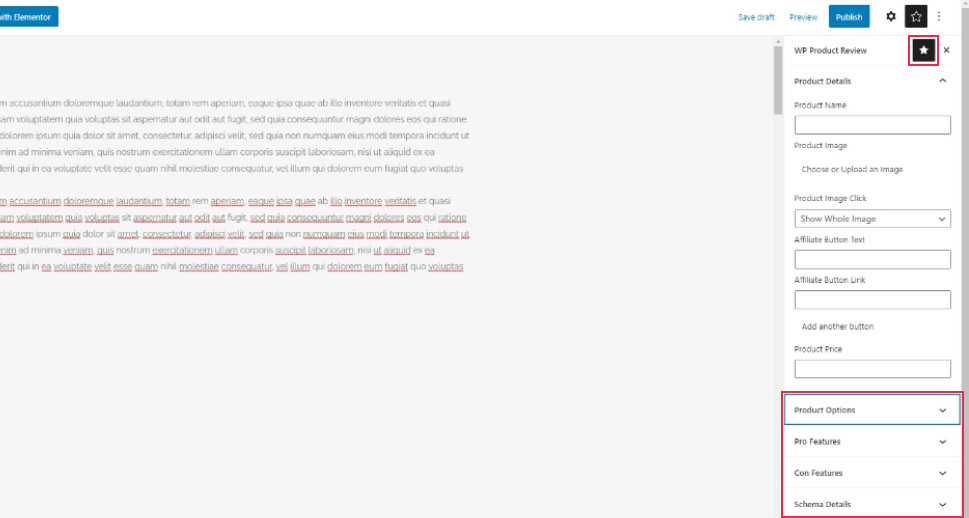
Once you have made your post a review, you will find another tab, with a star icon, on your screen, next to the settings tab (gear icon). Here you can enter your review details, such as product name, options, pros and cons, price, product image, affiliate data, and many other schema details (awards, brand, dimensions, colour…), making your product review as detailed and therefore as helpful as you want it to be.
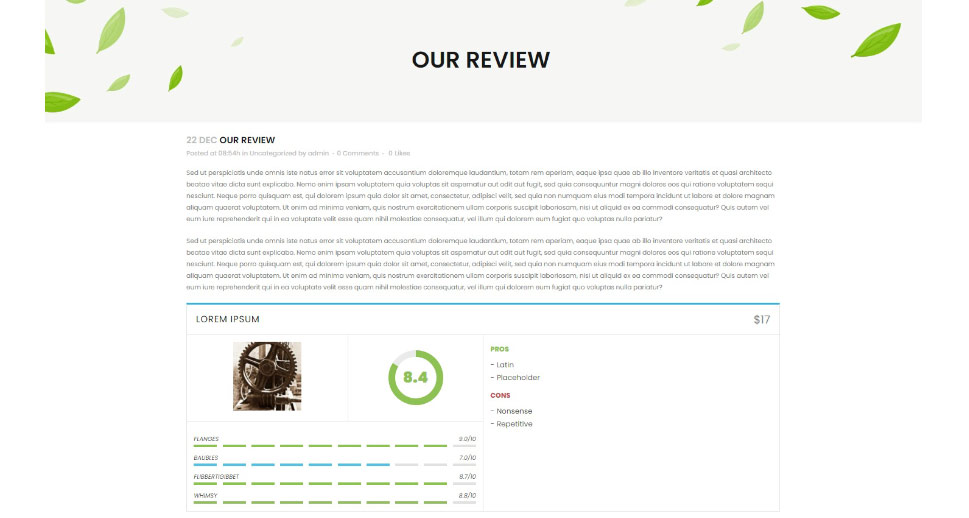
Finally, once you publish your review, your visitors will have a neat summary of the product you have reviewed. The data entered will also affect what your post looks like as a search result.

This is the trickiest bit: there‘s no how-to that is guaranteed to work. Still, there are things you should be aware of when trying to increase the number of visitors on your website.
Quality content, unfortunately, will only get you so far. You need to make sure as many of your potential visitors see it.
Your visitors will likely use a search engine to locate the content they want. You should do your best to make your content SEO-friendly. Optimizing content for search engines is now a job in its own right, and even getting started with SEO is beyond the scope of this article – but you really should be aware of the basics of search engine optimization.
You should never, under any circumstances, underestimate social media. In order to grow the number of your visitors, you need to draw the attention of people who don‘t know you by slowly building a presence and interacting with your users. Focus on generating content for a social network you most wish to establish a presence on, join communities, and promote your brand identity. If you want to know more about social media strategies, check out our handy tutorial.

A website is an investment; an investment on which you probably want a return other than the satisfaction of having built a perfect review website. This is by no means a comprehensive strategy guide about making money on the internet, but let‘s take a look at some ways you can use your review website to generate revenue.
Firstly, there are ads. Ads are by no means unique to review websites, but if you have achieved substantial visitor traffic, you should consider them. Adding Google AdSense to your website is easy enough, but that‘s just one of the ad placement strategies you might use. Some ad management plugins even allow you to combine multiple ad networks on a single page.
Secondly, there are paid reviews. You can reach out to businesses in your area of expertise – and your visitors‘ area of interest – and ask them to review their products for money. If you have built a name for yourself, businesses might even reach out to you. Either way, the point is to get paid for an honest opinion and competent analysis of a product.
Additionally, you could join an affiliate marketing program. Many internet traders will have an affiliate program: they supply you with tracking links to their pages, with a commission granted for each shopper which buys a product or a service having gone through your website to find it.
In Conclusion
As we have shown, WordPress‘s central tenet that anyone can build a website stands vindicated even in the case of a review website. Nothing comes from nothing, though: creating any kind of website takes time and effort, and there is no instant recipe for success – don‘t let anybody tell you otherwise. Still, the journey of a thousand miles starts with the first step, as they say, and we believe that this tutorial will get you more than a couple first steps along the way.
