How to Change Your WordPress Theme (Without Breaking Your Website)
In this article, we will show you how to safely change your WordPress theme when you already have another theme and plugins installed on your WordPress website.
Changing a WordPress theme is a relatively simple process. Essentially, all you need to do is install your WordPress theme and activate it after the installation. The entire process may take a few minutes if you’re uploading theme files from your computer using an FTP client or cPanel.
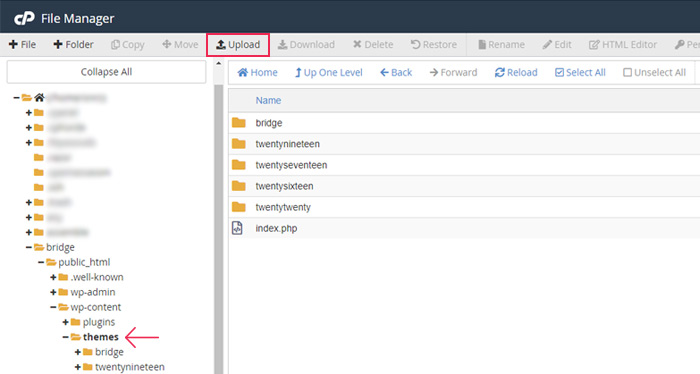
If you choose to upload your theme via cPanel, navigate to the root folder and locate the path to the themes folder. This is usually a folder with the name wp-content / themes unless you have multiple website subfolders within the root folder. In the themes folder, click on the Upload button.
Within the popup window find the theme folder on your computer and confirm its upload so that you can later activate the theme.
You will apply the same method if you’re using an FTP client to connect your computer and the server. Locate the theme folder in the left panel. In the right panel, click on the folder wp-content / themes which contains all the themes on your live site.
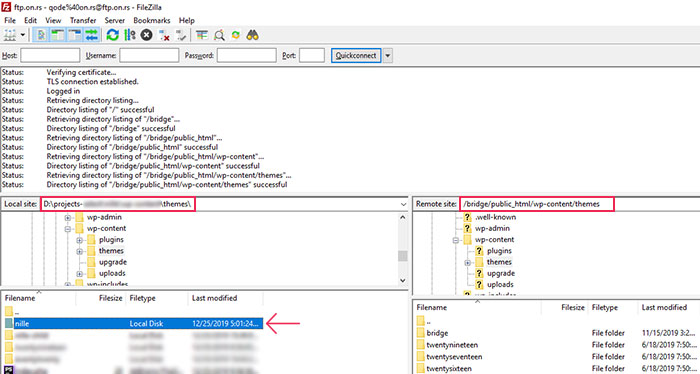
Drag the local theme folder from the left to the right panel. This will automatically make a new theme available on the live site.
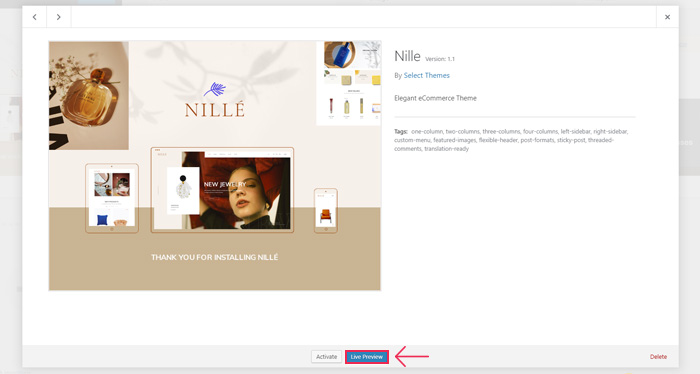
Using the option Appearance > Themes on your site, locate and activate the installed theme.

Before you activate the theme you can preview it using the option Live preview. Apart from showing you your new site’s look, this option can also show you how the new theme may affect your website.
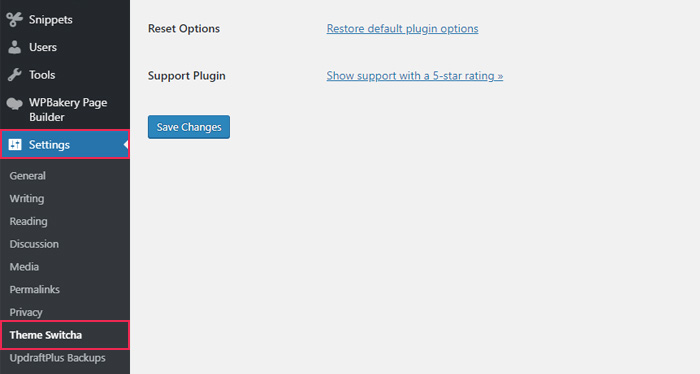
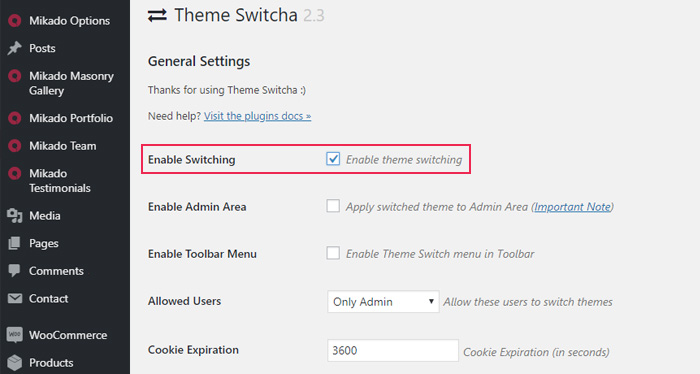
Finally, there is a possibility to change and preview the theme using the Theme Switcha plugin. After you install and activate this free tool, go to the plugin settings and enable theme switching.
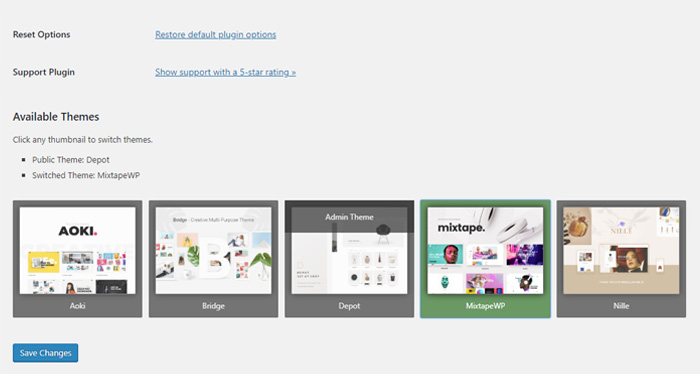
When you save changes, the plugin will list all the themes that are installed on your website. It takes only a click on the new theme to open a preview in a new tab of your browser.
How to Change a WordPress Theme Manually
If none of the previous methods work for you, you can learn how to change a WordPress theme manually. Some troubleshooting methods incorporate these steps as well.
This method is extremely useful when you are unable to access the control panel due to a website crash. This way, you can troubleshoot the error by manually removing the currently active theme.
This method also utilizes the capabilities of phpMyAdmin to change the active theme directly within the database.
Start by connecting your computer to the server using FTP software. Locate the themes folder with all of the installed themes on your WordPress setup.

Folder names represent the names of the currently installed themes. If you need to add a new theme, follow the steps from the previous section – simply unpack the new theme’s folder on your computer and transfer it to the wp-content/themes folder on the server.
When you access the themes folder with all the available themes on your WordPress site, remember the name of the one you want to activate.
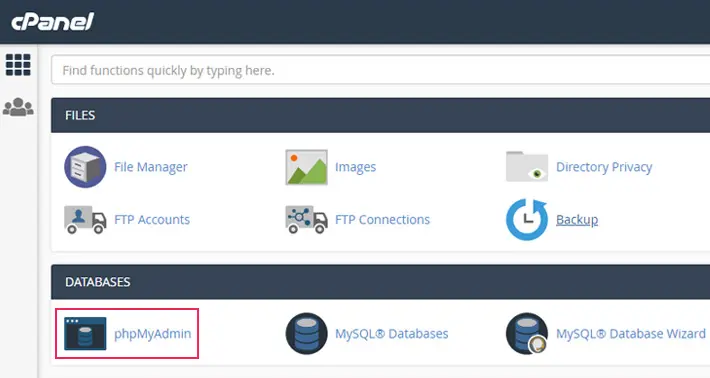
Log into your WordPress hosting plan’s cPanel and click on the option phpMyAdmin.
When you access the phpMyAdmin panel, you’ll see a list of databases on the left. Select the database you’re using for your WordPress site and click on wp-options.
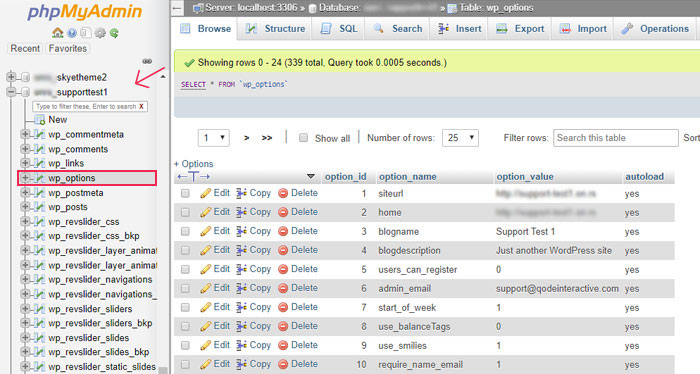
Short reminder: WordPress is using “wp_” as a prefix for the tables’ default names. However, this prefix can be changed, so you may see tables with a different prefix.
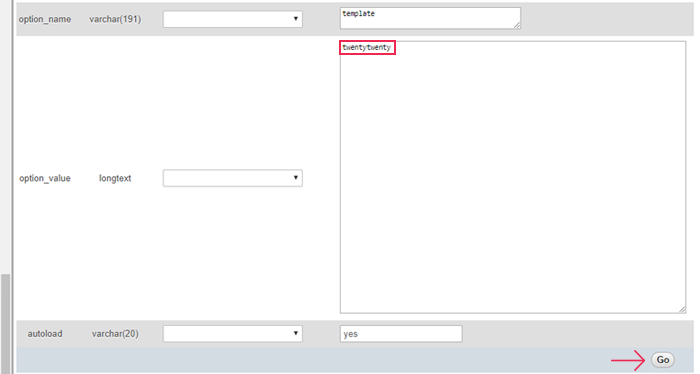
Afterward, locate template and stylesheet rows in the right panel.

Click on the Edit option in the template row to open the editor. In the editor, find the option_value field and change its value by entering the name of the theme you want to use. This name should match the name of the folder of the theme in /wp-content/themes/ folder. When you finalize the changes, click on the Go button to save them.
Repeat this process with the stylesheet row. Once these edits take effect, you’ll have a new theme on your website. Check your live site to make sure everything is working fine.
Although changing your theme is a relatively simple process, after the edits you may encounter some issues with your WordPress website. The most common problems include:
-
Incompatibility with the plugins used in the previous theme
-
Style options from the previous theme do not apply to the new theme are not visible on the new theme
-
Website pages are not displayed properly due to various content editors and custom shortcodes used in different themes
These are the most common problems in the aftermath of changing your WordPress theme, so there are a few tricks to prevent them.
Qode WordPress Themes: Top Picks
View Collection


3 Steps to Change Your WordPress Theme Safely
To avoid problems with compatibility and crashing your website, there are three steps that will help you circumvent any potential problems.
1. Create a Backup Copy of Your Website
It is recommended to create a backup before any significant change to your WordPress site. This way, if anything goes wrong, you can easily revert to the last working version of your website.
If you’ve never created a backup copy of your site, there are two ways to do it – manually or using a plugin such as UpdraftPlus, BackupBuddy or Duplicator.
If you want to have total control over the entire backup process, avoid using plugins and manually backup the site. If you’re not an experienced administrator, plugins may be a better solution due to automated processes.
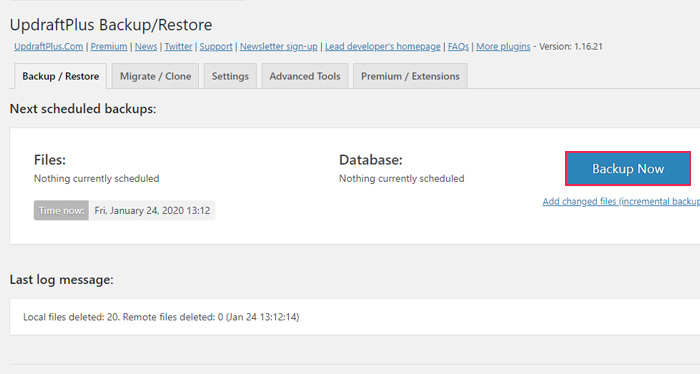
For the purposes of this article, we will install one of the most popular backup plugins UpdraftPlus to show you how to create a backup using the plugin. When you install the plugin and activate its options, click on the Backup Now button:
No matter which plugin you choose, it is important to include the database and all relevant files in your backup copy to create a full website backup.

The duration of the backup process depends on your website files’ size and number. It could take a while if you have a more robust site. When the backup is done, you will be able to see your site’s copy in the backup folder.
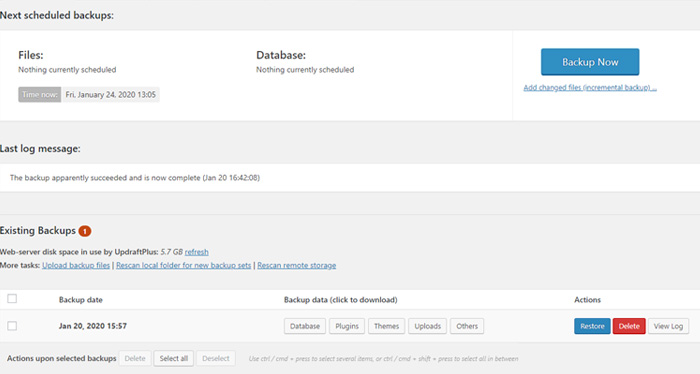
If anything goes wrong with your site, you can easily go back to its last working version by clicking on the Restore button.
2. Create a Staging Environment
To avoid testing your theme on the live site, it is recommended to create a staging environment where you’ll be able to see how your site behaves with new settings. A staging environment is a copy of your live site with restricted access that allows you to freely experiment with any theme, feature, and plugin you want to add to your site.
It is a common practice among developers to build a staging site before transferring it to a live server. They also often keep this site for any future experimentation.
However, there is an issue with this approach. Some things that work on your local server may not function on a live server due to different server configurations. This is why it is much better to build a staging site on your live server.
There are two ways to do this – you can create a staging environment manually or using a plugin. Established hosting providers offer a staging site as a built-in option with their hosting plans. It is easily implemented, making this the easiest way to create a staging environment. For more information, contact your hosting provider.
In case your hosting provider does not offer this option, you can use plugins such as WP Staging – DB & File Duplicator & Migration plugin, All-in-One WP Migration, Duplicator. You can also opt for premium plugins such as WP Stagecoach and BlogVault.
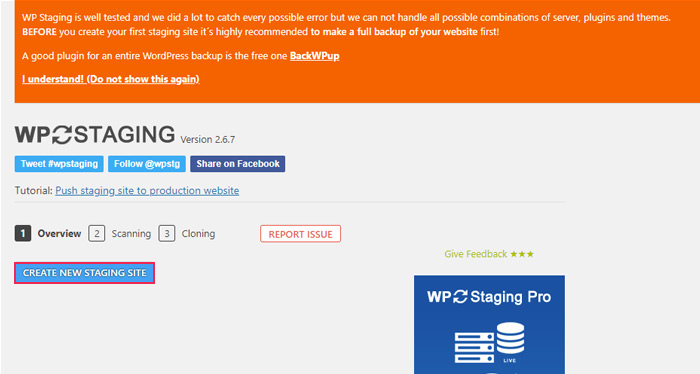
For the purposes of this article, we’ll use WP Staging – DB & File Duplicator & Migration plugin. Start by installing and activating the plugin. Afterward, navigate to the plugin dashboard and click on Create new staging site.
The next step requires naming your test environment and marking the files and the database that you need. Once you’re finished, click on the button “Start cloning”:
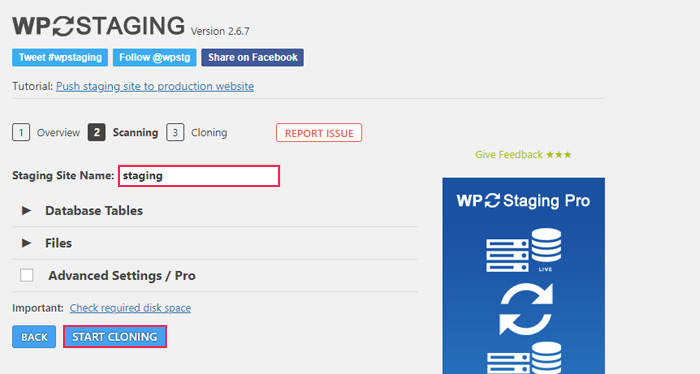
The process may take a while, however, the final result should look like this.

In case you didn’t successfully create a staging environment or there has been an error, the full tutorial for using WP Staging can be found in the plugin’s documentation.
Since you’re creating a full online copy of your website, this process may harm your SEO ranking. That’s why it is recommended not to index your staging environment. Simply navigate to Settings > Reading and select the option Discourage search engines from indexing this site. This is how you’ll add a “noindex” tag to your testing environment.
3. Test Your Pages, Posts, and Plugins
Finally, you can start testing! Install and activate your new theme in the staging environment. Go through your pages, posts, and plugins, and check for any errors and incompatibilities. Since every WordPress website and theme are specific, there is no one-size-fits-all solution to identifying common issues and their causes. However, here are some things you should look out for:
-
Check your pages and posts in detail to make sure they are properly displayed. This is particularly important if you are using additional style options for some page elements.
-
Check the plugins you were using with the previous theme, one by one to make sure all of them are working properly with the new theme. Be extra cautious with third-party plugins that come packaged with the theme. Free themes don’t have built-in plugins, so it is always a question whether they are compatible with the plugins you need. Premium themes often include plugins that increase their functionalities, so the risk of compatibility issues is minimal. However, during the theme switch, this may cause problems. This is why it is a good idea to deactivate and delete all the plugins installed with the old theme (core plugins) and plugins that were created specifically for it. This is what the built-in plugins look like for one of our premium themes. These plugins cannot be used with any other theme. These checks may take a while but be patient – it is incredibly important to be thorough.

-
Check the links, shortcodes, and widgets. Some themes come with specific options for content building so their shortcodes and widgets may end up working differently with a new theme.
Keep in mind that changing your theme shuffles things around on your website. However, what matters is to keep your site’s main characteristics intact. If that doesn’t happen, your site will need coding fixes and theme functions edits. In this situation, you may want to reconsider your choice of the theme.
Final Thoughts
Once you are sure that the new theme won’t crash or break your website, you can install it on your live site. If you want to be sure, you can go through these steps one more time. Don’t forget to delete the cache memory after any theme or style changes, so your edits can be visible straight away. All that’s left to do is enjoy your new theme!
