A Complete Guide to the WordPress Media Library
Imagine the internet without any images. Imagine it doesn’t have any videos, either, or audio tracks – it’s just lines upon lines of text, any direction you look. If you were around for the early days of the internet, you don’t have to work too hard to picture that kind of internet – it’s what you would have dial-up-friendly back in the day of slow internet speeds. You probably would have preferred it over media-rich pages because they took ages to load. Today, however, bandwidth isn’t that big of a problem, which is why there’s no reason any WordPress website wouldn’t use its WordPress media library to the fullest.
In this article, we’ll show you everything there is to know about the WordPress media library. If you’re new to WordPress, you can expect to find some pretty useful tips on WordPress media library management. If you’ve had a website for a while, though, you’ll still want to stick around for tips on cleaning the library. All in all, you’ll read:
Qode Themes: Top Picks
View Collection


When you add content to your WordPress website, you do it by creating a post. WordPress has two main post types, posts and pages, and while they have differences, the process of adding content boils down to the same thing whichever of the two you use. You add the text, and then you add the media. Once you save it, the non-media content of the page or post is stored in your website’s database. The media content, however, isn’t.
There are a couple of different ways you can add media content to your pages and posts. You can embed it as you would a YouTube video or a video hosted on another service. If, on the other hand, you decided to host your media files – something that might be okay with images but could be impractical with videos – then you’d upload the file and host it on your own server.
The place where the media files you add to your posts are stored on your server is typically located in public_html/wp-content/uploads. If your website’s been around for a while, you’ll notice that all kinds of plugins have directories for their content within /uploads. The content you want is usually stored in folders named by the years they were uploaded.
There are two ways you can access the media content of the uploads folder. One is by using an outside tool, such as the File Manager provided by your control panel software, or an FTP solution. The other way of accessing media files stored on your server is via the topic of this article – the WordPress Media Library.
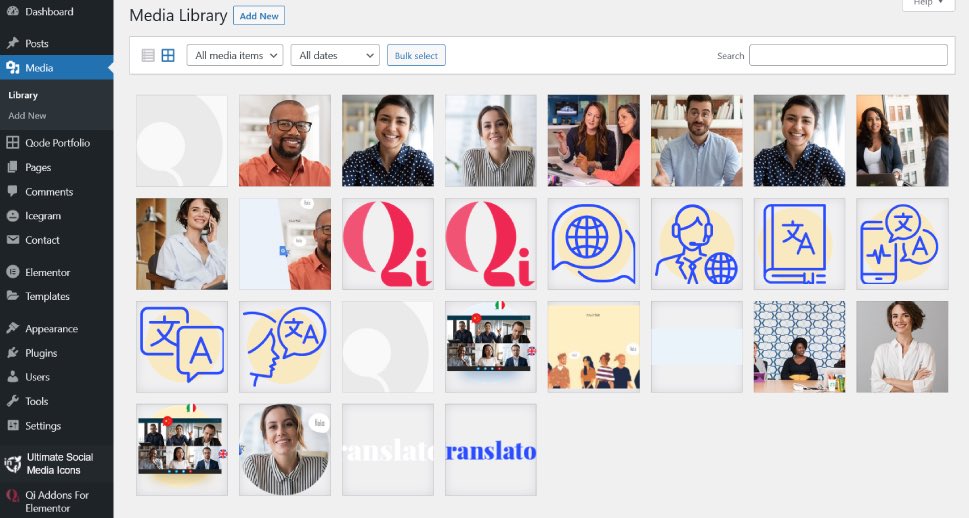
So the WordPress Media Library isn’t the thing that stores the content you use for your posts and pages. What it is is an interface, or a tool, created to help you access and manage the storage and the files within. This tool is included in WordPress’ core software and it’s very useful for a bunch of reasons, not the least of which is the fact that you can access it from your website’s dashboard, by going to Media > Library.
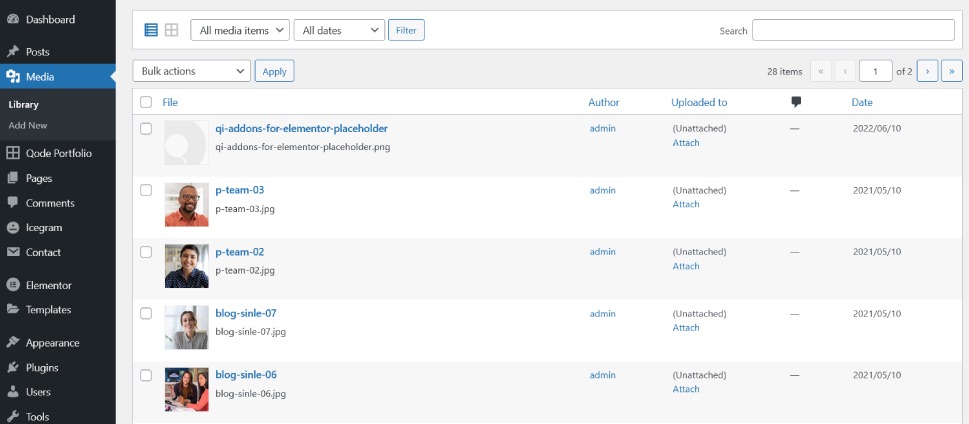
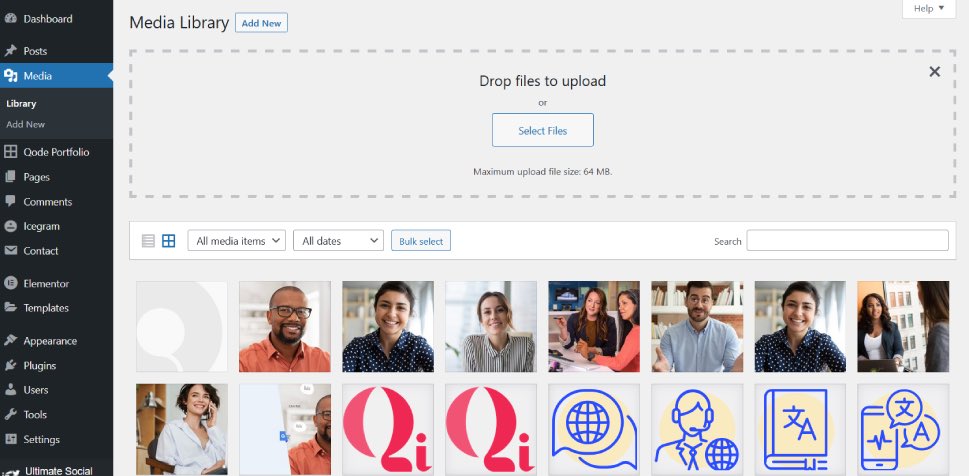
Once there, you’ll see all the media files your website has in storage. At the top of the window, you’ll notice a strip with some viewing, navigation, and search options. The first one will let you choose between the grid view, which displays items in your media storage as thumbnails, and the list view, which looks similar to how the lists of posts or pages on your website look.
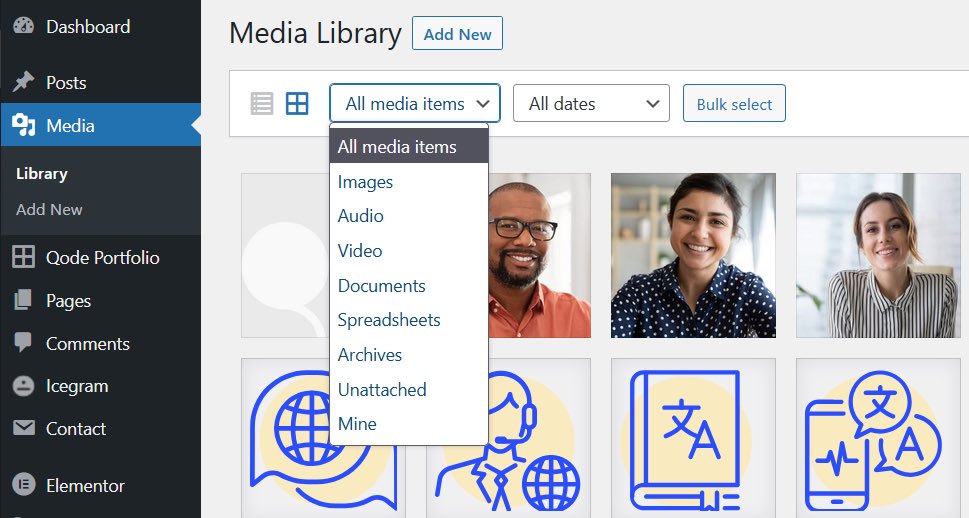
Next, you have two filters you can apply to your media files. The first lets you specify the types of media files you wish to see – images, audio, video, documents, and others. The second lets you filter the media files by the month they were uploaded.
Finally, both types of view will let you bulk select media and perform a bulk action on them. The way you bulk select might depend on the view – with the gallery, you simply click on the thumbnails you want to select, while the regular view gives you boxes you can check for bulk selection. The bulk action you can perform is deleting the files you’ve selected.
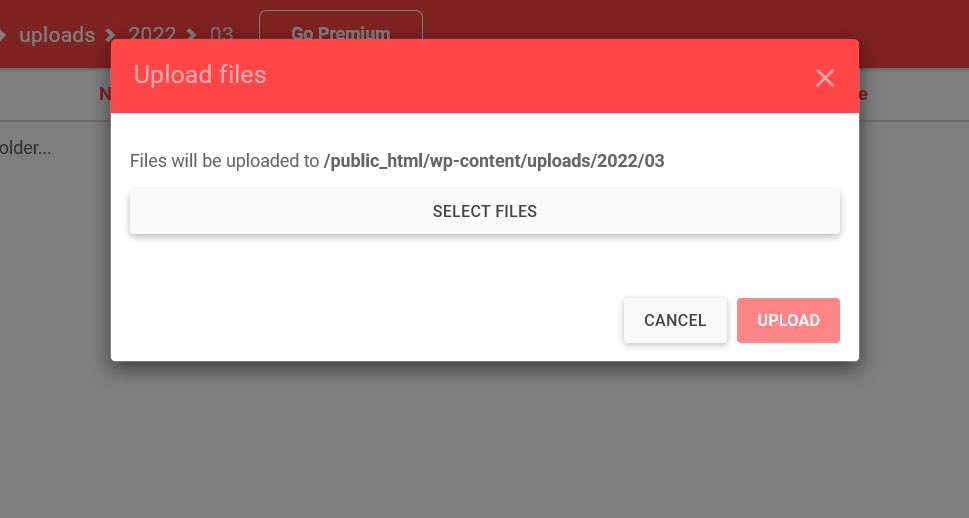
To have new media files show up in the media library, you have to add them to your website’s storage. One way you can do that is through the control panel or using an FTP solution, both of which can come in handy if you want to upload media files in bulk, but require an additional step for WordPress to recognize the files in the Media Library. So even if you prefer doing things through the Media Library, you still want to at least know one additional method for uploading files.
If you decide to upload files from your website’s backend, there are a couple of places you can go to do it. You can, for example, find the “Add New” button in the Media Library itself, and use it to bring up the file upload menu.
Alternatively, you can navigate to Media > Add New. It will show you a file upload menu that looks very much like the one that opens up in the Library window. If you’re having trouble with it, however, you’ll have the option to switch to the browser uploader.
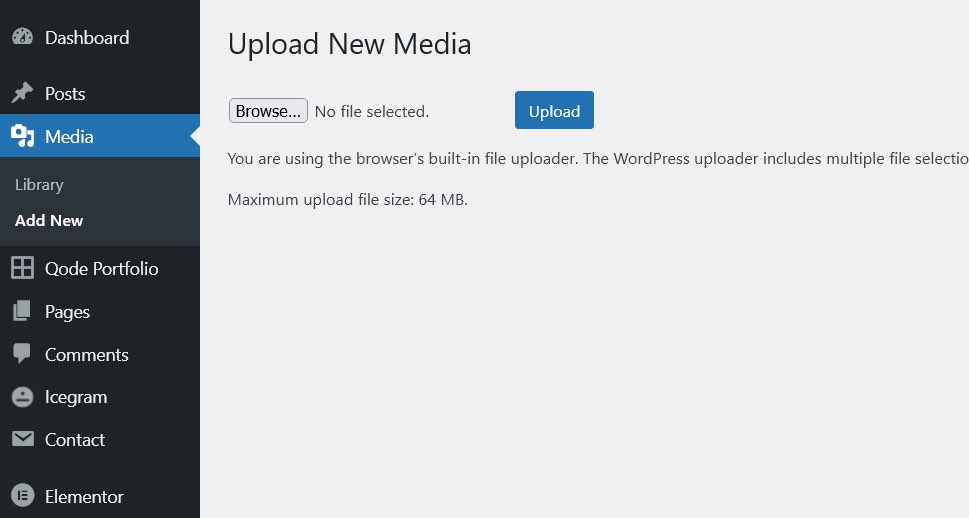
You’ll notice that there’s a limit on the maximum size of the file you can upload using the Media Library. This is something you can change, and we’ll provide more information about it in the Tips and Tricks section of this article.
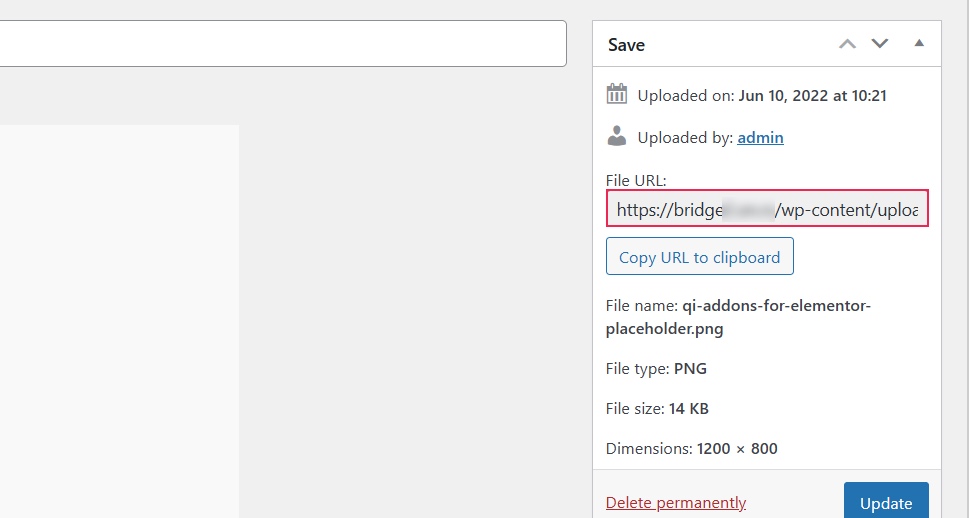
One of the best things about the WordPress Media Library is how easy it makes editing media information and in some cases the files themselves. If you’d go into the Media Library using the grid view, simply clicking on any file you can see would bring up the Attachment Details window.
There, you’d see a bunch of information about the file, such as the date of uploading, its name, size, and type. You’d also have the option to edit some of the meta information for the file. For an image, you’d be able to add alternative text, caption, and description.
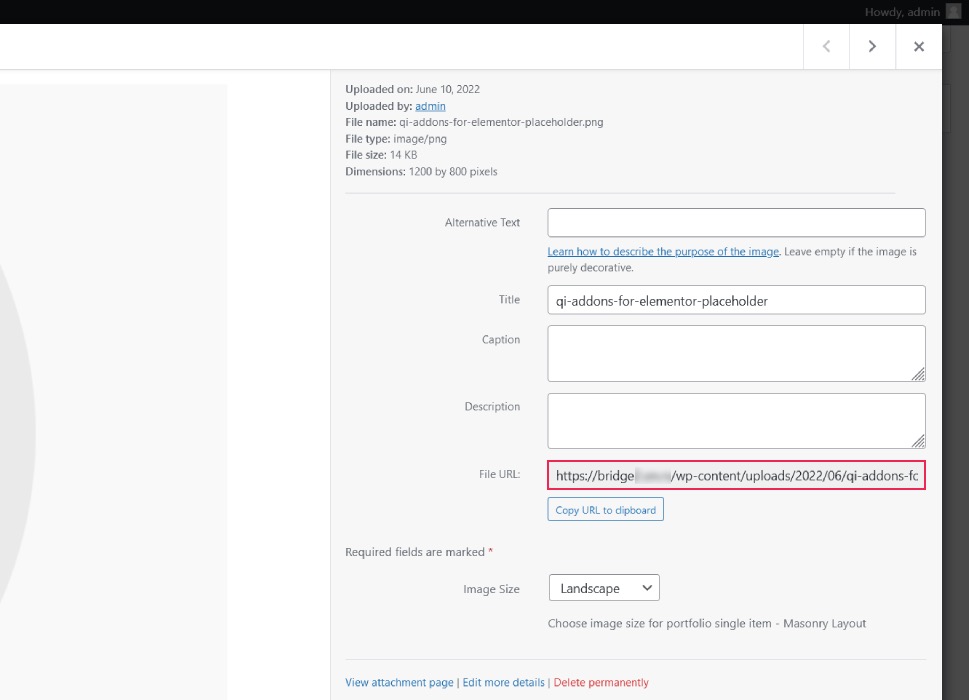
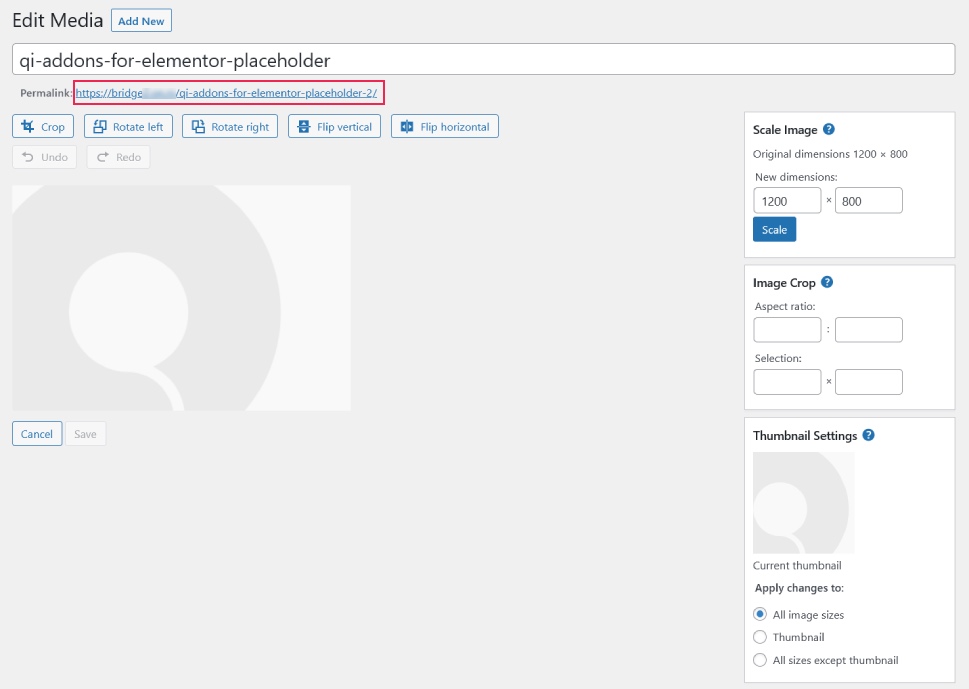
For even more editing options, you could click on the “Edit Image” button and get additional editing tools. These would allow you to crop, rotate, and flip images. You’d also have the ability to scale the image and enter the aspect ratio and pixel values for cropped images. Finally, there will be an option for thumbnail settings, where you can choose whether you want the edits to apply to the thumbnail, all image sizes, or the sizes except the thumbnail.

If you use the list view of the Media Library, you’ll have a slightly different window in front of you when you decide to look up and edit attachment details, but all the same information and editing options will still be there.
You’ll also be able to edit images by clicking on the “Edit Image” button. Again, the window will look slightly different than it does when using the grid view, but you’ll have access to all the same options.
For more substantial edits, or if you want to do something like adding some nice Photoshop effects to your photos, you’ll have to use specialized software. Media Library’s editing will, however, suffice to ensure that the image isn’t upside down and that it’s the right size.
Besides adding and editing media files, the WordPress Media Library is also the place where you can go to delete the media files you don’t need anymore. It’s not the only place where you can do it, as we’ll see shortly, but it might be the most convenient of the choices you have.
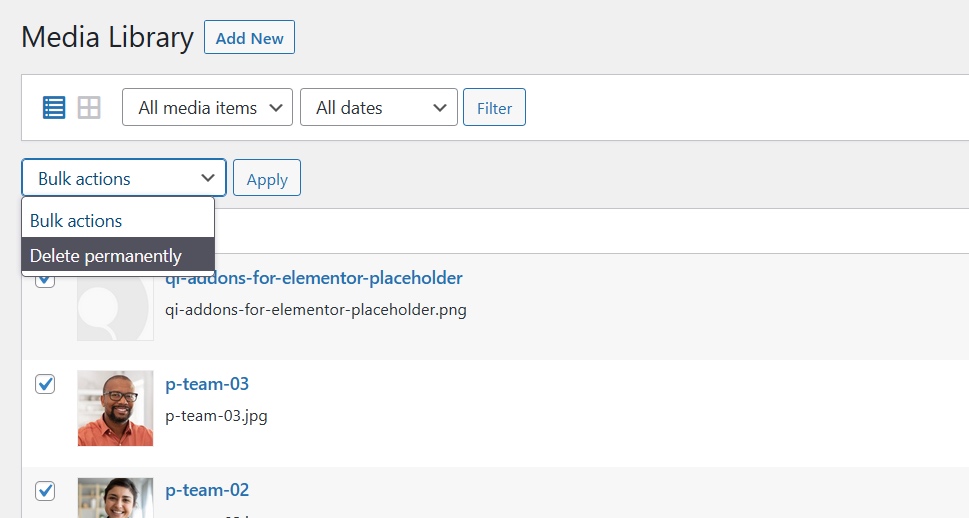
To remove media files from the Library, navigate to Media > Library. In the list view, hovering over a single file will show you the menu that allows you to delete it permanently. To delete more than one file, use the selection checkboxes next to the items to select the ones you want to delete, and then choose “delete permanently” from the Bulk Actions dropdown, and click the Apply button.
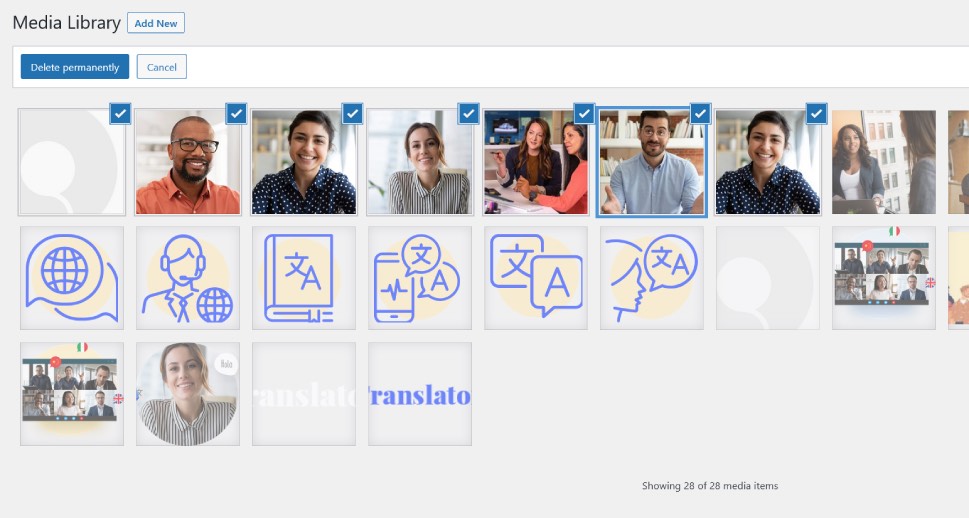
If you prefer the grid view, clicking on the file you want to delete and bringing up its Attachment Details page will give you the option to delete it permanently. As for doing it in bulk, you’ll notice the Bulk Select button in the strip atop the files. Clicking on the button will let you choose the files you want to delete and issue the command.
For those who want to remove files straight from the source, navigating to where they’re stored on your host’s hard drive using the hosting control panel or an FTP solution is an option. It should be as simple as finding the files in their respective directories and deleting them.
The ability to add, edit, and remove media files are the three fundamental services of the WordPress Media Library, but they’re not everything you can do with it. Although you might need some outside assistance to achieve some of the additional things with the Media Library – and media files on your website in general, what you get from it might be worth installing an additional plugin or two.
Back Up and Download Your Media Library
It goes without saying that somehow losing the files in your website’s media library can be detrimental to your website. That’s why it’s a good idea to back up the library and its contents. Keep in mind, also, that media files aren’t stored in the database, so backing up the database won’t help safeguard the media files.
To help you create a copy of the media files in your Library, we’ve created a detailed guide about downloading the Media Library. Whether you want to do it using a plugin, FTP, or cPanel, you’ll find all the steps in our guide.
Stop WordPress from Making Copies of Images
When you add an image to your Media Library, WordPress might create multiple copies of those images, changing their sizes. This way, you’ll have a thumbnail-sized version of an image, as well as medium size and large size.
To stop the number of image files you have in storage from ballooning, you can navigate to Setting > Media and set the sizes for the extra images to zero. It’s as easy as that.
Organize Media Files into Folders
It’s true that, on the server where they are stored, media files are organized into folders. But that’s not the case when you look at the Media Library – every file is listed separately. If you don’t want them to be, you can organize them into folders.
You will need a plugin to enable Media Library folders, but you’ll find plenty of them on WordPress.org. From the oft-recommended FireBird to the Real Media Library or the aptly-named Media Library Folders, you’ll have your pick of plugins with a variety of useful features.
Add Taxonomies to Media Files
Another pretty useful tool for organizing the media files in your Media Library is taxonomies – categories and tags. With them, you can sort and filter the files in a way not originally devised by WordPress.
Once again, you’ll have to turn to a plugin to add the categories and tags feature to media files. There will also be many to choose from, some of which might also be able to let you create folders. Finding a single plugin that does both things would be a good way to reduce the overall number of plugins you have installed.
Change Maximum File Size for Uploads
WordPress will put a limit on the size of a file you can upload via the Media Library. You can be happy with the limit, but in case it bothers you, it’s easy to change it.
We’ve created a thorough guide on increasing the maximum file upload size. It will show you which files you need to edit, and what code you need to add to them.
Let’s Wrap It Up!
The WordPress Media Library is a great place that lets you add, edit, and remove media files to and from your website. It offers a simple set of tools for basic file management, as well as file-editing capabilities. For the most part, it makes it easier to operate with media files than doing so via cPanel or FTP, but it has its limits. Then again, this is WordPress, and reaching the limits of core features is only a sign you should continue your search among the plugins. In the case of the Media Library, they don’t disappoint in the slightest.
