12 Photoshop Effects to Use in your Creative Web Design Projects

Adobe Photoshop was released in 1990, and over the course of 30 years, it became one of the most popular graphics editors in the world. This software is used by millions of people. Web design beginners and professionals alike love it because it enables them to express their creativity in a variety of spectacular ways.
As a powerful photo editing software, Photoshop includes a myriad of astounding tools and effects. You can use it to manipulate and retouch images, create mockups and digital paintings, organize photos, and much more. Because of its powerful functionalities, it has become an indispensable tool for designers, photographers, and all creatives.
The better you understand how Photoshop works and the more of its options you know how to use, the easier it will be to give life to your ideas. In this article, we will introduce you to some default Photoshop effects, filters, and options that will help you better express your artistry and create authentic, eye-catching images and designs. We will also share some beautiful examples that demonstrate what you can achieve with the selected filters. The effects we will discuss include:
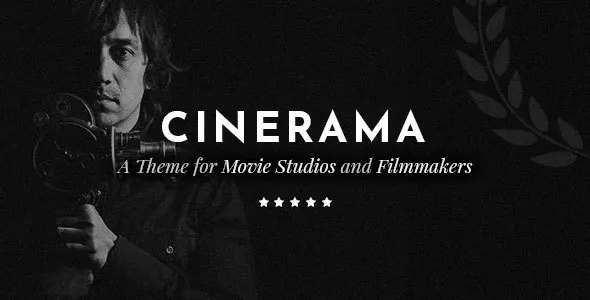
Top Themes for Creatives
View Collection

In photography, the blur effect is most often used when you wish to put a particular subject into the spotlight. You can achieve that simply by blurring out the rest of the image. Photoshop includes a Blur Brush tool, located in the toolbar, which will help you soften targeted areas of your image. The more you sweep the brush over selected regions, the blurrier the photo will become. Photoshop also has several blur filters, such as Field Blur, Radial Blur, Motion Blur, etc., but we recommend going with the Gaussian Blur.
To open it, go to Filter > Blur > Gaussian Blur. This filter blurs the whole photograph equally, but the Radius Slider allows you to control the intensity of the effect. You can also use one of Photoshop’s marquee tools to draw a selection around a particular subject to ensure the blur does not apply to it.

Gaussian Blur is often used in classic photography, but it’s also popular in modern settings, especially on photos that combine blurred typography or abstract elements with large white spaces. In web design, Gaussian Blur looks particularly striking when used on hovers. On Qode Interactive’s theme NeoBeat, we applied it not only on hovers but also on the transparent blurred white background and the video button.

The noise effect is a very popular choice in digital photography. It instantly adds a vintage analog effect to images and makes them look more artistic. Noise mimics film grain, and because of that quality, this effect is particularly fit for photography portfolios and movie websites.
Adding the charm of the old times to a modern image is a simple yet effective thing to do, and it will make your project more appealing to the audience. Grain looks beautiful on clear, monochrome surfaces, so you can either make it the most prominent characteristic of your photos or combine it with other effects. In fact, noise is widely used in web design, even more than you can tell, precisely because it is often overpowered by more obvious effects.
To add it to your images, go to Filter > Noise > Add Noise. Use the amount slider to control the amount of noise added to the photograph.

Qode’s portfolio theme, Bølge, beautifully illustrates the use of the noise effect on a contemporary project. Its pages and the content featured on it are adorned with a grainy texture that, in combination with the floral elements and pastel hues, looks very delicate. And even though noise is heavily used throughout Bølge, it still does not affect the theme’s simple and pure vibe.

You can also see the effect on the Hendon theme, where noise is used on some of the grey and orange elements. A subtle noise effect is noticeable on large monochrome areas, which gives Hendon an elegant and luxurious appeal.

Considering the number of options and effects Photoshop packs, it’s normal not to be familiar with all of them. Minimum and Maximum are the two unusual tools that some people find useless, but both could be of great help in your work. They are placed under Filter > Other > Minimum/Maximum.
Playing with typography and finding the right font combination for your project is fun, but if you want to up your typeface game, the Minimum and Maximum filters could be just what you need. The former will minimize the amount of white and empty space, so it makes sense to use it for large headlines or apply it on projects where illegibility is encouraged and deliberate.

The Maximum effect, on the other hand, will spread out the white areas and it will make letters thinner. You have the option to specify the radius within which these two effects should replace pixels’ brightness levels with either the highest or the lowest brightness value of pixels surrounding the selected radius.
If you would like to apply the Minimum and Maximum filters on textual content, it’s important to set a good font thickness of the contrasting font. The thicker the font, the more prominent and strong the Maximum effect will be. When it comes to photography, the effects work the same – Minimum shrinks lighter shades while spreading out the darker ones, while Maximum works the other way around.

Motion Blur is used to add a touch of speed to an image, to make it look as if some kind of motion was captured on a camera (e.g. a car or a bicycle on the move). To access this filter, go to Filter > Blur > Motion blur. As with other effects, you can select the area of the image you wish to make blurry. Moreover, you can set the motion Angle, while the Distance setting lets you determine the amount of blur that should be applied to the selected photo region.
This effect, along with other Photoshop filters, is most often used in fashion and experimental photography, as well as in web design.
We will now show you one way of using Motion Blur. First up, we are going to make our photograph black and white by selecting Image > Adjustments > Black and White. Then, we want to enhance the level of brightness and contrast. For that, we will choose Image > Adjustments > Brightness > Contrast. As the last step, we will add the Motion Blur effect to the photo.

Some Photoshop effects can be recreated without having to apply filters. For instance, you can mimic Motion Blur by copying image layers several times and then gradually decreasing their opacity, just like Unruh Jones did on his website.

Typography is one of the most important elements of web design and it has a great impact on the vibe and overall look of a project. Finding the right font combination is essential, but you can make textual content even more interesting by slightly tweaking the style of the letters. You don’t even have to add special effects or filters. Instead, you can use outlined letters to make your designs more arresting and add more authenticity to your works.
To create outlined text in Photoshop, you should first select the Type tool and enter some text. Then, right-click on the text layer in the Layers panel and select Convert to Shape from the newly-opened menu. You can also select the Rectangle tool in the Toolbar, to change the colors and thickness of the outline.
You can combine outline with other effects to achieve unique results, just like Shotaro Momoi did. He is known for his minimalist approach to design, and his website exemplifies the striking combination of the outlined text with the noise effect.

Our theme Breton is another great example that demonstrates how impressive the pairing of outlined typefaces with other effects can be. Other filters used on the theme further accentuate the beauty and the contemporary feel of outlined letters.

Our design team also used outlined letters on one of the best-selling creative themes in the world, Bridge. Bridge’s portfolio demo is striking thanks to the clever combination of outlined letters, bold colors, and interesting imagery, resulting in an attention-grabbing site.

The Photo Filter adjustments in Photoshop allow you to easily set a different tone for your project and quickly change its colors. To access it, select Layer > New Adjustment Layer > Photo Filter. From the dropdown menu, you can choose anything from warming and cooling filters to deep red, underwater, and more. A filter that stands out from others is Sepia, which colors photographs in reddish-brown, warm monochrome hues and gives them an appealing antique look.
The website created for the Russian-Austrian educational program beautifully depicts the use of sepia in web design and demonstrates how well it complements images of antique statues.

Kathleen Boschiero’s Behance profile offers an insight into her creativity, but we especially liked the photo of Japanese blossom, where she combines the oil painting effect with sepia, creating an image that oozes the spirit of the old days and that, as she says, reminds her of her grandmother. This example also illustrates how the combination of several effects significantly changes the look of an image and the impression it leaves on viewers.

To control the strength of this filter, use the Density slider. Moreover, if your image appears to be highly saturated once you apply the Sepia filter, you can change the color vibrance or saturation levels by selecting Image > Adjustment > Vibrance.

While editing images, we use some effects more than others, so we often end up bored with them or we think there’s nothing new we can do with them. However, Photoshop styles have infinite creative possibilities, and when you apply them to layers, there’s always a chance you’ll find a way to use them differently.
You need two layers to work with – the base and the blend layers. Filters are always applied to the latter. To add the Multiply mode to it, you should right-click on the layer, select Blending Options in the upper left corner of the Layers panel, and then choose Multiply.
This filter will multiply the colors of the blending layer, which will then darken the base layer. Multiply is used for shadow coloring, especially in poster and logo design.

London-based designer Ian Perkins specializes in logo and identity design. On his Behance profile, you can check out how he masterfully applied the Multiply effect when creating Anita Giraldo’s brand identity. For the brand’s logo, Perkins opted for bright, almost neon colors, making the cross-sections extremely vivid. And he complemented this by using the same effect throughout the project. You can find more examples of the Multiply effect in action in his portfolio.

The creative agency Farewell NYC used the Multiply effect when developing the brand identity for the Japanese Bessou restaurant. The site is filled with overlapping elements and the Multiply filter has made them look more light and interesting to the eye.

The popularity of the Gradient Overlay varies. Designers use it to either blend colors, with one hue fading into another, or to create a dark-to-light gradient from a single color. You can add it to your files by going to Layer > Layer Style > Gradient Overlay, where you can adjust colors, opacity, and more.
One thing’s for certain – gradients always look fun. They are used on backgrounds, hovers, abstract objects, as well as for styling photographs and texts. They are often mixed with other effects, such as Brush or Noise, which makes them appear modern, or futuristic even.
You can mimic the gradient effect by using a regular Photoshop brush and then reducing the image sharpness to a minimum. Color a layer in one hue, then merge two layers into one, and apply the Gaussian Blur filter on it.
MiM | Montréal in Motion brings together artists from various disciplines to create collaboration opportunities for its participants. They’ve applied the animated Gradient effect on the background, and while you explore the site, you will see it behind the outlined large typefaces.

The Gradient Overlay is the most prominent effect on our music theme, Vibra. The fluidity of the gradient in combination with purple letters and neon hues vividly depicts the state of experiencing a true musical ecstasy.

Outer Glow is a heavily used Layer Style. In combination with the Drop Shadow effect, it’s often seen in the background of textual content, but it is primarily used to mimic the neon light effect.
When you apply it to objects or texts, you don’t have to match the color of the glow with that of the content. However, if you do go with one hue, the outer glow effect will be more prominent. To further enhance the glow, designers usually opt for a contrasting background. They go with a dark background in combination with the objects colored in lighter hues to which they apply the Outer Glow filter.
Fill Ryabchikov is an illustrator who designed the futuristic website for the social debate platform The Ether. He applied the Outer Glow effect on numerous icons, buttons, headlines, and other elements on the site, perfectly complementing the neon futuristic aesthetic of the site.

A combination of white typography, the Outer Glow style, and a dark background is undeniably arresting, as you can see on our Eldritch theme. Our designers have used the effect only in headlines, but, in combination with interesting illustrations, that was more than enough to make this theme irresistible for all those into gaming.

Liquify is a fun Photoshop tool used by many. With it, you can distort, rotate, push, pucker, and bloat some parts of your images, turning them into liquidy forms without jeopardizing the quality of the photo. This effect is extremely eye-catching on its own so you don’t have to mix it with other styles.
Liquify is mostly applied to headlines or other large textual content. To access this option, you need to go to Filter > Liquify. The Liquify filter includes multiple distortion tools that are placed on the left side of the screen. On the right-hand side, you will find options that allow you to control some of the tools, such as the Reconstruct brush.
The Zermatt theme exemplifies the use of huge, black typefaces distorted with the Liquify tool. They look impressive on the contrasting white background.

Graphic designer Pablo G. Lucio has used the Liquify tool on his Posters / Experiments Vol. 02 project. He applied it to typography and some of the featured objects, which resulted in the creation of an interesting, minimalist project.

This is an option that never gets old and is easy to apply. The first thing you have to do is duplicate your image. Create two layers – one with text and the other containing a photo. Then, hold the “Alt” key and the right mouse button simultaneously, and the image will appear through the letters.
This effect is memorable and can be applied to patterns, drawings, and pixels in any shape and form, not just on pictures. You also don’t have to use it exclusively in combination with texts but with any kind of content inside of which you wish to place images (or other types of graphics).
The designer of the Querida theme has subtly implemented floral elements on typefaces, mockups of digital devices, and images using the Text Mask effect. He opted for a vibrant color palette, which gave the theme a fresh and modern look, while the Text Mask tool made it all the more interesting.

Sheldon Stenning is a graphic designer and a musician. On his website, he used the Text Mask tool to make abstract patterns and illustrations appear through rectangles. That content is beautifully animated, which makes it look all the more appealing. Headlines are written using smaller-sized letters, but they’re not any less important than the dominant abstract area of the site. In fact, the contrast between the two makes the text all the more eye-catching.

Vivid Light is another Blending mode that increases or decreases the contrast between colors, depending on the color of the blend layer. You can burn or dodge colors with this tool, but it’s important to keep an eye on the opacity levels as you probably wouldn’t want them to be too strong. With this type of color blend, you will achieve more vibrant hues that sometimes appear almost neon-like.
This is what a dark blue color looks like when the Vivid Light effect is applied:

Dystopian Creatives is an award-winning creative studio from Denmark with a compelling website. It seems that they’ve used Vivid Light on it along with some other filters we discussed. The site is also wonderfully animated, which only makes it all the more memorable.

Final Words
Photoshop is a versatile editing software that packs a surplus of powerful editing and design tools. I’ve listed some effects that I like to use in my work, but of course, this selection varies from one designer to the next. What matters is that there is a tool for virtually anything you can think of and an endless list of filter combinations, which allow you to create impressive art pieces. And in case our captivating examples left you craving some more inspiration, check out the Halogen theme, which includes a lot of heavily edited images that demonstrate the great creative heights you can reach with Photoshop.

