How to Make a Perfect WooCommerce Thank You Page

If you’re using WooCommerce to power your online store, there are many things you can do to enhance the browsing (and shopping) experience of your customers. For example, you can create high-quality product images, ensure that your WooCommerce store has clear website navigation, offer some discounts and vouchers, and the list goes on. Now, you may think that a WooCommerce Thank You page is not that big of a deal, but in fact, this kind of page can easily become one of the driving things that makes the experience of your shoppers much more interactive and engaging.
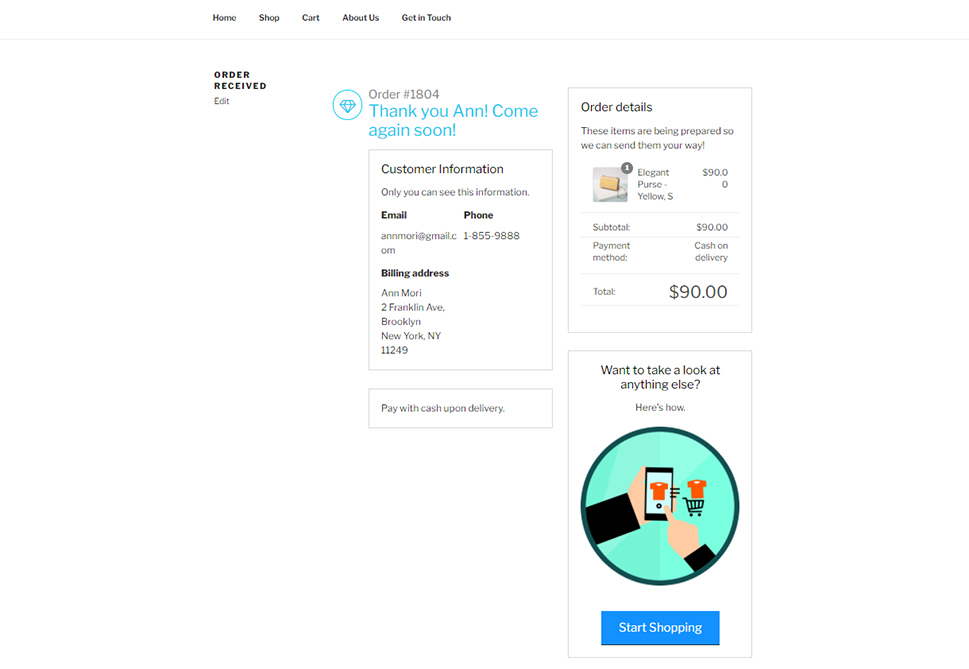
In a nutshell, a WooCommerce thank you page is a new page to which a customer is redirected after placing an order. This page can be used to thank the customer and invite them to come and check out the rest of your products. Also, it can represent a sort of token of appreciation or a form of nice gesture for the customer. Still, this page cannot really be customized or styled in more detail by default, and there isn’t really that much content on it that would make it appear too significant in the first place. However, if you use the help of the appropriate plugin, there is a way to turn this kind of basic-looking page into one that will look much more appealing to visitors, which can only help you drive more sales as a result.
This time around, we will show you how to build a WooCommerce thank you page that will contain more useful elements for your customers (such as custom text, colors, buttons, etc.) and create an overall better customer experience on your online store using a plugin.
Here’s what we’ll cover:
eCommerce WordPress Themes
View Collection


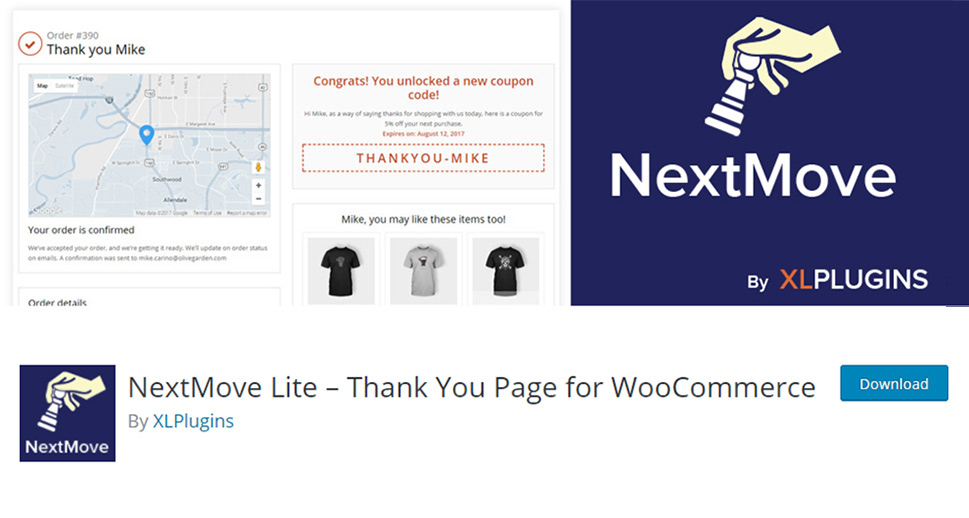
If you plan to give an entirely new look to your thank you page on your WooCommerce-powered store, we recommend using a plugin called NextMove Lite – Thank You Page for WooCommerce. This plugin is great as it completely overrides the default thank you page, allowing you to create and customize an overall more attractive thank you page for your customers. You will get to use and add video, HTML, dynamic coupons, image and text, recommended products, and more. Some of the other components you can add include personalized order confirmation, order and customer details, location map, and so on.
First things first, install and activate the plugin. Right upon activation, the plugin will create a new custom thank you page which you can further adjust according to your own preferences.
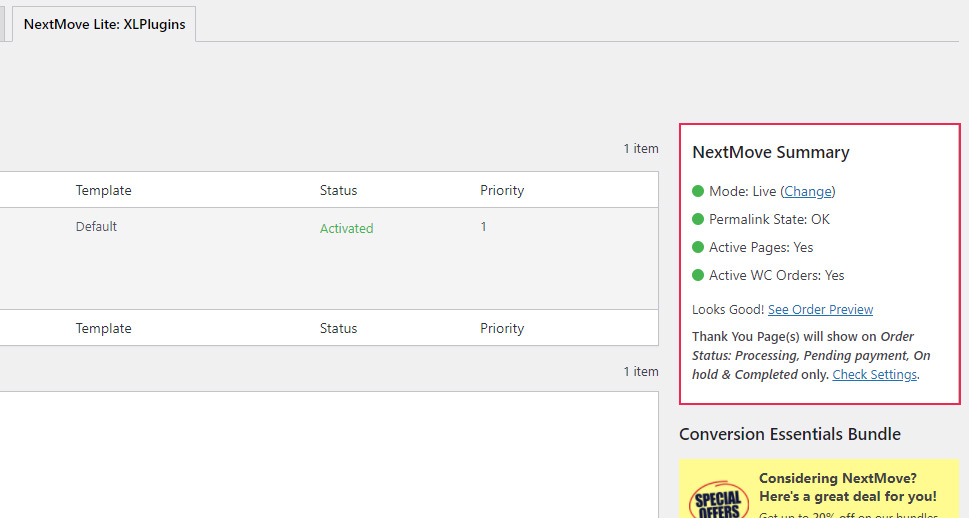
To edit your new thank you page, head to WooCommerce >> Settings located in your WordPress admin dashboard. Then, choose the NextMove Lite: XL Plugins tab.
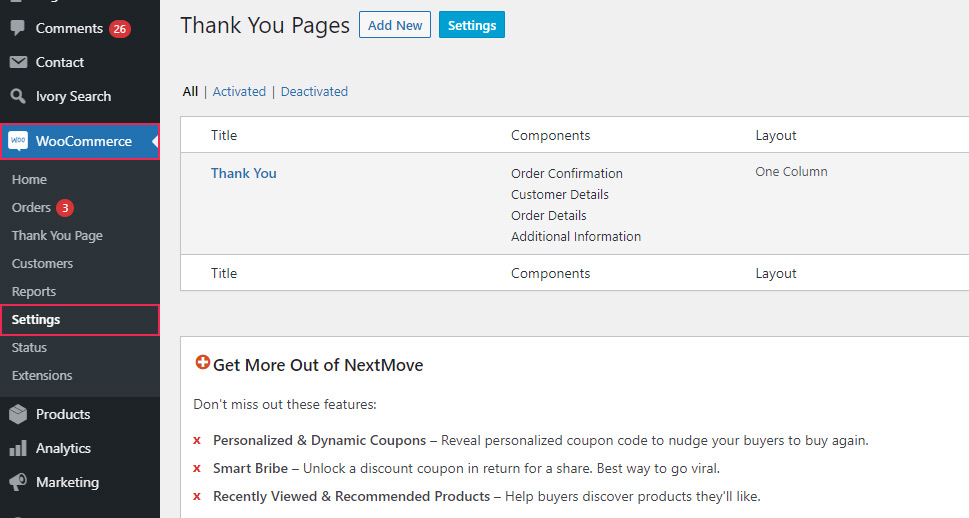
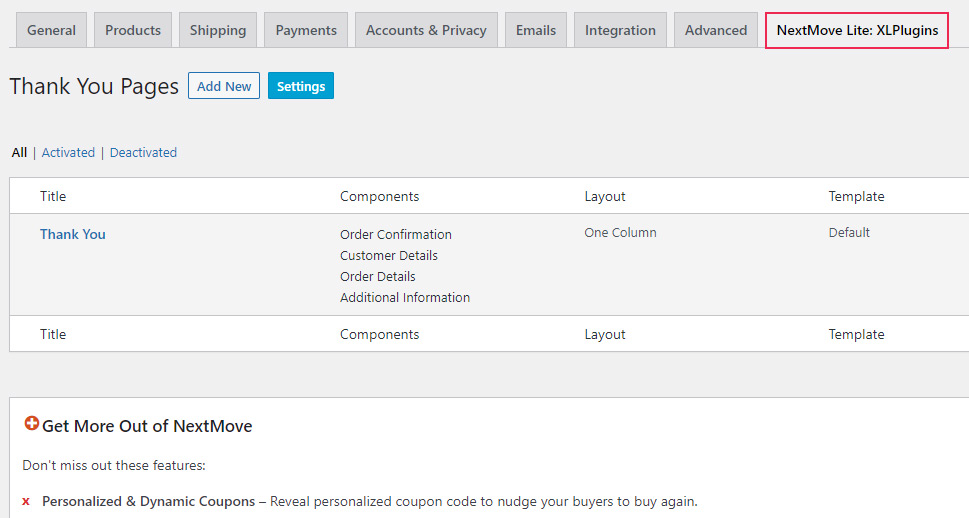
This is where you will be able to see all active thank you pages as well as info on where they are shown (on the right side of your screen).
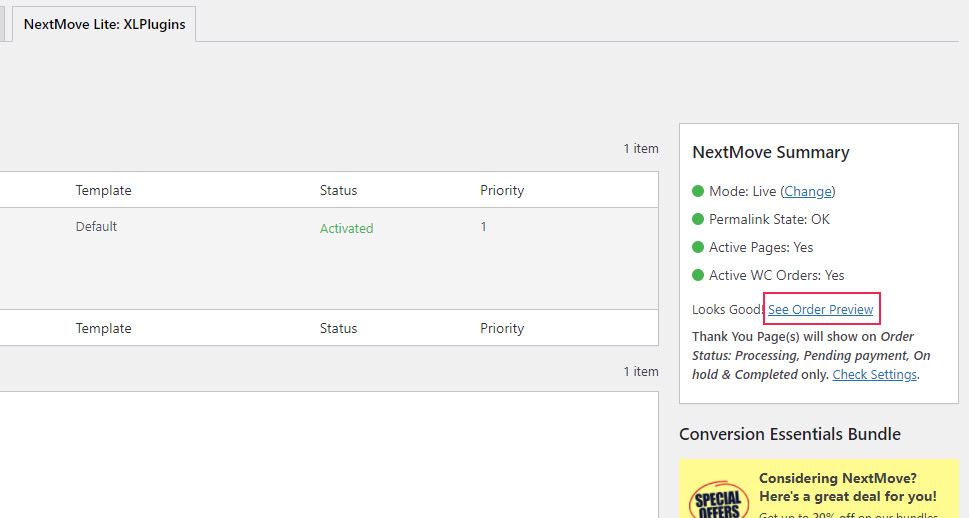
If you want to check out the look of your thank you page without having to perform a test order, simply hit the See Order Preview button.
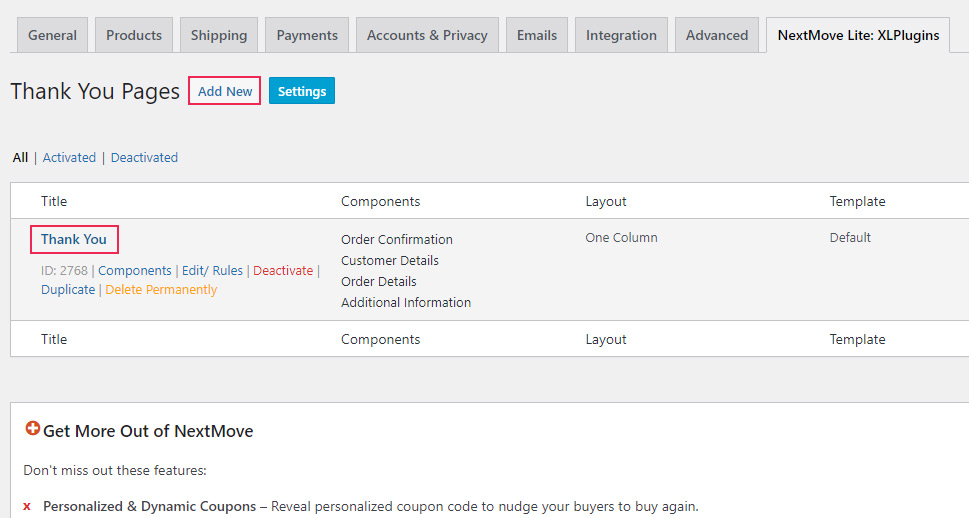
You can either click on the premade thank you page or hit the Add New button to create your page from scratch.
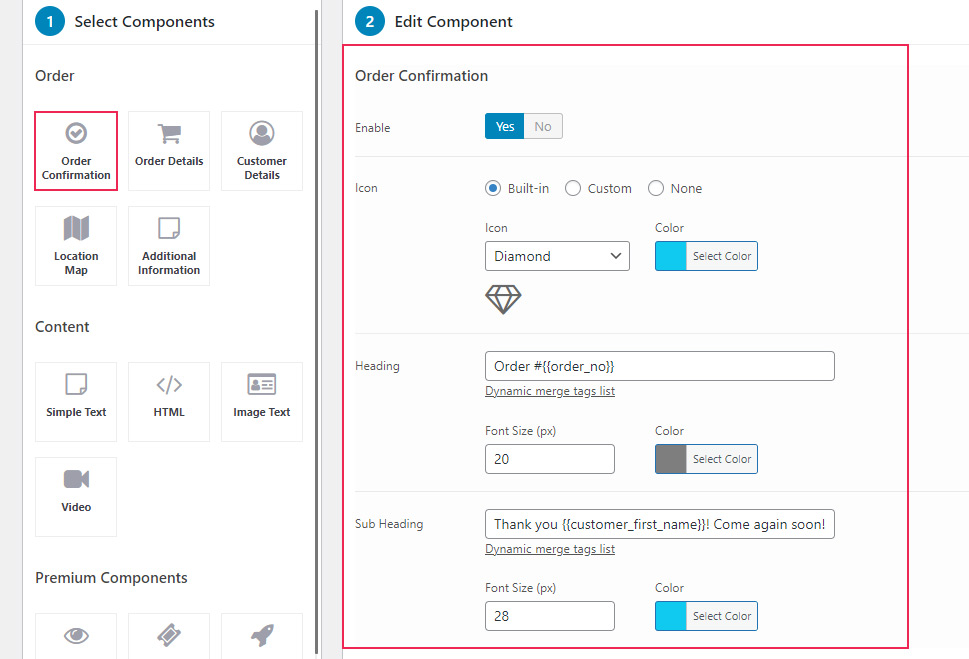
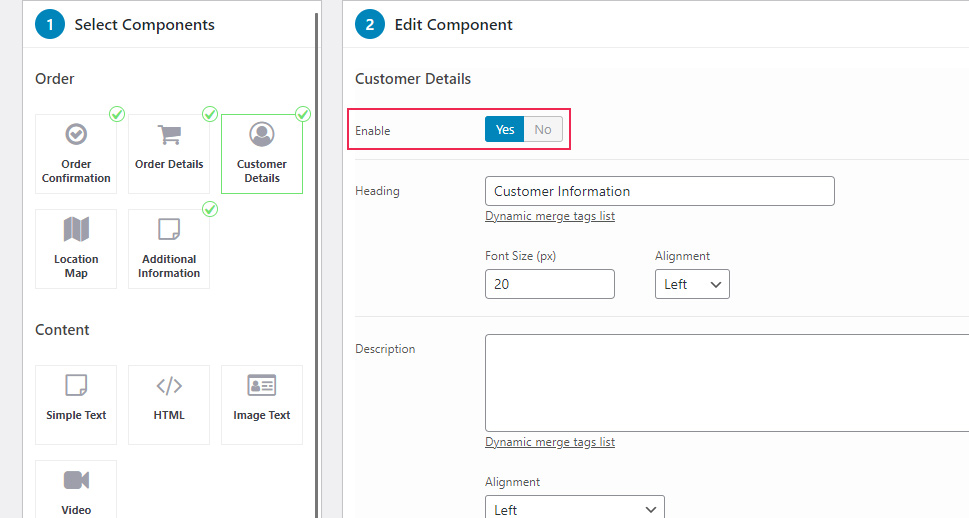
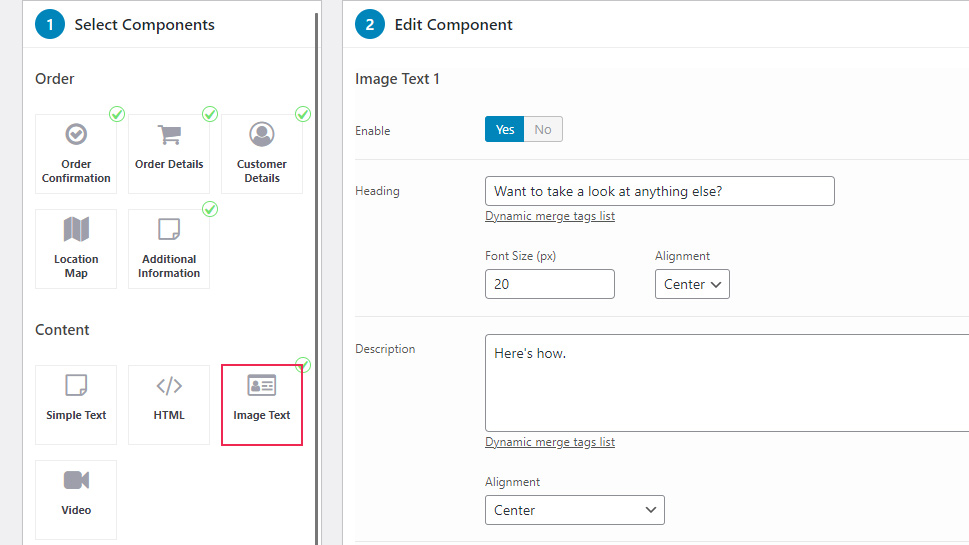
Now, the main visual page editor of the NextMove plugin will ease your creation process as it is segmented into four main steps – Select Components, Edit Component, Choose Layout, and Arrange Components.
The Select Components area allows you to add or remove different modules and then edit their settings.
For example, by clicking on the Order Confirmation component, you will be able to see (and edit) a list of all settings related to it. You will get to switch this component on or off, choose its icon (instead of a checkmark, you can choose from 10+ other icons, such as smiley or thumbs up, for example), edit the icon’s color, add your heading and subheading, and more. Of course, you can edit these settings in any way you like.
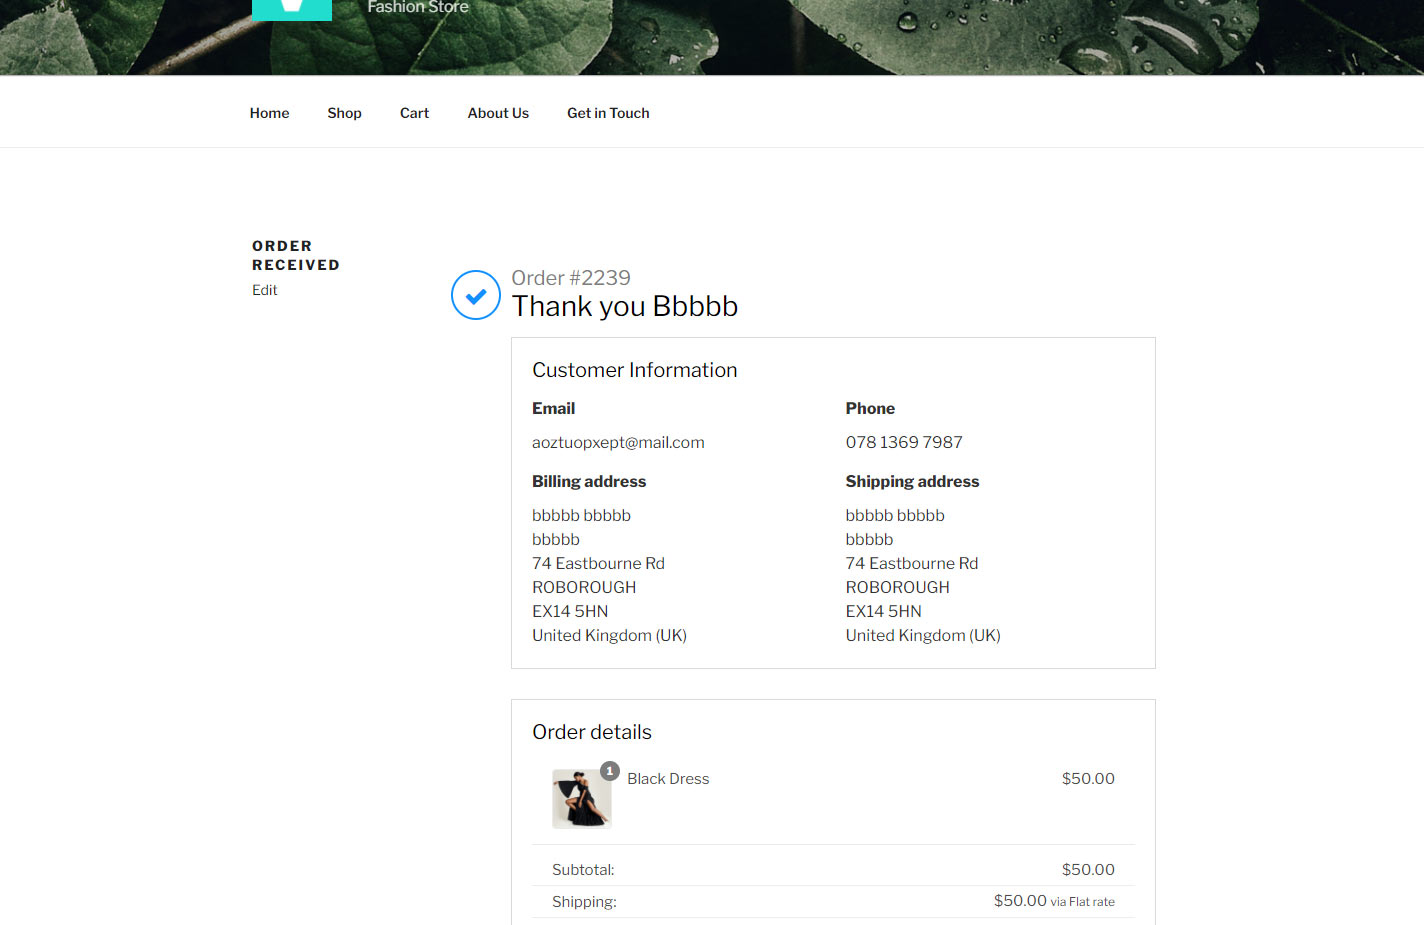
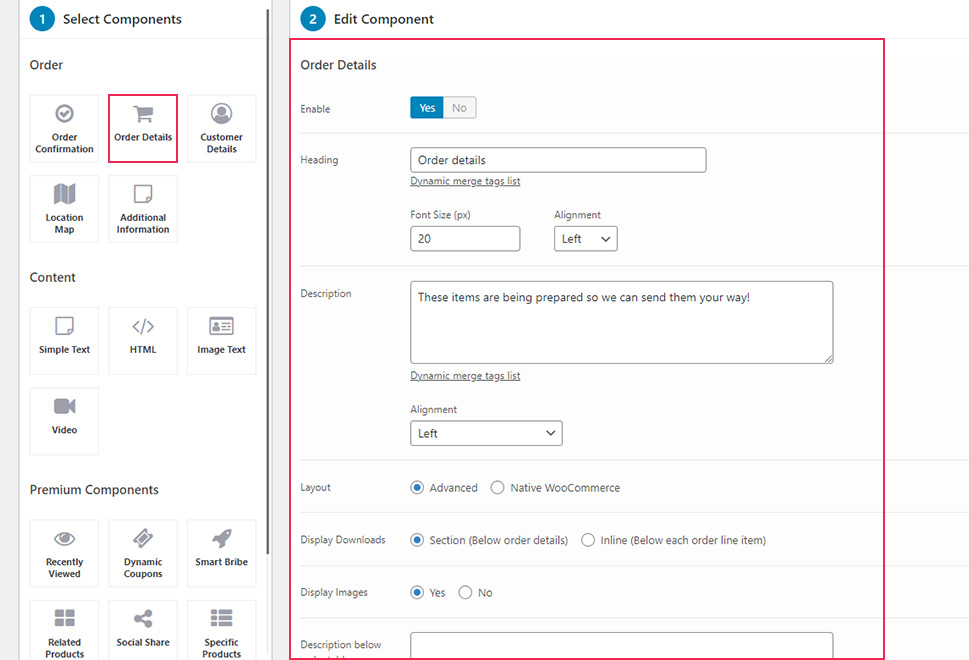
Next, clicking on the Order Details component allows you to set plenty of options related to the section that lists details of the customer’s order. This includes changing the heading title, description, font size and alignment, choosing whether to display images, setting border options and more.
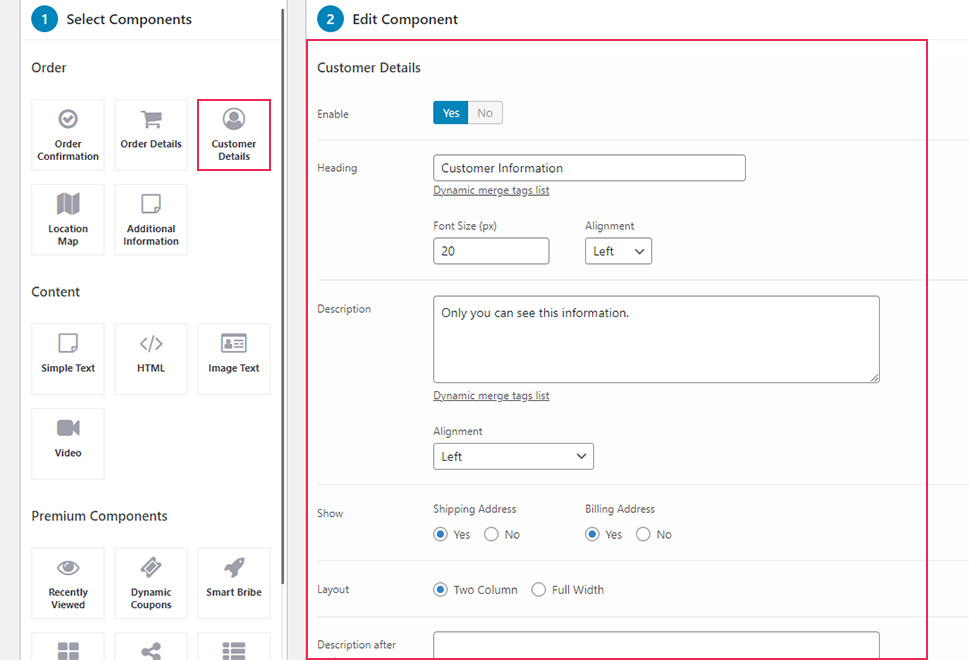
Now, the Customer Details component allows you to include information about your customers, such as their shipping and billing address. You can also change the name of the entire section (it is named “Customer Information” by default), insert some additional description that would be shown right after customer information, change alignment, border style, background color, etc.
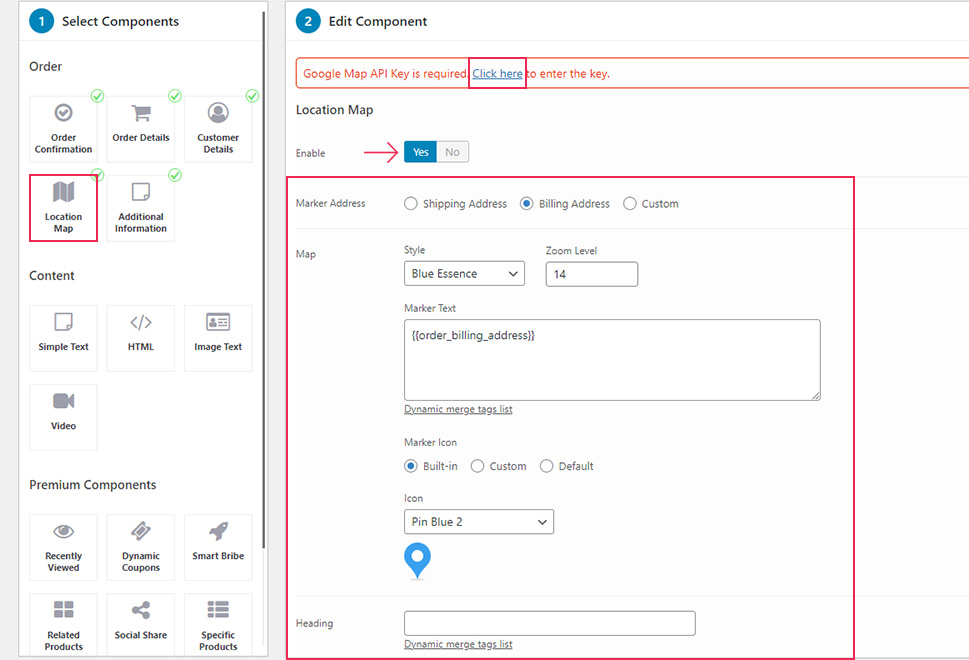
The Location Map component allows you to insert a map into your thank you page. This way, you can visualize to the customer that you’ve received all the required shipping information and that they will receive their product in no time.
Just like with all other component options, here you will also be able to change some font, alignment, and color options to fit your preferred page design. Also, you will be able to choose the map and Pin icon style, and of course, generate the Google map API key to get Google Maps to work (you will be led to the plugin’s Settings to generate the key).
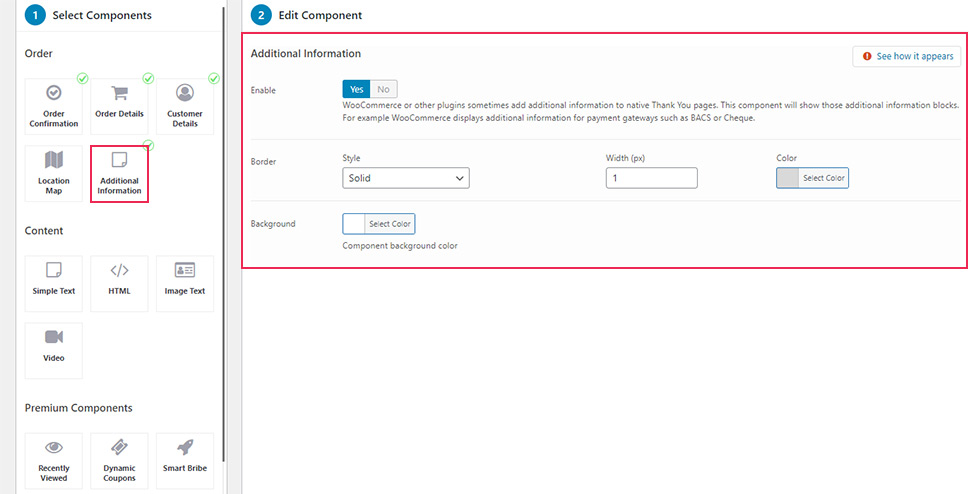
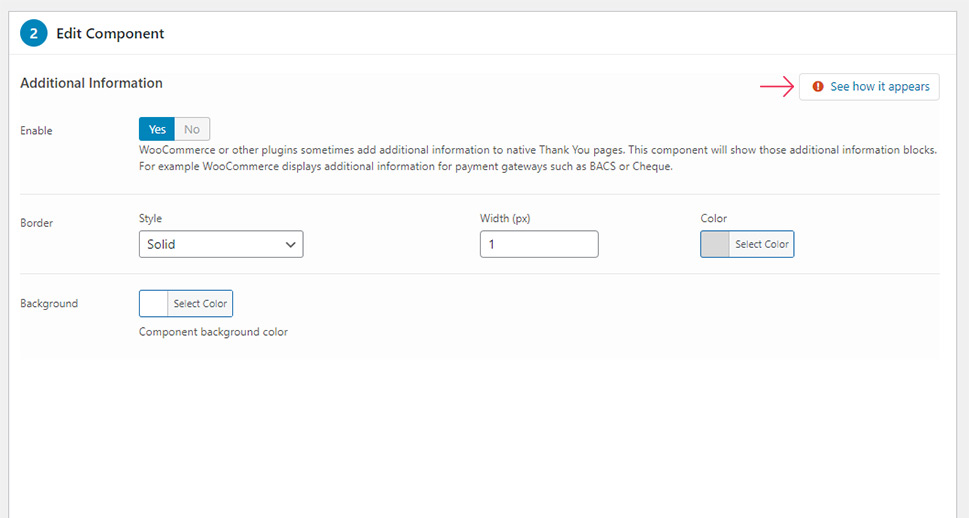
Finally, the Additional Information component will list some additional info blocks related to different payment gateways, for example. If you enable it, you will get to edit and customize its border style and background color according to your preferences.
Feel free to add or remove different components and edit them one by one, as per your preference. Also, you can easily switch on or off each component using the Enable option (available at the beginning of settings for each component).
Last but not least, there’s a neat “See how it appears” option available within each component that allows you to quickly preview the component you’re customizing.
Next, the Choose Layout section will let you choose from a one-column or two-column layout for your components.
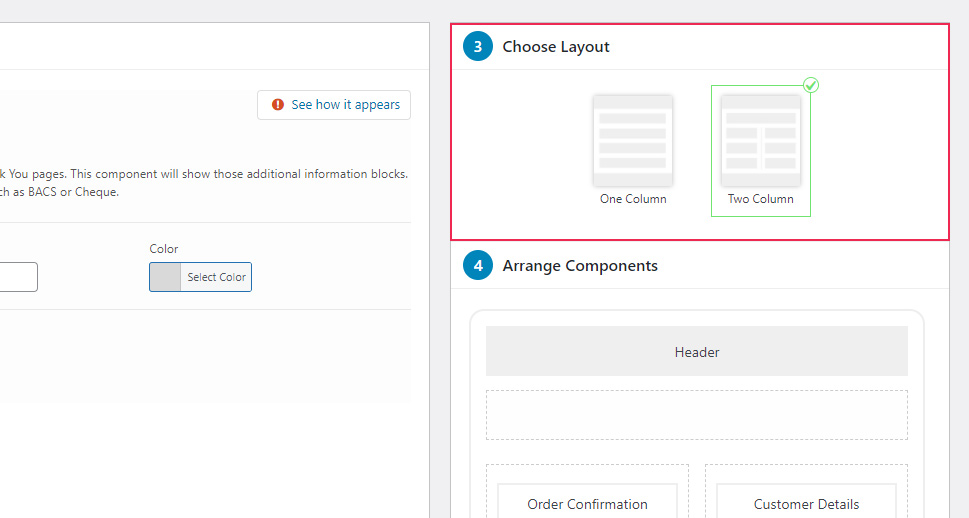
Similarly, the Arrange Components section will let you arrange your components according to the type of layout you’ve chosen using a simple drag and drop functionality.
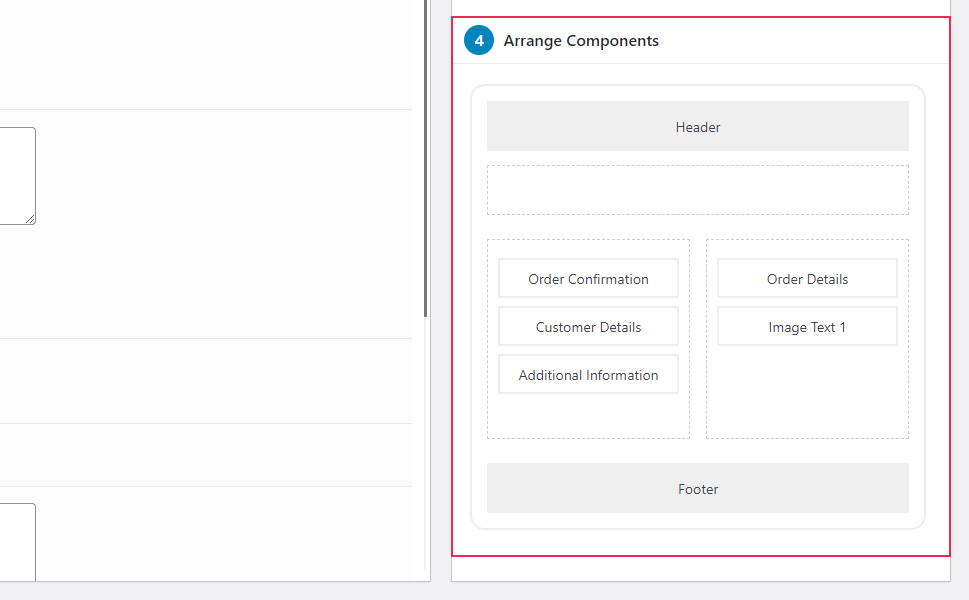
We’ve chosen a two-column layout for our thank you page and moved some components to fit our two-column design.
To boost the look of your thank you page even further, you also get the ability to add and customize some additional content sections. These include components such as Single Text, HTML, Image Text, and Video.
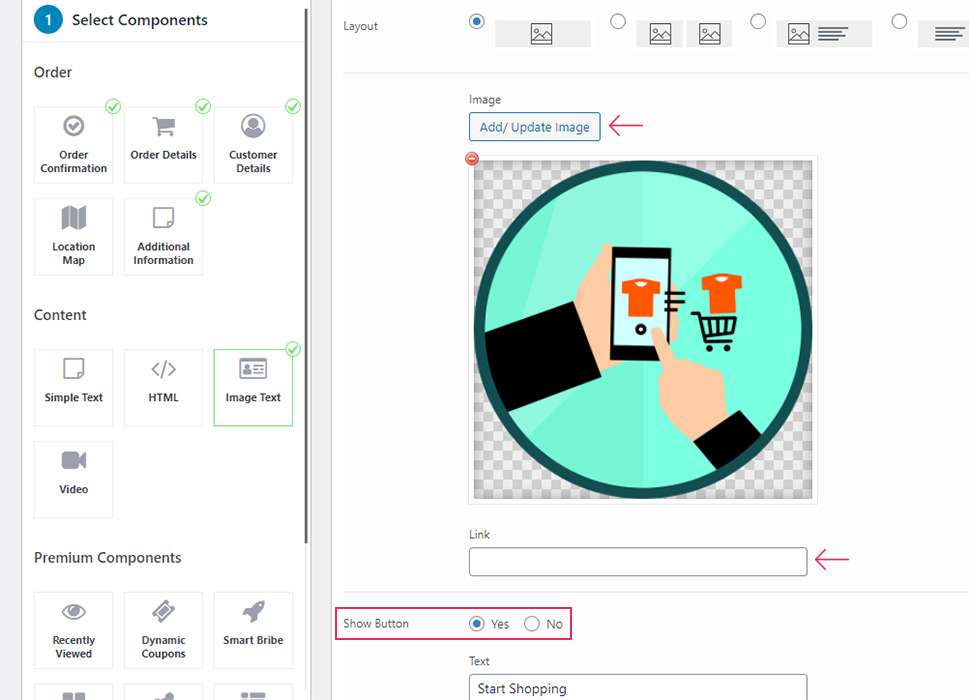
For example, an Image Text component gives you a chance to motivate your customers to go back to shopping or return to a product page. After activating this component, you can simply add an image of your choosing, choose your layout, customize other styling options and add desired page link, and you’re all set.
If you want, you can even choose to show a button or not. It is called “Start Shopping” by default, but you can change even this text into something else if you’d like.
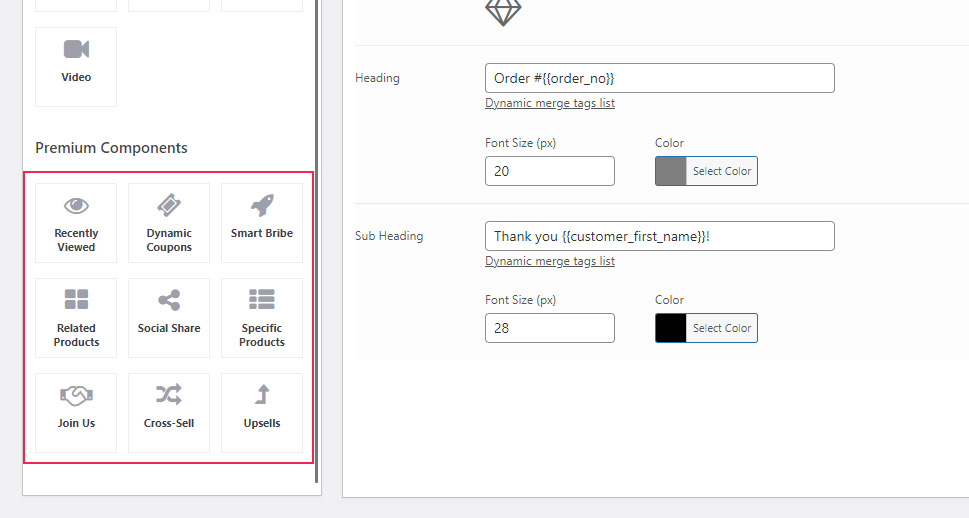
Now, while it’s true that the plugin can be largely used for free, there are some components you only get to use if you choose to upgrade to Next Move Pro (starting at $29 per year). By doing so, you get the ability to further enhance the look of your custom thank you page.
Some of the components you will get include Dynamic Coupons, Recently Viewed, Related Products, Social Share, Specific Products, and more.
Finally, make sure to click on the SAVE button located in the upper right corner of the screen once you’re done with creating your page.
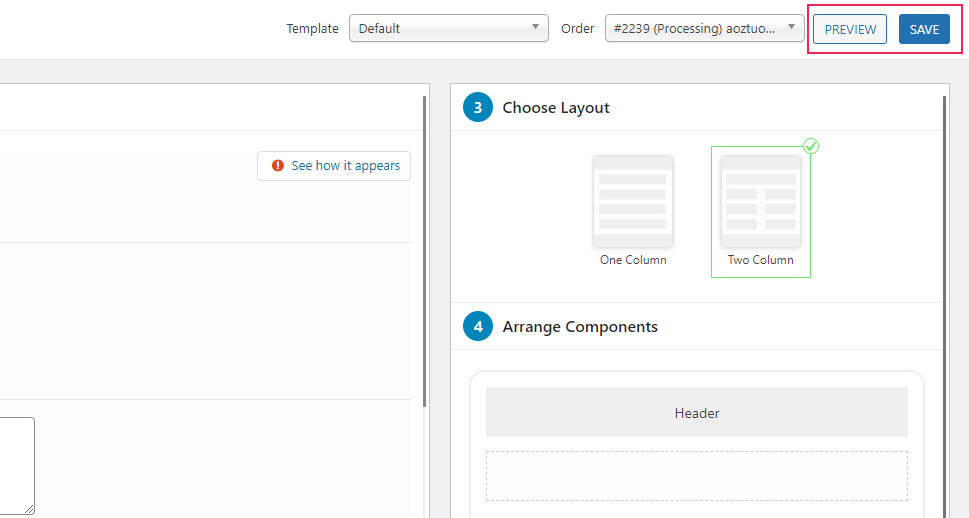
You should also hit the PREVIEW button to see your new WooCommerce thank you page in action.
Conclusion
A WooCommerce thank you page can be a useful component of your online store that, if customized properly, has the potential to improve the overall experience of your customers and even help you drive more sales. We recommend trying out a NextMove Lite plugin as it allows you to customize the look of your thank you page down to the tiniest detail – from changing layouts and colors to adding custom text, images, buttons, and even a map. As a result, your thank you page will appear much more attractive and customer-friendly for each visitor, which can only give a boost to your online store.
