How to Create a Paid Newsletter in WordPress Using Mailchimp

WordPress websites are incredibly versatile when it comes to monetization options you can use with them. You could say that it’s all up to you – whatever you choose to make with your website and whatever monetization method you decide to apply might work if you’re capable to pull it off. You can try selling stuff via affiliate links, building your own WordPress store, or creating a food blog and monetizing it with ads.
Creating a paid newsletter is another great way to earn money from your website, although it’s not one you see often. Your ability to succeed will depend greatly on your ability to produce awesome content and set up a way to monetize the subscriptions. We’ve offered plenty of advice to help you improve the content and even dip your toes in content marketing. This time, we’ll help you set up a Mailchimp paid newsletter in WordPress.
In this article, you’ll read:
SEO WordPress Themes
View Collection


Putting content behind a paywall isn’t a new monetization strategy. It was used to prop up a whole section of media – print media – and we’ve seen those same publishers implement that model on their digital outlets. Some did it with more success than others, granted, but either way, the idea of asking people to pay for access to digital content isn’t new. Neither is the idea to deliver that content in the form of a newsletter – and that’s great news for you.
Because this is something people have tried before, you have some information that can guide you. Writing for Mailchimp’s Courier magazine, Substack’s Nadia Eghbal shared that the monthly prices for personal interest newsletters range from $5 to $7. For business newsletters, prices average between $10 and $15, and even more. That’s some great information to have when starting.
Equally useful is the info from the same article about what constitutes a good open rate for newsletters – it’s between 50% and 60% – and that 5% to 10% is a good conversion rate from free to pain newsletter. Of course, all of this is important to you if you plan to develop a free newsletter first, and then piggyback your paid newsletter on it. And that’s something you don’t have to do.
When starting a paid newsletter, you must have some proof that your newsletter will be able to deliver value people will want to pay for. A free newsletter is as good as proof as you can get, but any other kind of content you create can work, too. You can create great articles, or have your own YouTube show, or a podcast, and offer a paid newsletter. Your content should demonstrate the type of newsletters you’ll create, and that you can do it with a consistent level of quality.

Now that you know a thing or two more about paid newsletters than you did before you started reading this article, let’s see what are the things that you’ll need to create a paid newsletter. You’ll have some room to pick and choose with some of the components. We’ll let you know what we chose and why.
A WordPress Website
Whether you want to create high-quality articles to draw an audience, or you plan to build up an audience with a free newsletter first, a WordPress website will be an asset you’ll never regret.
Building a WordPress website is easy, and with our Qi Theme, you’ll have free access to a professionally designed WordPress theme. Just install it and import a couple of demos, and you’ll be on your way to creating a great-looking website. Choose a couple of staple plugins, and you’ll be set to go.
A Mailchimp Account
There are a couple of reasons why we’ve chosen Mailchimp for a paid newsletter. One is that Mailchimp is a popular service that offers plenty of integrations that make newsletter monetization easy.
The other reason why you see Mailchimp used for emails all over the place is that WordPress’ native email delivery system is notoriously fickle. It will let you down when you need it the most, and you’ll never be sure whether your newsletter ends up in the trash folder or the inbox.
Tools like Mailchimp take care of that issue. Plus, setting up and using Mailchimp for WordPress is incredibly easy – you just need to make an account on Mailchimp, install a plugin on your website, and connect the two.
A Subscription Management Platform Account
Among the subscription management platforms that integrate with Mailchimp, you’ll find services such as Chargebee and MoonClerk. We’ve opted for Campaignzee because it’s easy to set up – we’ll show you how in the next segment when we talk about connecting Mailchimp to a subscription management platform.
A Payment Processor Account
Different subscription management platforms will work with different payment processors. Campaignzee works with Stripe only, and you need to create a Stripe account for the tutorial to work for you. If you’ve ever made Stripe work with WordPress, you already have an account so you don’t need to create a new one. If you haven’t, they are easy to create.
In case Stripe doesn’t offer service in your region, you’ll have to use one of the other subscription management platforms. Chargebee offers a wide array of payment options, including PayPal, so you might consider giving it a go.
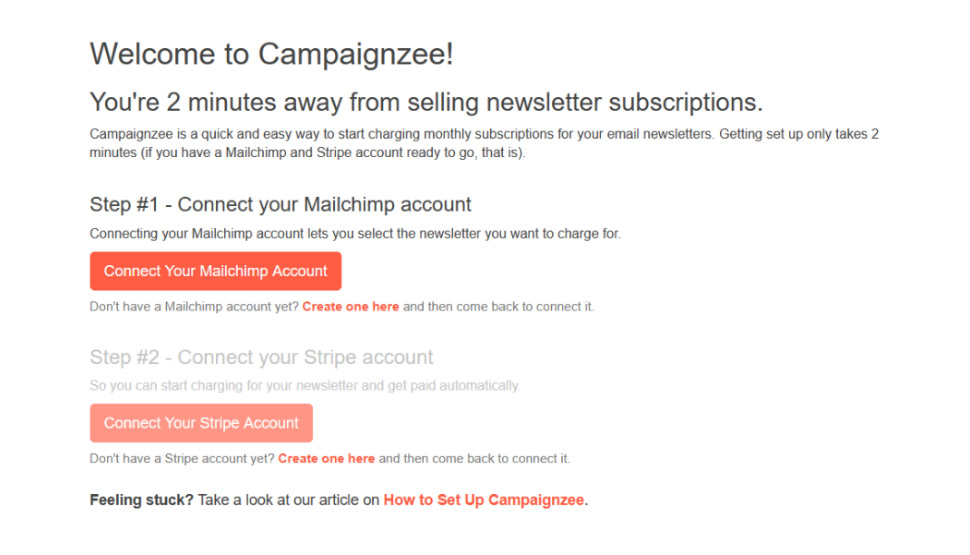
At this point, you should have a WordPress website connected to a Mailchimp account, as well as a Stripe account. The next step would be to connect Mailchimp and Stripe to Campaignzee, which you’ll do in the process of creating a Campaignzee account. Head over to the Campaignzee website, click on the “Sign Up” button and provide your email address and a password. After clicking on the “Create Account” button, you’ll be prompted to connect your Mailchimp and Stripe accounts.
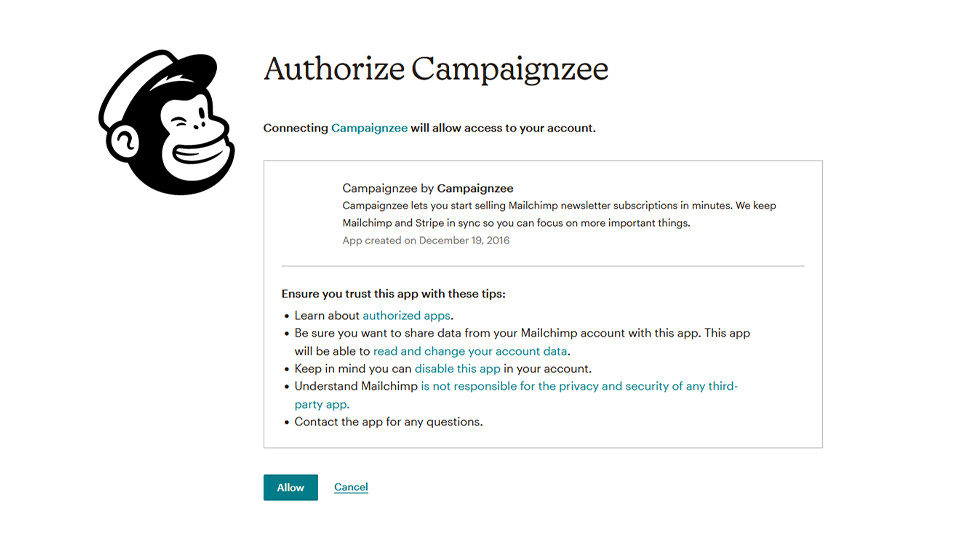
Clicking on the “Connect Your Mailchimp Account” button will prompt you to provide your Mailchimp login information. After you do that, you’ll be asked to authorize Campaignzee. You have to accept it to continue with the process, but make sure you read all the text about Campaignzee and app authorization.
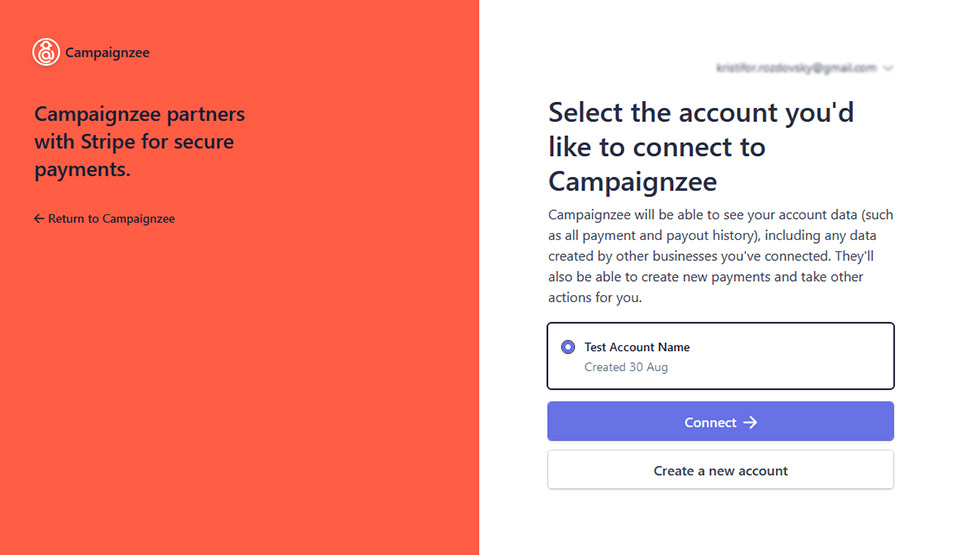
After you authorize Campaignzee, you’ll be brought back to the page where you can connect Mailchimp and Stripe. With Mailchimp down, Stripe is next – click on the “Connect Your Stripe Account” button. You’ll be asked to provide Stripe login information and prompted to choose which account you want to connect to Campaignzee. You’ll also be able to create a new account.
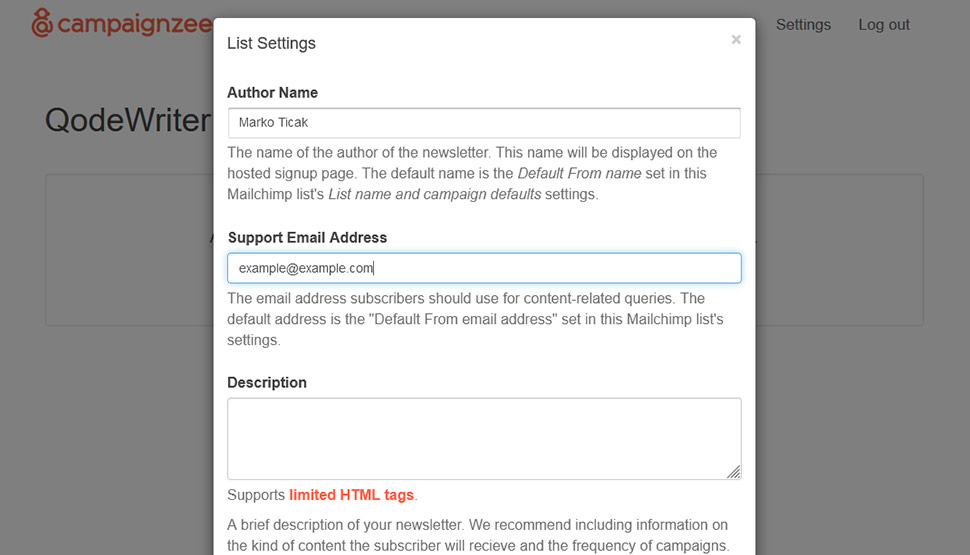
After you’ve connected Mailchimp and Stripe to Campaignzee, you’ll access the Lists menu which will show all of the lists you have in Mailchimp as well as their status. Click on a list, and you’ll be prompted to create a subscription form for it. You’ll have to provide information about the list, including the author’s name, a support email, a description, terms and conditions, and a signup message.
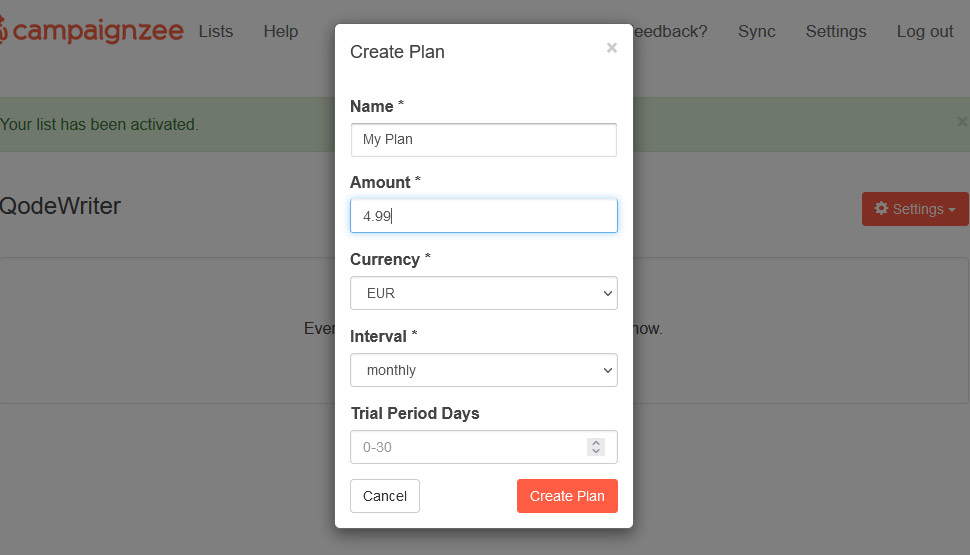
After providing that information and activating the list, you’ll be able to access the list setting and create a listing plan. Creating a plan is fairly simple – you just need to provide the name, amount, currency, interval, and an optional trial period.
After you’ve created the plan, you’ll notice that, when you access the list for which you’ve created it, there’s an additional button titled “Links” right next to the “Settings” button.
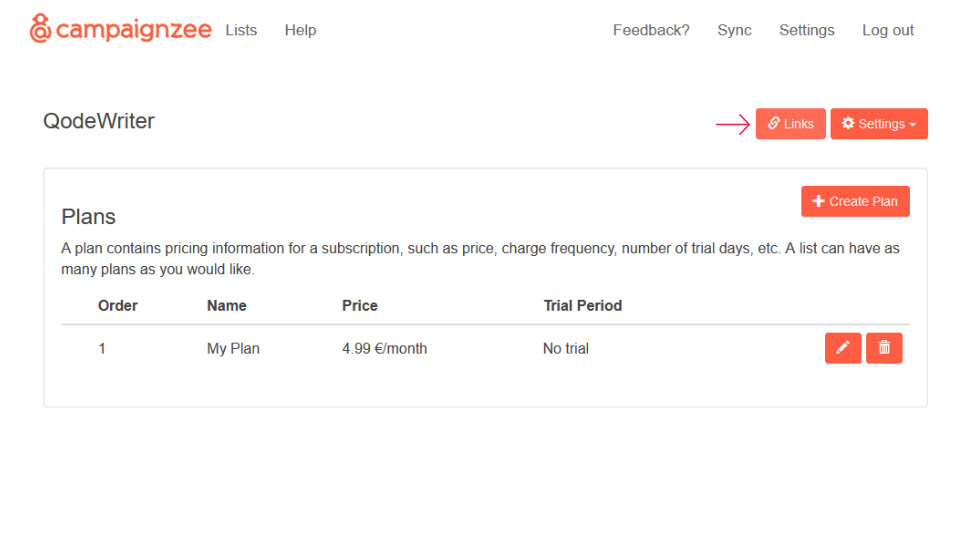
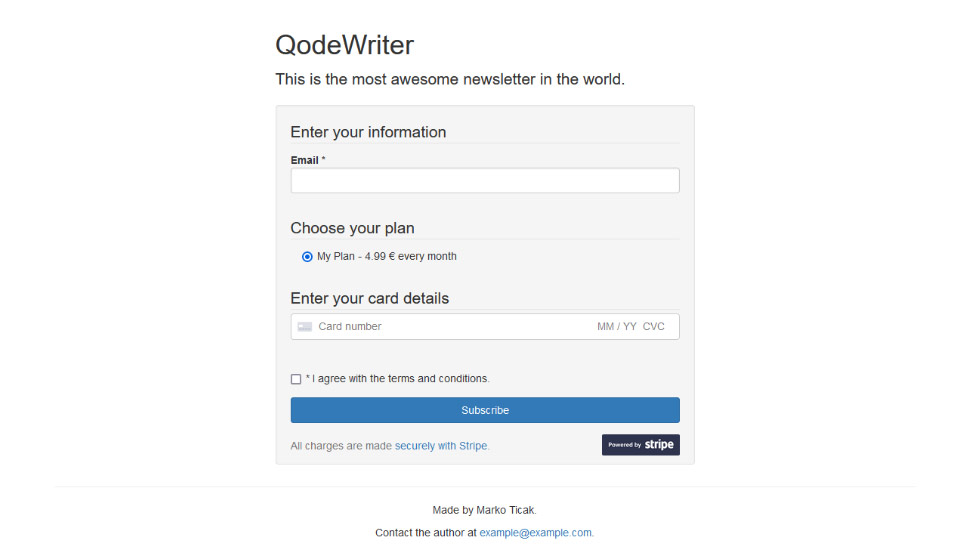
Pressing that button will show the link where the subscription form for your newsletter is hosted, as well as some code that will allow you to embed the form on your website. This is what the hosted form looks like.
You can choose how you want to share the form with your users. Either way, your job is done – you’ve created a paid newsletter with Mailchimp and WordPress, and you can start charging people for the awesome content you create.
Let’s Wrap It Up!
The ability to create content people will find useful, or funny, or maybe both is something you should consider monetizing. One way to do it is using a paid newsletter – a method that’s not as mundane as some others are, but that’s been used enough time for us to know that it could work.
If you decide to try and create a paid newsletter with WordPress, Mailchimp will be tremendously helpful. With it, a service like Campaignzee, and Stripe, you’ll have your newsletter up and running in no time!
