How to Create Flipbox Overlays and Hovers in WordPress

Creating visually immersive and engaging sections on your WordPress site can go a long way when it comes to capturing the attention of your visitors. In general, one great way to make your site appear more visually appealing and interactive as a whole is to add hover effects to your pages. But to truly make the most out of these effects and introduce some interactivity that your site visitors will appreciate, we suggest that you use a so-called flipbox overlay effect.
This time around, we will show you how you can easily create and add flipbox overlays and hover effects to your WordPress pages using a plugin. But before we begin, we will explain what a flipbox actually is and how it can benefit your site. Make sure to keep reading as we talk about:
Qode Themes: Top Picks
View Collection


Just as its name suggests, a flipbox is a box that has a hover animation effect and is usually filled with various elements. This hover effect makes the box turn, or rather, it “flips” the box over once you hover over it with your mouse. The flipbox hover animation effect can be used on many different page elements and sections, and it’s usually added to images, various text boxes, etc. Depending on the tool that you use to add this effect, you will be able to set the way your image and/or other elements will flip (at which speed, in which direction, etc.). You will also be able to set different colors, insert additional intro and/or outro animations, and add elements such as buttons and icons, among other things.
A flipbox effect can be particularly beneficial if you want to add more interactivity to a website that mostly has static elements. It can also be great if you simply wish to capture the attention of your audience in a fun and attractive manner and boost their overall user experience. For example, you can use a flipbox image overlay effect to present various different images related to your brand and/or company. Once the image flips over, a different image with various bits of information about your business can appear on the screen. You can also use this effect to reveal pricing info of specific products and/or services, uncover any important links and/or call to action buttons, or any other info that will be beneficial for your visitors. In short, the ways in which you can use this effect are limitless.
Without further ado, here’s how you can generate and add flipbox overlays in WordPress.
One great plugin you can use for creating and adding flipbox image overlays and hover effects is Flipbox – Awesome Flip Boxes Image Overlay. This plugin lets you insert awesome flipbox image overlays to your pages by creating a box that will flip and showcase various elements within the box. Essentially, the plugin combines the info box and call to action element, making the flipbox appear as a regular info box. However, once the user hovers over it, it reveals various elements that will make the user take action. Aside from images, you can add all sorts of elements to your flipbox to help make your site appear more engaging and professional as a whole, including videos, maps, buttons, icons, and so on.

If you want even more features, such as the ability to adjust colors, access to 20+ templates, over 100 different effects, and professional support, you can upgrade to the premium version of the Flipbox Awesome Flip Boxes Image Overlay plugin. The pricing for the Basic plan starts at $19.99.
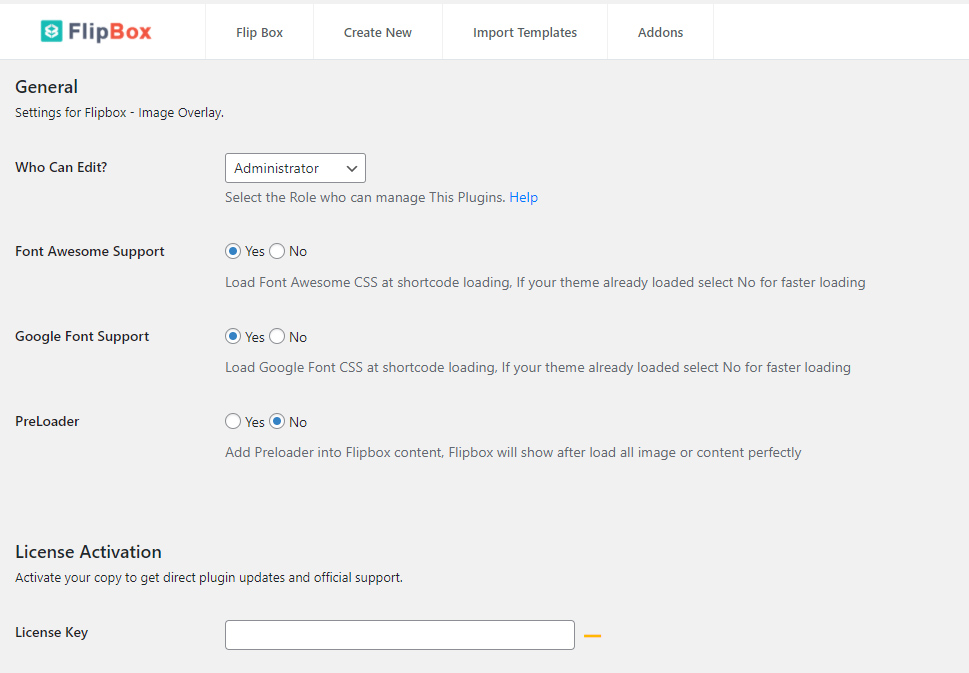
Once you install the plugin and activate it, you can head to the Flip Box >> Settings page to adjust some of the plugin’s basic options.
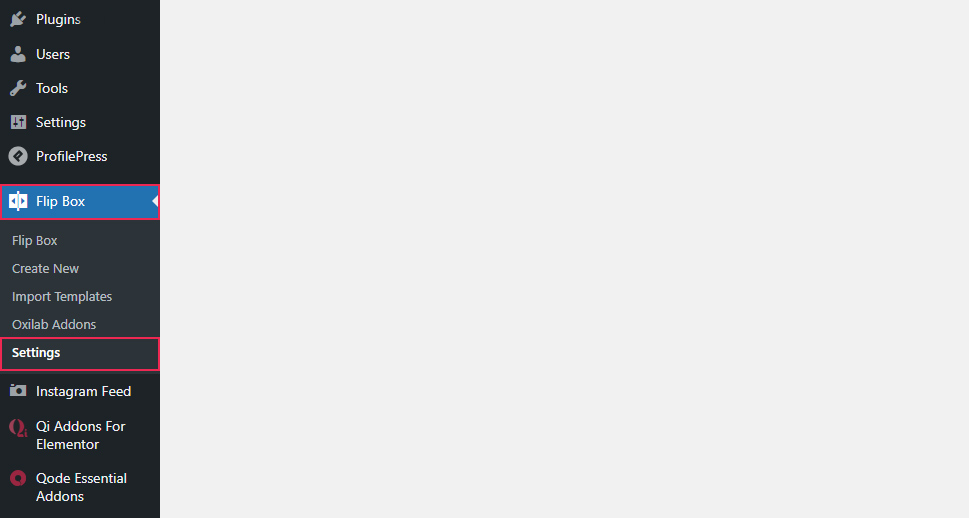
There, you will be able to pick a user role that will be able to edit the plugin (Administrator, Editor, Author, etc.), and choose whether you want to enable Font Awesome, Google Font, and PreLoader support. Disabling one or more of these options will allow you to load your flipboxes faster, so if you don’t need some of these, we suggest that you disable them.
Hit the Create New tab to start building your flipbox.
You will see that you can choose from five different styles by default. Click on Create Style to begin with your template customization.

A new box will pop up with the options to select one of the three available layouts (three different layouts can be used per style), and insert the name of your flipbox (this will be the name of your shortcode). You should note that the style of your flipbox will look the closest to the template you choose, so make sure to pick the one that fits your vision the most.
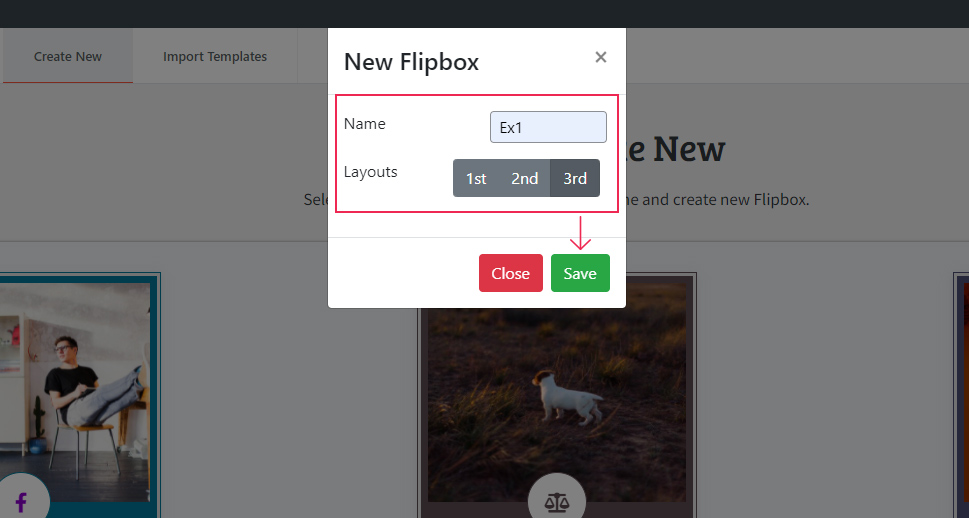
Hit the Save button when you’re done.
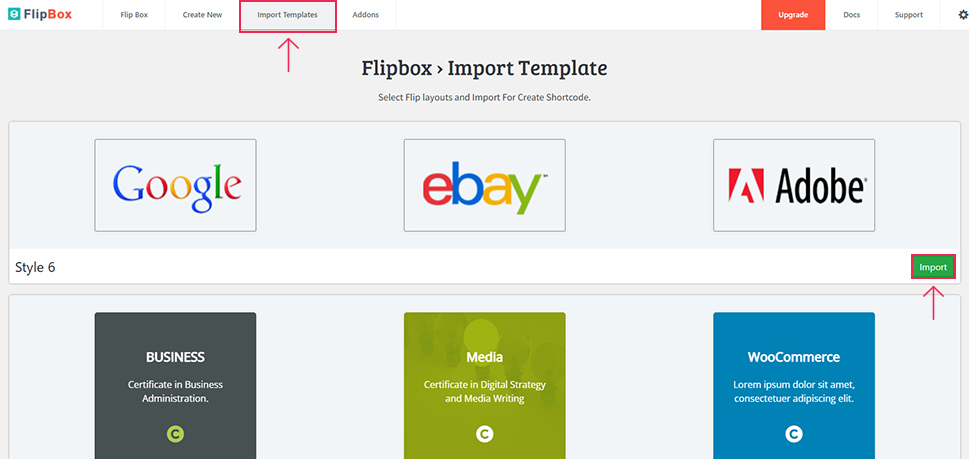
If you want access to more styles, the free version of the plugin also allows you to use the Import Templates option and import one of five additional template styles.
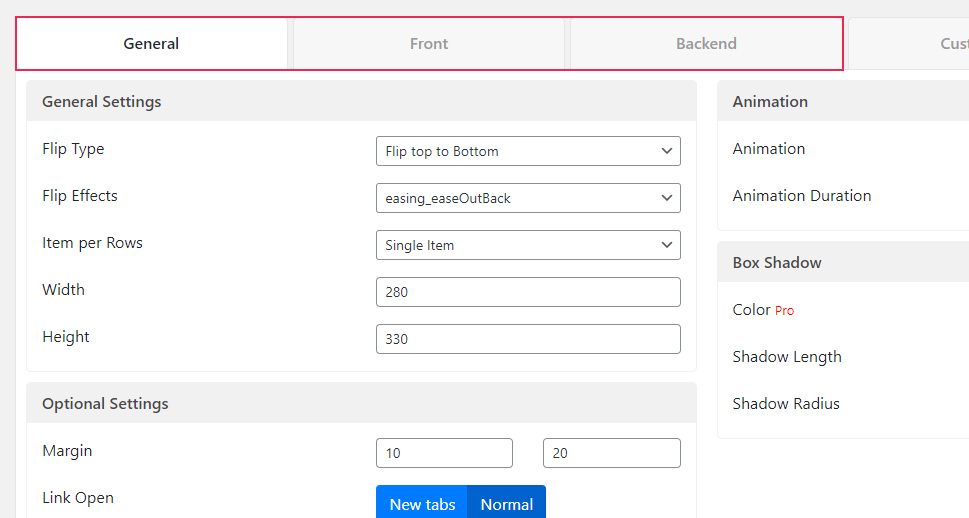
Now, with the free version of the Flipbox Awesome Flip Boxes Image Overlay plugin, you will be able to use three different tabs – General, Front, and Backend.
The other two tabs – Custom CSS and Support – will become available if you upgrade to the premium version of the plugin.
Back to the General tab – if you want, here you will be able to change the options related to the Flip Type and Flip Effects. These options will determine the way your flipbox will flip over on hover. You can also set the number of items per row (you can have up to six items), and adjust the width, height, and paddings of your flipbox.
In addition, if you want to take the look of your flipbox to another level, you can also choose from many available entrance and/or exit animations.
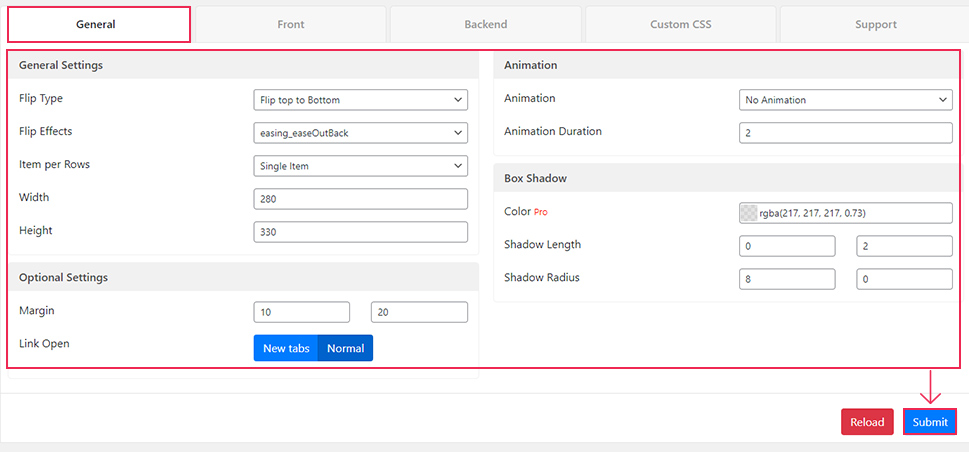
To save the changes to your flipbox, you need to click the Submit button.
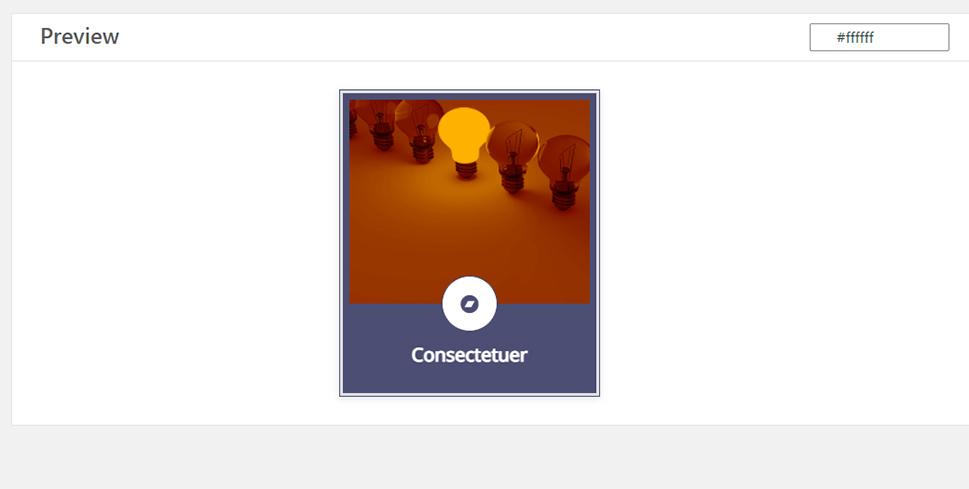
If you wish to preview your changes, you simply need to find the Preview section located at the bottom of the page.
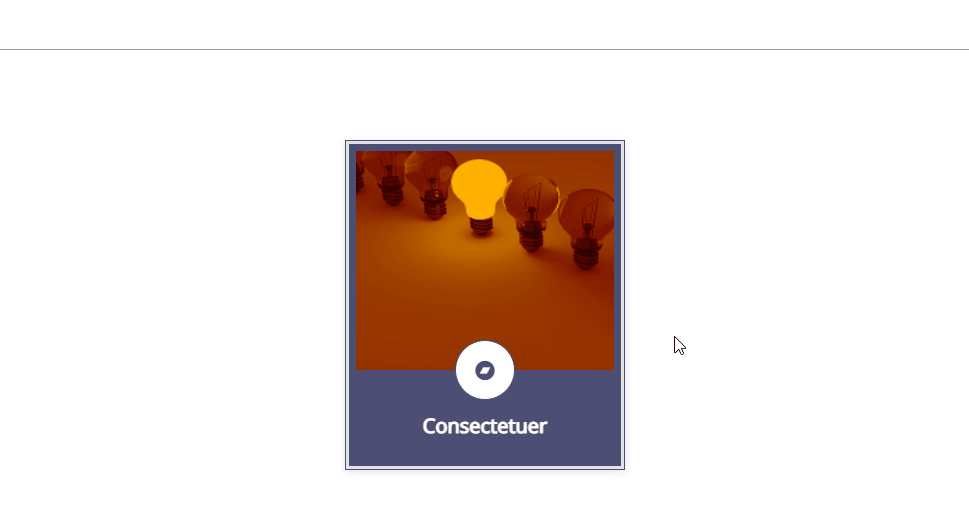
For example, here’s what our flipbox preview looks like when we choose the animation “rotateInUpLeft”:

We’ve also chosen the “Flip Bottom to Top” flip type and selected the effect called “easing_easeOutBack”. Here’s what it looks like:
Of course, you should feel free to adjust all these settings according to your own preferences.
In the Front tab, you will be able to adjust all the settings related to the appearance of your flipbox when you’re not hovering over it.
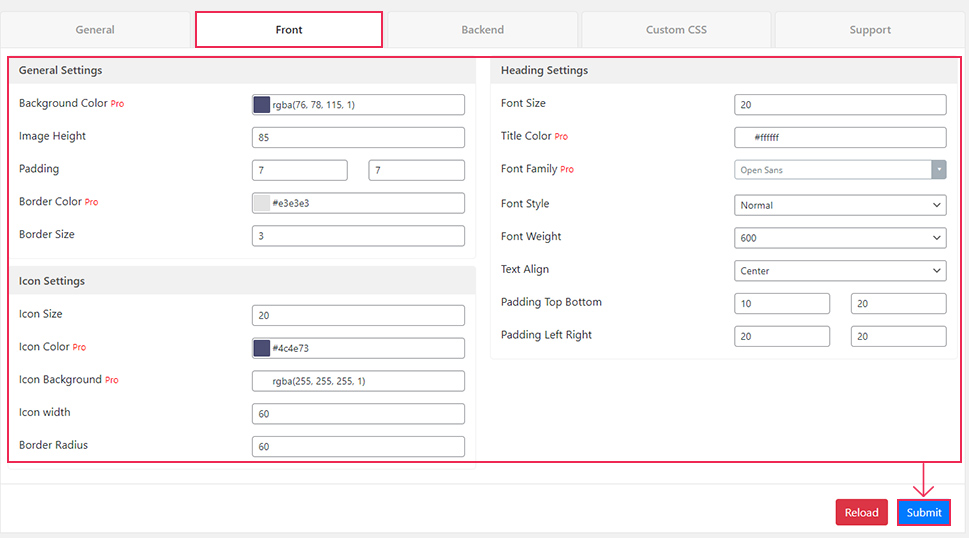
Here you will find the options to change and set the image height, padding, border color, and size, adjust the Icon (size, width, and border radius), and Heading settings (related to your text, i.e. font size, font style, font weight, and so on).
Some of the options here will only become available in the Pro version of the plugin, such as the ability to change background and border colors, icon color, and icon background, and choose the title color and font family.
Once again, you need to hit the Submit button for the changes to take effect.
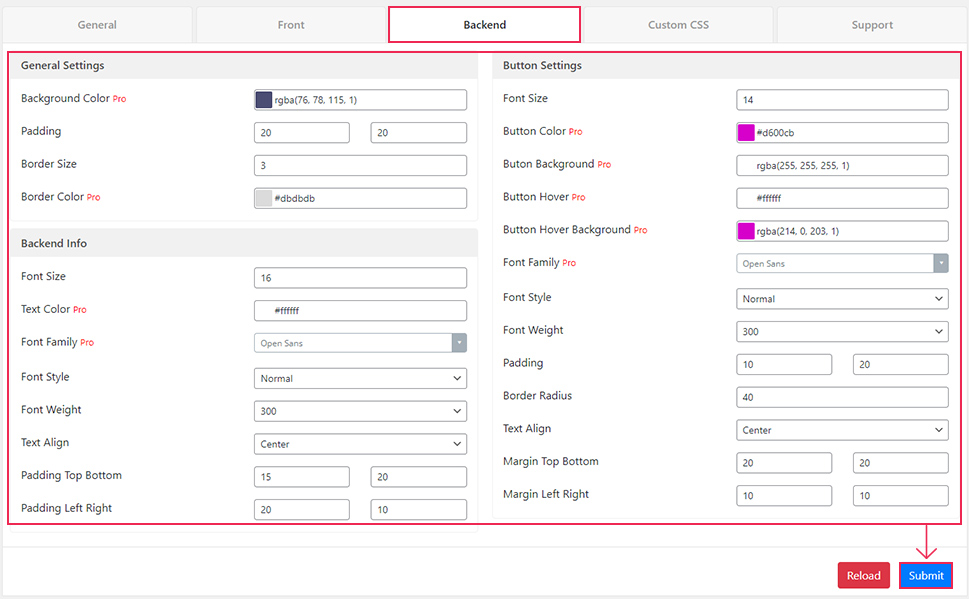
The Backend tab allows you to set the options related to the way your flop box looks when you hover over it. And so, you will get to use this tab to change the padding and border size, change font size, style, weight, etc., as well as adjust the button settings in full detail.
Once again, a few of the customization options here (background and border colors, button and text colors, etc.) are only available with the pro version.
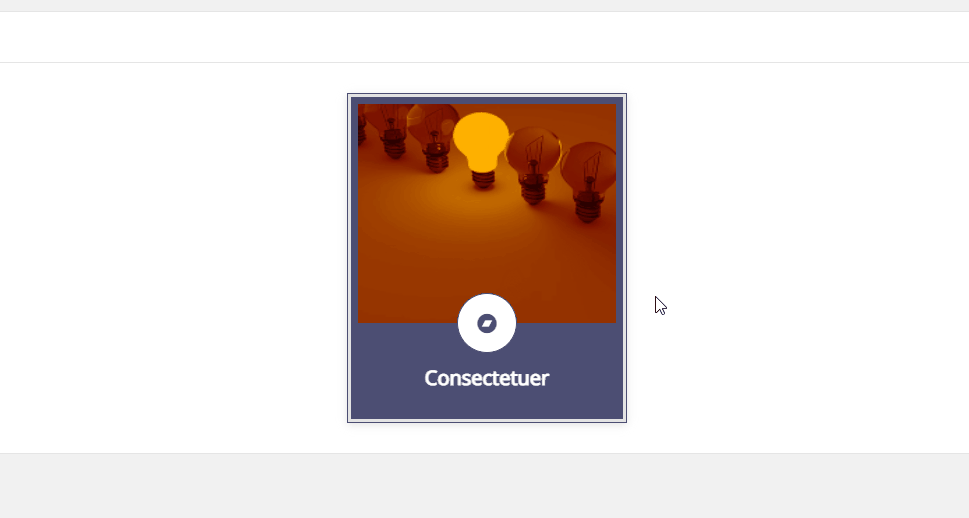
Now, to change things such as your background image, icon, and custom text of your flipbox (on both sides), you need to hit the Edit button located in the Preview section. You will find the Edit button when you hover over the flipbox preview itself:
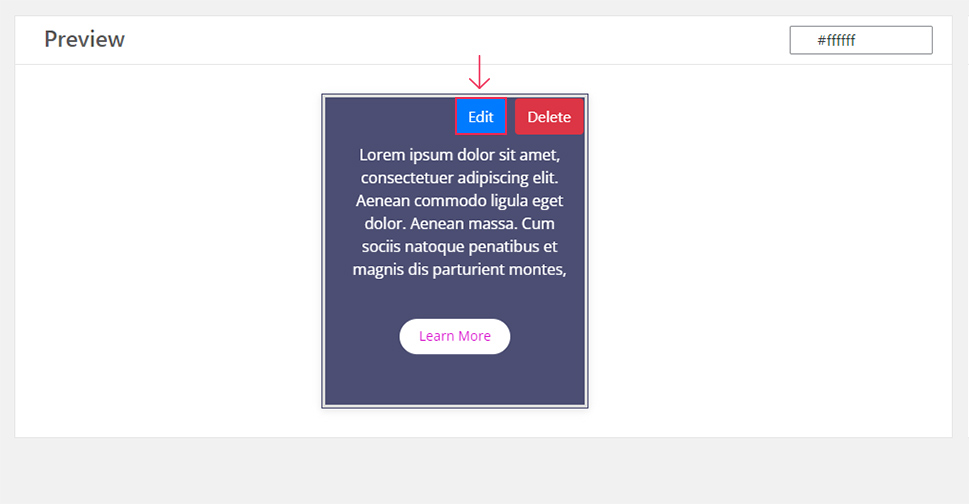
By doing so, you will trigger a new window that will allow you to enter your front and back text, change your background image, etc.
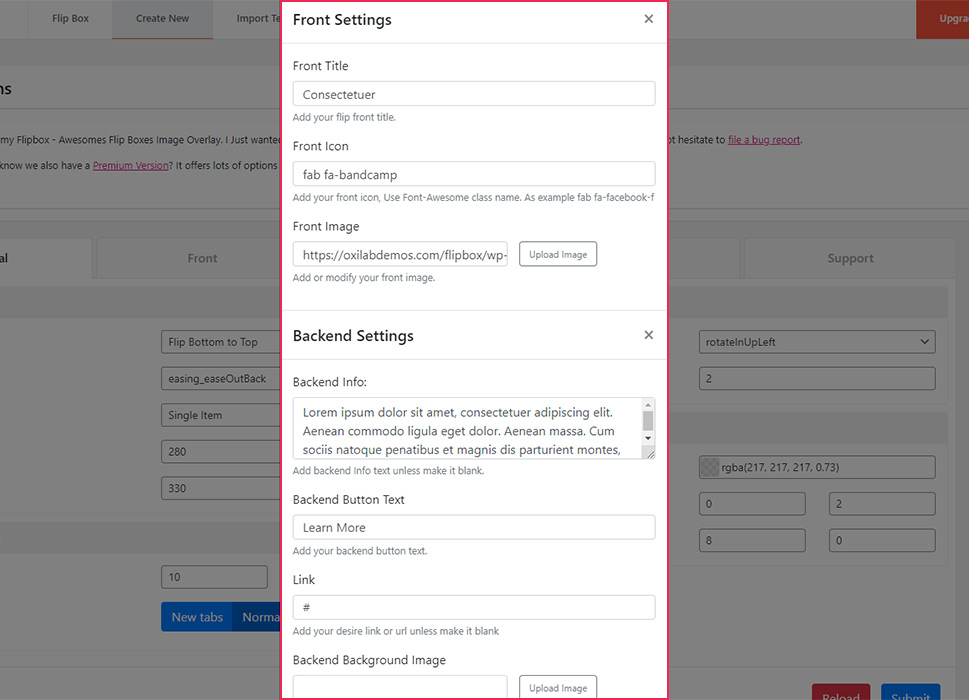
In the Front Settings section, you will be able to change the Front Title, Front Icon, and upload your Front Image. The Backend Settings section allows you to edit the content that will activate once your flipbox “flips over”. Here you will be able to find the options to insert your Backend Info, Backend Button Text, Link (of your button), and Backend Background Image.
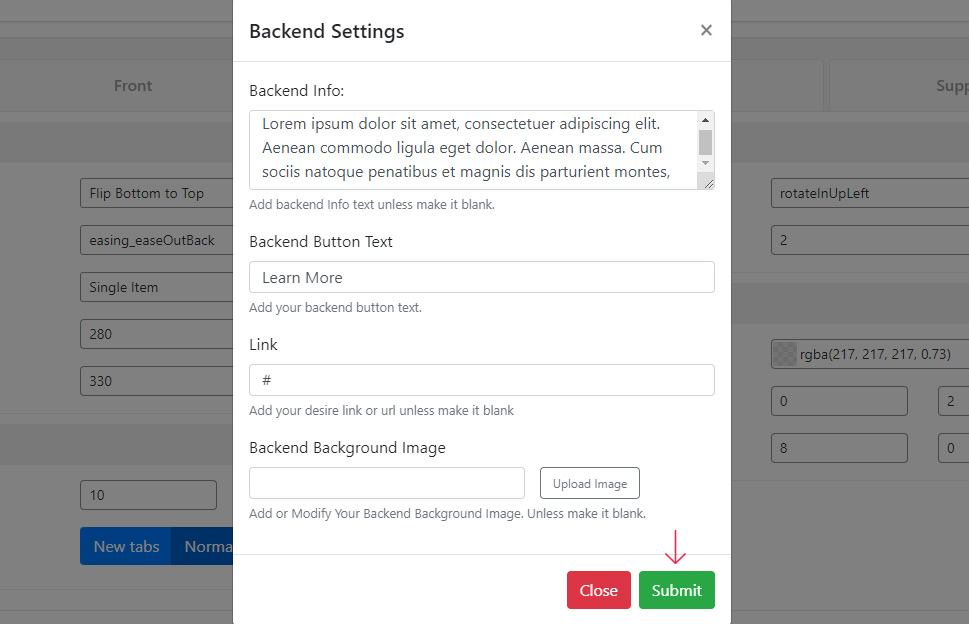
Just make sure to hit the Submit button when you’re done.
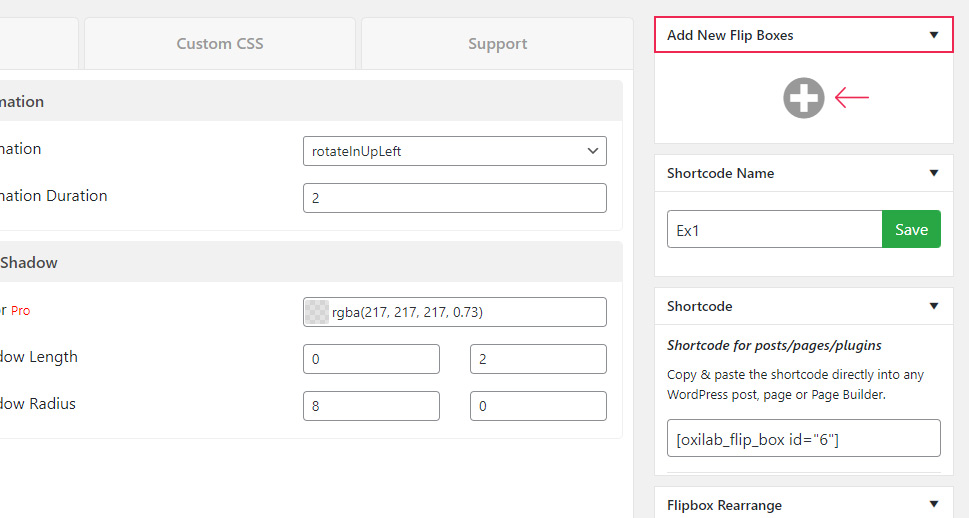
If you wish to create more than one flipbox, you simply need to select the “+” icon located in the meta box called Add New Flip Boxes (on the right).
Once you do this, you will open a new pop-up with customization options identical to the ones we’ve mentioned right above.
Once you’re done with adjusting the settings of your flipbox, you can proceed to insert it into your WordPress site.
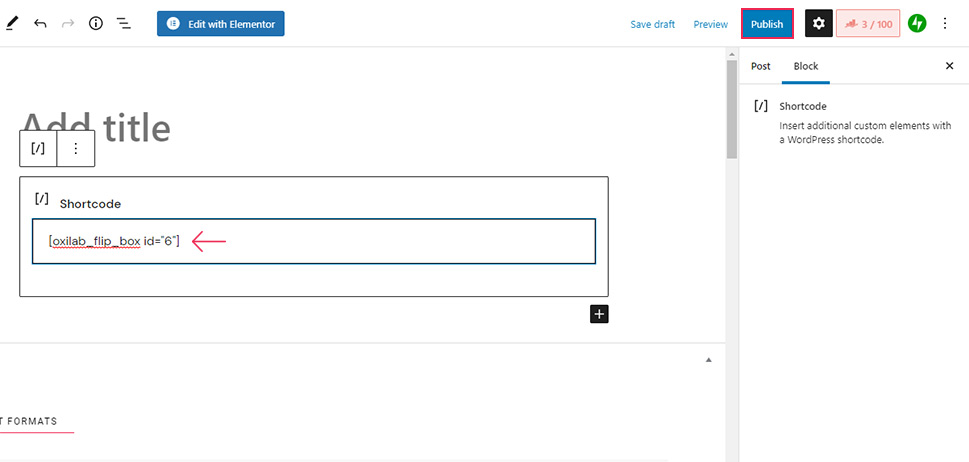
You can do this by simply using the shortcode generated on the right side of your settings screen. You will find the shortcode under the Shortcode meta box:
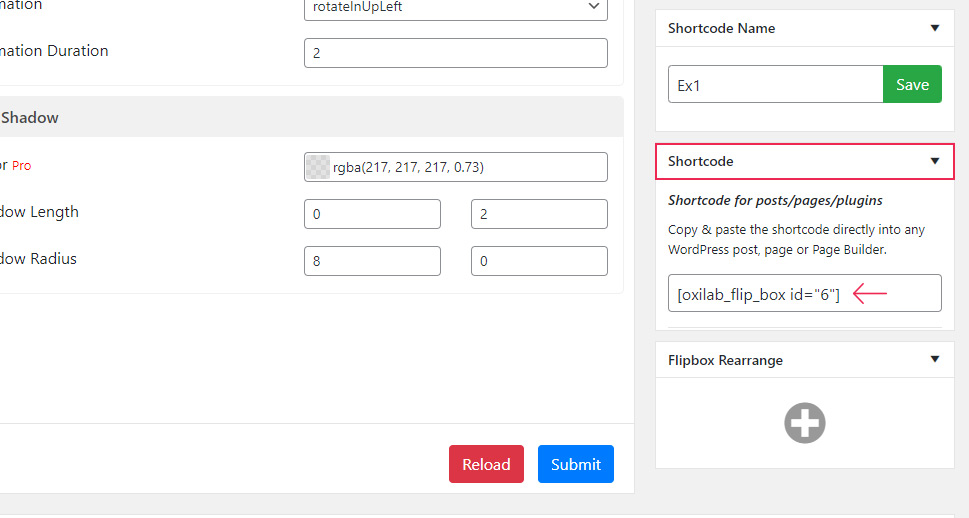
You should copy this shortcode. Then, head to the page/post of your choice and paste the shortcode using the shortcode block. To do this, simply hit the (+) or “Add Block” icon in your editor and find and add the Shortcode block.
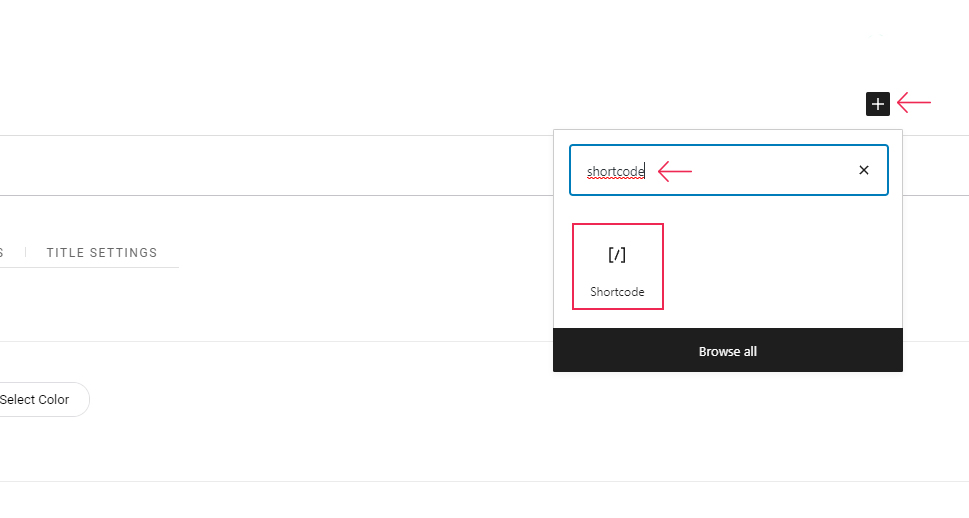
Paste the shortcode into the block, hit the Publish/Update button, and you’re all set.
You can click the Preview button to see what your flipbox will look like live on your page/post. Also, you can use the Tablet and Mobile tabs to view what your page looks like on mobile and tablet screens.
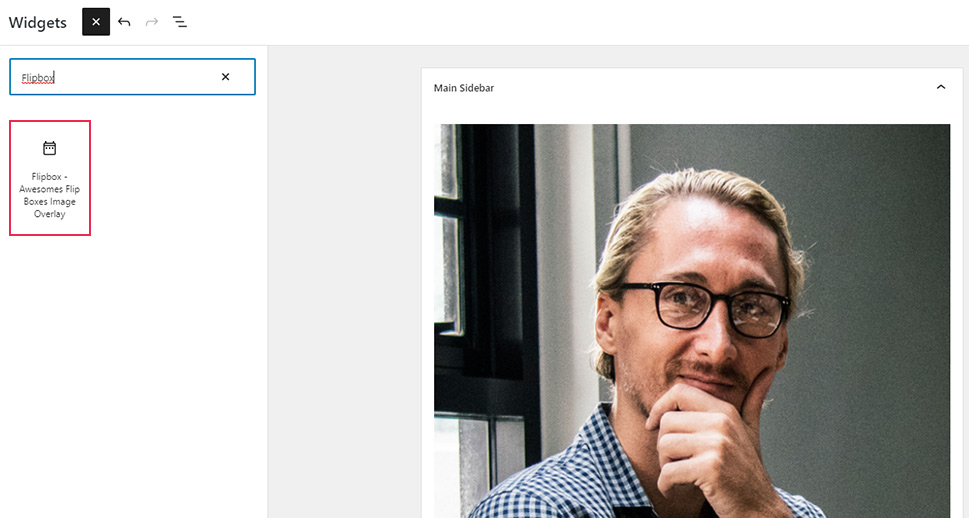
If you want, you can also insert a flipbox widget into any widget area of your choice (of course, if said widget area is available in the theme you’re using).
Head to Appearance >> Widgets and add the block widget called Flipbox – Awesome Flip Boxes Image Overlay. Simply drag and drop the widget to your desired widget area.
You then need to insert the style id, which you will be able to find on the plugin page (Flip Box tab).

Hit the Update button and that’s it. You will be able to see your flipbox widget in action once you access the widget area that you added your flipbox to.
To learn all about using block widgets in WordPress, we suggest that you check out our article on the same subject.
Wrapping Things Up
Flipboxes are rather practical and visually immersive elements you can add to your WordPress site to enhance the overall user experience of your visitors. We recommend using the Flipbox – Awesome Flip Boxes Image Overlay plugin as it is quite easy to set up and comes with all the features needed to completely customize and stylize the look of your flipbox according to your needs. This includes using different flip effects, using some additional animated effects for that extra oomph, setting the styling of fonts, buttons, and icons, and more. We encourage you to go ahead and create flipboxes that will best fit your brand identity and vision to truly enrich the interactivity of your WordPress site.
