How to Use the New Block-Based Widget Editor in WordPress

The release of WordPress version 5.8 has brought one major change to its users – the latest WordPress widget block editor. What this essentially means is that the default widget system used for adding widgets got replaced entirely with the new, Gutenberg block-based one. So, in a way, this almost resembles the situation that occurred in the not-so-distant past, when WordPress first introduced the Gutenberg block text editor for creating pages and posts. And now, you can also use the same block-based system to create, modify, and add widgets to different widget areas on your site.
Thus, we’ve decided to make an introduction to this new widget block editor and show you how to use it to add widgets in WordPress. We’ve also made sure to mention some of the most useful block widgets and explain what you can use them for, so make sure to read on:
Qode Themes: Top Picks
View Collection


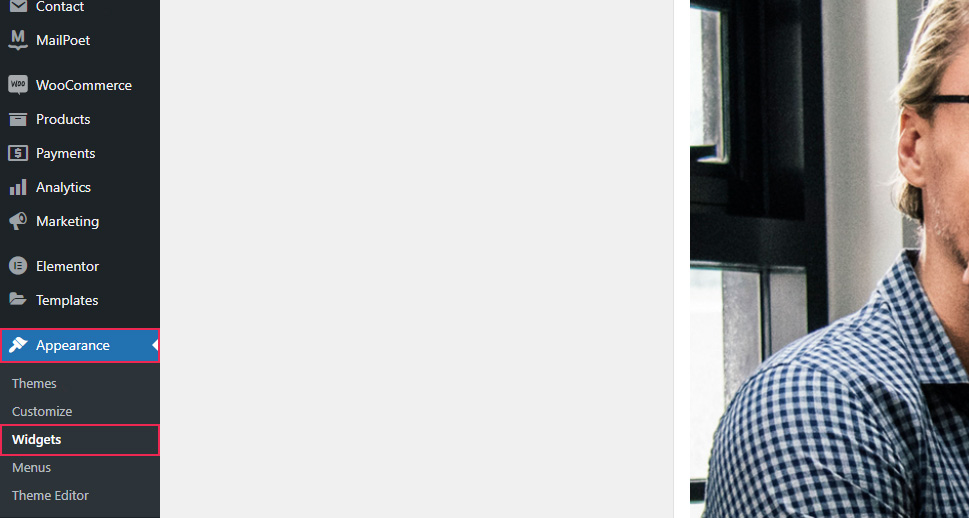
There are two ways in which you can access the new block widget editor. The first way is to head to Appearance >> Widgets. This action will open the new widget editor.
The other way to do this is to go to Appearance >> Customize and then click on the Widgets screen.

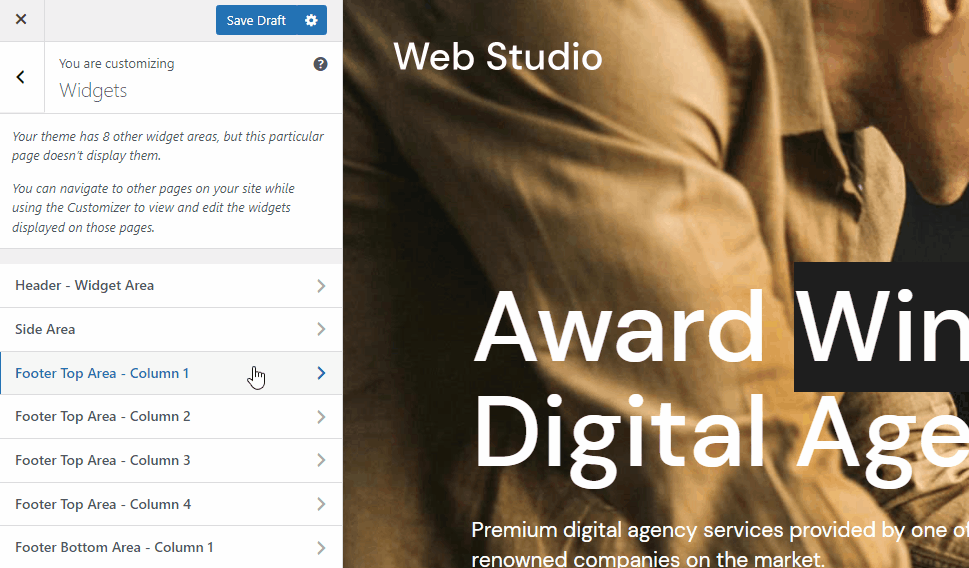
If you use this interface, you will also be able to see the way your widgets look live on your site while editing them. That being said, if you want to have more editing space and see all the options more clearly, we recommend using the first option to add your widgets. But regardless of which one you choose, the widget editing process is generally the same. For the purposes of this article, we will be using the Appearance >> Widgets screen.
As we’ve mentioned in the very beginning, the new widget editor works by using blocks, i.e. the same Gutenberg block system also used for creating WordPress pages and posts.
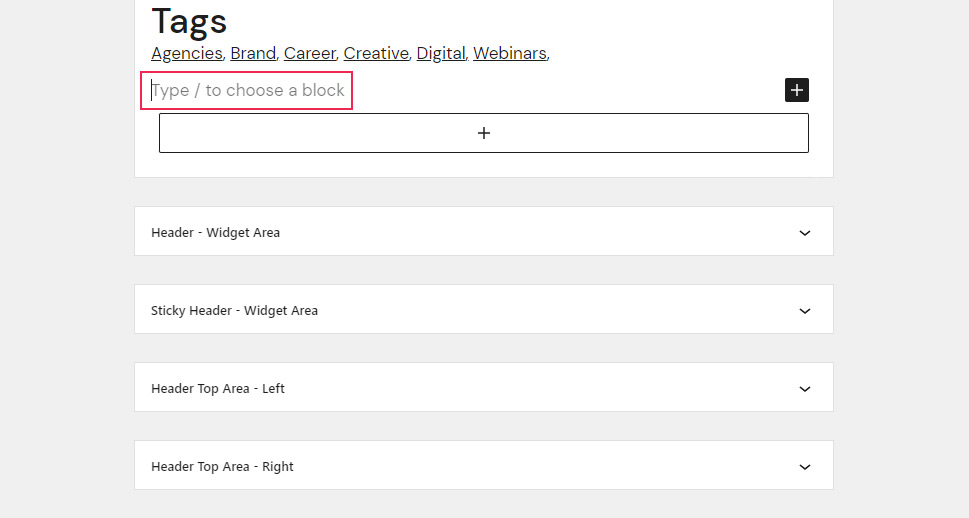
In order to add a new widget, you simply need to hit the plus (+) icon located in the top left corner of the screen.
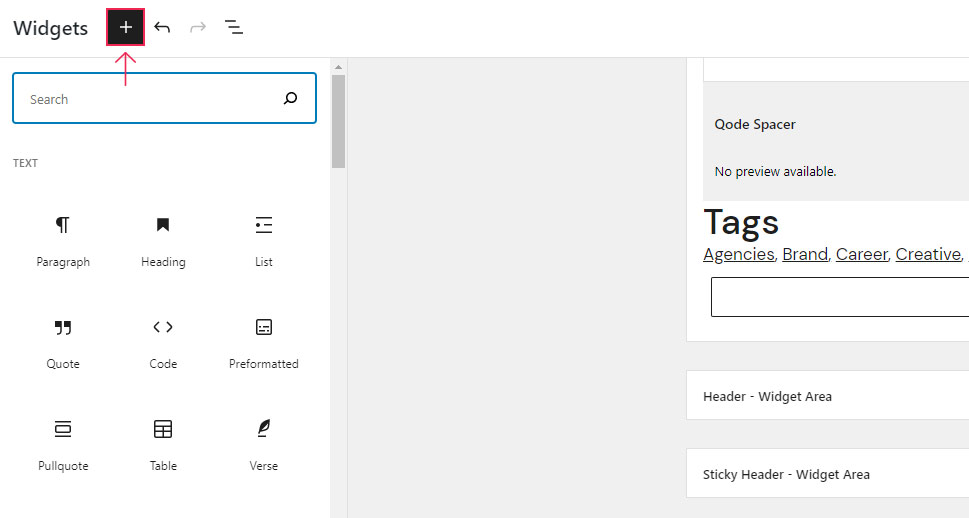
Alternatively, you can click on the plus icon that can be found in the specific widget area you want to add your block to.
For example, if you want to add a text widget into your widget area, simply select the Paragraph (or Heading) block. Then, insert your desired text within the block.
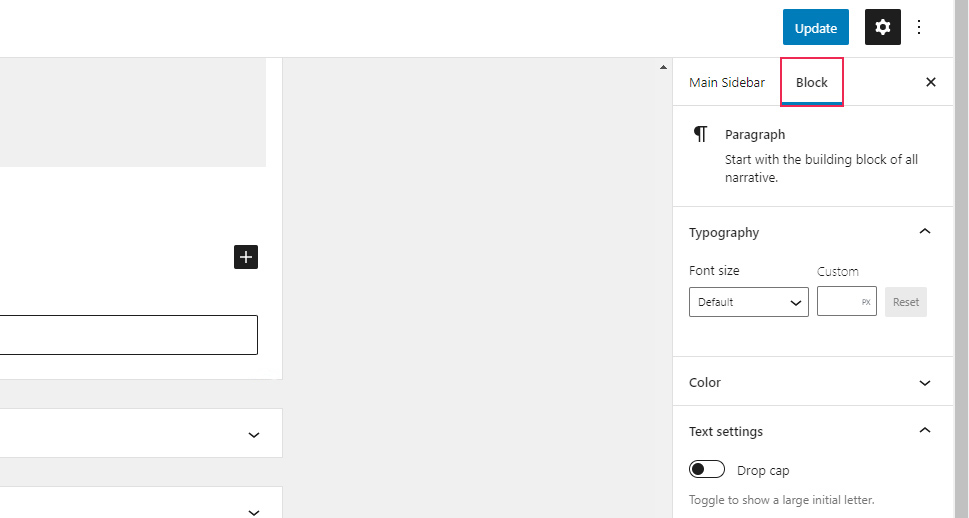
Once you click on the block, you can also edit its settings by using the regular block sidebar and hitting the Block tab.
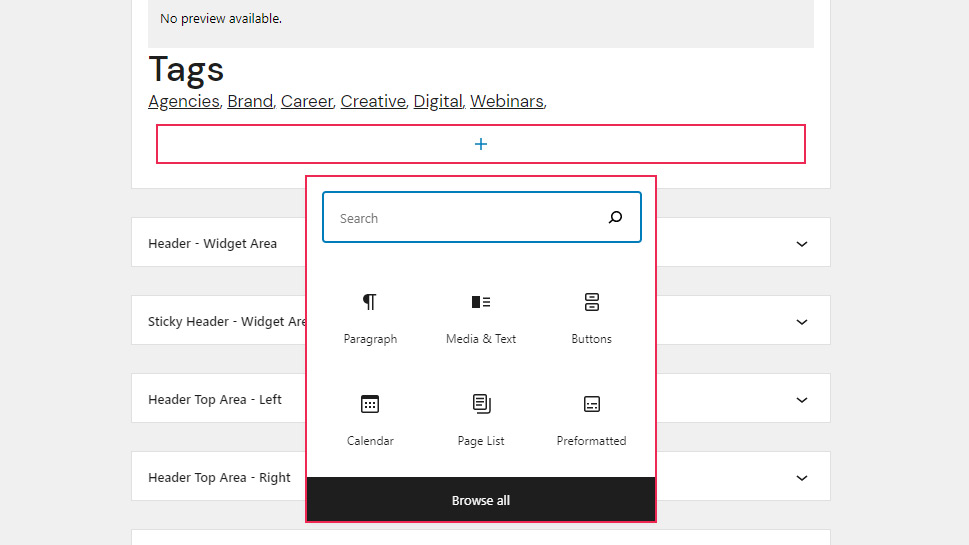
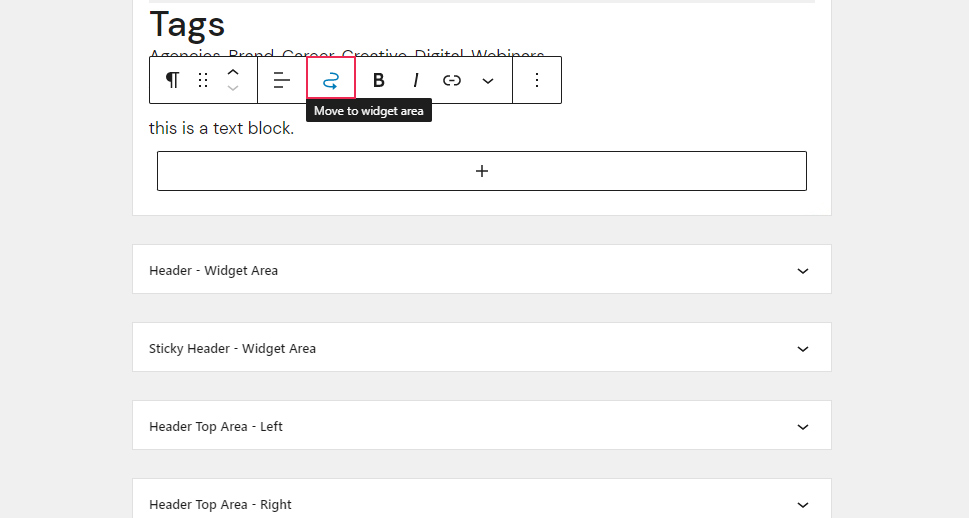
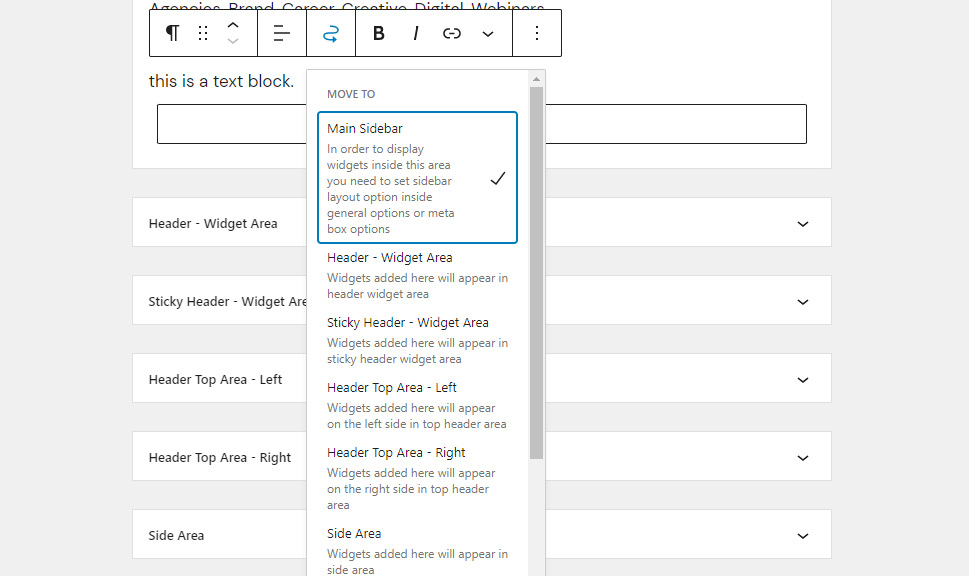
If you select the wavy-looking icon located in the block toolbar, you will be able to move different widgets to other widget areas. Once you click on it, simply pick the area you want to place your widget in from the dropdown menu.
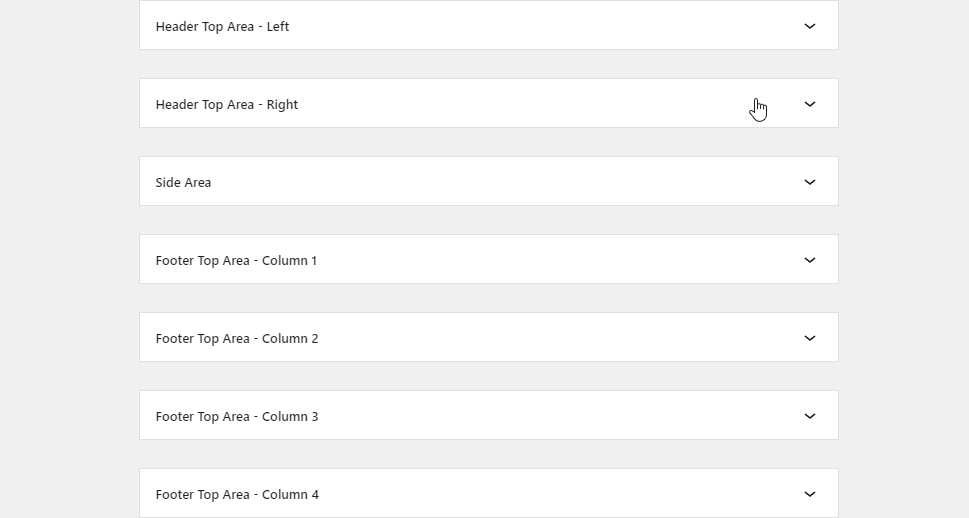
If you want to open and use any other widget area, you just have to click on the icon next to that widget area’s name. This will expand the widget area options and you will be able to add and edit different blocks there. Like this:
As you can see, the new widget editor works very similarly to the default WordPress block post/page editor. However, if you used to regularly add widgets while the old-fashioned way of doing it was still available, then it might take you a bit of time to get used to this new interface at first. That being said, due to it having similar editing features as the default block editor, you’ll get used to the new way of using the widget editor in no time. Plus, the block widget editor gives you the ability to edit your widgets (and widget areas) in more detail, which is always a good thing when attempting to modify your site’s appearance.
Still, if you find that this new block widget editor simply isn’t cutting it for you, there are ways to disable the new block widgets. We suggest that you check out our article that covers this topic for more details.
Archives
The Archives widget will allow you to display and organize your previous posts by month and year, helping your visitors find any older articles you’ve posted in no time.
If you want, you can show users the number of posts you’ve published on a monthly basis using the Show post counts option.
Another great option is called Display as dropdown – as its name suggests, it will display all your previous posts within the dropdown, allowing you to minimize the amount of space you’re using while still letting users efficiently browse through your articles and find your older work with ease.
Latest Comments
The Latest Comments widget does exactly what its name indicates – it shows the latest comments that can be found on your site or blog. In addition, it will also specify which article the comment belongs to, allowing you to showcase all the activity on your blog and create a sense of community on your site. In turn, this can even inspire other users to also engage with your posts and thus help you get more comments on your WordPress blog.
All this being said, we recommend that you limit the number of comments that users will be able to view at a time to prevent running into any page loading issues.
Latest Posts
This block will show a list of your most recent posts, allowing visitors to always be up to date with your newest content regardless of the page they’re browsing at that particular moment. There are many different ways in which you can customize this widget. For instance, you can add featured images, post excerpts, or the name of the author to provide more context to potential readers. You can even display content from particular categories or authors only.
Social Icons
This widget will allow you to easily put up a list of your social icons so that your visitors can easily access and explore your social media profiles. You will be able to add links to networks such as Facebook, Instagram, and more. If you want, you can even change the icon colors to match the overall style and design of your blog.
Navigation Menu
Navigation Menu is another useful widget that will display the desired navigation menu in any widget area of your choice. Having a solid website navigation system on your WordPress site is mandatory for an optimal user experience, and this widget can only contribute to improving your WordPress navigation in general. For example, with this widget, you can easily create a separate menu with the most important site links in your footer, and place links to some of your most popular posts in your blog sidebar area (or anywhere else you deem fit).
Media & Text
As its name suggests, the Media & Text widget will allow you to insert any piece of text and media into your preferred widget area. You can upload images, videos, audio, and other files using the Upload option or by selecting files from your media library, and then adding your written content right next to it. Depending on its purpose, this block widget can make your website appear more informative, engaging, and visually appealing all at once.
Conclusion
And that concludes our brief overview of the new WordPress block widget editing system you can use to add widgets to your WordPress site. As you can see, adding widgets with this new editor is quite similar to adding blocks when creating your WordPress pages or posts. You just have to go to Appearance >> Widgets (or Appearance >> Customize >> Widgets), hit the (+) icon (the “Add block” button), and start adding blocks to your preferred widget area.
Also, keep in mind that there is a wide variety of other widget blocks you can explore that go far beyond our list of most useful widgets. So, feel free to play around and explore other options to discover which blocks work best for your specific needs and start enhancing the appearance, user-friendliness, and overall functionality of your site.
