How to Set Up Search Filters in WooCommerce

As your online store starts growing, more likely than not, the number of products you have for sale will start to increase. And when that happens, it might become difficult to have all these products easily accessible to your potential customers. This is the moment when most online shop owners turn to WooCommerce search filters for help.
Say that you run a women’s clothing and accessory store that offers new trendy products each season. Combine that with different items that you might want to present – trousers, skirts, leggings, bags, glasses, what have you. Then, you’d also have to showcase articles with different materials, colors, price ranges, and the list goes on. See how the number of products and their variations can balloon quite easily and become too unwieldy to browse. And that’s precisely why search filters are such a great solution if you have too many products in your catalog.
Luckily, if you own a WooCommerce-powered store, it’s quite easy to set up search filters for your products. And while there is a default filter WooCommerce functionality available that contains some of the most common filtering options, to get a much wider range of options and more possibilities to display your filters in general, we recommend that you use a suitable search filter plugin. So this time around, we will show you how to easily add and customize search filters in WooCommerce using a free plugin, so make sure to read on to learn all the steps needed:
eCommerce WordPress Themes
View Collection


Generally speaking, search filters represent a useful search functionality that’s specifically focused on your products. By adding this type of functionality to your store, your visitors will be able to easily navigate through the different kinds of products you put up. That’s because product filters allow them to narrow down their search until they are only able to find and see the products they are specifically interested in. And there are many different ways in which you can use these filters – you can filter products by price, categories, tags, rating, and even attributes like size, colors, gender, material, etc.
By helping people easily find products that meet their specific criteria, you greatly improve their user experience and also enhance their entire shopping process. Naturally, this can only lead to more customers actually wanting to buy your products. Moreover, due to the smooth product browsing experience, you can also strengthen your customers’ trust and get them to return to your store to shop for more products again.
So, without further ado, let’s see how you can easily include this product search functionality into your WooCommerce store and greatly improve the user experience of your customers.
If you plan to implement search filters into your WooCommerce store, a great way to do so is to use a plugin called Product Filter (by WooBeWoo). This freemium plugin will let your customers easily filter your products by different criteria, like price, tags, attributes, categories, etc.
What’s great about this plugin is that all available criteria are fully customizable, allowing you to set filters for your products in any way that best fits your (and your customers’) needs. You also get to display your filters in a variety of different ways –as a radio button list, checkbox list, a dropdown, etc. Plus, as you add your filters, you get to see all changes in an instant thanks to the live preview functionality. Adding filters to your pages is also quite simple to do – you can insert them using a shortcode or even add them to your page’s sidebar with the help of a widget.
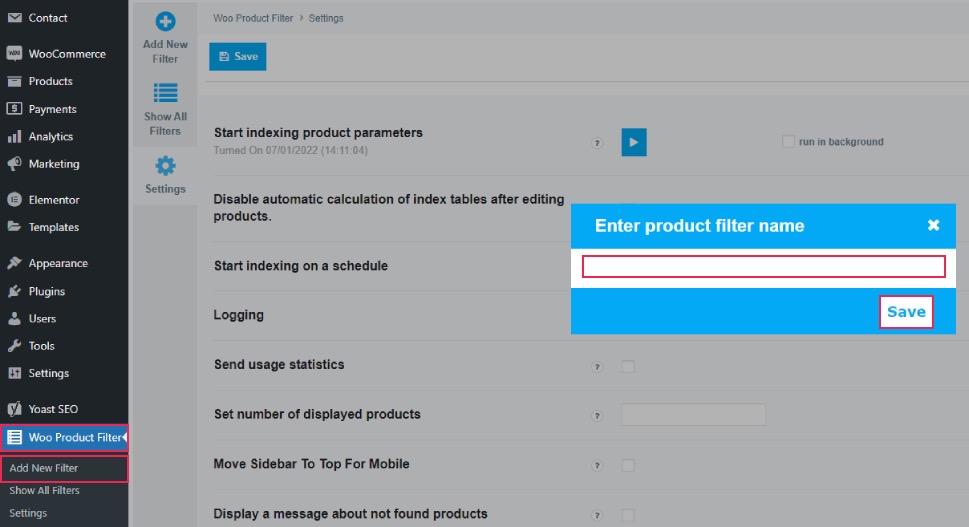
After installing the plugin and activating it, you should access Woo Product Filter >> Add New Filter.
Enter the desired name for your filter, then click Save.
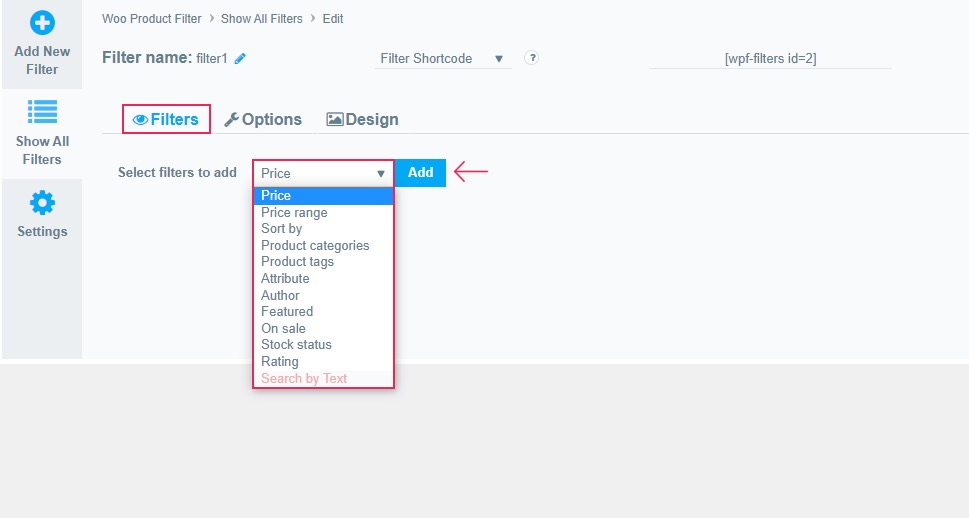
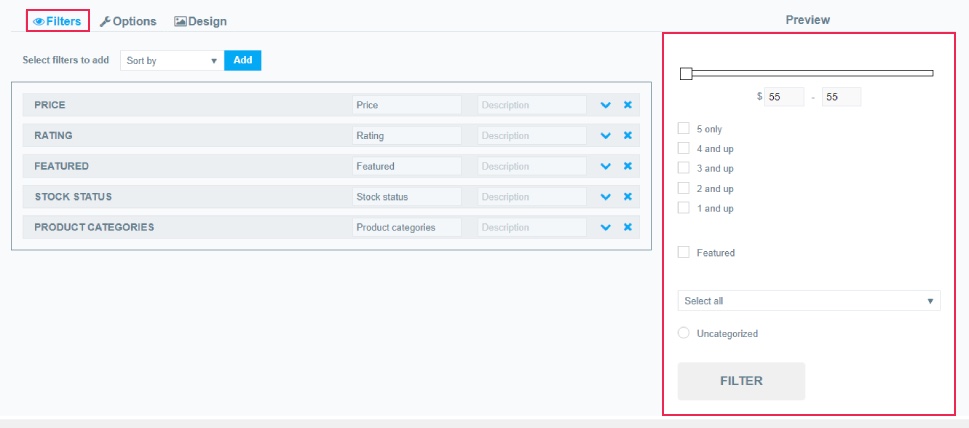
Once you do so, you will instantly get to select all the filters you wish to add to your search filter element.
You just need to select a desired filter from the dropdown and then click on Add.
Some of the available options include Price/Price Range, Sort by, Sort by product categories/tags, Attribute, Rating, On Sale, etc.
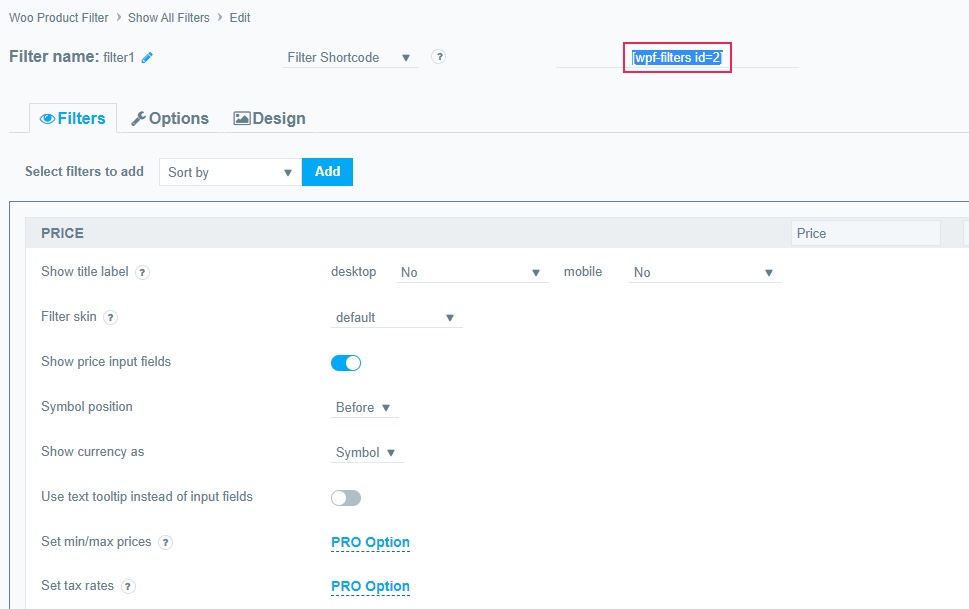
For example, if you add a price filter, you get to change the title of this filter and add a description. Then, you can also adjust a whole other set of useful settings that become available once you open the dropdown using the arrow.
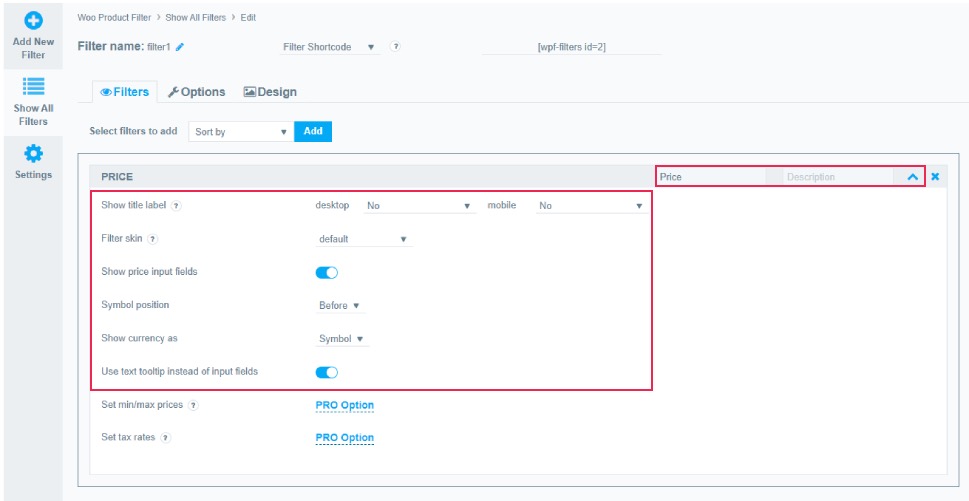
Some of the options here include the ability to show input fields for the price, choose the way you want the currency to be shown as well as its position, set min/max prices (an option available in the pro version of the plugin), and more.
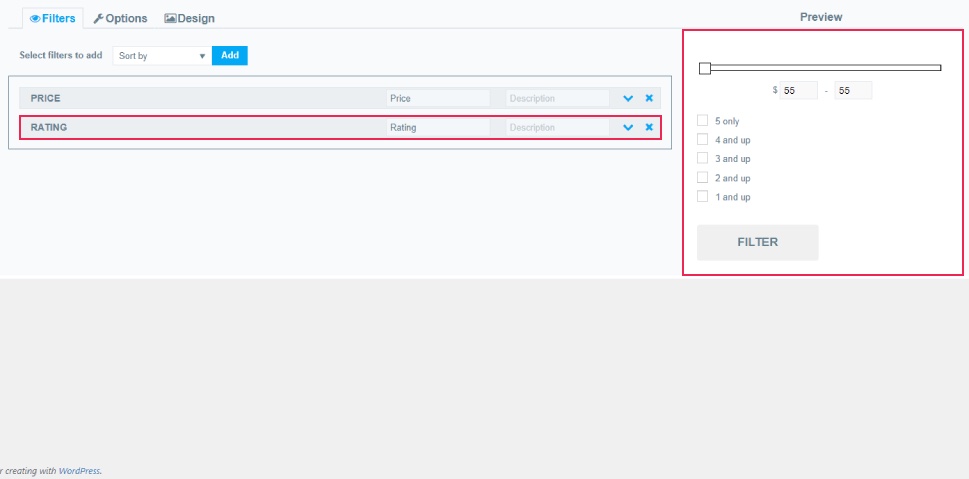
The entire time you’re customizing your filter option, you get to see a preview on the right side of the screen.
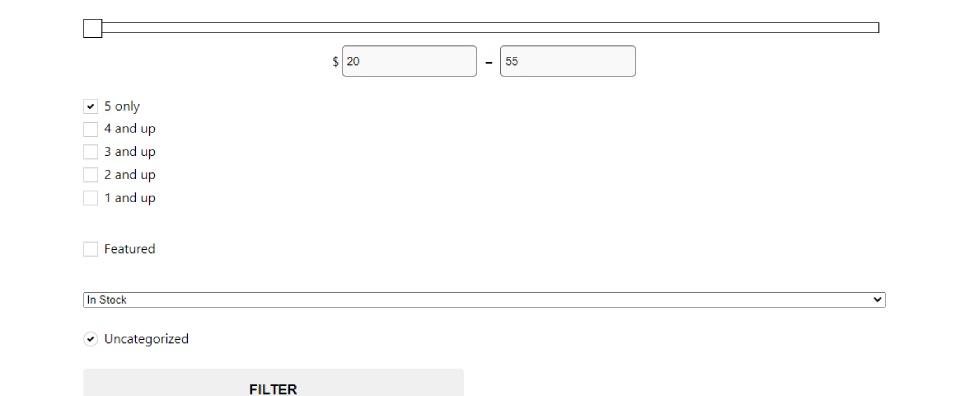
This screen will have new items added to it as you insert more filters. For example, here’s what your filter can look like once you add a rating filter as well.
For demonstration purposes, we’ve decided to add a few more filters, like ‘featured’, ‘stock status’, and ‘product categories’.
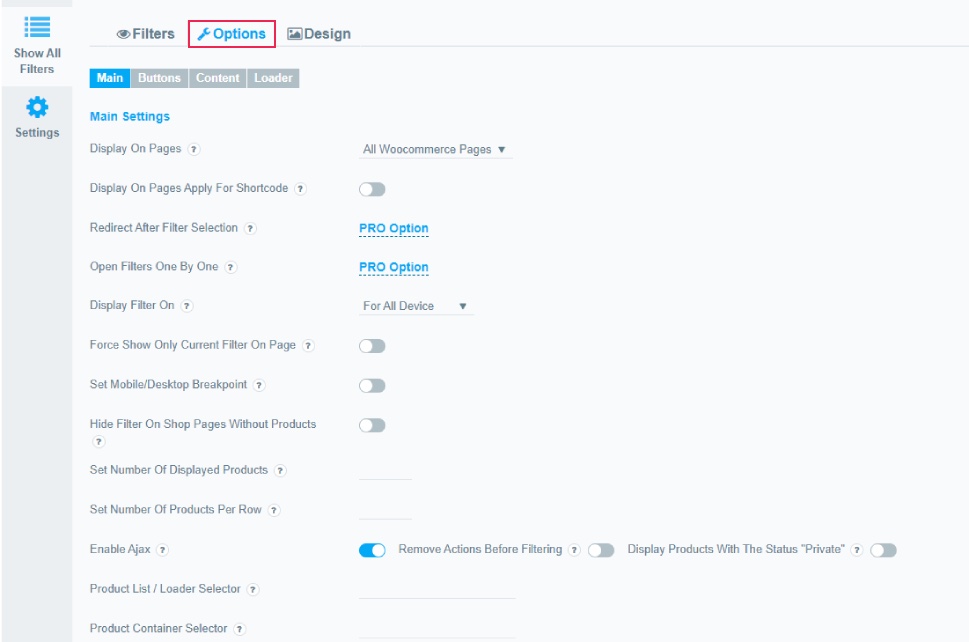
Once you customize each filter to your liking, you can access the “options” tab where you can further customize the way you want your filters to be displayed on your site.
For example, you can choose whether you want to display your filters on all WooCommerce pages, on your Shop page only, on your product page, etc. Also, you can decide whether you want to display filters on all devices, or on desktop/mobile only, set the number of products you want to be displayed, enable Ajax, and so on.
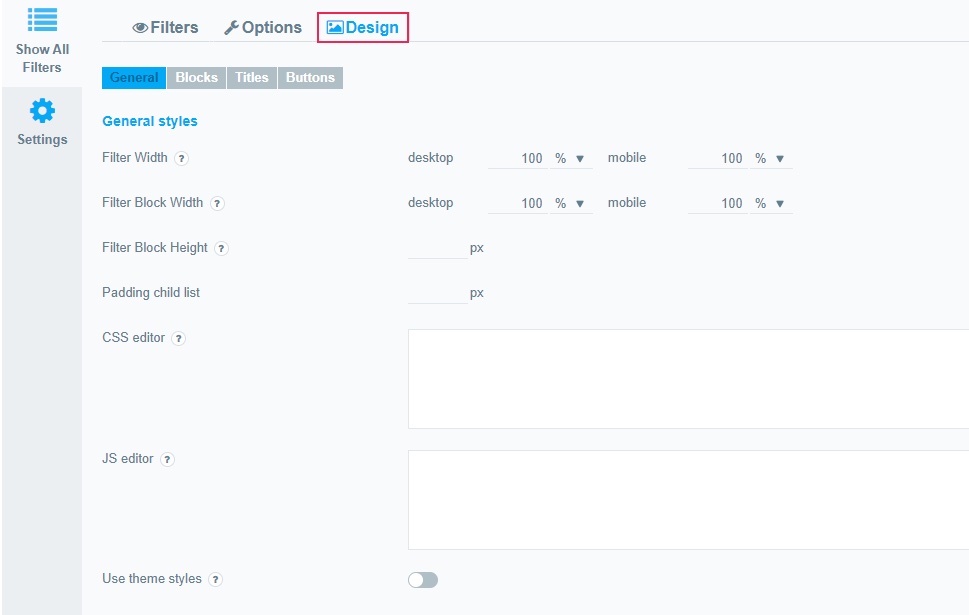
There is also the Design tab, allowing you to set things like desired filter width, add custom CSS/JS styling, etc.
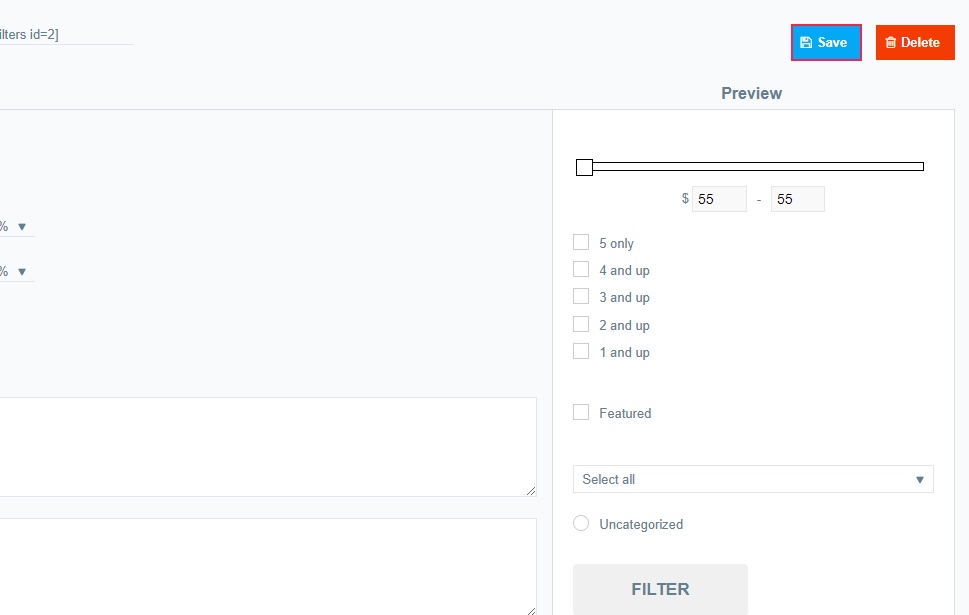
Once you’re satisfied with all your changes, make sure to hit the Save button located at the top right corner of the page.
Once you are done with setting up your search product filter, all that’s left for you to do is add it to your page. There are a few different ways in which you can do this.
To insert your filter with a shortcode, simply copy the shortcode located above all your filter options.
Then, access the page you wish to add your filters to and paste the shortcode in the “shortcode” block.
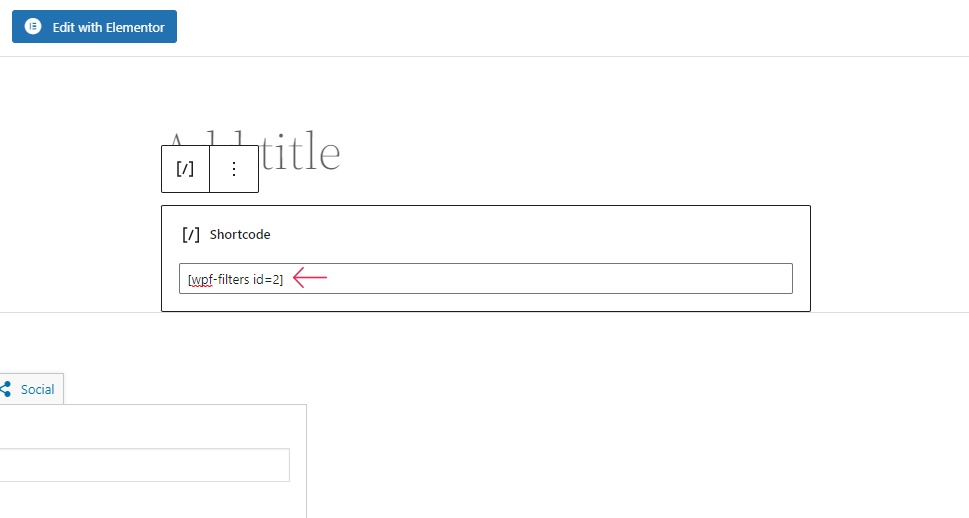
Hit Preview to see what your product filter looks like on your page.
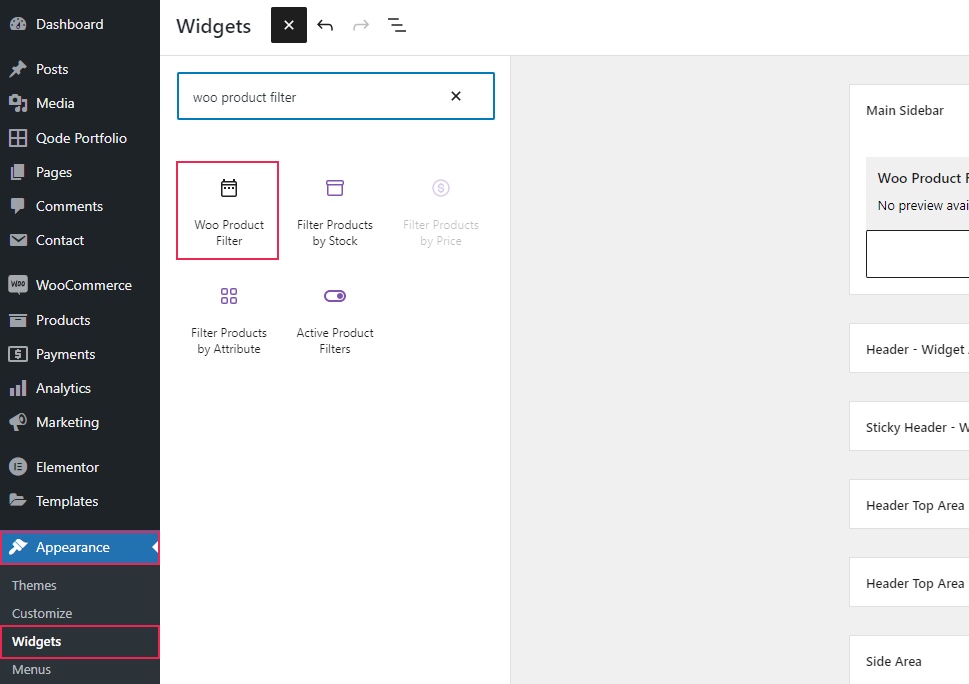
You can also easily add your price filters to a widget area using the price filter widget.
To do this, head to Appearance >> Widgets and find and select the Woo Product Filter widget. Then add it to the desired widget area.
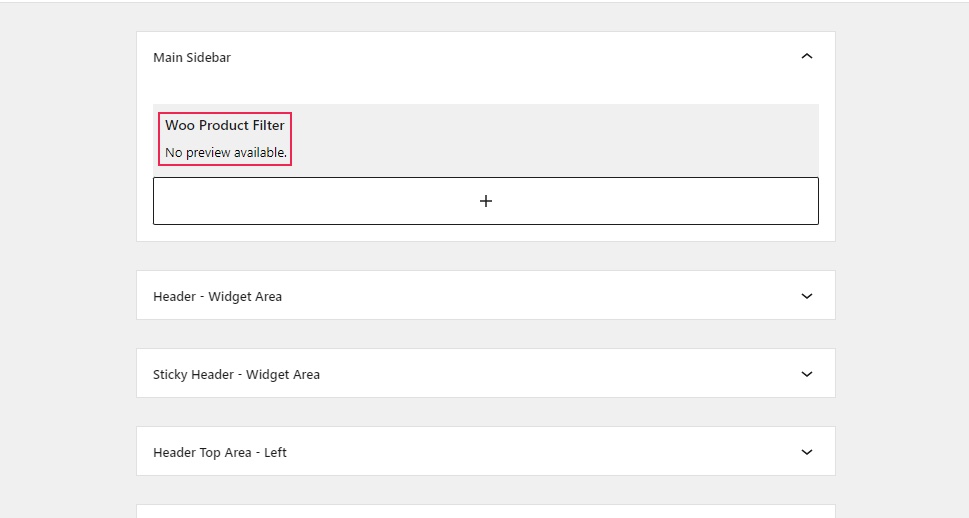
To learn more on how to add block widgets in WordPress, make sure to check out our article that covers the same subject.
Finally, here’s what our product filter widget looks like on our Shop page.

Wrapping Things Up
WooCommerce search filters can be a great addition to any eCommerce site as they can only help make your store appear more professional, organized, and user-friendly as a whole. As a result, you can only earn a favorable reputation among your customers and increase the number of sales in the long run.
One of the easiest ways to set up search filters on your WooCommerce site is to do so with a suitable plugin. We recommend using the plugin called Product Filter as it not only comes with great options that are available for free, but it’s also highly flexible when it comes to customizing and styling your filters in any way you like. After following our instructions on how to install and create your filter, make sure to check out all other available options until you find the filter combination that works best for your store.
