How to Accept Venmo in WordPress and WooCommerce

Whether you’re running a WordPress online shop and you want to add Venmo as a payment method, or you’re looking for an easy way to allow your visitors to send you money through your website, today you’re about to learn how to accept Venmo in WordPress.
Here’s what we’ll discuss:
eCommerce WordPress Themes
View Collection


Venmo is a mobile payment service that aims to simplify money transfers between users. With this service, anyone (with a Venmo account) can send and receive money and because of this, it has become a service of choice for younger demographics. People mostly use Venmo to send and receive smaller sums of money (the average transaction is $60), for loans between friends and family, for splitting bills and making other “unofficial” transactions.
The only downside is that Venmo is currently limited only to the US-based users.
The way it works is very simple. You download the Venmo app and sign up for an account. Then, you link your Venmo account to your bank account or credit card. Next, you find friends who also use Venmo by syncing your contacts or via your Facebook account. You can only send and receive money to and from people who also have Venmo.
To send money, simply enter the amount you want to send, select the recipient, and add a description of the payment. You can also request money from other users.
When someone sends you money on Venmo, the funds will be added to your Venmo balance. You can then transfer the funds to your bank account or keep them in your Venmo balance to use for future payments.
Venmo doesn’t charge any fees for standard transactions, but does have fees for transactions made with credit cards and for electronic withdrawal via instant transfer.
There are a couple of situations in which you may want to have your WordPress accept Venmo. The most obvious one is if you want to add it as a payment method in your WooCommerce shop. In addition to credit and debit cards, you should always consider offering other payment methods to accommodate the maximum possible number of users. Most commonly, WordPress merchants add a PayPal button since this is a widely popular payment method. Adding Stripe is another great way to increase your shop conversions. For freelancers, there are a number of PayPal alternatives to use in case you don’t want to use this particular method. By adding Venmo to this roster you’re allowing even more users to complete purchases through your shop and this can only be beneficial for your business bottom line.
Another situation in which you may want to add Venmo to WordPress is if you want to set up some form of donation system for your website. This can work for websites selling NFTs, for blogs with partially or completely gatewayed content, and so on. If you have a following and you want to give them a chance to support your work via occasional donations or payments, Venmo can be a great solution.
Generally speaking, adding Venmo is a smart call. However, it’s not for everyone, unfortunately. If you don’t have a considerable US-based visitor demographic, Venmo is probably not for you. Still, it being basically free, you don’t have anything to lose by having your WordPress accept Venmo.
Now, let’s see how you can set it all up. We’ll cover two plugin methods and you will decide which one works better for you.
Note: If your intention is to use Venmo as a way to collect donations, remember that Venmo is now a PayPal company and that if you’re already using PayPal for your donations, for instance using the GiveWP plugin, you can now simply enable Venmo payments as well.
For WooCommerce shops, we recommend using a plugin called Checkout with Venmo on WooCommerce. This is a plugin designed specifically for adding Venmo to WordPress (to the WooCommerce checkout page). It has a five-star rating and 2,000+ active installations.
There are two ways you can set up Venmo with this plugin. The Venmo Link option will place a link to your Venmo username. The user follows the link to Venmo and makes a payment there, after which they can proceed to place an order through your website.
The other option is the official PayPal integration for which you will need a PayPal business developer account.
Since Venmo Link is a simpler and more convenient option, it’s the one we will use.
After installing and activating the plugin the usual way, you will notice a couple of new items in your Dashboard menu, and in the WooCommerce submenu.
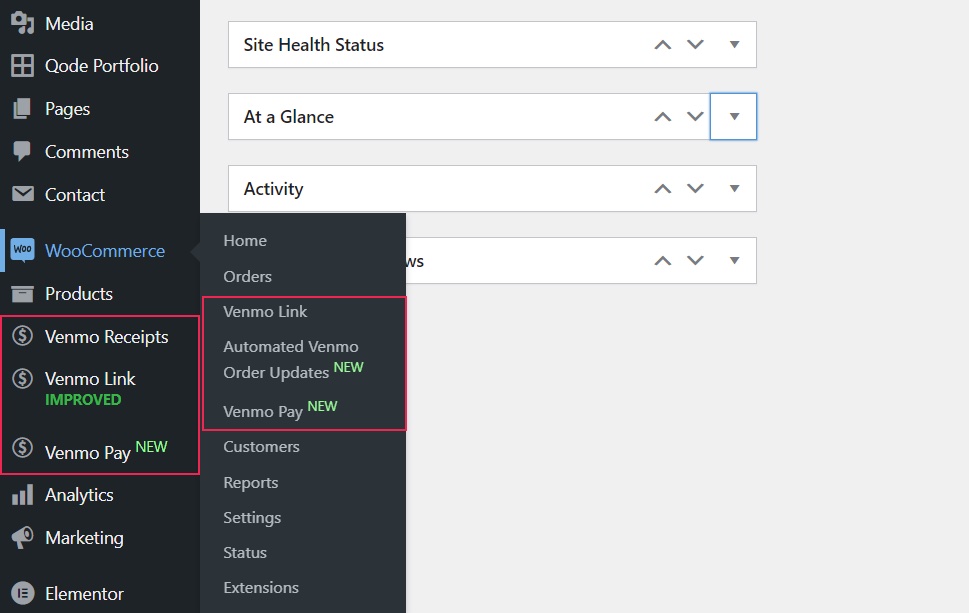
Go to WooCommerce>Venmo Link, which will take you to the Payments section. Here, the first thing to do is enable Venbo by toggling the appropriate switch.
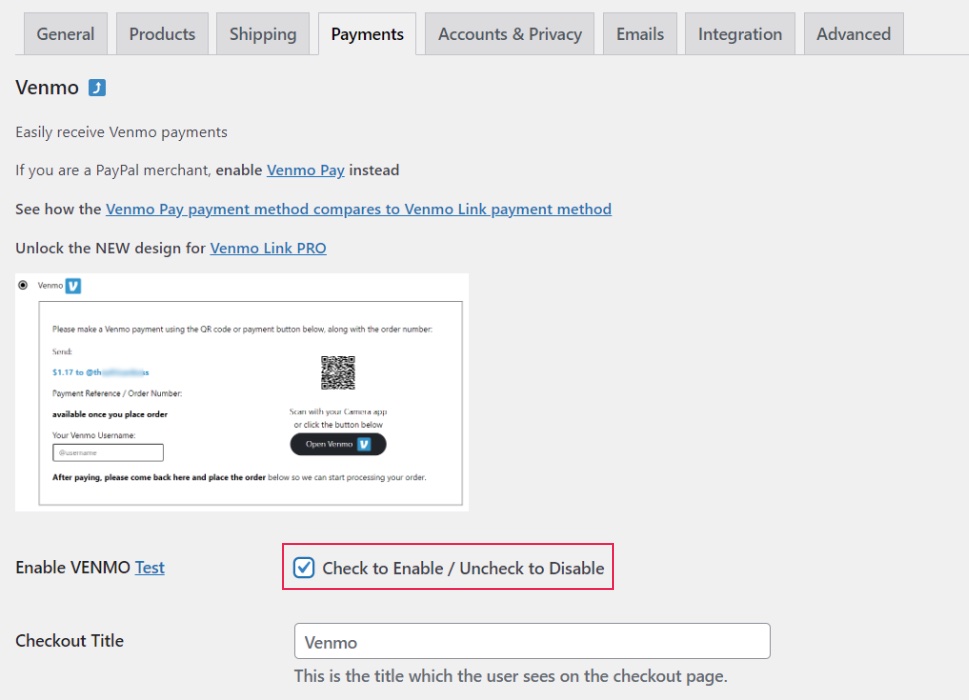
If you don’t already have a Venmo account, you can click on the Test link next to the toggle which will take you to the account creation page.
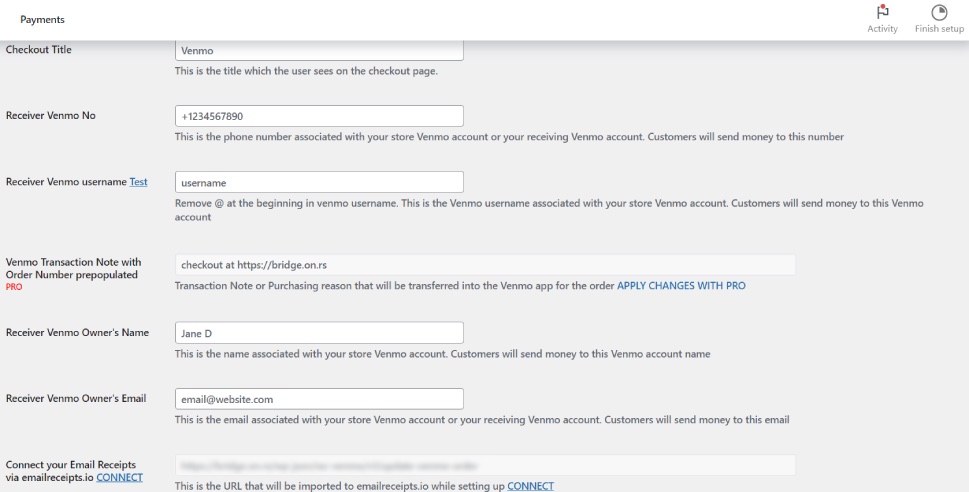
Now, go through the fields and fill them with your info: checkout title, phone number, name and email, and so on.
There’s also a number of pro features underneath this section, but since we’re covering the most convenient way to have WordPress accept Venmo, we’ll skip them. If you opt for the paid version of the plugin, you should make sure to go through all the options and set them to your liking.
These include stock updating only upon receiving the payment confirmation, thank you note, checkout notice, enabling or disabling automatic order processing, and so on.
After you’re done here, all you need to do is click on Save Changes and that’s it – you have now successfully connected your website to your Venmo account and you can start sending and receiving payments.
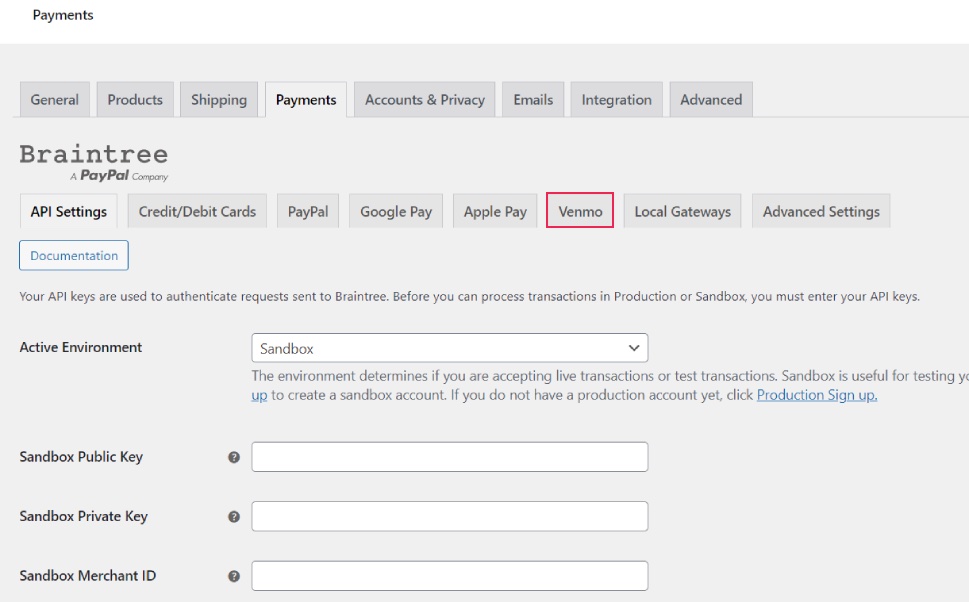
Another plugin you can use for this purpose is the Payment Plugins Braintree for WooCommerce. It is particularly recommended to users looking for an easy way to integrate several payment methods into their Woo-powered shop. With a single plugin, you can add PayPal, ApplePay, Google Pay, credit cards, local payment options and, of course, Venmo.
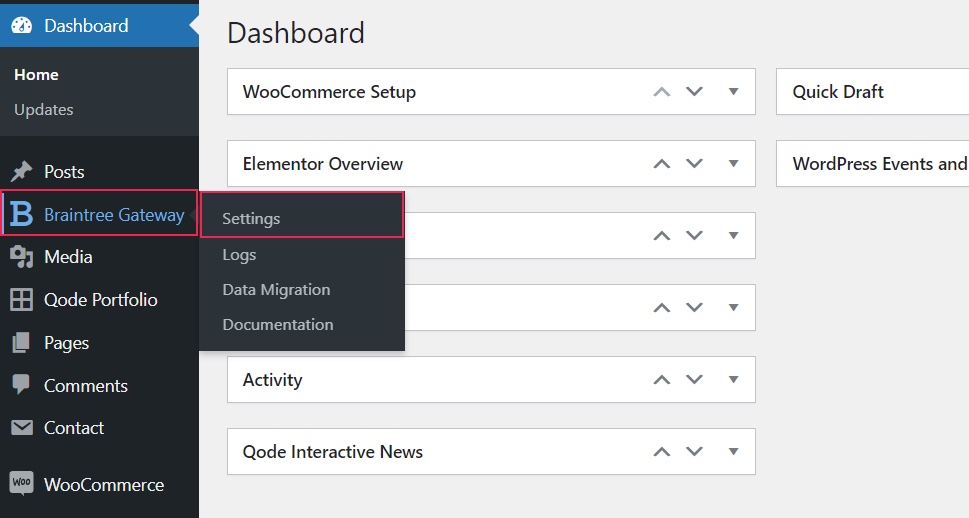
We’ll assume you already have your Venmo account in place, so we’ll proceed to setting up the plugin. After installing and activating the plugin, you will see a new Dashboard menu item called Braintree Gateway. Open that item and click on Settings.
Here you’ll find a selection of available payment gateways. Find the Venmo tab and click on it.
First, toggle the switch to enable Venmo payments.
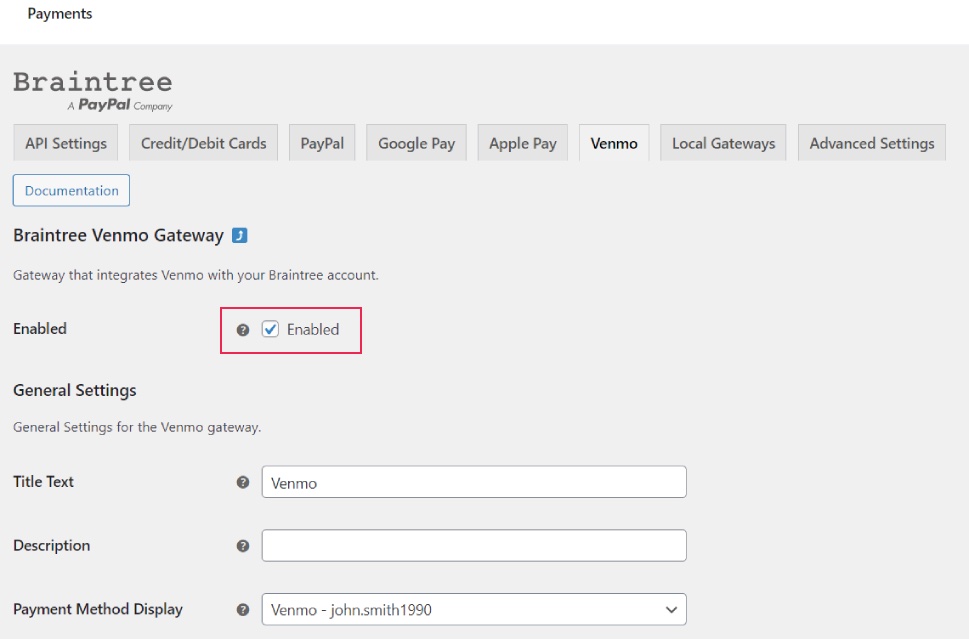
Here you will also enter the title text for your Venmo payment gateway, add a description and set how you want your payment method to display – for instance, you can have it say Venmo – Your User Name.
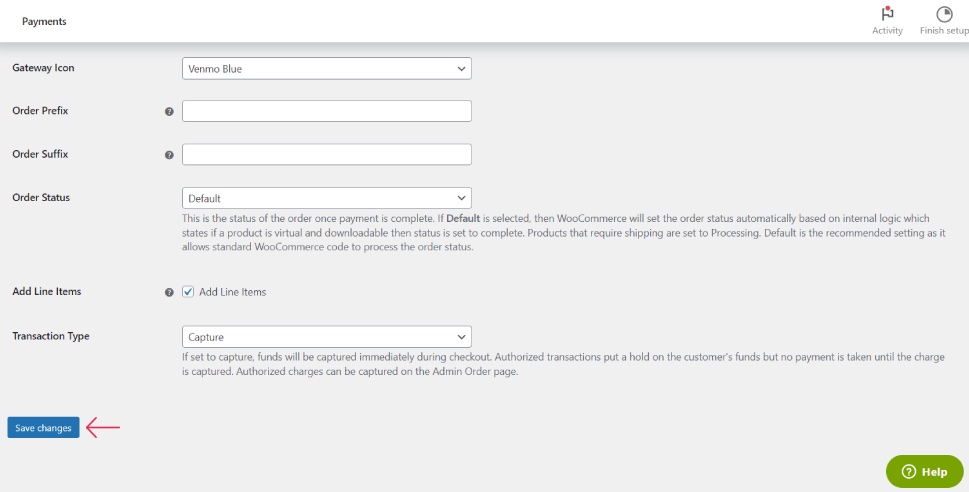
Following this, you can pick your Venmo icon, and set the order prefix and suffix. These are added to the WooCommerce order ID, which can be useful in case you want to track which purchases were made through Venmo, and which through other gateways you’re using.
The Order Status menu refers to the status the orders will have once a visitor completes a Venmo payment. If you leave it at Default, which is the recommended setting for most users, the order will be marked as Processing for orders that need to be shipped, and Completed for virtual products that only require downloading. The default setting mirrors the WooCommerce order status settings and is therefore the recommended one.
The Add Line Items option allows you to include all order line items in the transaction.
As for the Transaction Type, you can pick between Capture and Authorize. The first option means that your client’s funds are captured immediately upon checkout. With the Authorize option, you will need to capture the charge on the Admin Order page, and the funds will be on hold until you do.
After you’ve set everything the way you want, simply click on Save changes.
And with that, you’ve added Venmo as a payment method in your shop.
Wrapping It Up
Basically, enabling Venmo payment for your WordPress website means either adding it as a payment method at WooCommerce checkout, or adding a Venmo option for your PayPal-based donations.
Either way, Venmo can be added to WordPress quite easily, as we saw. If this payment method works for you – if you’re based in the US and expect transactions from US-based visitors – there’s no reason why you shouldn’t add Venmo to your roster of available payment methods. After all, we’re all spoilt for choice and your visitors will be glad they have another option at their disposal.
