How to Easily Export WordPress Menu Items

Migrating your website can be a complicated process, even if it’s just moving from one WordPress site to another. Not to mention cross-platform affairs like migrating from Joomla or moving your site from SquareSpace to WordPress, for example. Aside from making sure all your content – including text, pictures, and other media – is transferred properly, you also need to update your URLs after migration and make sure all your menus are properly relocated.
Of course, the same rules apply when you only wish to move specific pages and/or any other site elements without migrating your website in its entirety. For example, when you plan to move your menus from one site to another, it’s extremely important that all your menu items are transferred correctly so that they don’t link to the wrong pages. In these situations, using a suitable plugin can help speed up your migration process immensely and allow you to focus on the task at hand much more effectively.
While WordPress does come with its own default Import/Export tool, using this tool on its own is more suitable if you want to migrate all your content at once, and not just specific menu items. In this tutorial, we will focus on showing you how you can easily export your WordPress menu items using the help of a plugin, as well as how to import them to another site, so make sure to read on.
Qode Themes: Top Picks
View Collection


Exporting Your WordPress Menu Items With a Plugin
To export your menu items, we recommend using a plugin called WPS Menu Exporter. Not only will this plugin allow you to export your WordPress menu (or menus) with complete ease, it will also export all the pages, posts, and terms found and referenced in your menus.
For example, if your menu contains a menu item with a link that leads to your Blog page, your Blog page will also be transferred together with your menu.
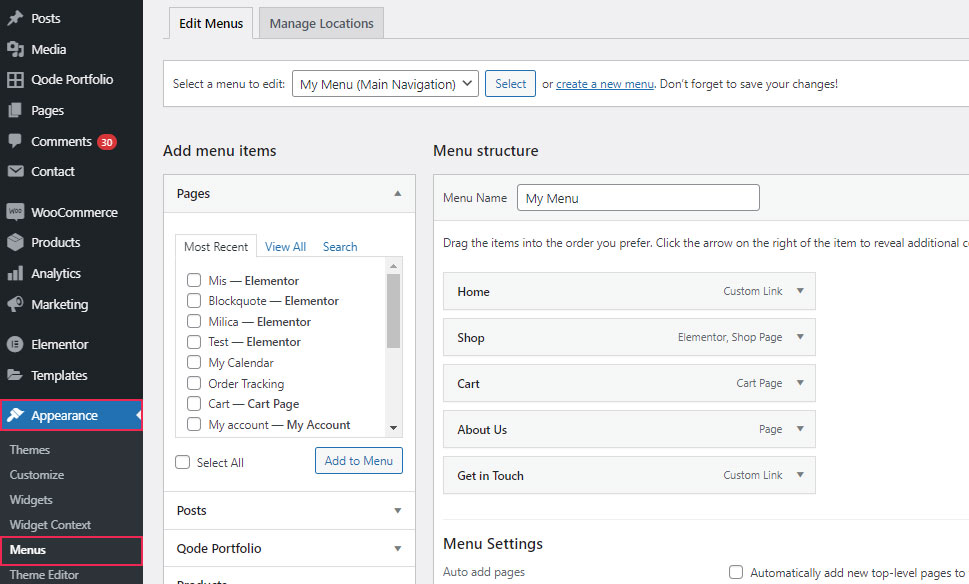
To begin, you should install the plugin and then activate it. After that, head to Appearance >> Menus to check out what your current menu looks like and see if that’s the menu you need. Also, make sure to check all the pages and links you have in your menu (or menus) to ensure that everything works well.
Then, you can head to Tools >> Export. Find the field called “Navigation Menu Items”. This new option was added by the WPS Menu Exporter plugin.
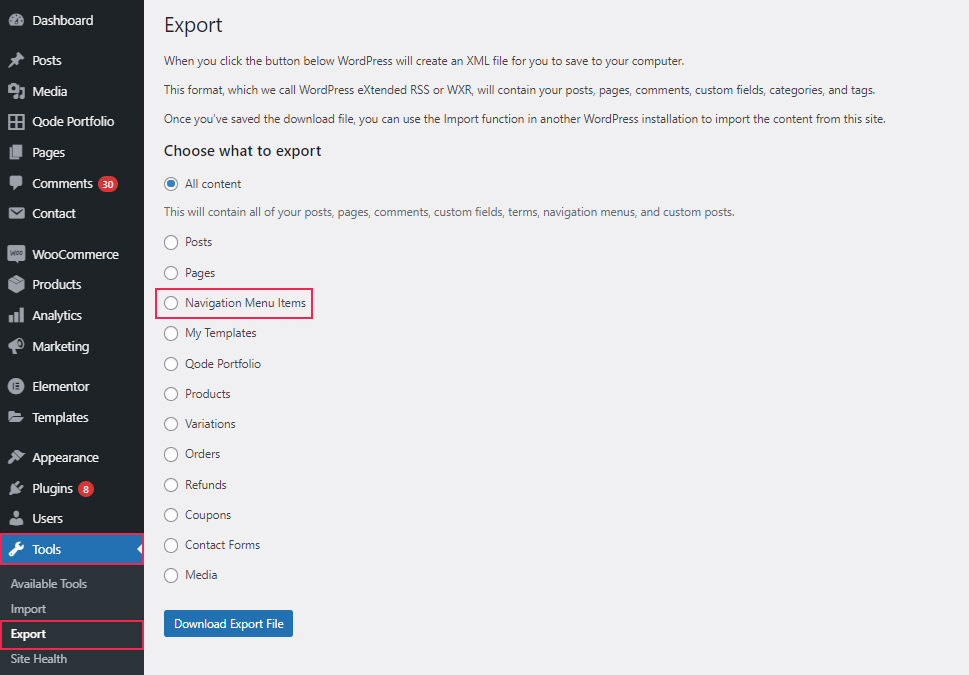
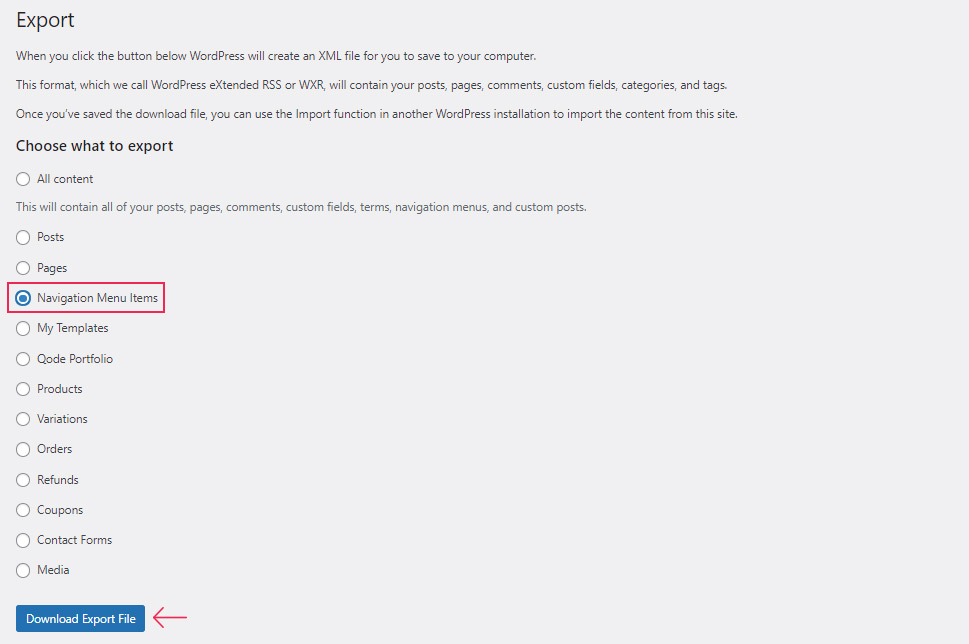
Select this field and hit the Download Export File button. By doing so, you will initiate a download of an XML file to your computer, so you should make sure to save the file somewhere convenient. You can also change the name of the file if you want.
After your WordPress menu file has been exported, you should head to the site on which you plan to import your menu. You can easily do this by using the default WordPress Import tool, so installing the WPS Menu Exporter plugin on this site won’t be necessary.
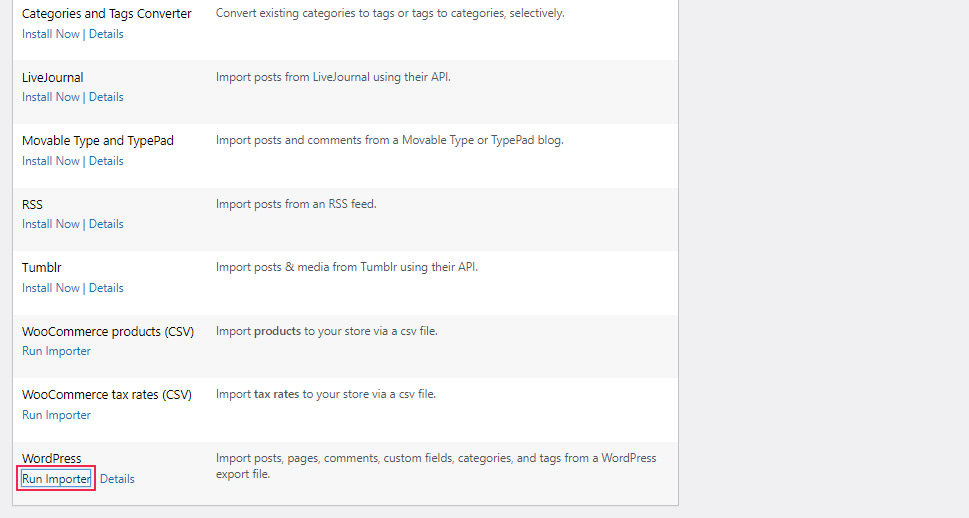
Go to Tools >> Import and head down to the WordPress section. Then, hit the Install Now button.

This will make another link appear in the place of the “Install Now” link, called Run Importer.
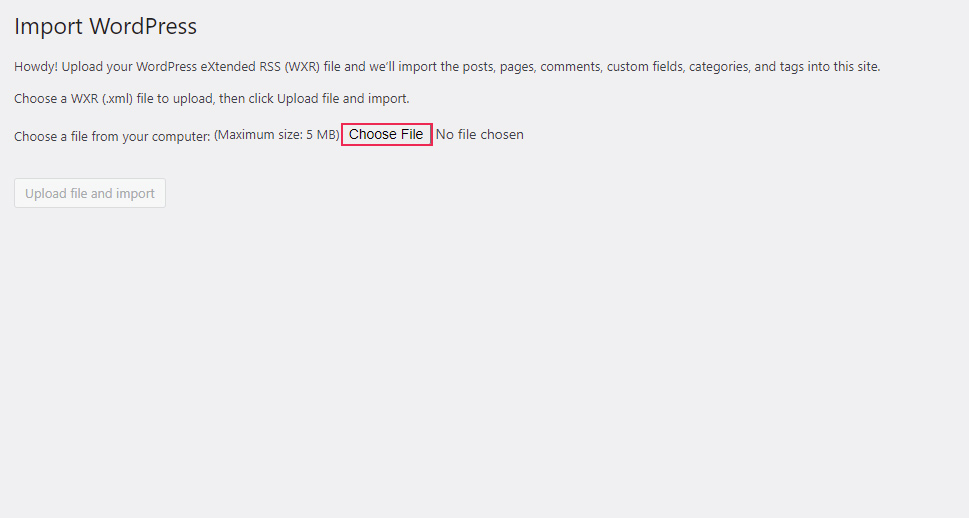
Once you click on this link, make sure to hit the Choose File button that will open in the new window. This will allow you to choose the XML export file you’ve previously downloaded.
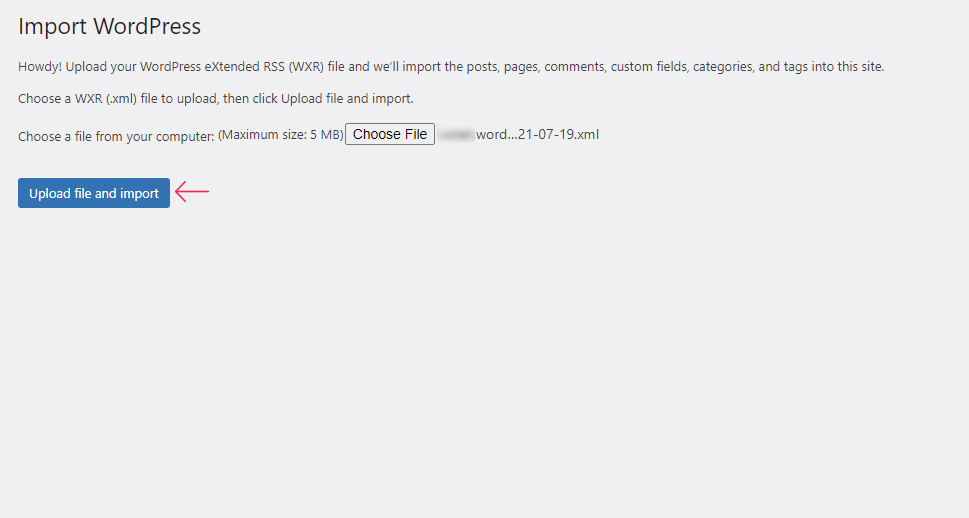
Finally, hit the Upload file and import button.
Mark the box named Download and Import File Attachments. If you check this box, all the media files (images, videos, etc.) from the pages in your menu will also be imported along with the menu items and page content. Also, if you want, you can assign your imported content to a specific user on your new site.
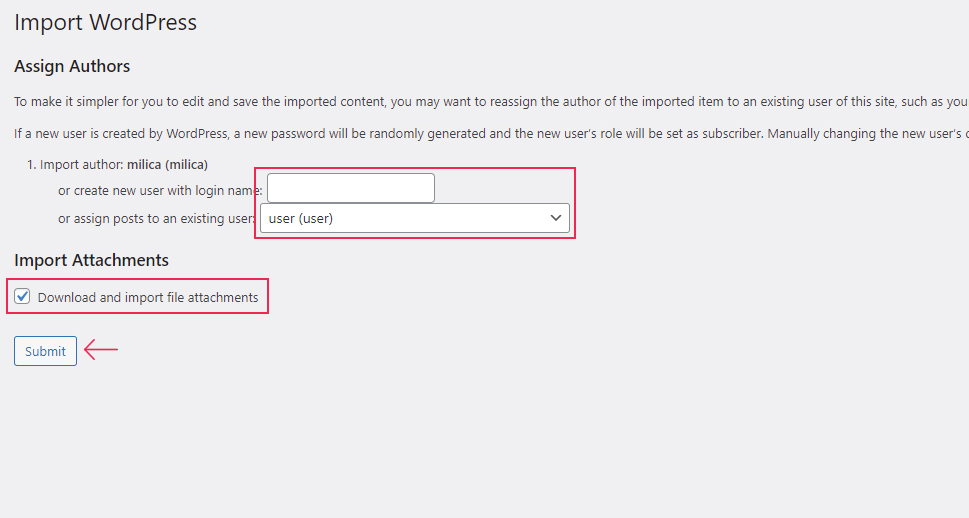
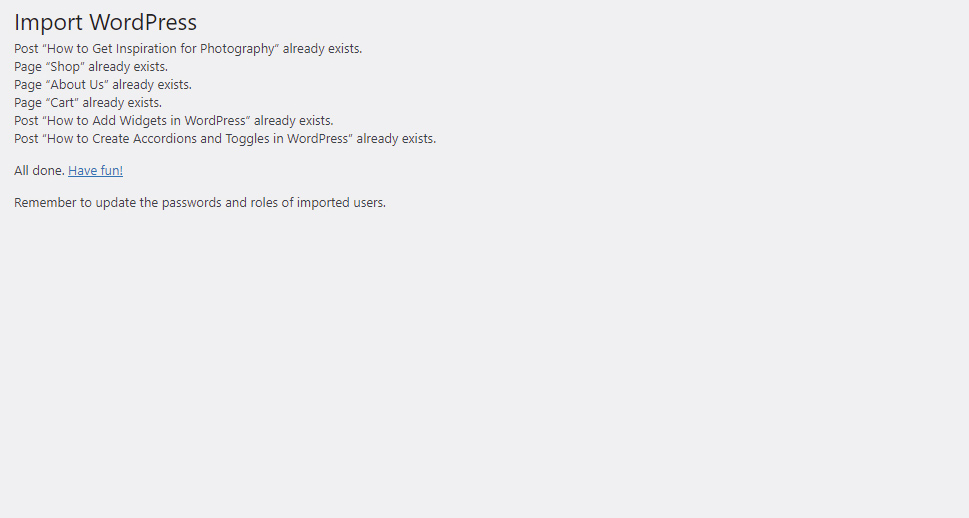
Hit the Submit button and you’re all set. The tool will notify you if any of your imported posts and/or pages already exist on your new site.
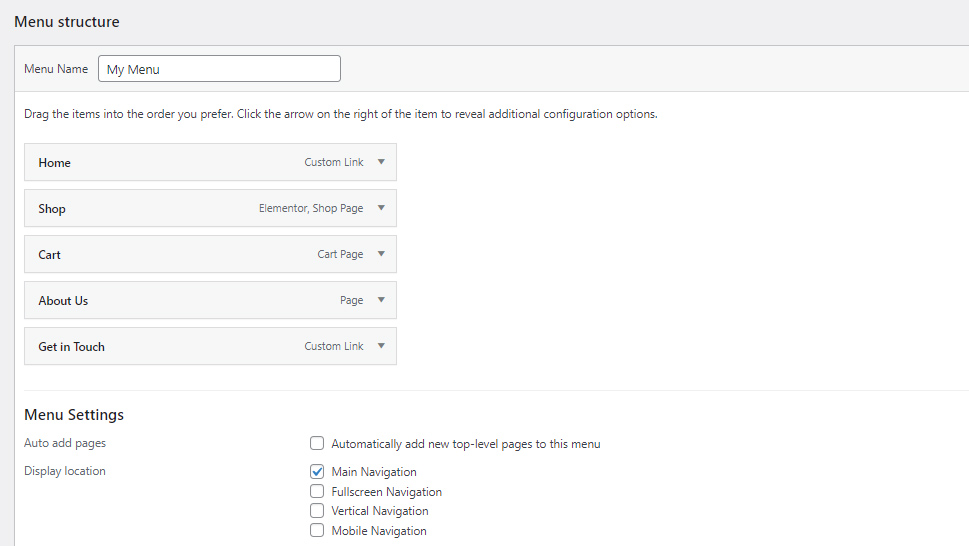
To check whether your menu is working, head to Appearance >> Menus once again. You should be able to see the menu from your original site here. Just make sure to test whether your menu and menu items are working properly.
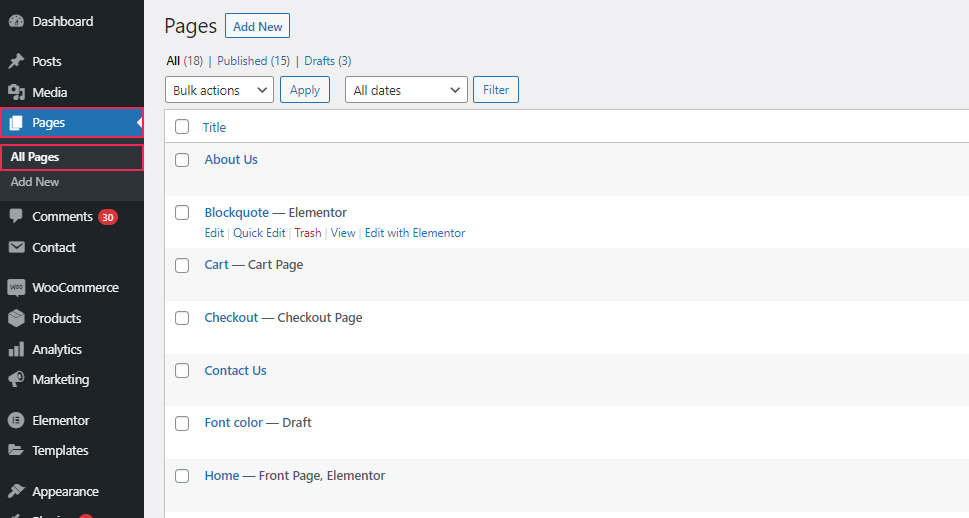
Don’t forget to check if all your pages and posts have been imported properly using the Pages >> All Pages (Posts >> All Posts) screen. If you notice any duplicate content, make sure to delete it.
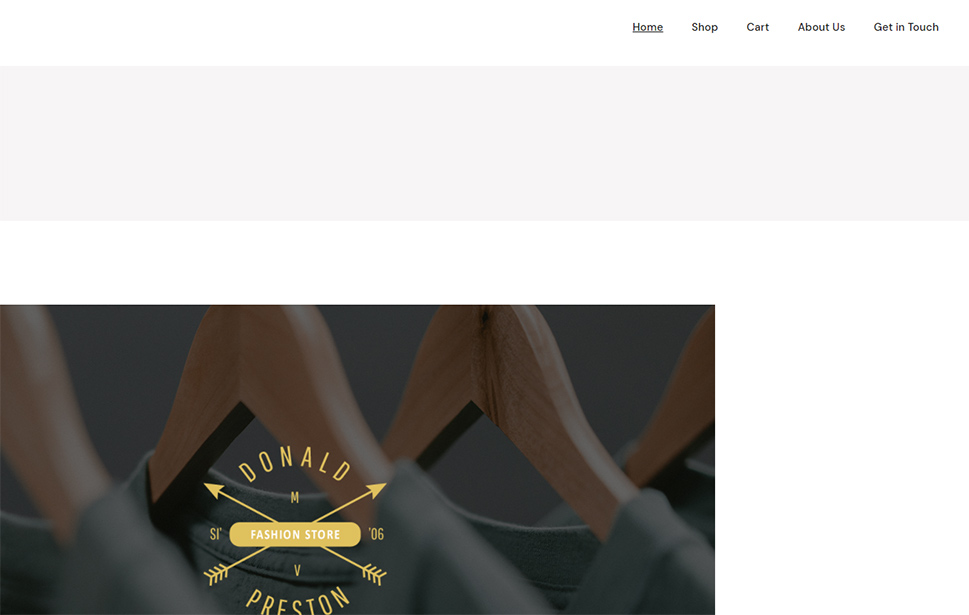
Finally, go ahead and check out what your imported menu looks like on the front end of your new site.
Final Thoughts
As you could see from the steps we shared above, exporting your WordPress menu items is as easy as it can get if you use the help of a plugin. Apart from moving your menu items, you will also be able to export all the existing pages and posts if their links can be found within your menu. Just make sure to carefully follow our guide and adjust the look of your menu items so that they match the design of your new site once you’re done with your migration.
