How to Migrate Your Website from SquareSpace to WordPress

Squarespace has a lot going for it. It can help you build some truly beautiful websites. It offers great value for money. It’s advertised during hip podcasts. Maybe best of all, Squarespace counts Keanu Reeves’ bike company as one of its customers.
But will all due respect to Keanu and his motorcycle, Squarespace isn’t WordPress. Then again, no other website builder is — WordPress doesn’t have a stranglehold on the market for no reason.
So, when you come to the limits of Squarespace’s offerings, it’s only natural that you’ll turn your eyes towards WordPress to serve as the new home for your content. Let’s see how you can migrate your website from Squarespace to WordPress.
We’ll show you:
Every website builder you see on the market has a trait, or two, or even ten, that might attract your attention. Squarespace is a website builder that can’t boast having the most intuitive interface with the least steep learning curve. But it lets you create stunning websites. That’s how it gets you.
And of course, that’s not all. Squarespace is reliable with good uptime, it’s fast, and it’s secure. You can use it to create anything from an online store to a portfolio, and it will serve you well. Up until a point, that is.
Squarespace doesn’t have a thriving community of third-party plugin creators. If you’re thinking about using third-party plugins to expand your Squarespace functionalities, you’re out of luck — you’ll have to opt for a more expensive plan. Squarespace doesn’t have lots of advanced marketing options, either, which can become painfully clear when your website takes off and you start needing them.
It’s quite obvious that Squarespace isn’t WordPress. It’s very good at what it does; it’s just a shame it doesn’t do more. If you’re lucky, you’ll understand this before your website grows too much because migrating a website from Squarespace to WordPress can be demanding. Doing it sooner rather than later can save you lots of trouble.
Your first step should always be to ensure that you have a new place for all the posts and pages that won’t have a home on Squarespace anymore. You should have a functional WordPress website (best option for photographers) before you start the process. At the very least, you should have a website with a temporary address, or a staging website waiting.
Besides transferring the contents of your website, you can also transfer the domain name if you used a custom one. It would be best to postpone the transfer until your WordPress website is ready. So while you’re working on your staging website — something your WordPress hosting provider should help you set up — your Squarespace website should be fully functional and open for business.
If you don’t have a custom address, then you should do the regular steps of finding a host, registering the address, installing WordPress manually or using a one-click installer if your host provides one. Once your website is installed, shopping around for themes might be a pleasant thing to do.
There are all kinds of WordPress themes you can browse, but you should choose one that matches the purpose of your website. A creative WordPress theme will suit websites that creatives build to showcase their talent. Architecture and city-planning businesses might opt for architecture WordPress themes instead. Take your time, enjoy the search, and make a choice you’ll stand by.
When it comes to exporting content from Squarespace, there’s good news and there’s bad news. The good news is that Squarespace exports content in a format that WordPress can ingest without any third-party conversion tools. That means that, as soon as you get that file, you can upload it to WordPress right away.
The bad news, however, is that when you do that, you’ll find that some of your content is missing. Or a lot of it, depending on your website. But let’s walk you through the steps for exporting the content first.
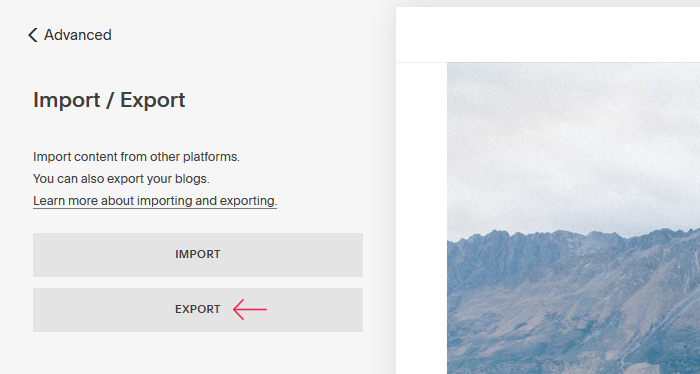
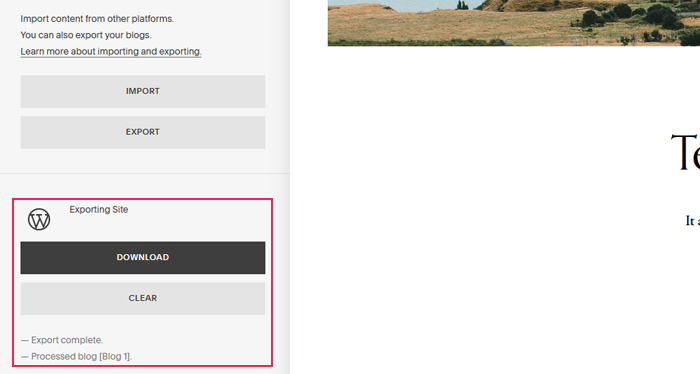
Head over to Squarespace, and from the dashboard navigate to Settings > Advanced > Import/Export. There, you’ll see two buttons that will set into motion either the import or the export procedure. Click on the one that says “Export.”
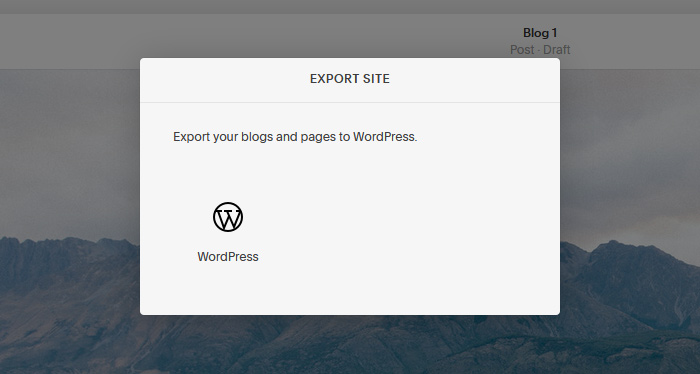
A window will open, prompting you to choose the format you want to export the content into. You should choose “WordPress,” and it just might be the only option you get.
After you click on it, Squarespace will take a while to prepare your content for the export. You’ll be notified when it’s done by getting a download link for the XML file with content you can export from Squarespace.
The problem here is that the file won’t contain all the content you have on Squarespace. Here are some of the things you can rightfully expect to find in the export file:
-
One blog page with its posts
-
Layout and gallery pages
-
Text and image blocks
And now, some of the things that likely won’t be there:
-
Album and cover pages
-
More than one blog page
-
Audio and video blocks
-
Product blocks
-
Drafts
As you can imagine, this can pose a problem. And it’s you who’ll have to fix it. But let’s first make sure that the content you managed to get out of Squarespace gets to its new destination relatively safely.


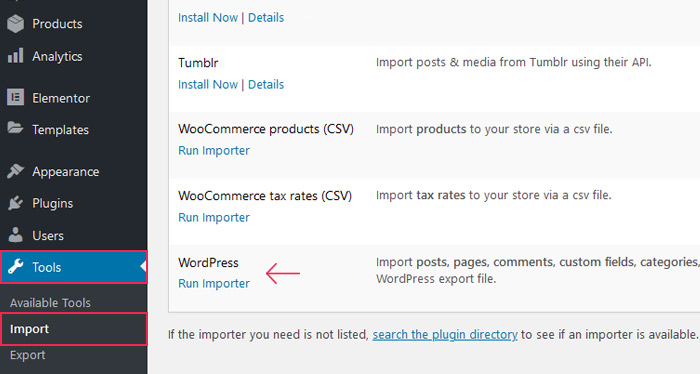
Head over to your WordPress website and navigate to Tools > Import. There, you’ll see lots of tools you can use to import content from different websites. Because Squarespace exported your content in a format that WordPress recognizes natively, the importer you’re looking for is the one at the bottom that says “WordPress.”
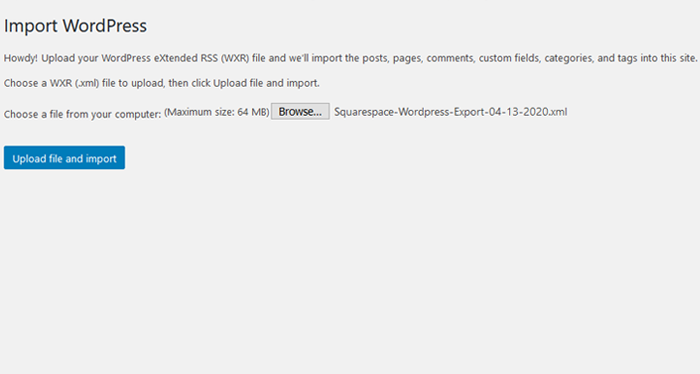
After running the importer tool, you’ll be able to navigate to the file you downloaded from Squarespace and upload it to your WordPress website.
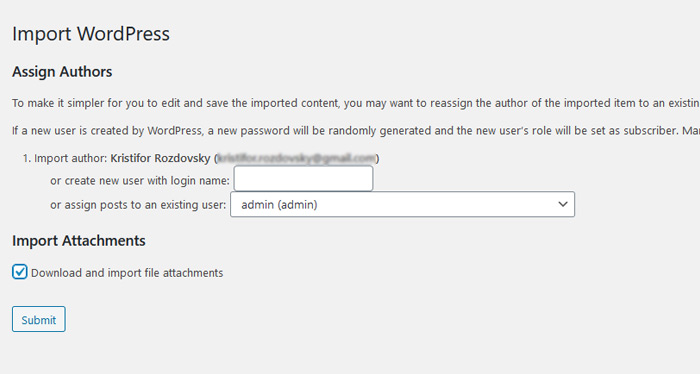
Next, you’ll be able to choose which author you want to assign to the content you’re importing and whether you want to download and import file attachments.
With this step done, most of the work on migrating your website from Squarespace to WordPress could be done. Unfortunately, that’s often not the case, due to the missing content issue we mentioned earlier.
Every piece of content you want on your WordPress website that didn’t make it in the transfer will have to be moved manually. This means that you should create every missing page in WordPress, then head over to Squarespace, copy its contents, and paste it onto the page in WordPress.
That’s the simpler way to do it, at least. The more elaborate pages will have to be built from scratch using one of the top page builders. Picking a good theme is something that can significantly speed up the process as it gives you access to premade pages that might be a good match for your content.
And while you’re at it, maybe you should check whether the images you’ve had on your site made it to their new home. Also, see if you can find them in your new media library. If you can’t, but you see them in the posts you’ve transferred to your new website, they’re still hosted by your old website and they’ll go down with it. If you can’t see them, maybe you should try using the Auto Upload Images plugin for help.

This plugin should pull all the images from Squarespace and move them into your library. If by any chance it doesn’t do the trick, you’ll be in for a ride. Squarespace doesn’t offer a straightforward way to download the images you’ve uploaded to your website. Instead, a workaround would be to create a page on your Squarespace website with all the images you need to download, visit it as a regular user, and use a browser extension to download all the images, or do it manually one by one. You’ll still have to upload them manually to your new website, though.

A link in Squarespace doesn’t necessarily have the same structure as the link in WordPress. You should make sure that people who follow the links to your website end up seeing the pages and posts on your new website, instead of a 404 error. Pages won’t give you nearly as much trouble as posts will, because there are no standard ways to create permalinks for posts.
Luckily, WordPress is well aware of just how important permalinks are for website performance, and it lets you create a custom permalink structure for your posts. You just need to go to Settings > Permalinks and choose a custom structure that matches the structure Squarespace used. When you transfer the domain to your new website and it goes live, visitors should have no trouble finding you using the old links.
Let’s Wrap It Up!
If your website is an important asset for your business or has personal value to you, you’ll always want to ensure that it can do the full scope of things you want it to do. As websites grow so do the demands we put on them, which is why it’s so easy to outgrow website builders such as Squarespace. But when that happens, don’t worry — migrating your website from Squarespace to WordPress might be tedious, but it shouldn’t be too difficult to do.
