How to Display Google Reviews on Your WordPress Website

Adding reviews to your site is always a great way to build customer trust and establish credibility in your field. Reviews can help your customers decide whether they can rely on a specific product or service you’re offering and whether they should trust your brand. In turn, this has the power to help increase your sales and conversions, boost brand engagement, and by extension, increase customer loyalty.
For this reason, many website owners strive to incorporate this useful feature into their site – be it a review that comes from third-party services like Yelp, or a practical Facebook page review. But if you ask us, there’s no better or more straightforward way to display reviews on your WordPress site than to do so using Google reviews. Since they’re connected to the Google my Business platform, not only will Google reviews provide an easy way for your customers to leave their reviews and opinions about your business, but they will also allow you to respond publicly to their reviews from your account. Plus, Google includes these reviews as part of its ranking system, which means that putting up reviews on your site can even boost your website’s SEO and increase your website’s visibility in SERPs.
So for all these reasons, we’ve decided to show you how to easily add and display Google reviews on your WordPress site. The most hassle-free way to do this is to use the help of an appropriate plugin, and we’ve got just the plugin for the job, so make sure to read on.
Displaying Google Reviews in WordPress With a Plugin
With over 80,000 active installations on WordPress.org, Widget for Google Reviews is a great plugin you can use to quickly and effortlessly display Google reviews on your site. And speaking of displaying reviews, this plugin will allow you to do so in many beautiful and effective ways. Namely, you will be able to use different kinds of layouts to present your reviews completely according to your preferences. For example, you can showcase reviews using a responsive and practical slider, put them in a list or grid layout, hide reviews and show ratings only, and much more.
If you want, you can also create multiple widgets and then connect more than one Google Place to the plugin (if you lead multiple businesses), hide specific reviews, shorten longer reviews with a “read more” link, etc.
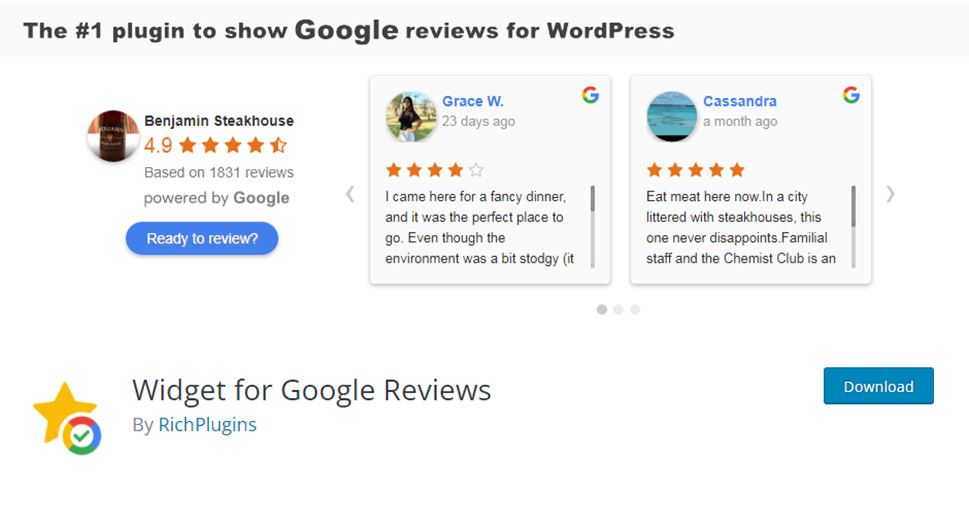
What’s also great about this plugin is that your Google rating and reviews get updated automatically, so you can simply add them anywhere you like on your site, be it a homepage, a dedicated Reviews page, product pages, a specific widget area, etc. You just have to connect it to your business using the Google Place ID, customize the plugin to your liking, and then insert the shortcode that will display reviews anywhere you like.
There’s also the Business version of the plugin available at $85 a year which comes with even more advanced features. These include the ability to connect and show reviews from other platforms such as Facebook and Yelp, use a custom review and rating template to create your own layout, place important reviews at the top, show or hide any elements of your choosing (i.e. names, ratings, reviews, business photos, etc.), and more.
After installing the plugin and activating it, you should head to the page called Trustindex.io. Here you will be able to configure the plugin according to your preferences and connect Google reviews to your WordPress site with ease.
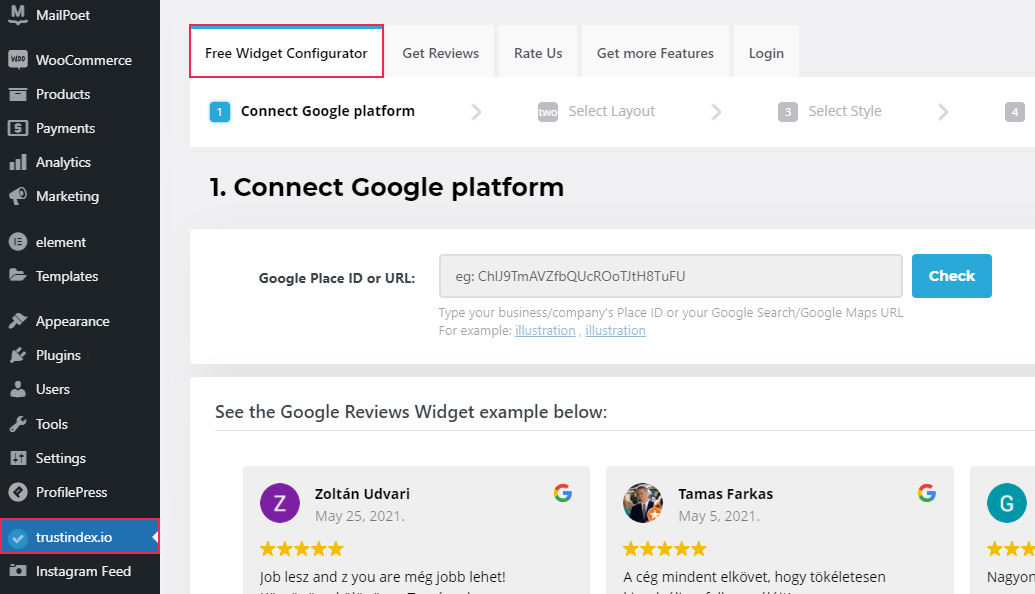
The first thing you need to do is connect your Google platform to your WordPress site by entering your Google Place ID. You can do this by going to the Google Place ID page and entering your location to find your place on the map.
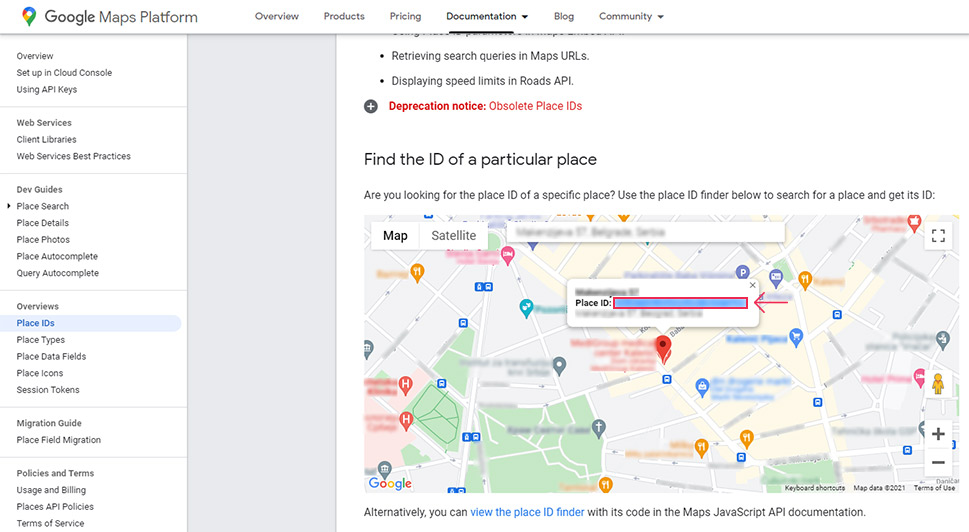
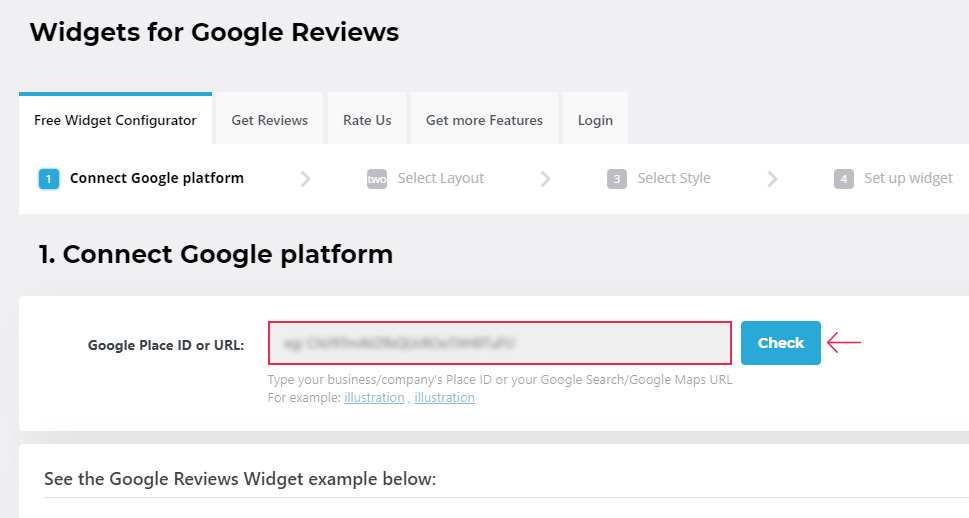
Copy the Place ID that shows up on the map and then head back to your plugin settings. Then, paste the ID into the “Google Place ID or URL” field and hit the Check button.
If there are multiple businesses in this location, you need to find the one that belongs to your business and hit Connect.
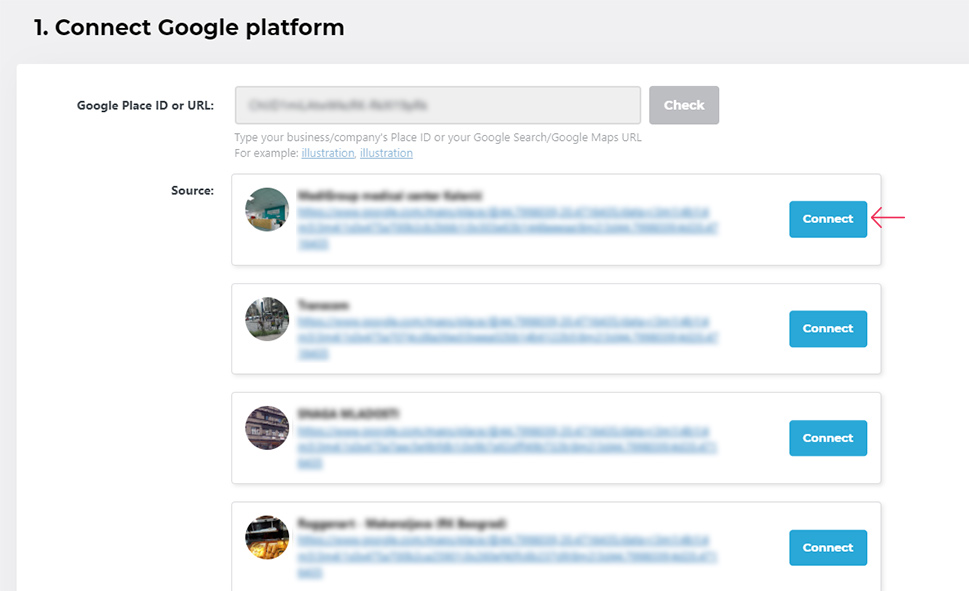
This will trigger the next step needed to complete the plugin configuration – Select Layout.
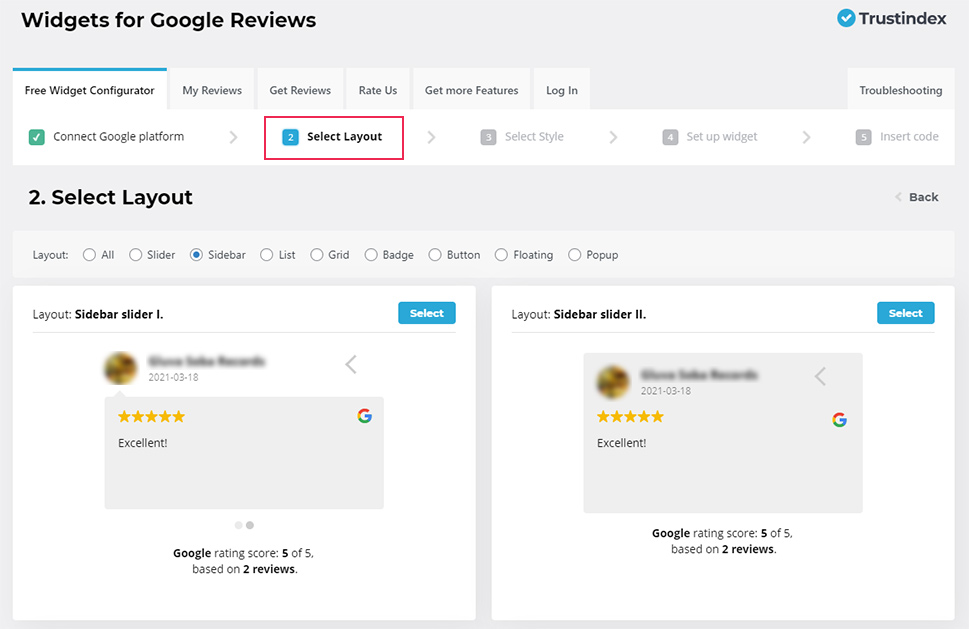
You will be able to choose from multiple layouts to fully customize the appearance of your Google reviews. For example, you can use the Slider layout, Sidebar, Grid, List, Badge, etc.
Once you select the desired layout, you will also be able to choose from different layout types according to the specific layout you’ve selected. For example, if you go for the Slider layout, you will have multiple slider types at your disposal – Slider I, Slider II, Full sidebar I, and so on.
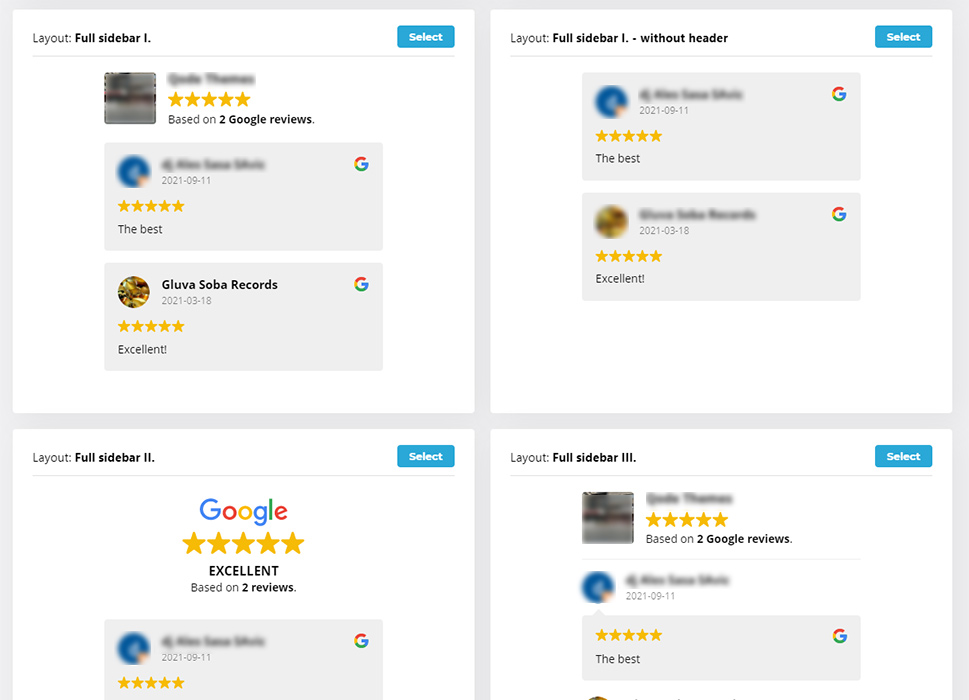
Simply hit the Select button next to the Google review layout type you wish to use on your site.
After you’re done with choosing the layout type for your Google reviews, you can proceed to select its style. You will be able to choose from styles like minimal, light background, light border, blue, dark background, and plenty more.
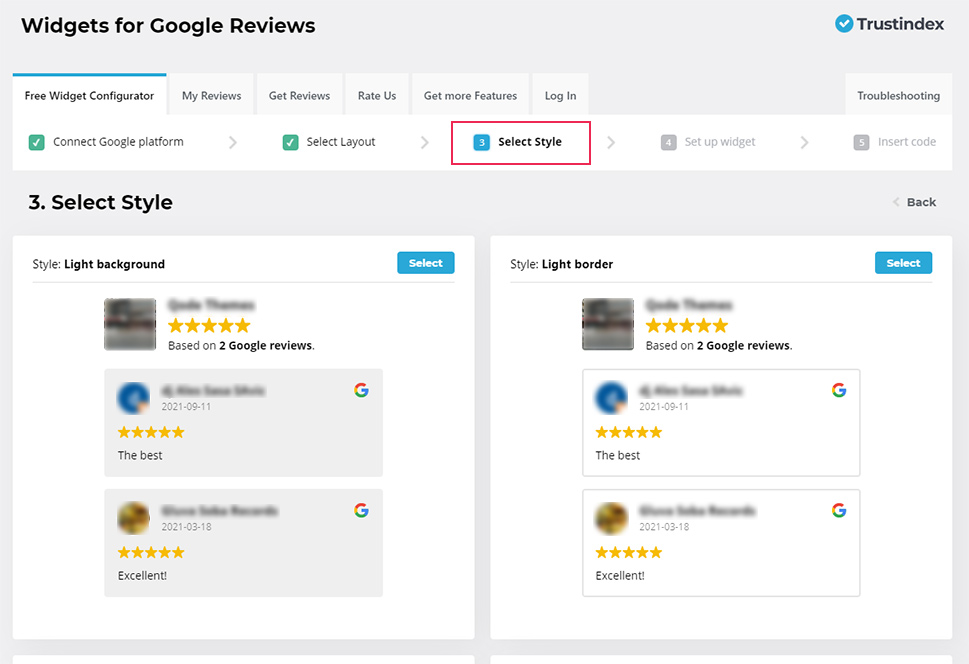
Then, you will be able to set up your widget.
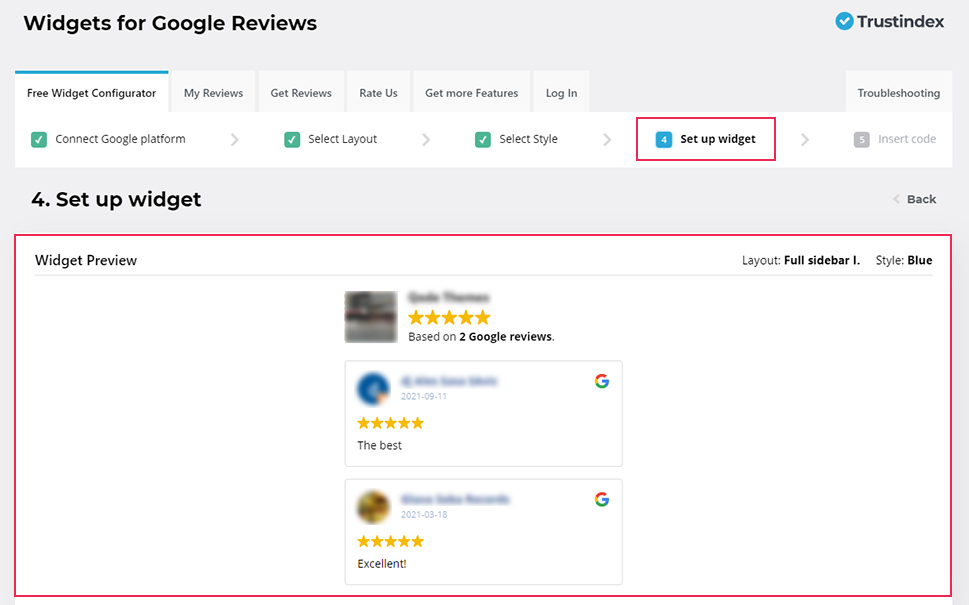
This screen will allow you to have a preview of your widget and adjust some of its additional settings. These include the option to select what kinds of ratings you want to show (you can choose to show all ratings, four- and five-star ratings, or five-star ratings only), select your language and date format. Additionally, you will be able to hide or show reviews without comments, rating text, reviewers’ photos, etc.
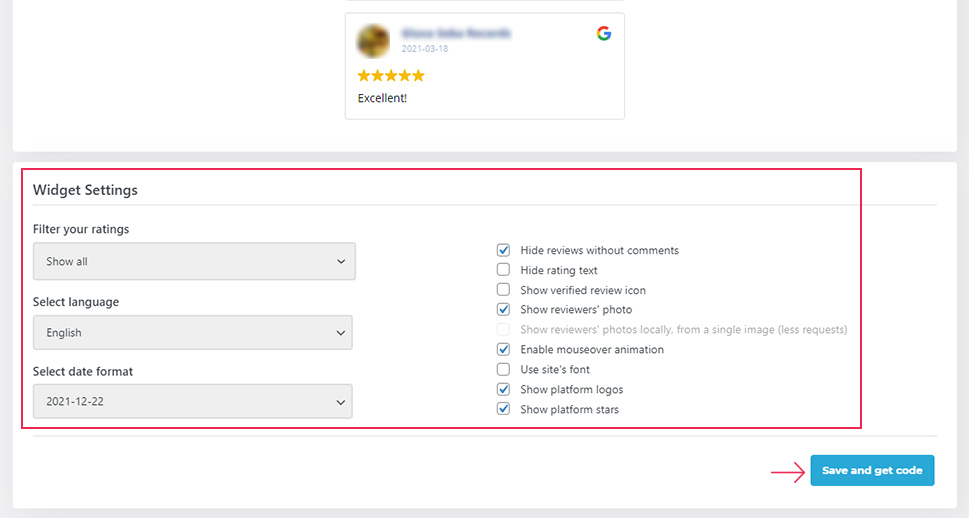
Once you’re done with configuring your settings, you should click the button called “Save and get code”.
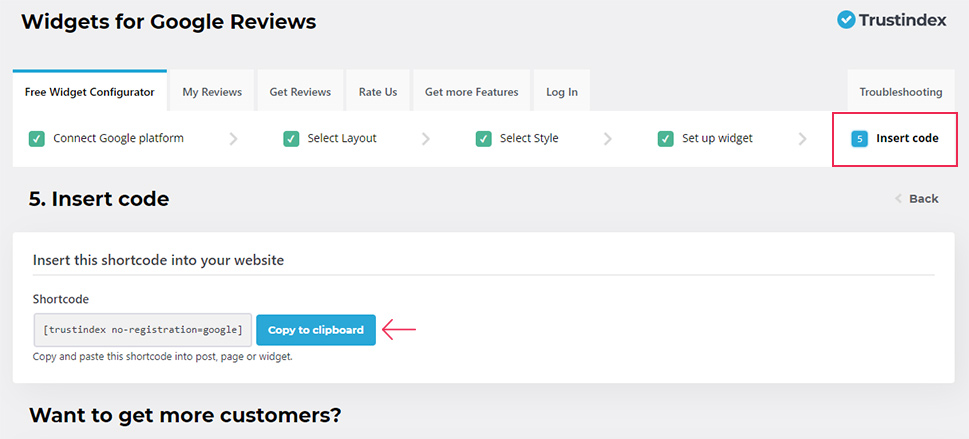
Finally, in the last step, you will get to copy the shortcode of your Google reviews. You can paste this shortcode anywhere you want on your site, including your pages, posts, and/or widget areas.
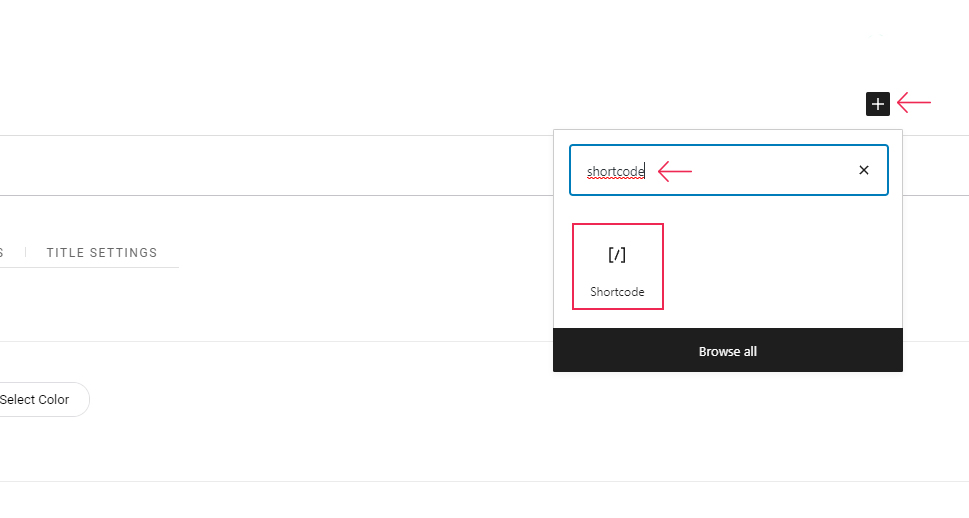
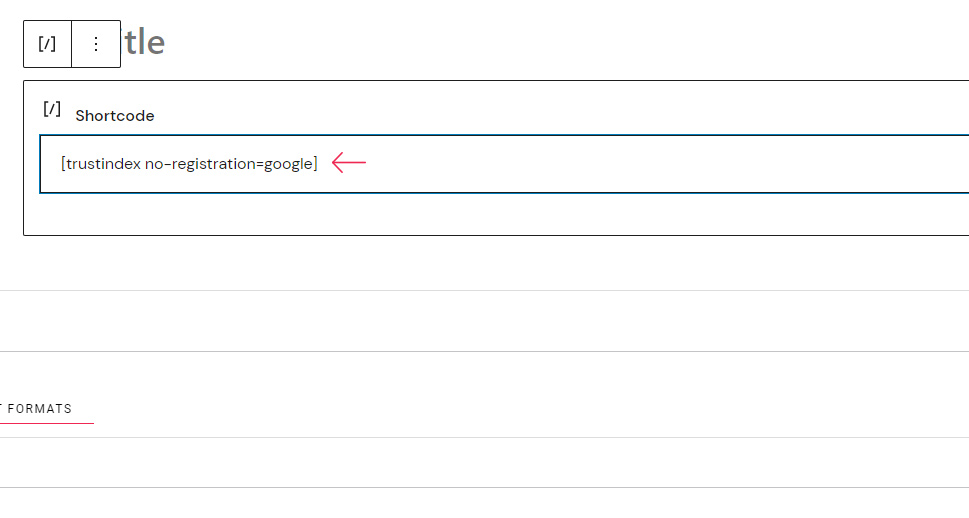
To place the shortcode into your page/post, simply head to your page/post edit, hit the plus (+) icon, and find the shortcode block. Then, paste the shortcode within the block.
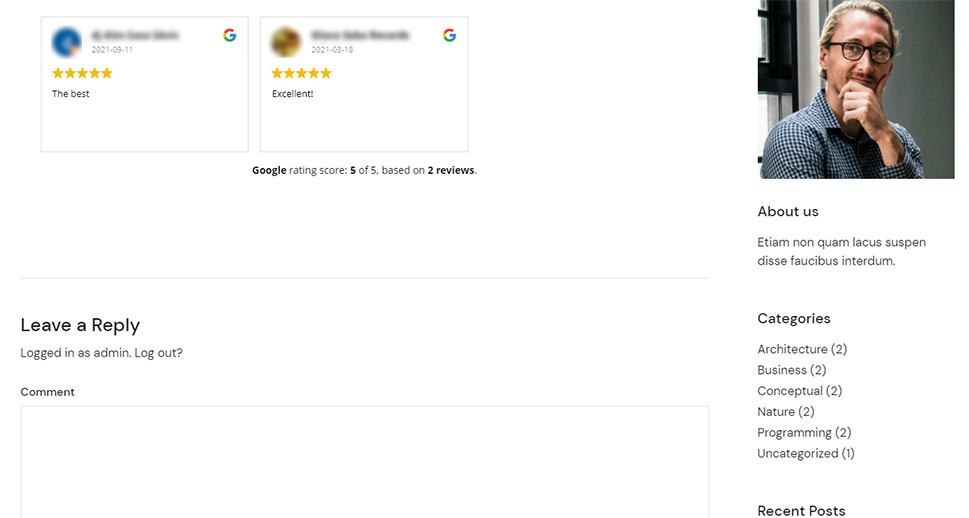
You can go ahead and see what your reviews look on your page/post:
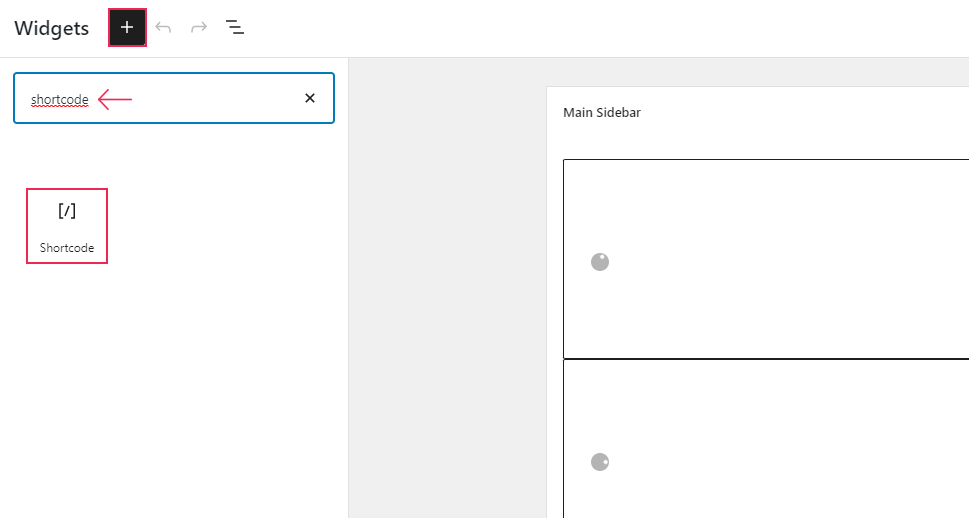
If you want to add your Google reviews shortcode to any widget area on your site, head to Appearance >> Widgets, hit the “+” (“Add block”) button located in the top left corner of the screen (or find and click the “Add block” button within the widget area you wish to add your shortcode to) and add the shortcode block widget. Then paste the shortcode within the field. To learn more about adding block widgets in WordPress, we recommend that you check out our article on how to use the new block-based widget editor.
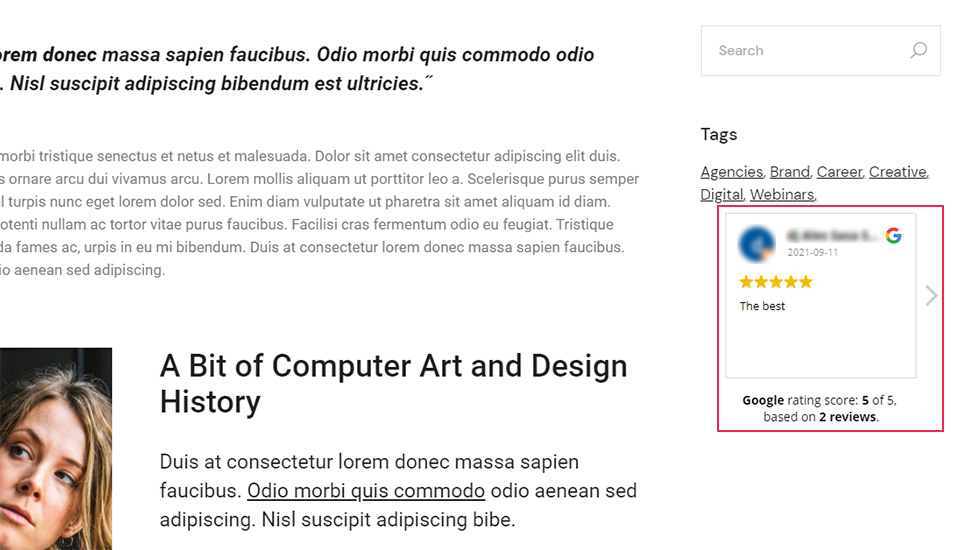
Hit the Update button, and that’s it. Your widget area will now contain the Google reviews widget.
Conclusion
Adding Google Reviews to your site is one of the most effective ways to gain the trust of your potential customers and get them to buy your products. And if you use a plugin like Widget for Google Reviews, you will be able to insert Google reviews anywhere you want on your site with the plugin’s shortcode – be it a homepage, specific page (or page section), or widget area. You just have to connect your place ID to your WordPress site and then you can proceed to customize and stylize the look of your reviews to fit your specific requirements. Make sure to follow our instructions carefully, and you’ll be well on your way to boosting the credibility of your business.


