A Comprehensive Elementor Tutorial for Beginners
It’s safe to say that the space between coming up with an idea for a website and creating that website has never been smaller. These days, we can do a lot with very few resources and basic coding knowledge because big site builders such as WordPress make it easy for us.
WordPress isn’t doing it all on its own. It is trying, though, as we’ve seen from the release of the Gutenberg editor. But what makes WordPress such an easy system to use for creating a website are page builders.
The Elementor plugin has quickly become one of the most widely used WordPress page builders in the world. And today we’ll find out just what makes it so special and show you how you can use it to create stunning WordPress pages. In our beginners Elementor tutorial, we’ll cover the following topics:
The role of a page builder comes down to two things: to help you make the most out of what your content management system offers and to do it in the most convenient way possible. Because WordPress is a content-oriented website builder, you’d expect a good page builder to allow you to easily add all kinds of content to a page or a post. And Elementor certainly does it.
Elementor is what is called a drag-and-drop builder, which means that you perform a lot of the tasks in it simply by dragging certain elements to where you want them to be. It’s also a front-end page builder, which means that you’re building it by manipulating the same page elements your website’s visitors will see. And it’s a live builder, so you’ll see all the changes as you’re making them.
But that’s just Elementor as a page builder. As a WordPress plugin, it’s one of the most popular ones, counting over four million installations as of April 2020, and a five-star rating based on around five thousand user reviews. Its core functionalities are free to use, but you can also shell out for the Pro version and get some useful options such as additional widgets, predesigned templates, a popup builder, and more.
Elementor is also becoming more frequently included in bundles with premium themes. We’ve integrated Elementor with Bridge, our flagship theme, so our customers can choose between it and WPBakery, a veteran page builder. But that’s not all. We’ve also started shipping more WordPress themes with Elementor, where it’s the main page builder plugin.
If all of this sounds exciting to you, great. It should. Especially if you’re in the market for a versatile page builder that will allow you to build stunning pages without having to write a line of code! So, let’s look at how you can install and set up Elementor on your WordPress website.
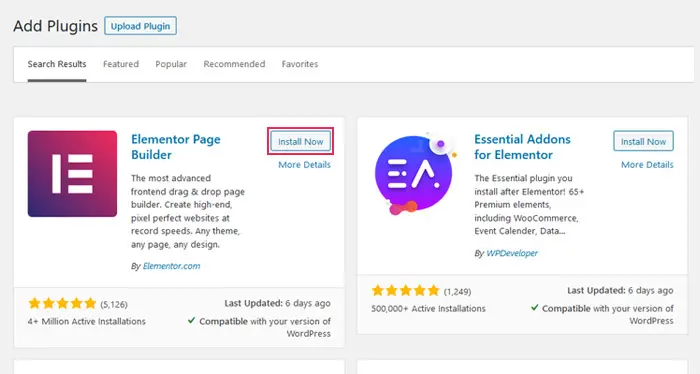
You start by going through the same plugin installation steps you would for any other plugin. Find Elementor in the plugin finder, click the “Install” button, and then click “Activate.”
After you’ve activated the plugin, you can adjust Elementor’s setting. You don’t have to, however, because it comes set up well out of the box. Still, let’s go through the options you’ll be able to access right from the dashboard.
Settings
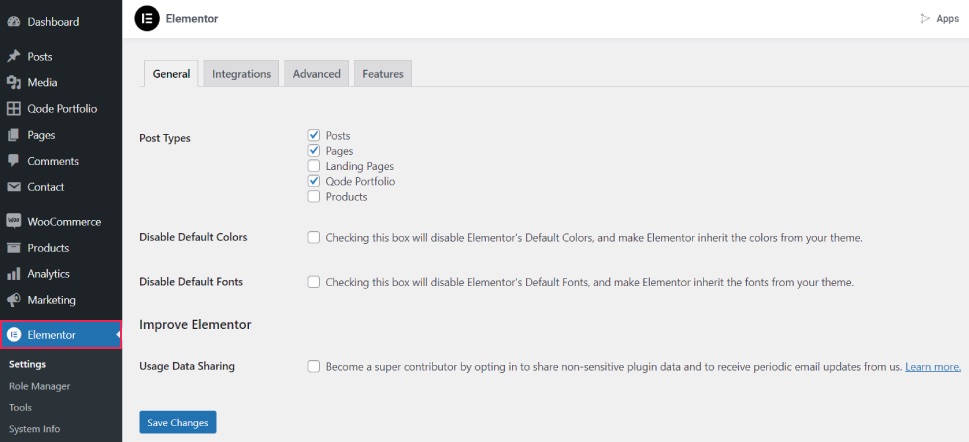
In the General tab of the Elementor settings, you’ll be able to select the post types you plan to use, as well as disable default colors and fonts — something you should do if you want your website to have the colors of the theme you’re using.
Under the Style tab, you’ll find options that include setting default generic fonts, tablet and mobile breakpoints, as well as a checkbox to enable image Lightbox. You’ll be able to access some of these options later, from within the editor.
The Advanced Tab is filled with things only advanced users should be concerned with. This is where you set the CSS print method, switch the loader method when troubleshooting server issues, and enable SVG support.
Under Features, which is a relatively new addition to the Elementor settings interface, you will find a range of new and “experimental” features, some of which have already become permanent. Here you can toggle on or off features and “experiments” such as Grid Container or Editor Top Bar, as well as stable features, in our case Optimized DOM Output, Improved CSS Loading, and the Flexbox Container.
Role Manager
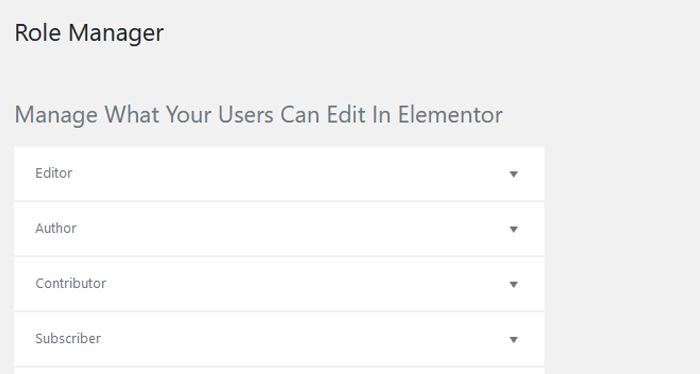
Different types of users can have different levels of access to your website, depending on their role. Elementor gives you some rudimentary role managing options, allowing you to exclude users from having access to the editor. If you have the Pro version, you can also limit the users’ access only to content.
Tools
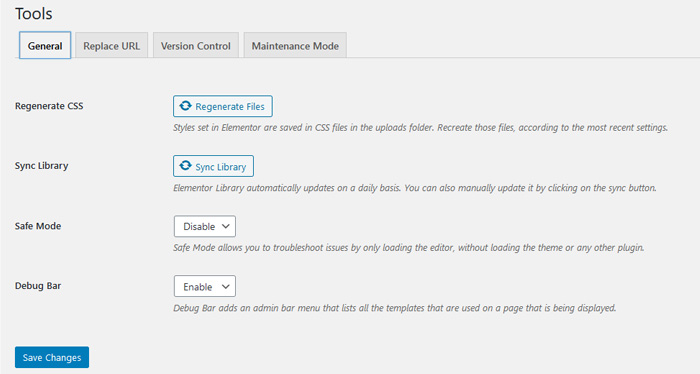
The general tools will let you regenerate the CSS on your website and sync your Elementor library manually If you need to. This is where you enable the safe mode and the debug bar, both of which come in handy when troubleshooting your website.
The Replace URL tab is a place where you can, as the name says, replace the URLs if you changed the site address. In the Version Control tab, you can roll back to a previous version of Elementor and become an Elementor beta tester. Neither of these things is something you should do without a clear reason.
In the Maintenance Mode tab, you get all the controls over the website’s maintenance mode you’ll ever need. Besides enabling maintenance mode, you can set who can access your website while it’s enabled and select or create a template for the maintenance mode page.
The remaining settings are either informative or accessible only by Pro users. Under System Info, you’ll see the information about the server environment, the WordPress version, the theme you’re using, the plugins you have installed, and more. Getting Started is an Elementor tutorial section with a button that leads you straight to creating a new page. Finally, Custom Fonts and Custom Icons are two sections you can use if you have the Pro version of Elementor to add custom fonts and icons.
How much you decide to dig into these settings is up to you. For some, such as the ones you find under the General settings, getting to them early would be a good idea. Others, such as the ones you find under the Tools settings, are only there for certain occasions.
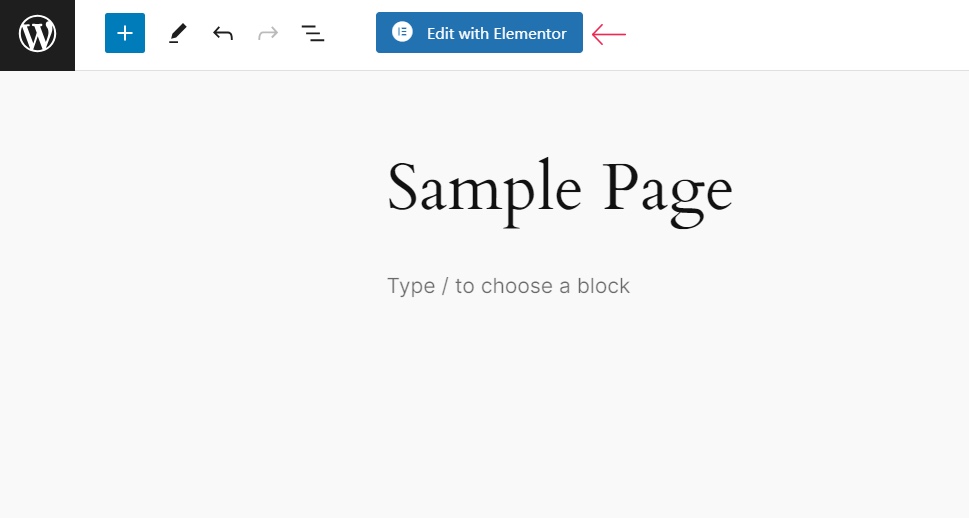
When you’re comfortable with the options you’ve chosen for your Elementor installation, head over to Page > Add New. We’ll create a new page and then edit it with Elementor to show you how you can navigate around the page builder. So once you’ve given your page a name, press the blue “Edit with Elementor” button.
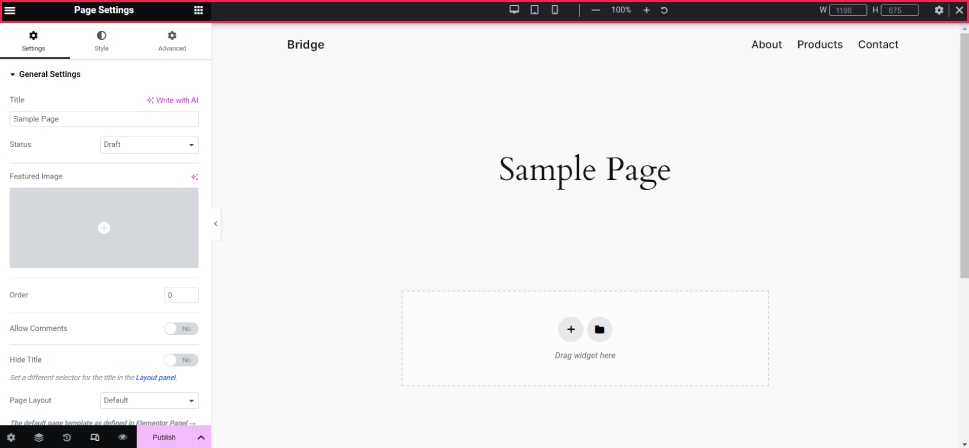
Right away, you’ll notice that the page is separated into different parts: the Elementor panel on the left, and the Elementor editing screen on the right.
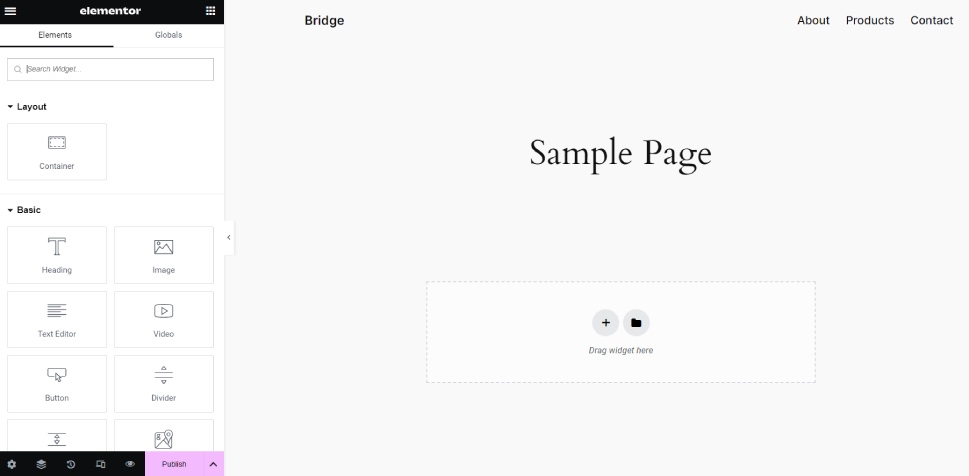
The editing screen is usually bigger than the panel, even though you can drag the rightmost edge of the panel further to the right to make them of roughly equal size. Let’s see all the great things you can find in the panel first.
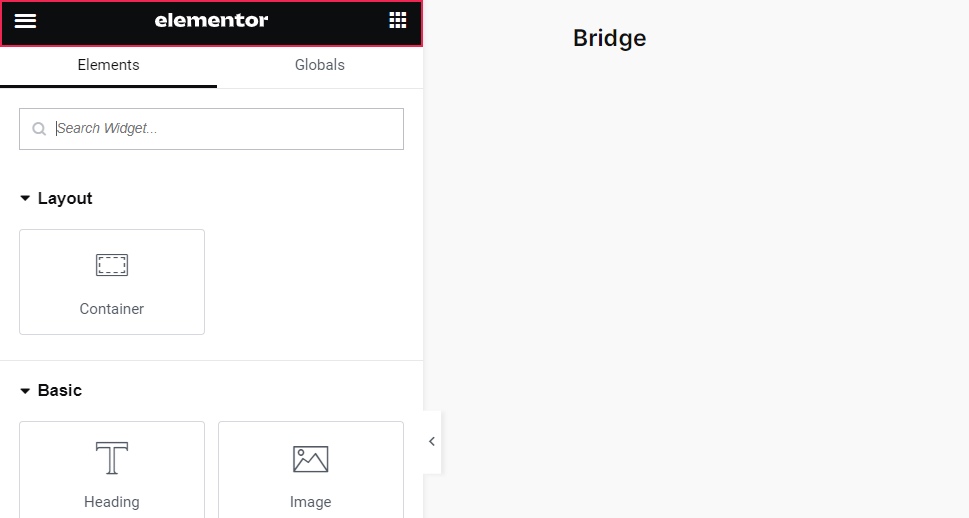
Right off the bat, you’ll notice that the panel is dominated by square icons. These are the Elementor widgets, and we’ll get to them in a second. First, however, we want you to look up to the very top of the panel, at that red stripe that says “Elementor.”
The Topmost Menu
The square on the right will always bring the panel back to the view you see now, with all the widgets listed. The menu button on the left, however, will give you access to certain options.
Site Settings
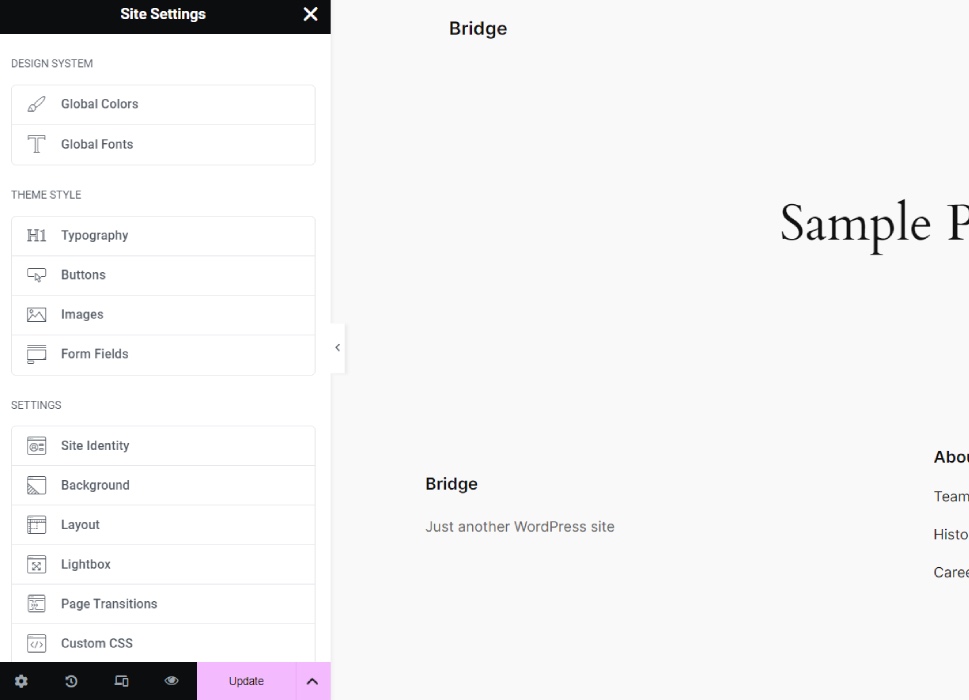
Under Site Settings, that you’ll reach by clicking on the hamburger icon in the left corner of the menu, you’ll find a range of options that apply globally, from colors and fonts to theme settings like typography, images, etc.
Elementor allows you to pick a color palette for your website if you choose not to use your theme’s default one. You’ll have a choice of premade palettes, and you’ll also be able to pick a primary, secondary, text, and accent color of your liking.
In the Global Fonts options, you’ll be able to choose the fonts for the primary and secondary headlines, as well as the body text and the accent text. You can choose the font family and the weight of the characters.
The Theme Style options only work if you’ve disabled Default Colors and Fonts on the Settings Page. In these options, you’ll be able to adjust anything from typography to form fields. It’s also the place where you can use Custom CSS to change the way your website looks if you have the Pro version of the builder
Particularly important are the options under Settings, where you will set your global layout options, lightboxes, page transition, etc.
The Theme Builder section is reserved for the Pro users, and it’s where they get to set site-wide options for every part of the site, from header to footer, like they’re building their own theme.
Finally, under User Preferences, you can set some of the things that will make your Elementor experience more tailored to your needs, like the UI theme (light or dark or autodetect), responsive preview and so on.
Under these Settings, there’s the Navigate from Page section, which is rather self-explanatory. You get options to search available apps, use the Finder to find anything in Elementor, and the View Page button that will shift you to a preview of the page you’re editing. The Notes are a Pro feature.
The Widgets
Right under the Search Widget bar, you’ll find Widgets — elements that work like units of content. You’ll see a Widget for the header, images, video, button, even dividers — these are the most minute building blocks of your page in Elementor.
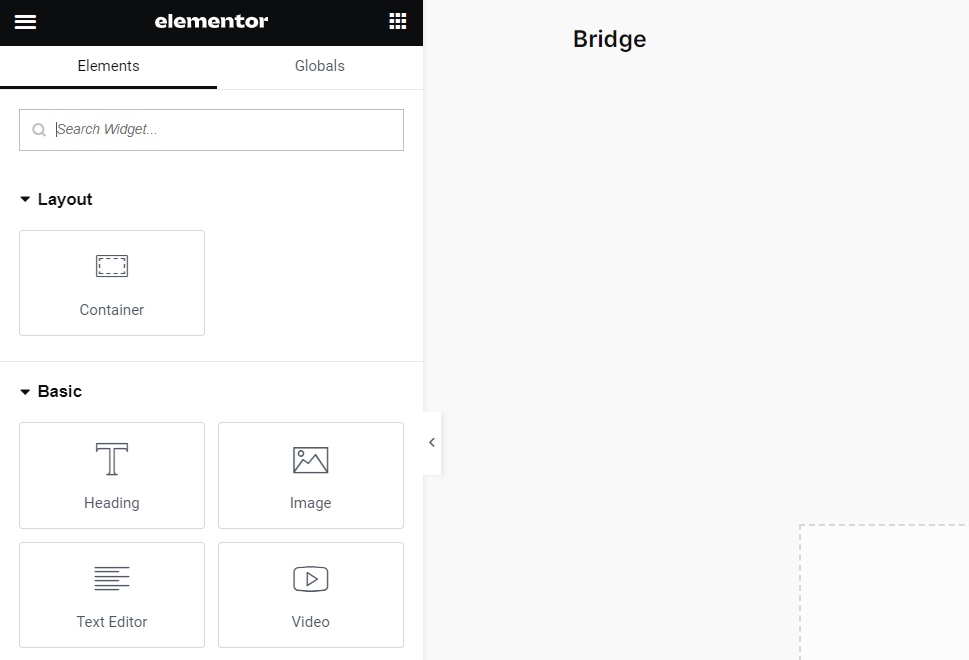
You won’t have access to the full range of widgets in the free version. However, between the basic widgets, the general widgets, and the ones provided by the theme you’re using, you’ll have more than enough to populate a page with content.
The Bottom Stripe Menu
Finally, on the bottom of the panel, you have another bar with very useful options and functionalities.
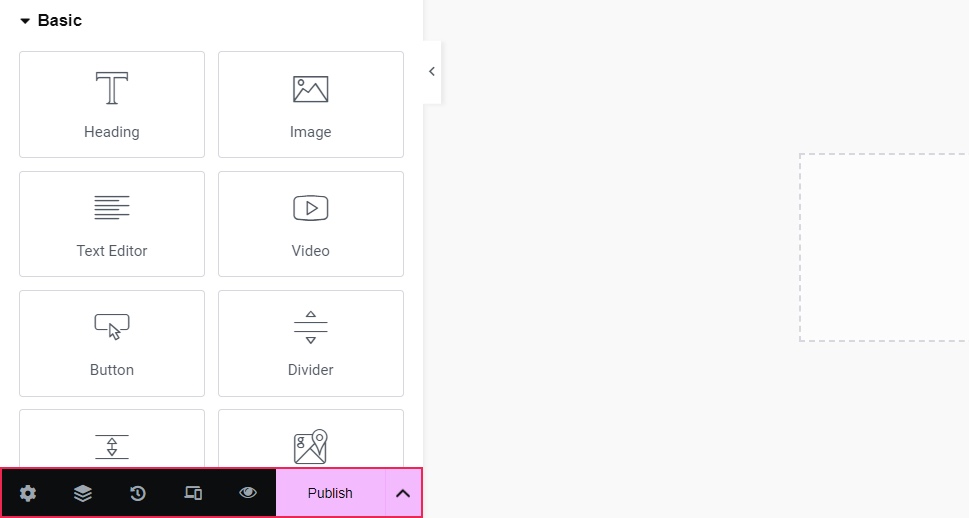
Settings
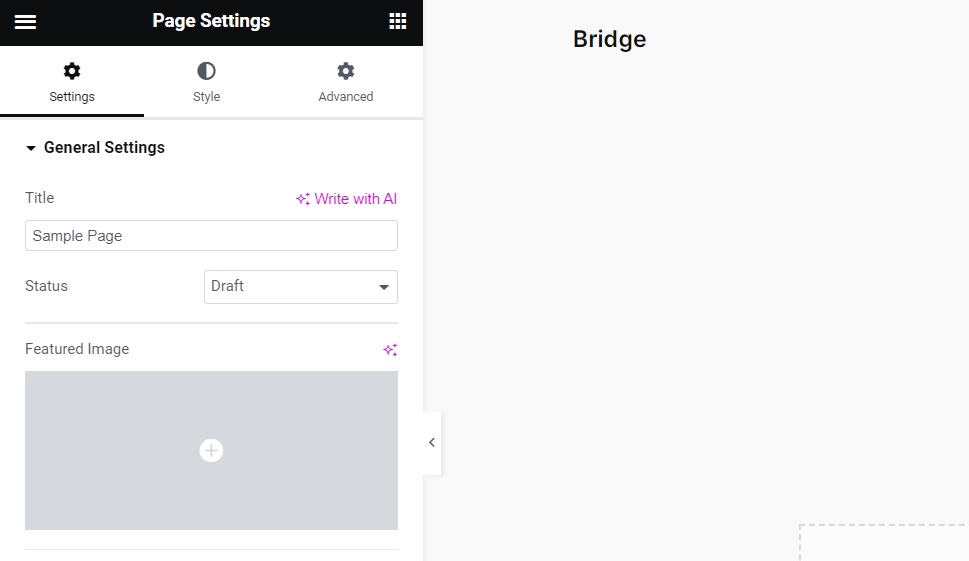
The Settings are the place where you make changes that affect the whole page. General Setting will, for example, allow you to change the title of the page and its status. This is where you can add an excerpt and the featured image to your page, but also hide the title and select the page layout.
The Style settings are limited to the Body Style, where you can choose the type of background and the padding. As for the Advanced Settings, that’s where you can add custom CSS if you’re using the Pro version of the page builder.
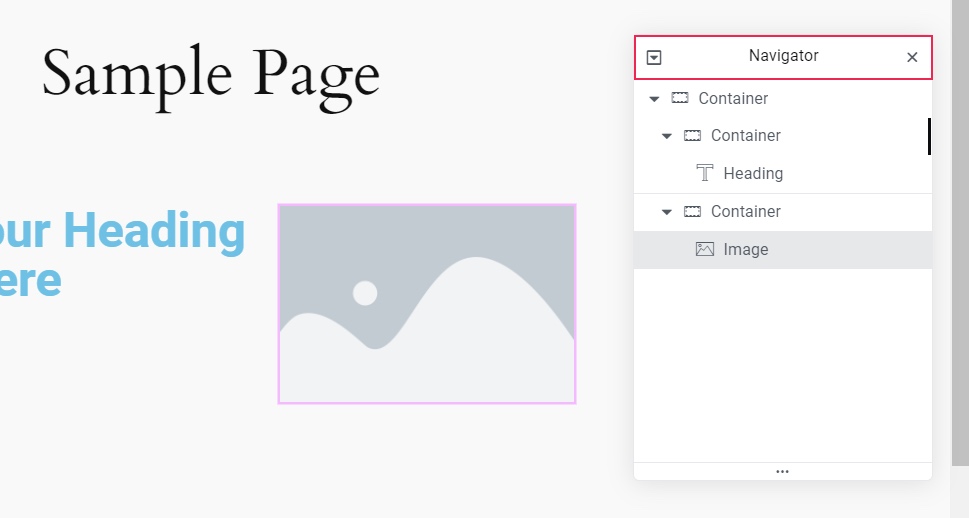
The Navigator
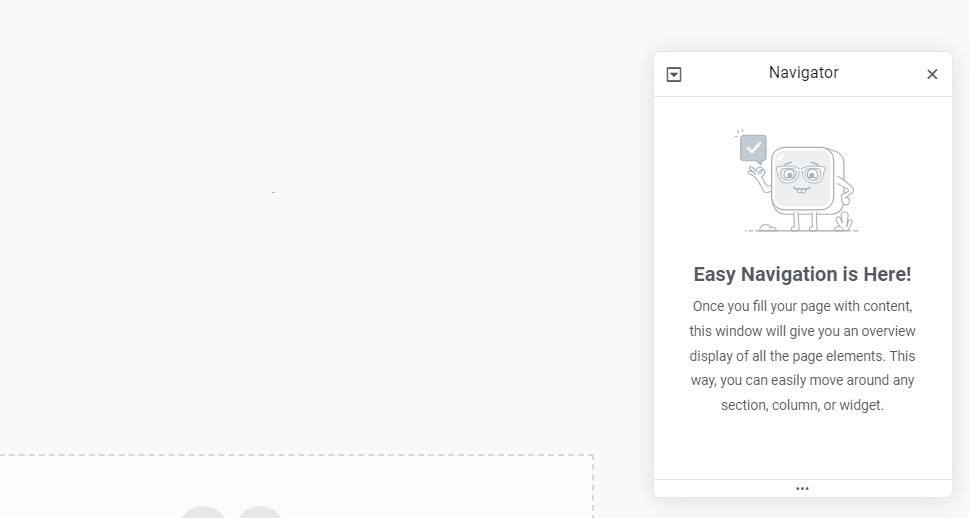
Hands down one of the most useful tools of Elementor, the Navigator is indispensable when you’re creating big, complex pages with lots and lots of elements. As you’re adding content to a page, it will also appear in the navigator window in the hierarchical order of Elementor elements. It will allow you to easily navigate through every section, column, and widget you add to your page.
History
Elementor will keep an eye on all the actions you perform while creating a page or a post. When you want to see what you did, all you need to do is press the History icon and have a look at the Actions tab. And if you’ve saved previous versions of a page or a post, you’ll be able to find them under the Revisions tab.
Responsive Mode
Clicking this icon will bring up a top menu where you can choose between different types of devices. Picking one will give you a preview of how your page looks on that type of device. You’ll be able to pick between a desktop computer, a tablet, and a mobile phone.
Preview Changes
When you click this icon, a preview of the page will open in a separate browser tab.
The Elementor panel is also where the options for all the widgets and elements you place in the editing screen will appear. But before we see that in action, let’s have a closer look at the editing screen itself and the elements that make up a page in Elementor.
Qode Themes: Top Picks
View Collection


Initially, you won’t see much in the editing screen apart from the header and footer that come with your theme. You won’t be able to edit them through Elementor unless you have the Pro version. But don’t worry, you can put a lot of content between the two for free.
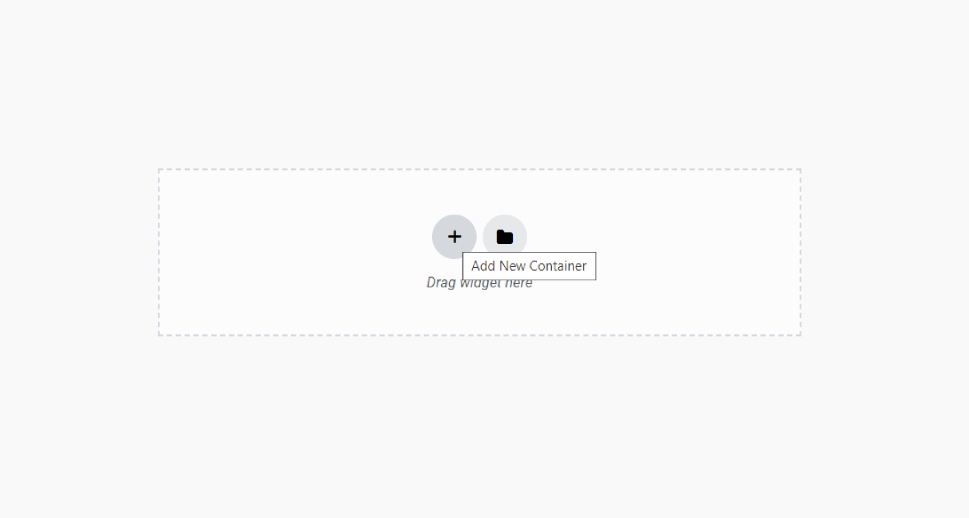
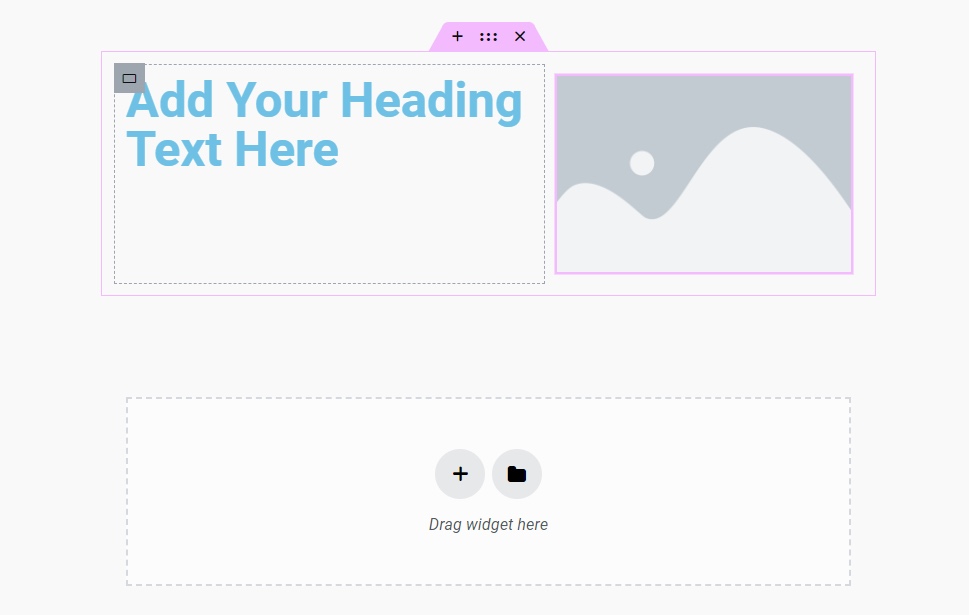
See the rectangle with the words “Drag widget here” and two buttons in the middle of the page — that’s called a section and it’s where all the fun happens.
The section is one of the elements you use in Elementor to create a page. On its own, it doesn’t do much. But you can look at it as a small part of the page where you can set certain rules that are different from the rest of the page. To create a section, you only need to drag a widget to it or press that plus button. You’ll get the option to choose the structure of the section. We’ll pick the one with the section split in two halves. The Elementor has introduced a feature called Container, which provides a new, more flexible way to edit page content. You can add as many of the containers as you like, and you can add containers within containers. These elements define the layout of a section – the number of columns, the direction of the content, and so on. Adding a container should be the first thing you do when you start editing, and you can add one by clicking on the plus sign in your editor.
At this point, you can choose a layout for the container, which means the way the content will be distributed, and in how many columns.

We can place lots of widgets in any one of these columns. You simply need to drag a widget from the panel and into the column, and you can easily stuff six widgets into two columns like this.
Thanks to these containers, you can just stuff your columns with the widgets of your choice, and you can add containers within containers. Each container can be adjusted by dragging its border left or right, which is an easier way to create a ratio between the columns. You can create a Russian doll out of your sections, or you can stack container below container – it’s up to you.
To add a new container, either within an existing one or below it, simply click on the plus sign.
Each of the elements (the sections, the columns, and the widgets) in Elementor has settings of its own. They will appear in the panel on the left as you add a new element, and you can edit them then and there. If you don’t want to do it that way, don’t worry — you can access all of them later.
There are a couple of ways you can edit elements when you decide to do it. Simply clicking on a widget will be enough to bring up the editing options in the panel.

To bring up the options for an element in the container, click on the little pen in the upper right corner.
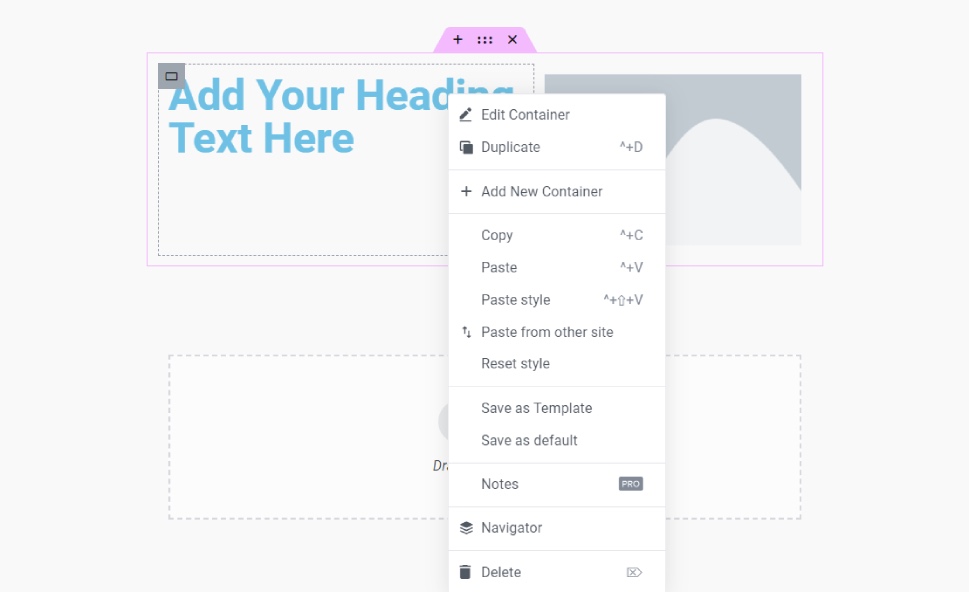
Similarly, if you hover anywhere within a container, you’ll see three buttons appear in the middle of the top border of the section. The left one (the plus sign) serves to create another container, the right one (the “X”) lets you delete the existing one, and the middle one (the six dots) serves to bring up the options.
If you don’t want to chase those buttons around, a more organized way to access all your elements and their respective options is using the Navigator. Bring it up by clicking the second icon from the left in the bottom stripe menu of the Elementor panel. Click on any element you find within it, and you will bring up its options in the panel.
Finally, you can right-click on any of the containers in the editing screen to bring up a menu that includes options ranging from editing the container and duplicating it, to saving it as a template or deleting it.
As for the editing options you can access, they will vary from one element to the other. For both the sections and the columns, the options are separated into several groups.
Layout
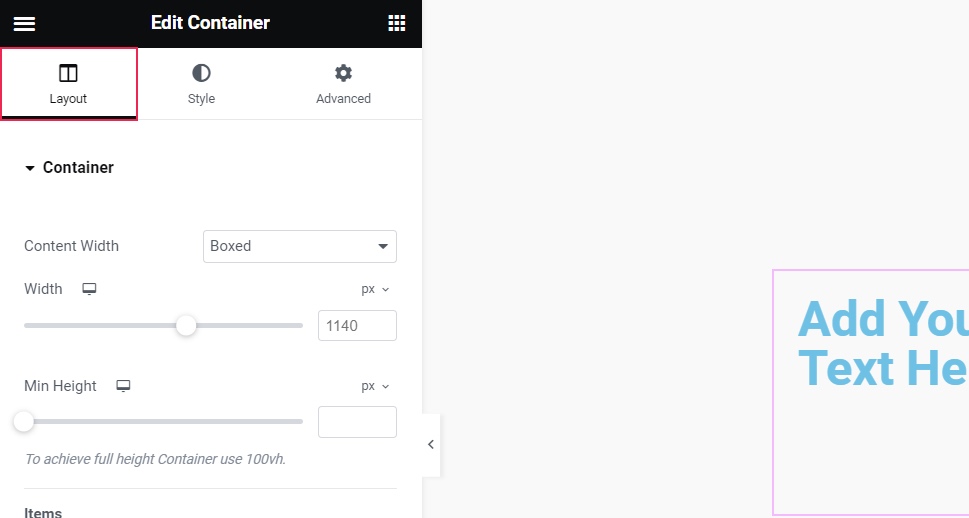
This section contains the options that pertain to the physical appearance of the content that’s within the element, as well as its structure in the case of sections. There is a difference between the layout options you’ll get when editing a column and a section — the section will always have more extensive editing options.
Widgets will have their content-specific options instead of the layout in the first group of options. If you’re working with a text widget, for example, you’ll see different options than those you see when you’re editing a spacer widget.
Style
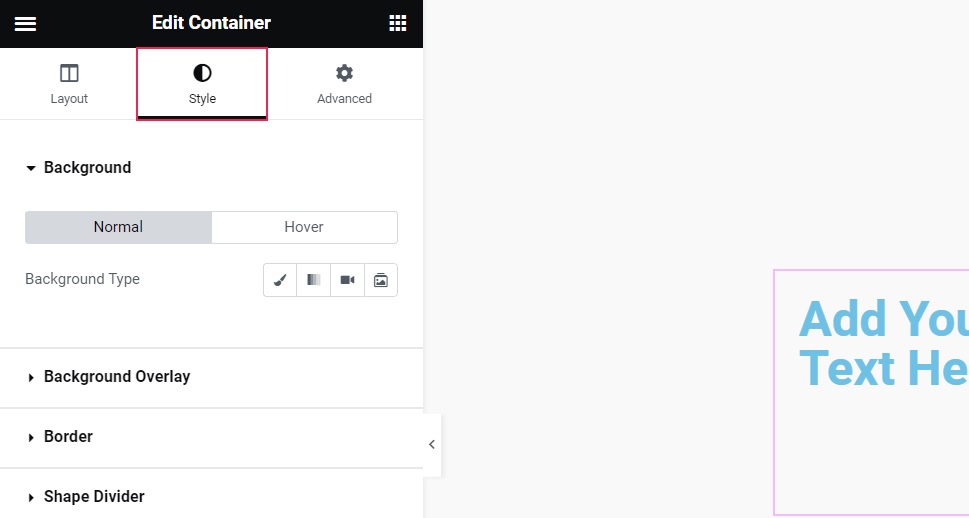
Background, border, and typography are the options that sections and columns have in common in the style group. If you’re styling a section, you’ll also be able to set up shape dividers and the background overlay.
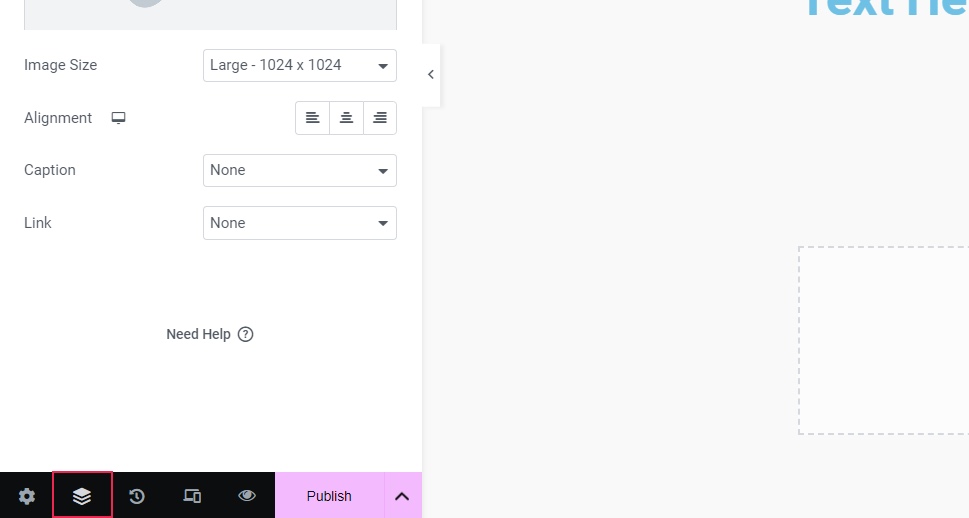
As for the widgets, their styling options will again vary depending on their contents. If you’re working with video, you’ll be able to set the aspect ratio here. For buttons, you’ll get a lot of options that include typography, padding, and border settings.
Advanced
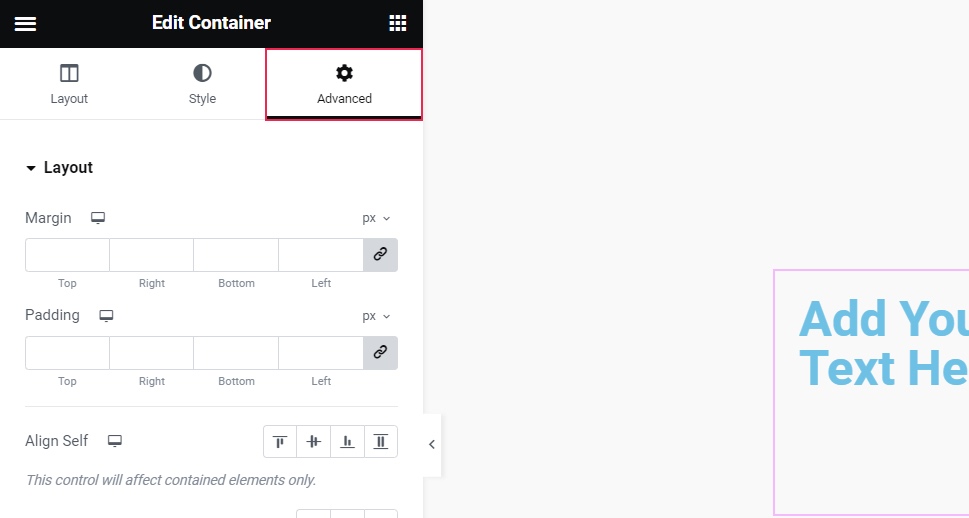
The Advanced group of options gives you the most extensive customization choices. Starting from setting the margins and paddings — something you’ll be doing a lot when building your pages — and moving to motion effects, background and border settings, and even responsiveness settings, this is the group of options you’ll want to pay attention to.
It’s also the group where you’ll see the most similarities between the options you get for sections, columns, and widgets. You’ll be able to add attributes and custom CSS, too, both of which are a Pro feature.
So there you have it: you’ve installed Elementor, you’re familiar with the editor, the basic elements and their options, and you have a blank page waiting for you to give it life. First, however, you have to figure out what kind of page you want to build.
If you understand landing pages, you probably know that there are certain things a landing page needs to efficiently do its job. It’s a completely different thing, however, to create an “About” page, because that page will require an entirely different set of elements.
So the bottom line here is that, before firing up Elementor, you first need to figure out every piece of content you’ll want to have on the website. Next, you need to figure out how to best spread that content across different sections. Then, you can use one of three different ways to create a page.
1. Do It From the Grounds Up
With this method, you’re relying on what you’ve learned in this Elementor tutorial to get you through creating your first page. Don’t worry — it’s easy and can be lots of fun. Just remember to approach the content of your page one element at a time. Let’s see how to create a “team member” section for your “About Us” page, for example.

As you can see from the Navigator, we’ve used three sections here. The topmost contains one column and a spacer widget to separate this area of the page from the rest of it. The second section contains one column and a heading widget, while the third section contains three columns, each equipped with an image box widget.
We’ve slightly changed the bottom margin of the second section to make more room between the heading and the image boxes, and that’s it. If you have the time and curiosity, you can experiment all you want with your website. Elementor makes it very easy. One section after another, and you’ll have yourself an awesome page.
2. Use Pre-Made Blocks
If you don’t want to spend too much time on building sections for your website, you can always rely on a premade block to, at the very least, light a fire under the heels of your imagination. So instead of pressing the “plus” button in the section-to-be, you can press the “folder” button and go to the Elementor library.
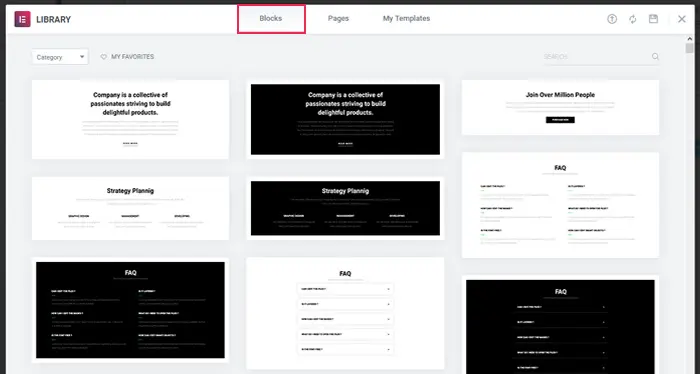
In the library, you’ll find whole pre-made blocks you can download to your page and then further customize to your liking. It’s a great way to get your creative juices flowing, although it’s just as likely to stifle your creativity and get you to settle for something that wasn’t custom-made for your website. You will need an Elementor account to access blocks, and some of them are only accessible by Pro users.
3. Use Premade Pages
If you want to spend even less time on building your website, you don’t even have to arrange the blocks on your page. You can simply go to the Elementor library and pick a whole premade page for your website. Some pages are available only to Pro users, and all of them require you to create an account for free.
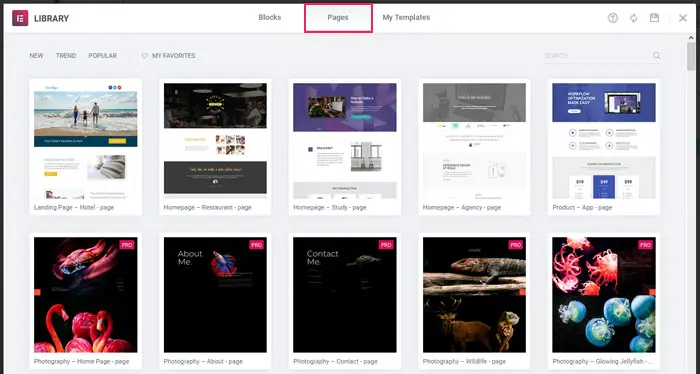
For someone who is in a hurry, or who doesn’t see the intrinsic value in having custom-made pages for their website, or who simply saw a layout they liked, pre-made pages are a great option. They are hands down the easiest way to populate your website with all the pages it will ever need.
Let’s Wrap it Up!
Most of us wouldn’t get too far in the digital world if it weren’t for entities such as WordPress that actively try to make it easier for everyone to participate. But even WordPress has its blind spots, which is why we have such a lively and vibrant plugin scene.
Page builders are among the more important members of that scene because, without them, it would be prohibitively difficult for most people to create a WordPress website. But if there’s a page builder involved, and if it just so happens the builder in question is Elementor, you can rest assured that the website will be up and running quickly and smoothly. And if you need some help along the way, you can always come back to this Elementor tutorial to get it.

Erin
Where can I find the Navigator window? Do I need to have Pro?
Qode Interactive
Hi Erin,
The Navigator is available with the free version of Elementor, you don’t need the Pro version. When editing a page or a post with Elementor, look at the bottom left corner, under the element selector. You’ll see five icons and a button for publishing the page. The Navigator icon is the second from the left – clicking it will bring up the Navigator. https://prnt.sc/s1U0UzKyDxzK
Hope this helps.
Best Regards,
Qode