How to Create Live Sale Notifications for Your WooCommerce Shop

There are many strategies you can use to boost sales on your WooCommerce site, like setting up free shipping or adding coupons, to name only a few. But among all those strategies, using social proof might be easily one of the best ways to attract the attention of potential customers. To be more specific, by adding live WooCommerce notifications to your site, you can easily inform your visitors about any important happenings on your online store and effectively enhance the overall credibility of your business, which can only lead to more sales and conversions in the long run.
So that’s why this time around, we’ve decided to talk more about the effectiveness of using live WooCommerce notifications on your online store. Then, we will also explain how to easily add live sale notifications to your own WooCommerce site, so make sure to keep reading.
eCommerce WordPress Themes
View Collection


What Are Live Sale Notifications and Why You Should Add Them to Your WooCommerce Store?
As we’ve already said in the beginning, using social proof is a great way to increase the online credibility of your business. This can include different types of product reviews, business testimonials, or, in our case, live notifications related to your products.
Now, when it comes to live notifications, these usually represent a popup that lets your visitors know about any new product sales you might have on your site at that very moment. The thing is, these notifications can indicate to users that people are actually buying your products and can also help create a sense of urgency. As a result, many users won’t want to miss an opportunity to make their purchase. So ultimately, they may become motivated to go ahead and buy your products as well.
Aside from letting visitors know about any real-time product purchases, you can also use these WooCommerce notifications to alert them each time a customer leaves a positive rating, subscribes to any of your services, and so on. All these notifications can only contribute to your brand’s reputation and can help you boost your sales and conversions, so we highly recommend that you apply this strategy to your WooCommerce store.
With all that said, let’s see how you can easily set up live WooCommerce notifications on your own eCommerce store with a plugin.
Creating Live Sale WooCommerce Notifications With a Plugin
The plugin we’ll be using to display live sale notifications is Live sales/Fake sales notification (full name “Live sales notification for WooCommerce, Fake sales notification for WooCommerce, Recent sales notification for WooCommerce”). As we can see from its name, it’s a plugin designed to boost sales using notifications even when the store doesn’t really have that many sales to highlight. It gives you two options – to send popup notifications about live original sales and virtual sales, which is a nicer way to say “fake sales.” If you opt for fake sales, your visitors will get notifications that an item has just been sold even though it hasn’t, and it will hopefully prompt them to purchase something themselves, for reasons we discussed above (social proof, FOMO, etc).
Now, if you don’t feel comfortable lying to your visitors and potential customers, you obviously don’t have to. The plugin can be set to display notifications about real sales only. However, bear in mind that if your shop doesn’t have a high frequency of sales on the average, the real sale notifications may not be that useful.
To get started, you first need to download, install and activate the plugin. You can search for it by name in the plugin section of your WordPress dashboard, or download it from wordpress.org and then upload it.
After installing the plugin, it will appear in the left-hand dashboard menu. Before you start using it, you should configure its settings.
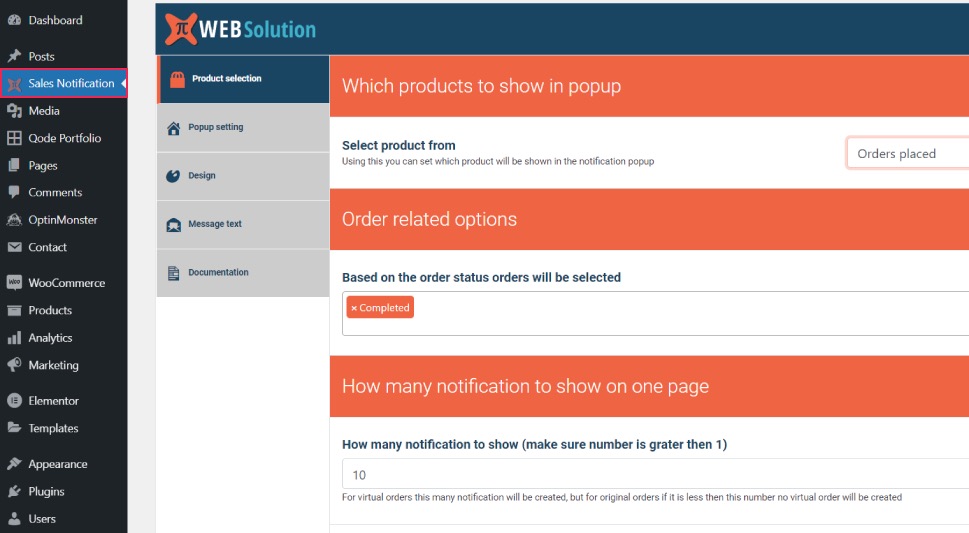
The first thing to set is the Product selection. Here you can specify where you want to select products from. For notifications about real orders and sales, select Orders placed. In the Order related options you can specify the status of the order you want to display notifications for. It can be just the completed orders, but it can also include orders pending payment, processing, on hold, completed, even canceled, refunded and failed. Here you’ll also set how many notifications to show per page. The number you set is only for virtual orders. With real ones, the number will represent the number of your actual orders made, and if that number is lower than the number specified in this field, the plugin will not add virtual orders to add up to the number.
Next, if you want to set up virtual (fake orders), select Recently viewed products.
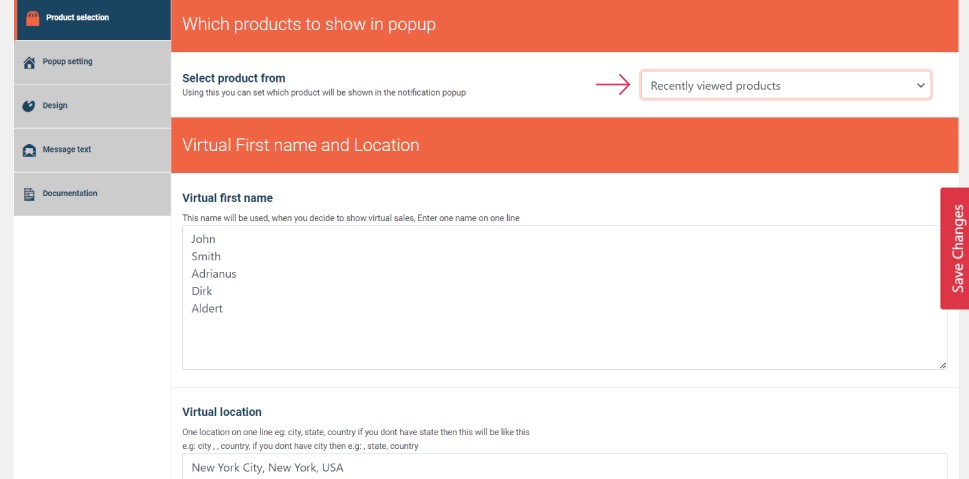
Here you can set the virtual names you want displayed in the notification. These names will represent the customer who “bought” the item. You can also specify the location, so the popup displays, for example, “John from Colorado.”
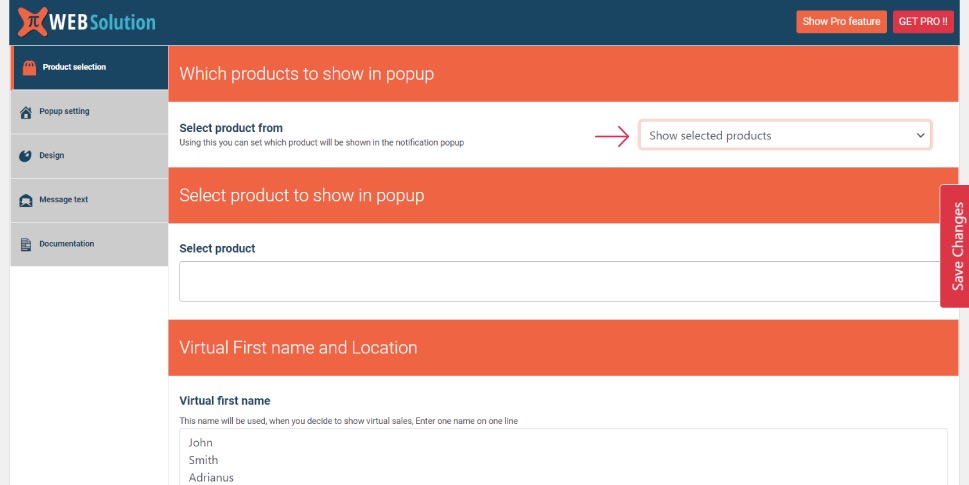
You can also set the product to show in the popup. In the Select product field, pick one of your items from the dropdown menu or type its name. Again, you can set the virtual name and location, as well as the number of notifications per page.
The last option, Show product from selected category, does a similar job – it lets you pick a category of products to display in the notification.
After you’ve set the product selection, it’s time to configure the popup. Click on Popup setting. The first thing to do is to check if the notifications are enabled (which they are by default, but it doesn’t hurt to double-check. Here you can set whether you want notifications to display on mobile devices too. Many shops keep mobile notifications off as they tend to hinder the user experience on smaller screens.
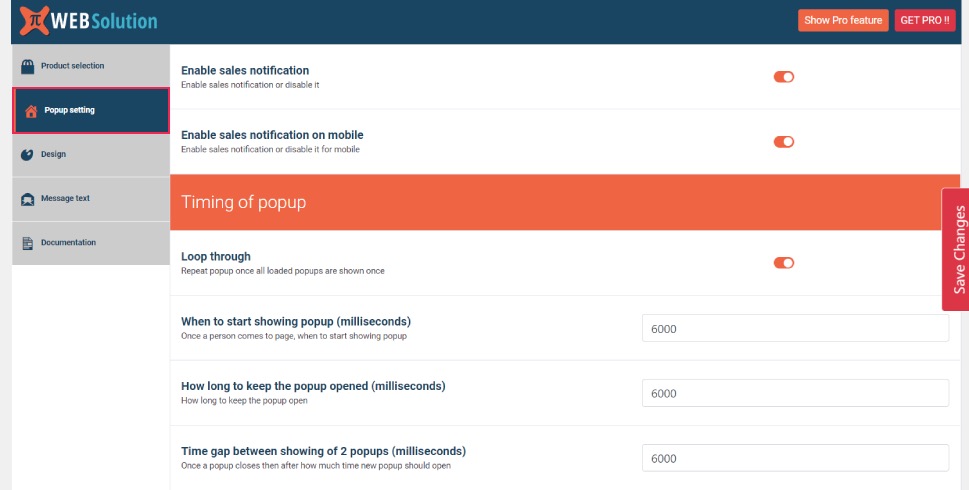
This section also allows you to set the timing and duration of the popup. We recommend keeping the default settings. The Loop through option, when enabled, makes your first popup appear again once all the other popup notifications have been displayed.
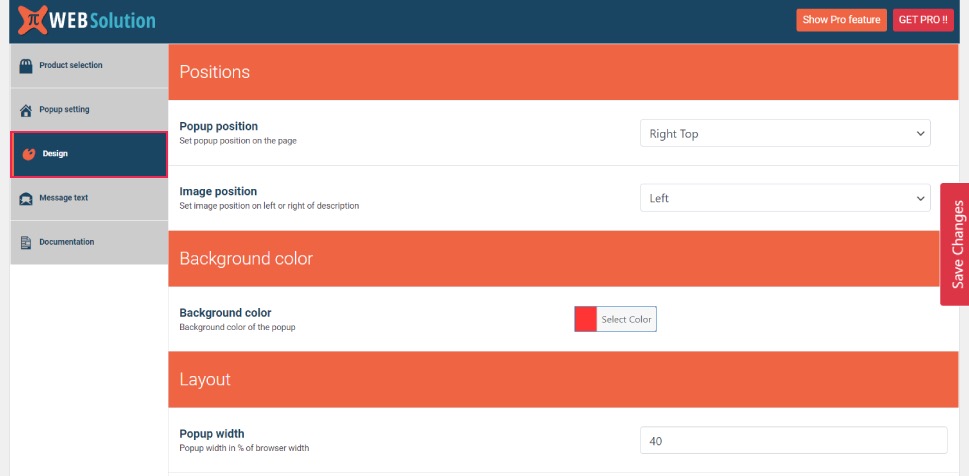
Next up, we have the Design options. Use them to set the position of the popup (left bottom, right bottom, left top, right top), the position of the image, background color for the popup, popup layout (width, image width, borders, spacing, link to product). You can also set the close button or upload your own icon for that purpose. It’s here that you’ll also set the audio alert. Bear in mind, though, that the sound will depend on user permissions and browser settings (many users turn the notification sounds in their browser).
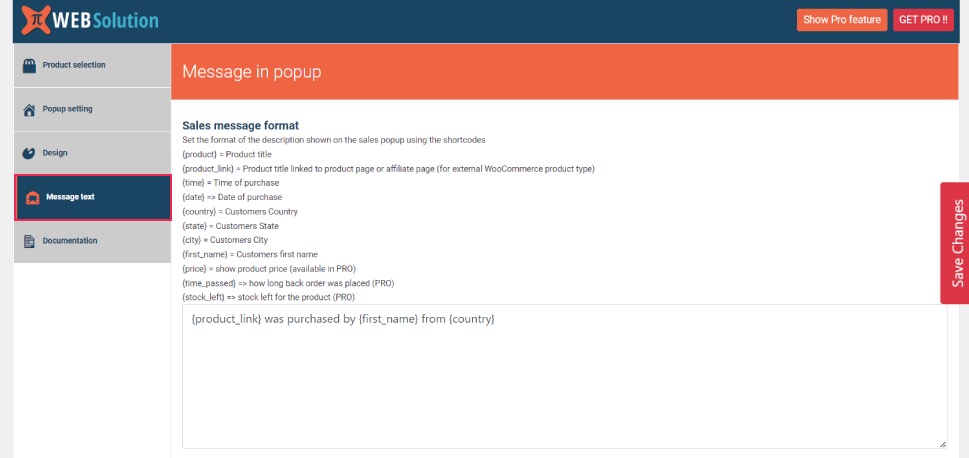
In the Message text field, you can customize the default message of the notification. Note that text in brackets (product link, name, location) shouldn’t be changed since these are pulled automatically. You can customize the text in between or add more text if you like.
Here you can also customize font size, font weight, colors, etc.
And that’s basically it. After leaving most of the default options on and using a dummy product, our live sale notification looks something like this:
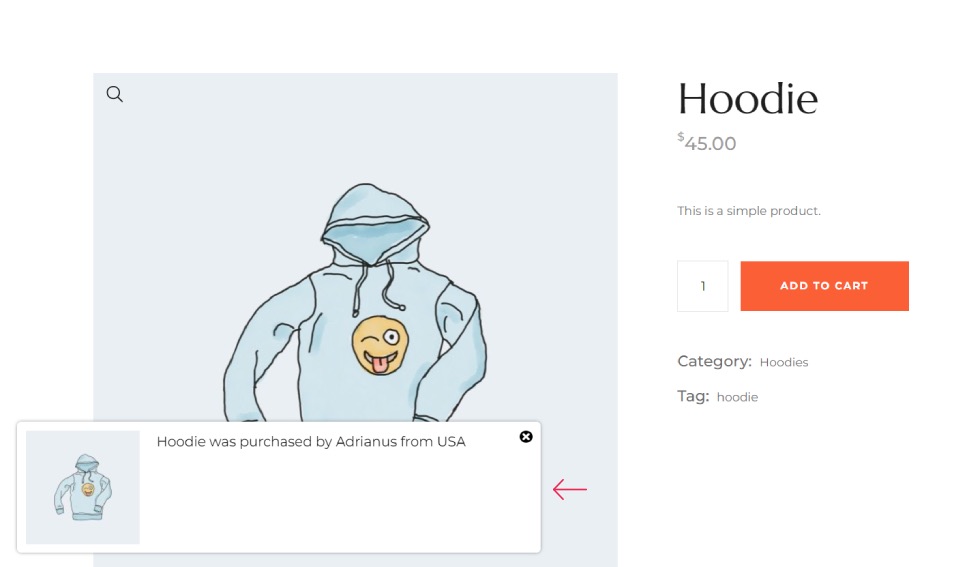
Your popup will, of course, be different after you customize everything to your liking and set the product selection the way it suits you best.
In Conclusion
Adding live sale notifications to your WooCommerce site can only help improve the credibility of your online store and boost your sales. We suggest that you try using the Live sales/Fake sales notification plugin to create, customize, and popups to your pages quickly and effortlessly. Not only is the plugin extremely lightweight and easy to use, but it also comes with every option you may need to completely customize the look of your notifications according to your specific needs. We encourage you to go ahead and start the process of making your online business look trustworthy enough to convert your new site visitors into actual buyers.
