How to Add a PayPal Button to WordPress
Nowadays, most purchases, payments, and donations are done online. Completing those actions should be simple and, most importantly, safe, which is why most users opt for using PayPal. This unparalleled ruler of the digital payments sector is not losing its popularity, 21 years after its launch. In fact, there seem to be over 286 million active PayPal accounts all over the globe.
This platform is known for its two-factor verification as well as the latest data encryption technology. What makes it particularly attractive for users though is the fact that the recipients don’t get to see their financial data at any point.
With all this in mind, you understand why it’s important to make it possible for people to perform financial actions through PayPal. We’ll show you how to add a PayPal button to WordPress, and, we promise you, you won’t break a sweat while doing it.
There are, in fact, two ways of doing this – either by using PayPal plugins or by manually adding a button. For starters, let’s see how you can do it with the help of plugins.
Method 1 – PayPal Plugins
There are multiple WordPress plugins you can add to your website, but the ones we liked the most are the PayPal Buy Now Button and the WordPress Simple PayPal Shopping Cart.
PayPal Buy Now Button
The PayPal Now Button is a plugin that you can use to allow users to make purchases on your website. It’s remarkably simple to use, and you’re pretty much only a few clicks away from effectively selling your products.
This plugin doesn’t require you to set up a complex eCommerce shop with too many functionalities. It’s a straightforward solution that puts focus on the products and the services you want to sell. You can add one or several buttons to your website, and when someone wants to make a purchase, they’ll be able to complete the payment via PayPal. End users don’t even have to have a PayPal account (however it’s important that you have one), as they can pay using their credit or debit card.
In case you don’t have a PayPal account, the PayPal Now Button includes instructions on how to create one with ease. Furthermore, there are also instructions on how to set up a PayPal Sandbox account, which basically allows you to test things out from both the buyers’ and the sellers’ end – of course, not with real money. The scope is to ensure things are running smoothly before going live. However, this option is available only for those who have a PayPal sandbox business account. To get one, first you need to sign up for a developer account on the PayPal developer website.
The PayPal Now Button also comes with four button styles, and it’s compatible with all WordPress themes out there. In case you get stuck at any point and end up needing assistance, it’s worth pointing out that the plugin includes built-in support in 18 languages and 25 currencies.
How to Use the PayPal Buy Now Button Plugin
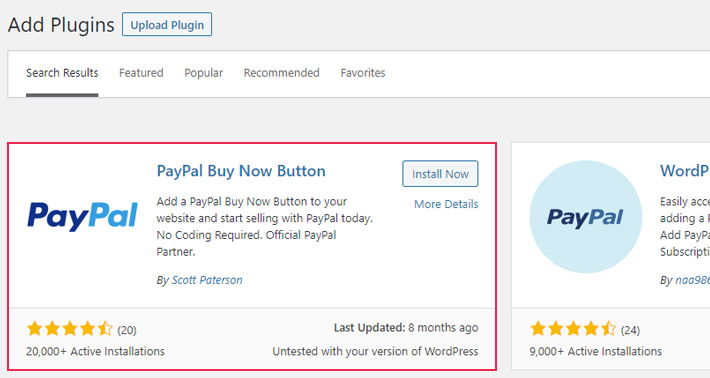
To set the wheels in motion, from your admin dashboard select Plugins > Add New and search for the PayPal Now Button. Click on Install Now and then Activate the plugin.
From the list of plugins choose the newly installed PayPal Now Button and click on Settings.

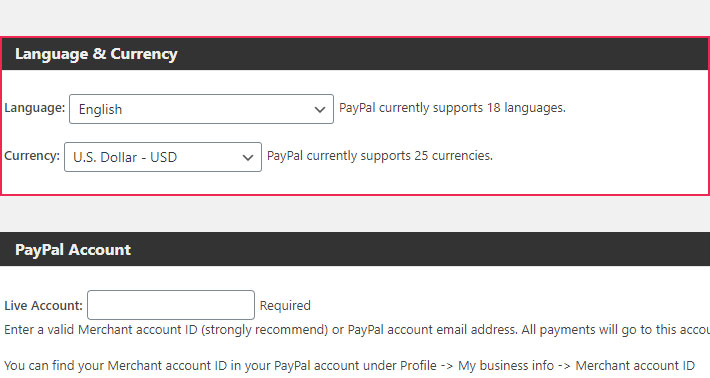
At the very top, you can pick a language as well as the currency for your PayPal button.
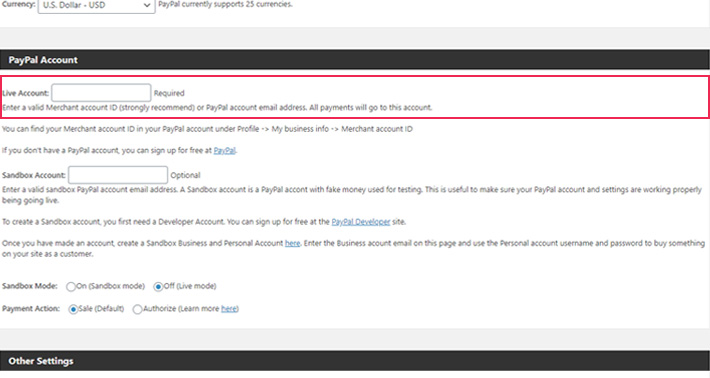
Next up, there are fields where you need to enter your PayPal Merchant ID or an email address that’s associated with your PayPal account. In case you don’t have an account at all, you’ll see a link that leads you directly to PayPal’s website, where you can create your account for free.
If you have a Sandbox account, you can enter your PayPal sandbox email address in the appropriate field. If not, simply skip this step.
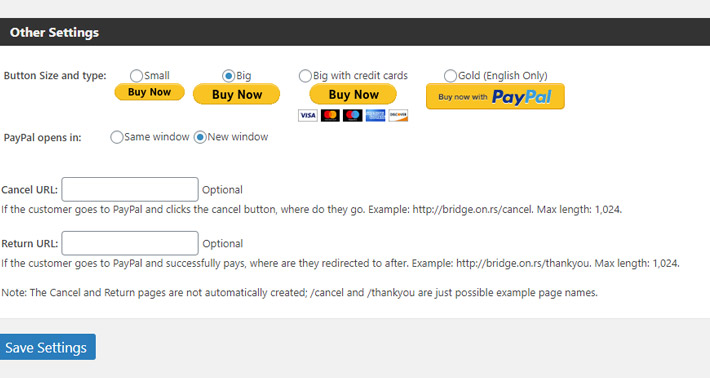
As you scroll further down, you’ll see the option to choose among four button sizes and types. You can also decide if PayPal will open in a new window or the same one upon clicking the button. When you’re done, click the Save Settings button at the end of the page.
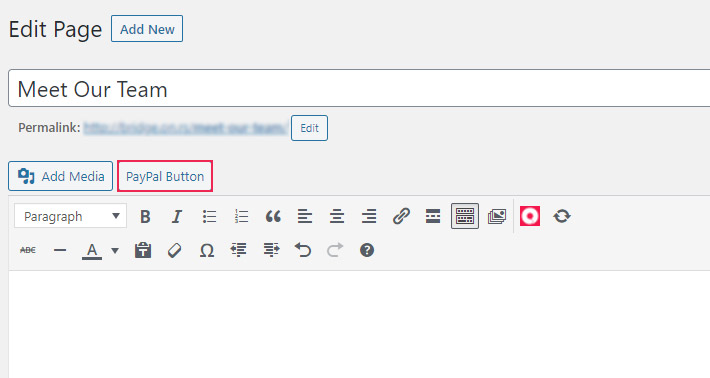
The next thing to do at this point is to choose where your PayPal button will appear. From the menu on the left, choose a Page or a Post, and then click on Add New. Right next to Add Media, you’ll notice a new option – PayPal Button.
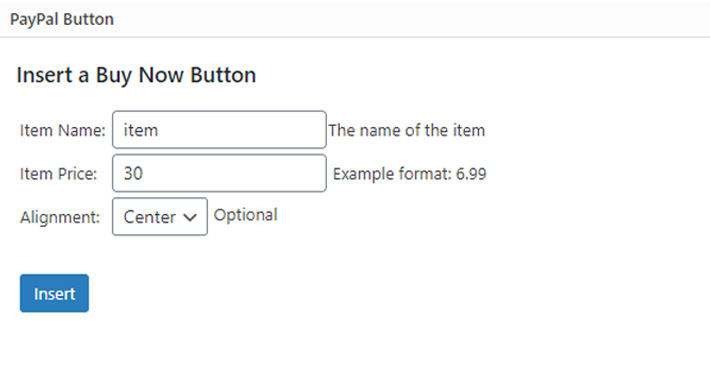
Click the button to open its editor. Next, insert the item name and item price, and choose alignment for your button. Once you’re done with the button settings, click on Insert.
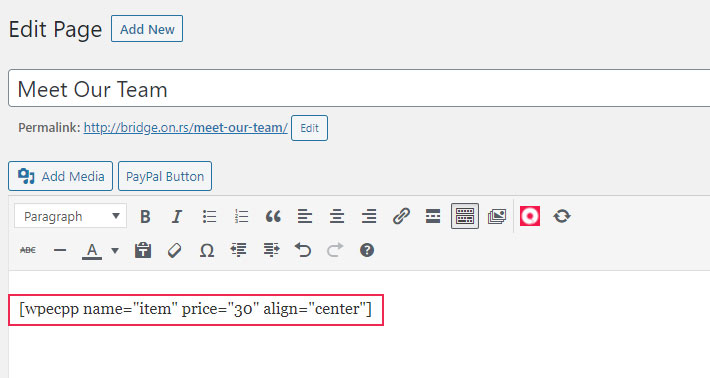
You’ll notice now that there’s a shortcode on your page or post now. You can leave it there where it is, or you can copy it and paste it to add the button elsewhere on your website. Click on Update, and the Buy Now button will appear on the front end of your website.
WordPress Simple PayPal Shopping Cart
WordPress Simple PayPal Shopping Cart is a remarkably simple eCommerce solution for your website. It allows you to start selling your products with utmost ease and to add an Add to Cart button anywhere you want on your website.
One of the advantages of this plugin is the possibility to add multiple products to a cart, and not just one. For every product you decide to sell you get a shortcode that you can then add to your posts, pages, and widget areas to display the PayPal’s Add to Cart button.
WordPress Simple PayPal Shopping Cart enables you to sell not only physical products and your services, but also all sorts of media files, such as music and audio files, videos, images, as well as ebooks.
Just like the PayPal Buy Now Button plugin, the WordPress Simple PayPal Shopping Cart lets you make the most of the PayPal Sandbox. Test things out before you go live, just to be absolutely sure there won’t be any issues neither for you nor for your users.
Among the many great and practical features this plugin comes with is also the possibility to use the Smart Payment Buttons, which will help your visitors feel more secure. Furthermore, you have the option to configure an email that the buyers will receive once they complete a purchase. There’s also a possibility of configuring discount coupons and giving them to your customers. You can also specify SKU for every product, and customize the Add to Cart button to your liking.
The list of useful features goes on and on. Add image thumbnails to your cart, style the checkout page as per your taste and make it open in a separate tab or window, track coupons, and much more. The plugin is also compatible with the WordPress multi-site installation and works great with all fully-responsive WordPress themes.
Beautiful eCommerce WordPress Themes
View Collection


How to Use the WordPress Simple PayPal Shopping Cart Plugin
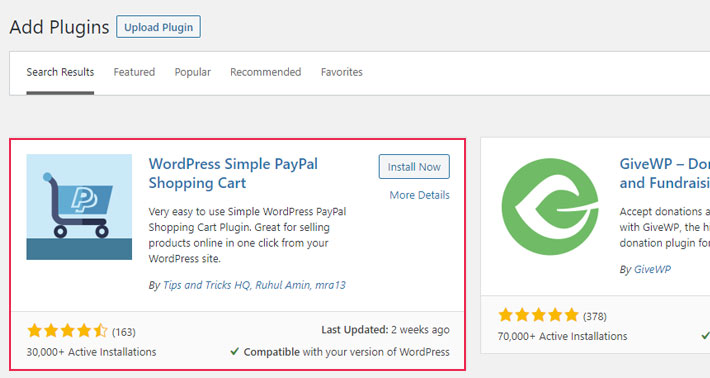
To start using the plugin, first up, go ahead and download it. As always, you can do this from your admin dashboard. Go to Plugins > Add New. Find the WordPress Simple PayPal Shopping Cart plugin, download it and activate it.
Once you complete the activation process, you’ll see these two options appear in the menu on the left-hand side.
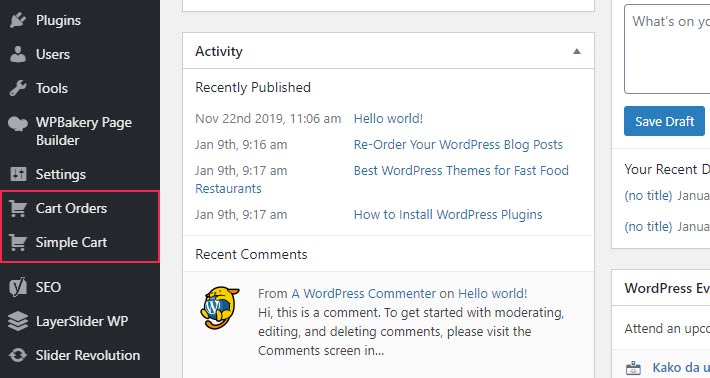
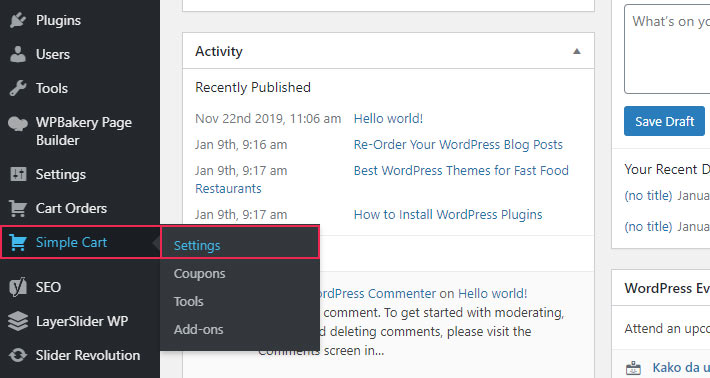
If you’d like to display customers’ orders, use Cart Orders. To take care of multiple settings that regard both PayPal and this plugin, use Simple Cart.
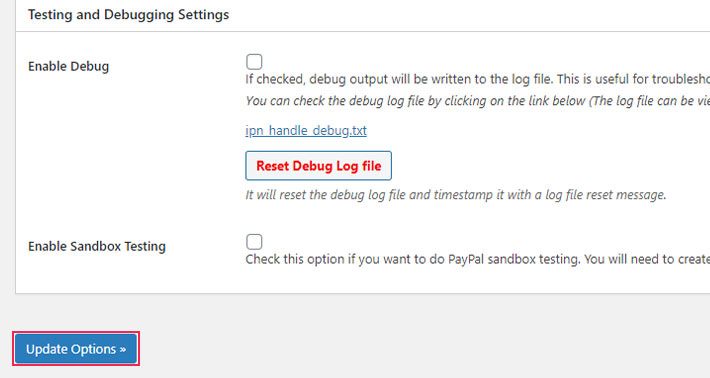
In order to enable customers to make purchases, enter your PayPal email address. Set the title for your shopping cart, the base shipping cost, choose the currency, decide if you want to use the PayPal profile based shipping, add a custom image or a text for the cart button, input the return and cancel URLs, and more.
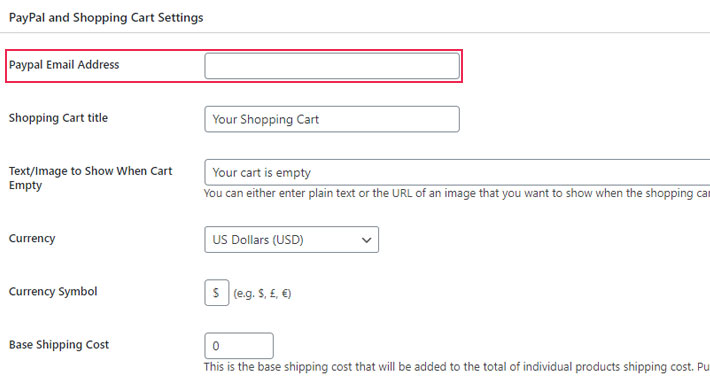
Once you’re done with making all the changes, click Update Options at the bottom of the page.
Creating Products with WordPress Simple PayPal Shopping Cart
This plugin is used only to enable users to sell their products. To create products though, you need to use a shortcode and do it all manually.
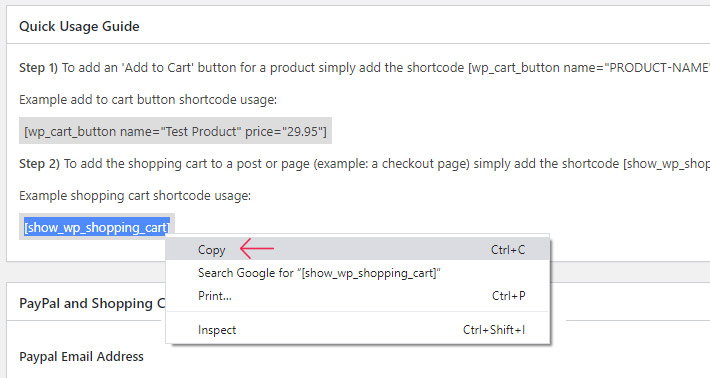
Don’t leave the Simple Cart page yet. Scroll up, back to the top. Under Quick Usage Guide you’ll notice that there are two shortcodes.
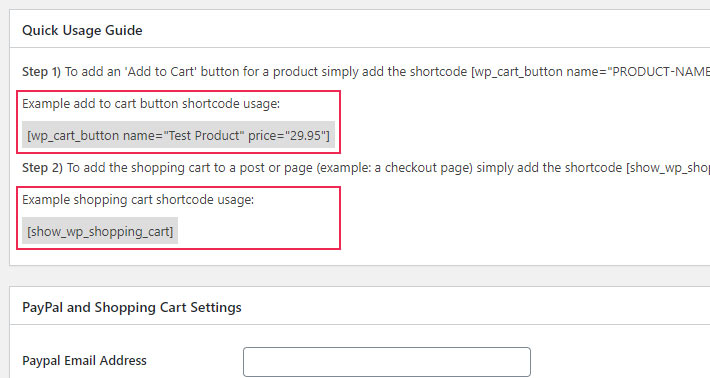
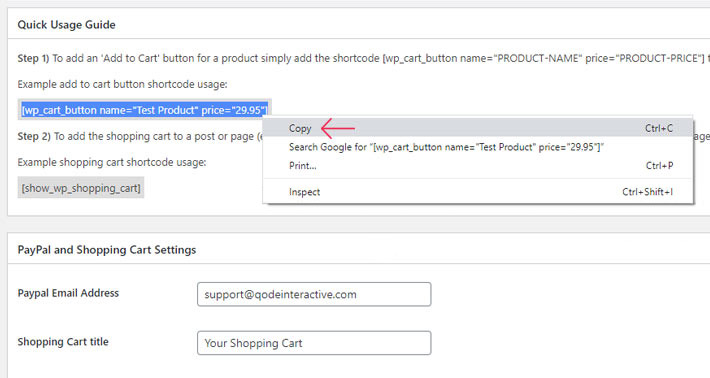
The first shortcode will allow you to create an Add to Cart button for a product that will then be sent to PayPal along with the indicated price. Make sure you copy this shortcode.
Next up, go to Posts/Pages (depending on where you want to display your product) and select Add New. Paste your shortcode there.
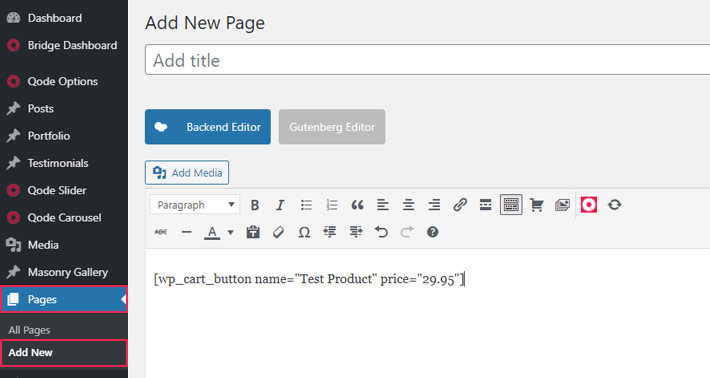
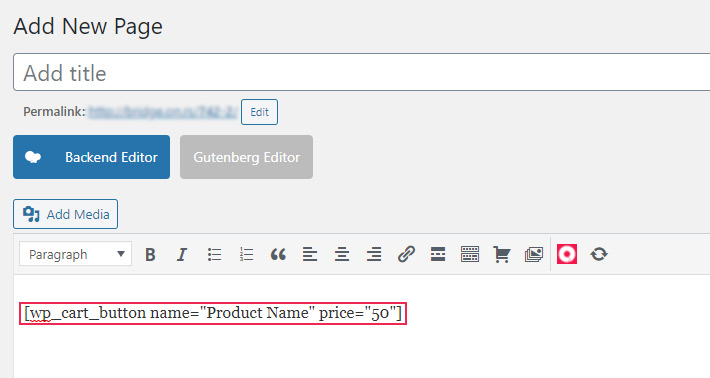
Make necessary adjustments and alter the shortcode by inserting the name and the price of the product you’re looking to sell.
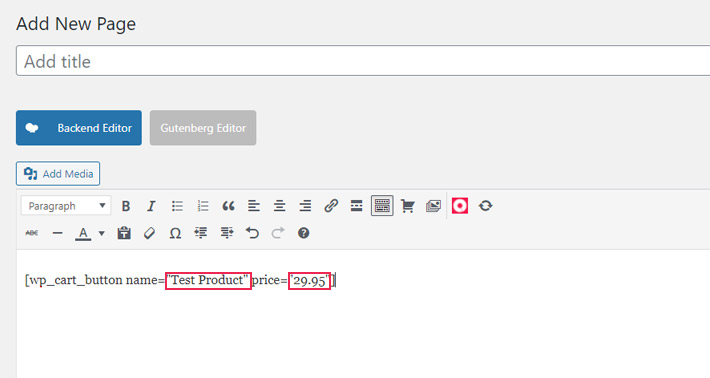
When you’re done, make sure to click Publish and the Add to Cart button for your product will appear on the front end.
By the way, did you perhaps notice the shopping cart icon in the page/post editor? That’s the quite handy WP Cart Shortcode.
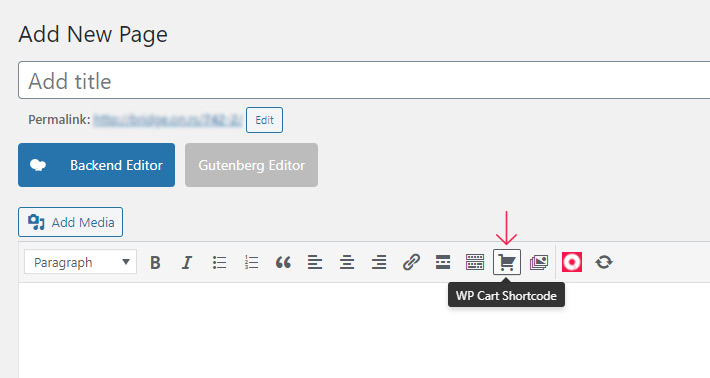
Click on it to modify it as per your requirements.
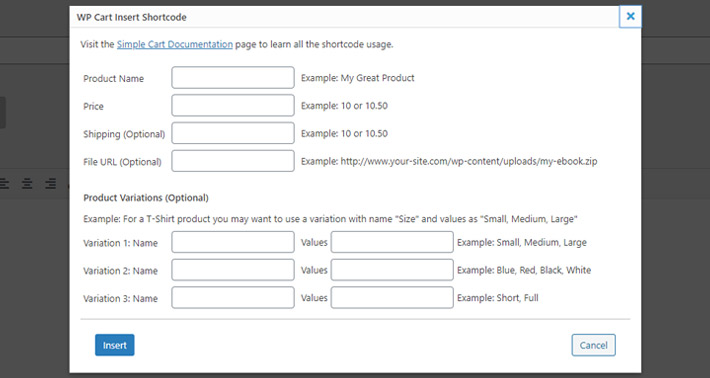
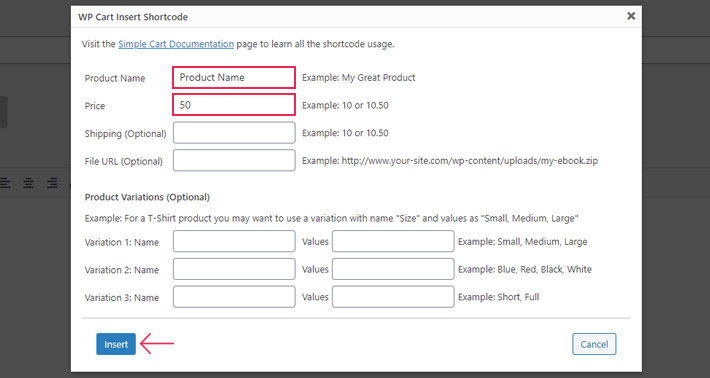
You can enter the name of your product and the price (which are mandatory fields), as well as some additional info, such as product sizes, etc. In case you have doubts about using the shortcode, check out the WP Simple Shopping Cart documentation. When you’re done with inserting the details, click Insert.
The shortcode for the product you’ve just created will now be visible in the editor.
The other shortcode in the Simple Cart settings, under Quick Usage Guide, enables you to add a shopping cart to any page or post. For starters, copy the shortcode.
Go to a page or a post where you’ve already added the first shortcode and paste the new one below. Next, Update the page/post.
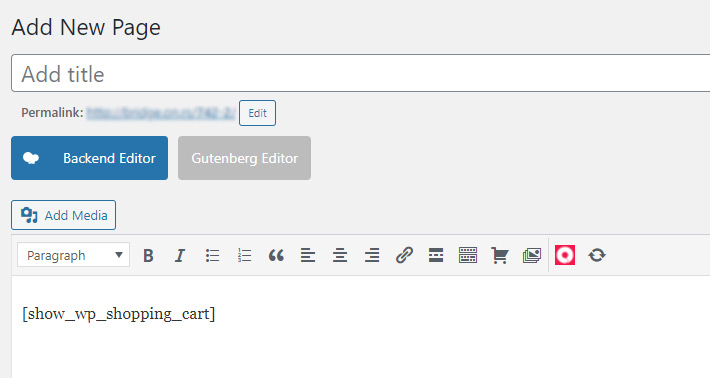
And the PayPal button will now appear on your website.


Method 2 – Adding the PayPal Button Manually
In case you don’t want to bother with installing plugins, let us show you how to add the PayPal button directly from their website.
Log into your account. At the top right corner of the screen click on the settings icon.
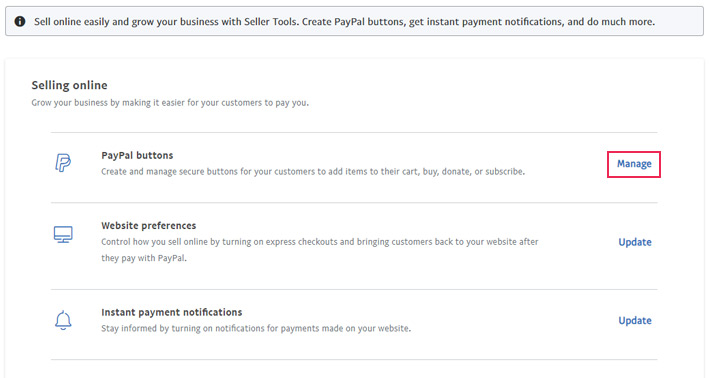
Now, click the Sellers Tools option.
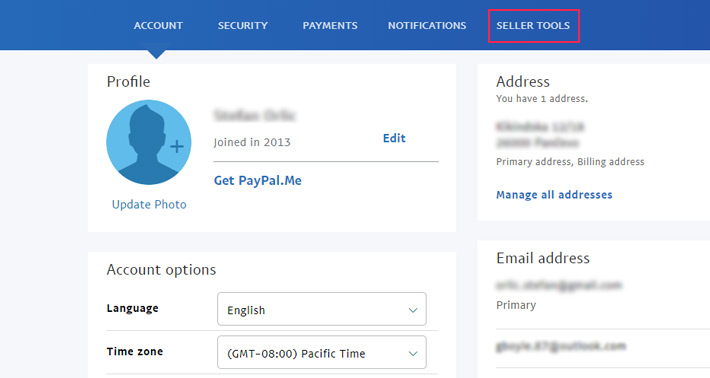
Here you’ll see a number of options that can help you streamline your online sales. We’re interested in the PayPal Buttons option. Click the Manage link next to it.
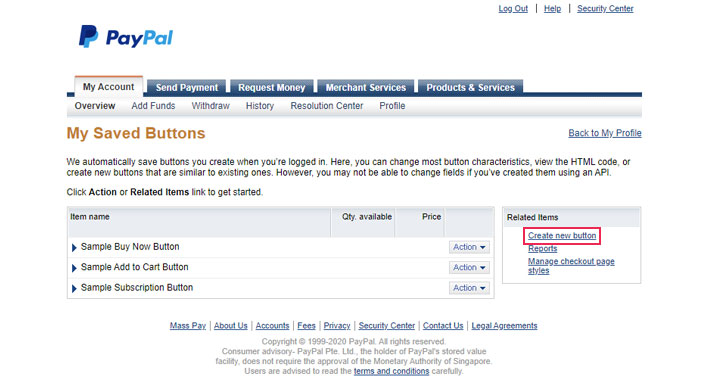
If you’ve created any buttons in the past, those will be listed under My Saved Buttons. If not, the section will be either blank or you’ll be able to see some sample buttons. Take a look at the right-hand side of the screen, under Related Items. There you’ll find the Create New Button option.
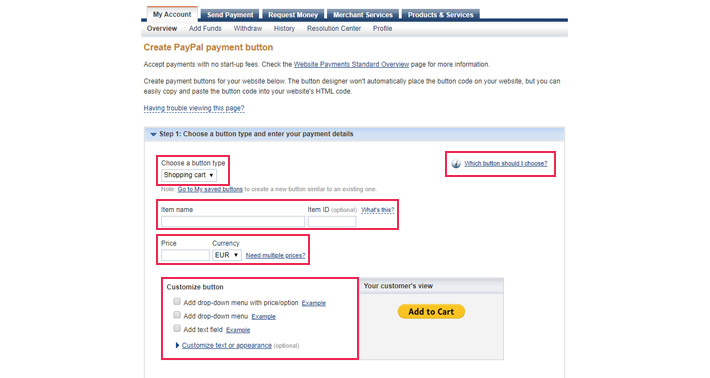
Click on it and you’ll see a bunch of options pop up on your screen. You can choose one of the three button types (if you’re unsure which button type to go with, click on Which button should I choose, where each type is explained), set the name for your product, the product ID, the price, as well as the currency. You can customize your button depending on which options you need (whether you want to add multiple pricing options, include a text field, etc.), and you’ll also be able to see the button preview, which shows just how your customers will see the button.
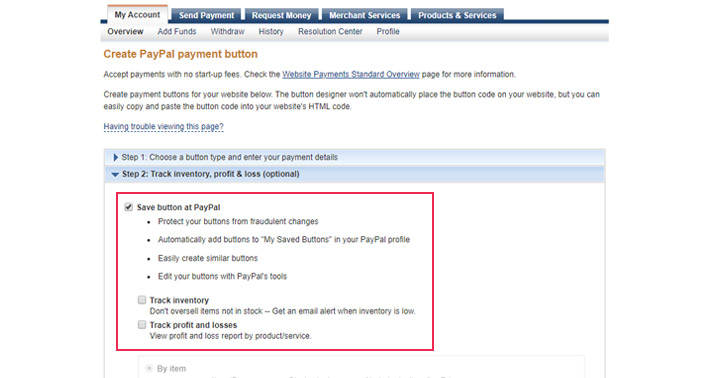
Once you’ve set everything up here, you can open the Step 2 tab. Here, you can save your button, choose to track your inventory, and choose to track your profit and losses.
Let’s move on now to Step 3. Here you have various options for customization, which are totally optional. If you’d like to customize checkout pages for customers, you can take care of it in this section. For instance, you can ask them to provide their shipping address, or redirect them to an URL when they cancel or finish their checkout. When you’re done, hit the Create Button at the bottom
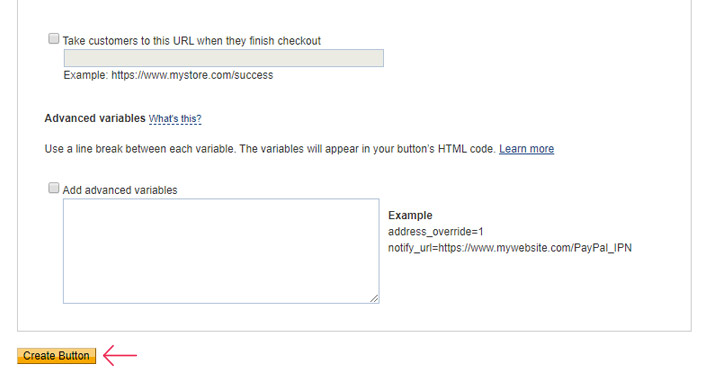
Next, you will get the code for your button that you want to add to your website.
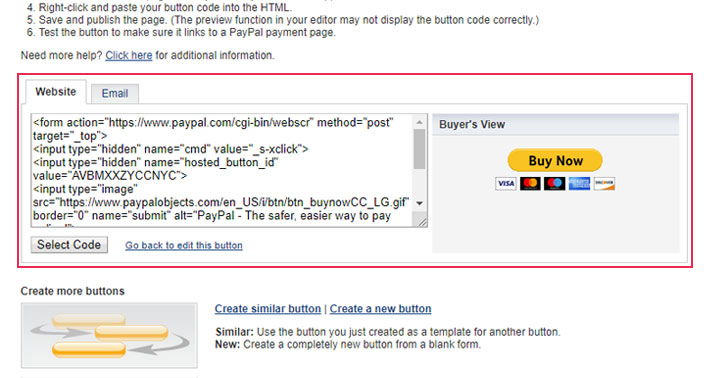
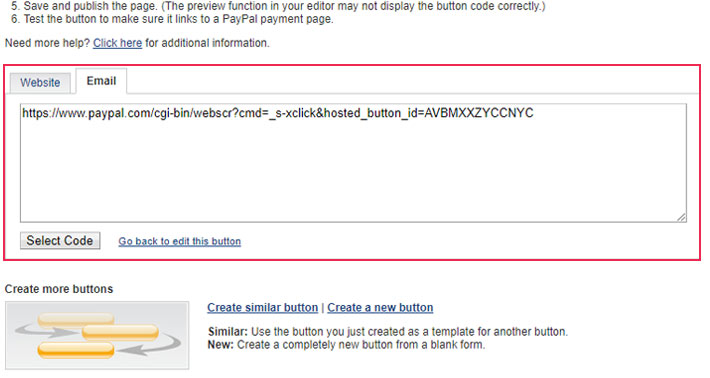
If you select the Email tab, you’ll be able to see the direct link to your product. You can use it to send it to someone directly.
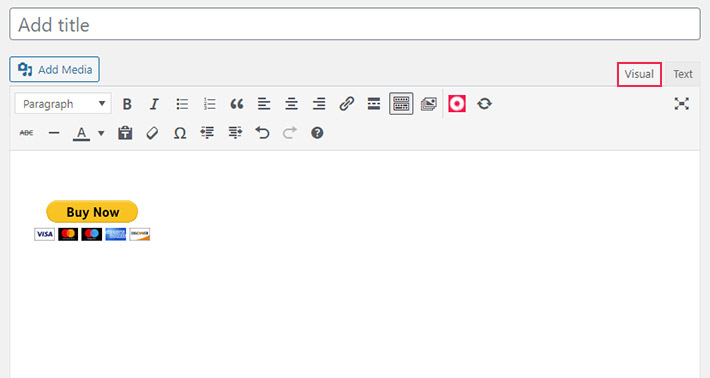
We’re interested in the code that’s displayed in the Website tab. Go ahead and copy it. Then, go to your WordPress admin dashboard, and select Page/Post > Add New. It’s important to choose the Text editor. If not, you risk getting your code broken in the Visual editor. Now, paste the code that you got from PayPal.
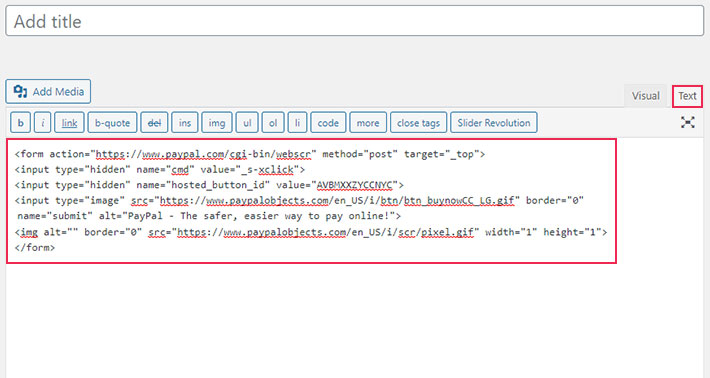
If you would like to check how your button looks, switch back to the Visual editor.
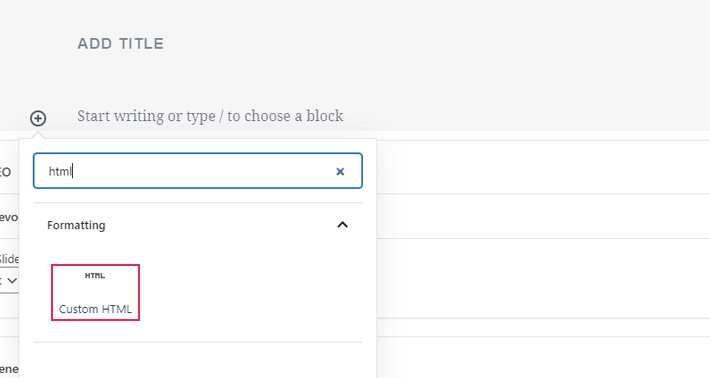
If you’re using the Gutenberg editor, you can add your button by choosing the Custom HTML block.
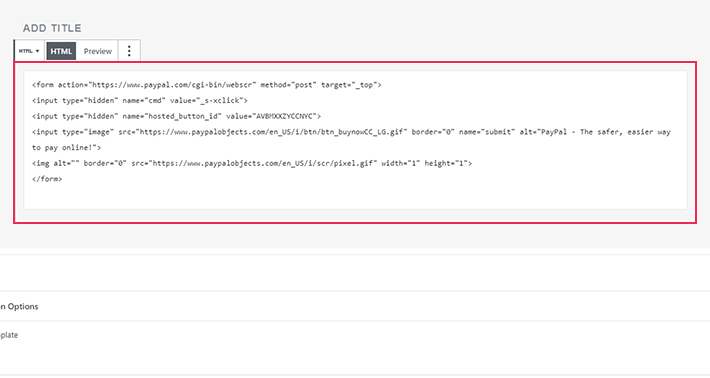
Just input the code you got from PayPal inside the block.
Then click Preview to check out your new button.
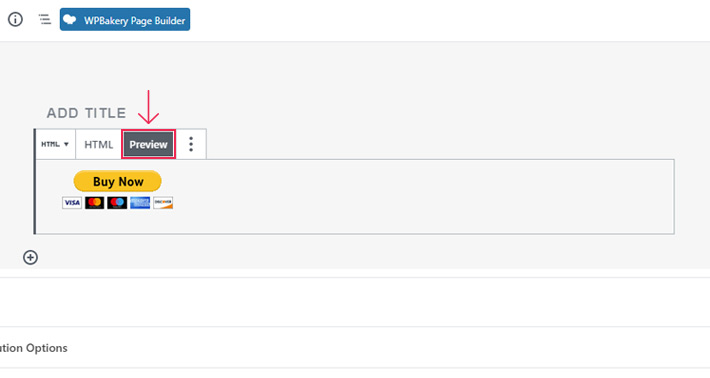
And that’s all there is to it. You’ve successfully added a PayPal button to your WordPress website.
Which Method is the Best?
Making sure your customers can pay without much fuss should definitely be a priority of all eCommerce websites, as that pretty much means success for any business. If you prefer to do things on your own and are not much of a fan of using too many plugins, go ahead and add a PayPal button to your website directly from their website. Not much expertise is required, albeit if you don’t want to bother with it too much, there’s no reason for you to. That’s what you got the plugins for! Both the PayPal Buy Now Button and the WordPress Simple PayPal Shopping Cart are flexible, straightforward solutions that will enable you to start selling your products and services in a beat. As you can see, you don’t have to set up a complex online shop for the cash to start rolling in. These sleek solutions will certainly do the job, regardless of which you end up going with in the end.
