What is the “robots.txt” File in WordPress and How to Use it

The art and science of getting your website to rank high in the results of various search engines are commonly referred to as SEO (Search Engine Optimization). And there are a lot of different aspects when it comes to SEO, perhaps too many to cover in a single article. This is why we will be focusing on just one right now—the WordPress robots.txt file. In this article, we will dig deeper into what the robots.txt file is and how to use it. Among other things, we will discuss different ways of creating the file and cover the best practices regarding its directives.
What is the “robots.txt” file
Robots.txt is a text file located in your root WordPress directory. You can access it by opening the your-website.com/robots.txt URL in your browser. It serves to let search engine bots know which pages on your website should be crawled and which shouldn’t. Strictly speaking, a website doesn’t need to have a robots.txt file. If you are in the process of creating your website, it is best to focus on creating quality content first. The search engine bots will crawl your website regardless of whether you have the robots.txt file or not.
However, there are quite a few benefits of having a robots.txt file with proper directives once your WordPress website is finished. Apart from preventing crawlers from crawling unnecessary content, optimized robots.txt directives ensure that your crawl quota (maximum amount of times a crawler can crawl your website during a given time) doesn’t go to waste.
Moreover, well-written WordPress robots.txt directives can reduce the negative effects of bad bots by disallowing them access. This, in turn, might improve your overall website load speed. But keep in mind that robots.txt directives mustn’t be your only security. Bad bots often ignore these directives so using a good security plugin is highly advised, particularly if your website is experiencing issues caused by bad bots.
Finally, it is a common misconception that the robots.txt file can prevent some of the pages on your website from being indexed. The robots.txt file can contain directives that prevent crawling, not indexing. And, even if a page isn’t crawled, it can still be indexed through external links leading to it. If you want to avoid indexing a specific page, you should use the noindex meta tag instead of the directives in the robots.txt file.
Qode Themes: Top Picks
View Collection


How to use the “robots.txt” file
Having clarified what a WordPress robots.txt file is and some of what it does, we can consider how it’s used. In this section, we will cover how to create and edit a robots.txt file, some of the good practices regarding its content, and how to test it for errors.
How to create the “robots.txt” file
By default, WordPress will create a virtual robots.txt file for any website. Such a file could look something like this, for example:

However, if you want to edit it, you would need to create a real robots.txt file. In this section, we will explain three ways you can do so. Two of those involve the use of WordPress plugins, while the third relies on the use of FTP.
-
Yoast SEO
With over 5 million active installations, Yoast SEO is one of the most popular SEO plugins available. It has a lot of site optimization tools, including a feature that allows users to create and edit robots.txt files.
After installing the plugin, click on the newly-created SEO section, followed by the click on the Tools subsection. Within the page that opens, click on the File editor link near the top.

On the following page, locate the robots.txt section. From there, if you haven’t already created it before, you should press the Create robots.txt file button.

This will create the file and you will be able to see its content in a text area. Using that same text area, you will be able to edit the content of your new robots.txt file. When you’re done editing the file, press the Save changes to robots.txt button below.

-
All in one SEO
All in one SEO is another highly popular SEO plugin that comes with various free features, including ones that allow users to create and edit WordPress robots.txt files.
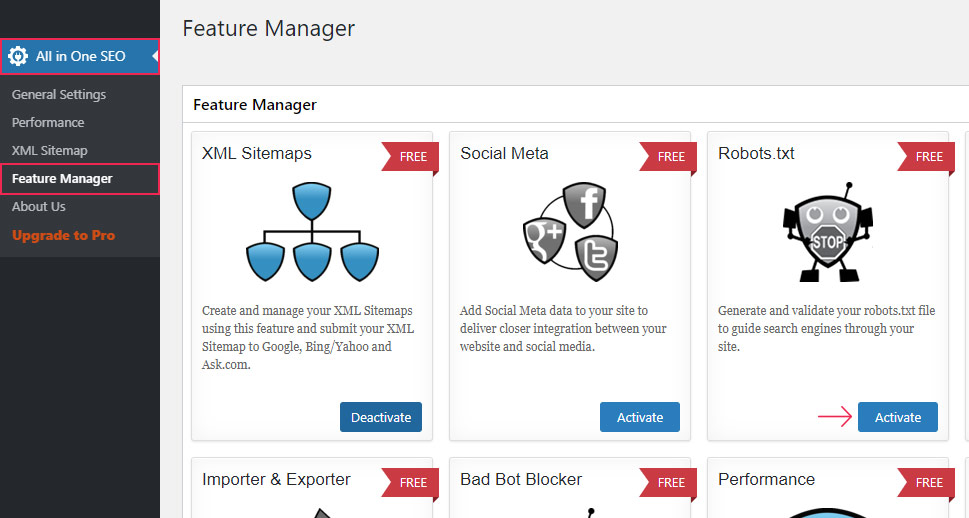
After installing the plugin, click on the new All in One SEO section in your dashboard menu, followed by a click on the Feature Manager option. Within the Feature Manager page, locate the Robots.txt feature and then press the Activate button next to it.
This will create the robots.txt file. Afterward, you will also see a success message stating that the options have been updated. And a new subsection called Robots.txt will appear.

By clicking on the Robots.txt option, you will get a view of the new section. There, you will be able to add new rules/directives to the robots.txt file, as well as see how it looks currently.

-
Creating the “robots.txt” file via FTP
Apart from using a WordPress plugin, you can simply create the robots.txt file manually. First, create an empty .txt type file on your computer and save it as robots.txt.

Then you need to upload it to your server using FTP. If you aren’t familiar with FTP, you should learn more about the use of FTP before proceeding.
When you’re ready, connect to your server using your FTP credentials. Then, in the right-hand section, navigate to your root WordPress directory, often called public_html. In the left-hand section of your FTP client (we’re using Filezilla), locate the robots.txt file you previously created and saved on your computer. Right-click on it and select the Upload option.

Within moments the file will be uploaded and you will be able to see it among the files in your root WordPress directory.
If you wish to edit the uploaded robots.txt file afterward, find it in the root WordPress directory, right-click on it and select the View/Edit option.

Adding rules to the “robots.txt” file
Now that you know how to create and edit the robots.txt file, we can talk more about the directives this file can contain. The two directives that are present in robots.txt most often are User-agent and Disallow.
The User-agent directive specifies which bot the directives listed underneath the User-agent directive are applied. You can specify a single bot (e.g. User-agent: Bingbot) or make the directives apply to all bots by putting an asterisk (User-agent: *).
The Disallow directive tells the bot not to access a specific part of your website. And there is also the Allow directive that simply does the opposite. You don’t need to use it as often as Disallow, because bots are given access to your website by default. The Allow directive is usually used in combination with the Disallow directive. More precisely, it serves to allow access to a file or subfolder belonging to a disallowed folder.
Additionally, there are two other directives: Crawl-delay and Sitemap. The Crawl-delay directive is used to prevent server overload due to excessive crawling requests. However, this directive should be used cautiously as it isn’t supported by some crawlers (e.g. Googlebot) and it is interpreted in different ways by the crawlers that do support it (e.g. BingBot). The Sitemap directive serves to point the search engines to your XML sitemap file. The use of this directive is highly advised, as it can help you with submitting the XML sitemap you create to Google Search Console or Bing Webmaster Tools. But keep in mind that you should use an absolute URL to reference your sitemap (e.g. Sitemap: https://www.example.com/sitemap_index.xml) when using this directive.
In the following section, we will show you two example snippets, to illustrate the use of the robots.txt directives that we mentioned above. However, these are only examples; depending on your website, you might need a different subset of directives. With that being said, let us take a look at the snippets.
-
This example snippet disallows access to the entire /wp-admin/ directory to all bots, except for the /wp-admin/admin-ajax.php file found within.
User-agent: *
Disallow: /wp-admin/
Allow: /wp-admin/admin-ajax.php
-
This snippet allows access to the /wp-content/uploads/ folder for all bots. At the same time, it denies access to the /wp-content/plugins/, /wp-admin/ and /refer/ folder, as well as to the /readme.html file for all bots. The example below shows the proper way of writing multiple directives; whether they are of the same or different type, one per row is a must. Additionally, this snippet example lets you reference your sitemap file by stating its absolute URL. If you opt to use it, make sure to replace the www.example.com part with your actual website URL.
User-Agent: *
Allow: /wp-content/uploads/
Disallow: /wp-content/plugins/
Disallow: /wp-admin/
Disallow: /readme.html
Disallow: /refer/
Sitemap: https://www.example.com/sitemap_index.xml
Testing the “robots.txt” file
After you add the directives that fit your website’s requirements, you should test your WordPress robots.txt file. By doing so, you are both verifying that there aren’t any syntax errors in the file, and making sure that the appropriate areas of your website have been properly allowed or disallowed.
To test the robots.txt file of your website, navigate to an SEO-testing website. Then insert any URL managed by your website (your homepage URL, for example), choose a user agent (Googlebot, for example), and press the Test button.

If the URL is crawlable, you will see a green result saying Allowed. Otherwise, it will say Disallowed. To confirm the proper crawl directives on your website you can repeat the same process for as many different URLs on your website as you wish.
Final Thoughts
The robots.txt file is a text file located in the root directory of every WordPress site. It contains directives for crawlers telling them which parts of your website they should or shouldn’t crawl. While this file is virtual by default, knowing how to create it on your own can be very useful for your SEO efforts.
That’s why we covered various ways of making a physical version of the file and shared instructions on how to edit it. Moreover, we touched on the main directives a WordPress robots.txt file should contain and how to test that you set them properly. Now that you’ve mastered all this, you can consider how to sort out your site’s other SEO aspects.
