WordPress Sitemap: What It Is, Why It Matters and How to Create One

In order to stay afloat in a highly competitive online world, website owners apply different SEO basics and techniques that will help them get noticed by search engines. After all, if you don’t get noticed by Google, people will seldom be aware of your presence in the internet sphere, which is why every website strives to implement a solid SEO strategy to get the much-needed attention of search engines. And since an XML sitemap has a major role in helping Google find the most important pages of your website, it falls into the category of most crucial SEO techniques out there.
This time around, we will get into the details of what an XML sitemap is, why you should make one, and how to add it to your WordPress website.
These are the topics we will cover:
Essentially, an XML sitemap is a file that acts as your website’s roadmap and lets Google know about the existence of all your significant site pages. To make a quick comparison, some websites have an HTML sitemap on their webpage, which is visible to visitors and serves to provide better user experience and overall easier navigation. An XML sitemap has a similar role, but the key difference is that it helps search engines navigate your website instead of users.
This file lists the content of your website in an XML format, which makes it easy for Google to discover your content and then index it. So, not only does an XML sitemap ensure that Google finds and crawls all these pages, but it helps Google comprehend the structure of your website as well. It also lets search engines determine the links that are more important than others and notifies them about the frequency of your site updates in general.
Best Themes for Marketing
View Collection


While an XML sitemap is not directly responsible for better search engine ranking of your site, it does let search engines know about the existence of your pages. Therefore, if you implement an XML sitemap into your site, search engine bots will crawl and index your content more easily, which means that the engines will end up showing these pages in their results. And naturally, if engines become aware of your pages’ existence, some of them will eventually succeed in getting higher ranks as well.
Adding an XML sitemap is particularly useful if you’re creating a WordPress website for the first time or setting up a WordPress blog from scratch. The reason for this is simple – new websites usually don’t have any backlinks when starting out, which makes it trickier for search engines to find their content.
Luckily, search engines like Google and Bing allow the submission of a sitemap directly to their webmaster tools, in turn making it easier for engines to discover your pages.
In a nutshell, adding an XML sitemap is extremely important as it plays one of the vital roles when it comes to improving the search engine visibility of your pages. There are various ways in which you can create a WordPress XML sitemap. We are going to show you two of the most universally accepted methods – the first one is done with the use of a Yoast SEO plugin, while the second can be implemented with a plugin called Google XML Sitemaps.
Yoast SEO is not only well-known for its ease of use, but it also comes with a wide range of practical SEO features – most of which are available for free. The ability to create an XML sitemap is among these, and the Yoast SEO plugin provides one of the easiest ways to do it by far.

First, you need to install the plugin and activate it. For a more comprehensive overview of its options, you can also check out our guide on how to set up the Yoast plugin.
Head to the SEO tab located in your WordPress dashboard and access the screen called General. Then, choose the Features tab.
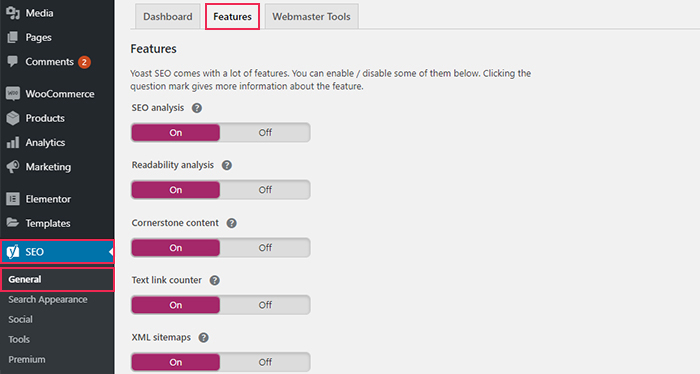
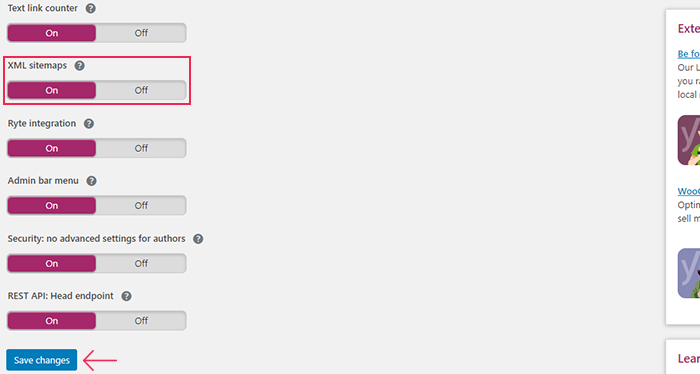
Next, find the XML sitemaps option and check if it’s switched on. Also, make sure to save your changes once you’re done.
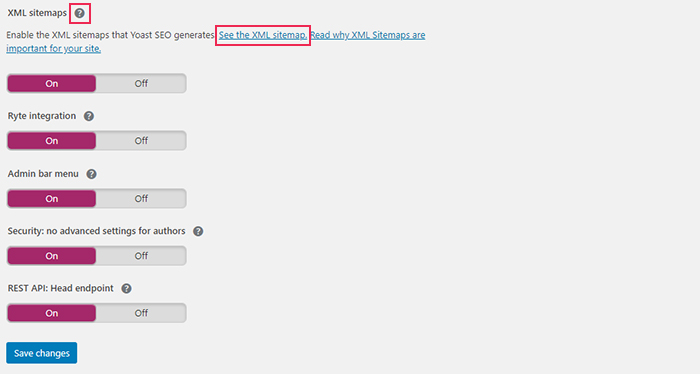
You can click the question mark icon next to the XML sitemaps option and then open the link titled “See the XML sitemap” in order to check if Yoast SEO has created it successfully.
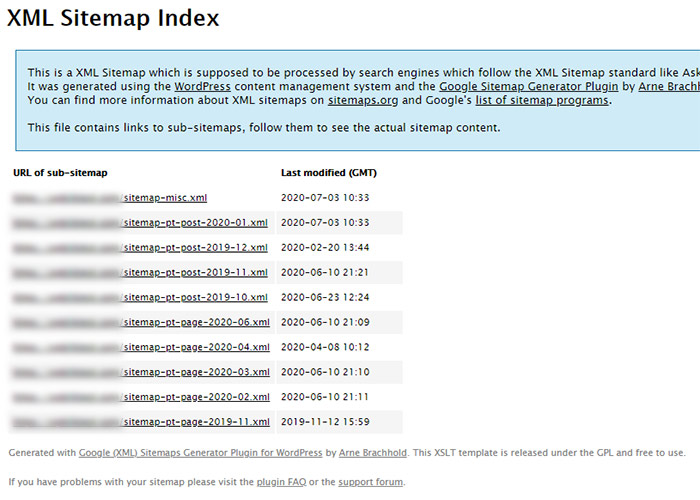
Another way to view your website’s XML sitemap is to add sitemap_index.xml to your website address.
Like this:
http://www.your-website.com/sitemap_index.xml
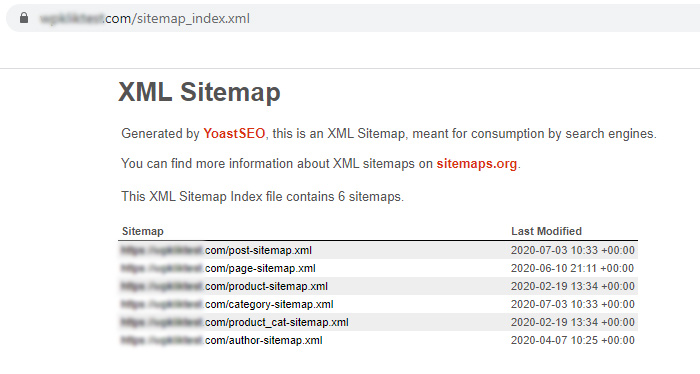
By default, Yoast SEO generates sitemaps for pages, posts, categories, and author. If you use WooCommerce on your site, it also generates a product and product categories sitemap. You should note, however, that you only need to add the main sitemap index file to your search engine (more about that later).
Another popular method for generating a WordPress XML Sitemap is using the plugin called Google XML Sitemaps.
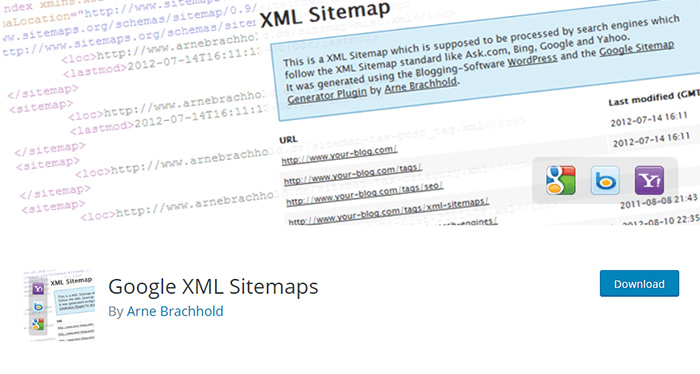
One great thing about Google XML Sitemaps is that it generates your sitemap automatically, right after you install and activate the plugin. You can view it by entering your website’s address in the browser and adding /sitemap.xml at the end.
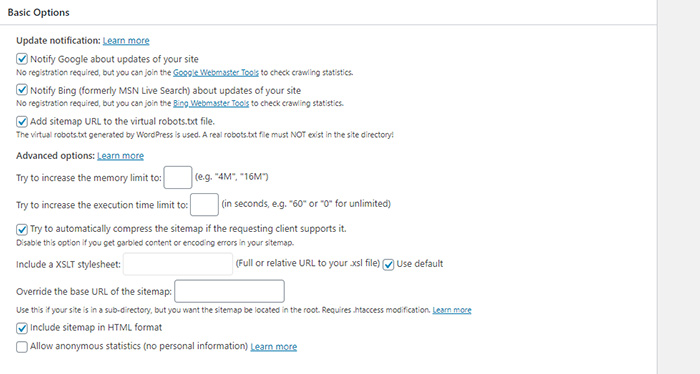
To configure the plugin’s settings, go to Settings >> XML-Sitemap. You get status info at the very top of the plugin’s settings, including information about your sitemap URL, as well as whether search engines have been notified about your sitemap.
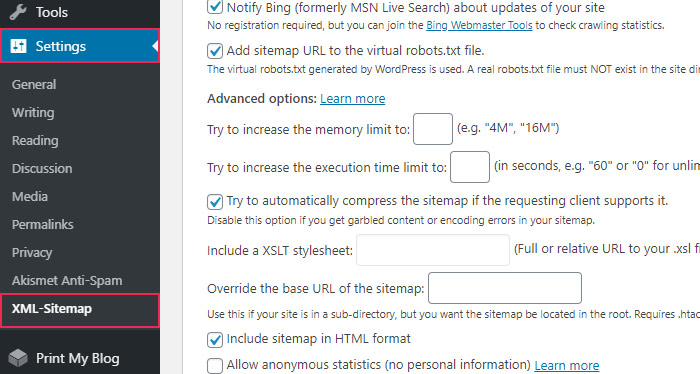
In the Basic Options section, you can check or uncheck several different options, such as whether you want to notify Google and Bing about your site updates, add a sitemap URL to the robots.txt file, increase the memory and execution time limit, etc. We have to note, though, that default basic settings will work for most WordPress sites.
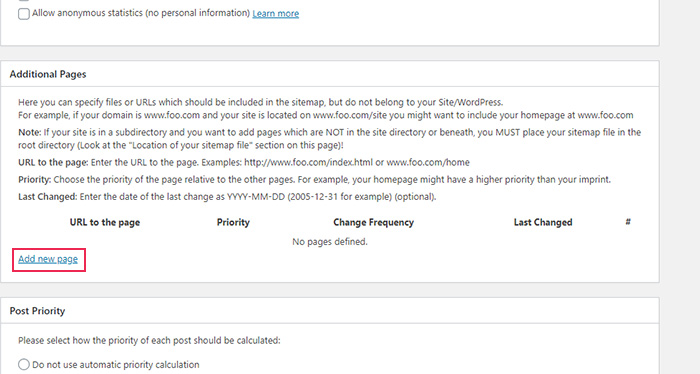
In the Additional Pages section, you will get to insert any of your pages to the XML sitemap manually. This can prove to be useful if you have any URLs that don’t belong to your site/WordPress.
The Google XML Sitemaps plugin also allows you to set the Post Priority. In this screen, you will get to choose not to use automatic priority calculation (which will give the same priority to all posts), use the priority calculated according to the number of comments on your posts, or use the average comment count.
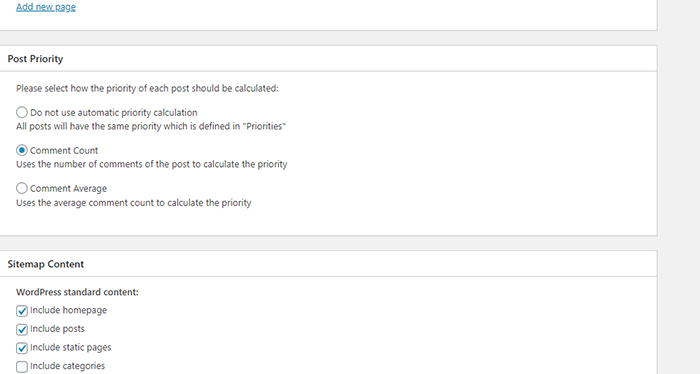
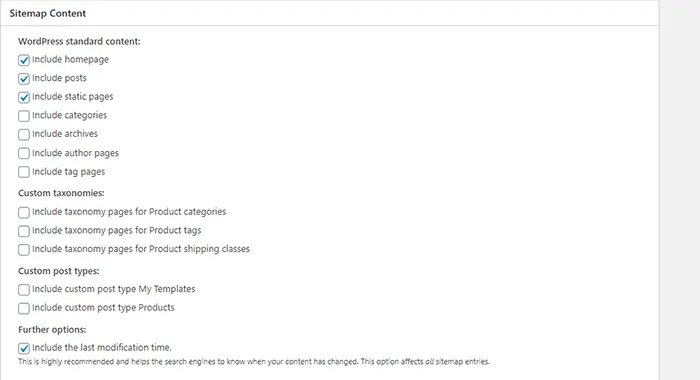
The Sitemap Content section lets you determine the types of content you want to include (or exclude) in your XML sitemap, like homepage, pages, posts, categories, custom taxonomies, and so on.
In a similar fashion, the Excluded Items section allows you to exclude specific posts and/or pages, as well as specific categories.
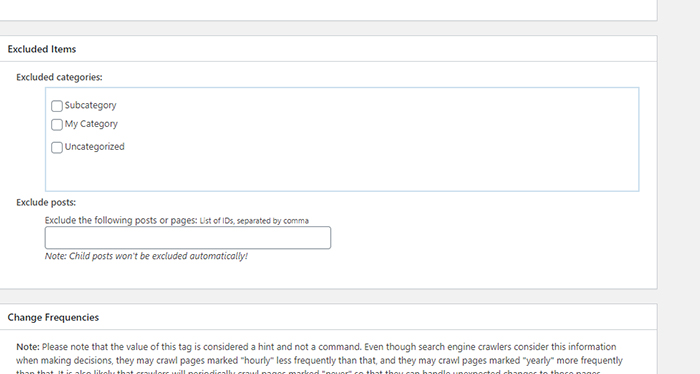
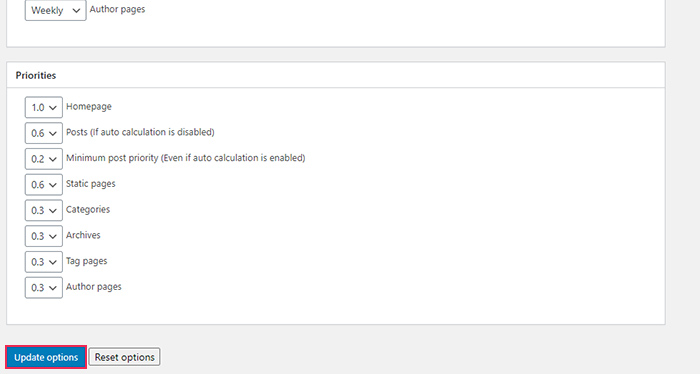
Finally, you can set Frequencies and Priorities of your XML sitemap’s content. You should note that these options serve only as a hint to search engines – they will determine whether they want to follow these commands or not.
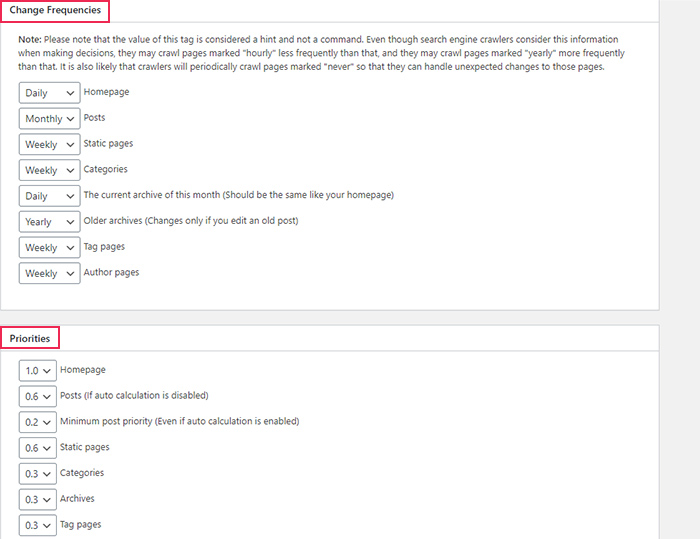
Make sure to hit the Update options button when you’re done with setting all the options.
Every time you post new content on your site, Google and Bing are notified about these changes. But of course, it all depends on the types of content you included in your sitemap.
That being said, we still urge you to submit your sitemap manually, just in case. We will show you how to do this when it comes to the two most popular search engines – Google and Bing.
Submitting Your WordPress Sitemap to Google
You can use Google Search Console in order to submit your WordPress XML sitemap to Google. Namely, Google allows its users to use this tool for free, which is particularly useful if your website is new and you want to be absolutely certain that Google is aware that your pages exist.
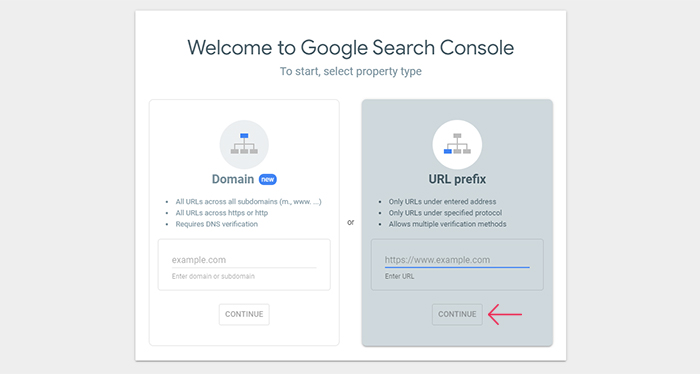
Go to the Google Search Console webpage. After you sign up and create your account, you can go ahead and select your property type.
Here you can choose to enter your site Domain or URL prefix. We suggest going for the URL prefix option, as it makes the entire setup simpler.
After you enter your website’s URL, select the Continue button.
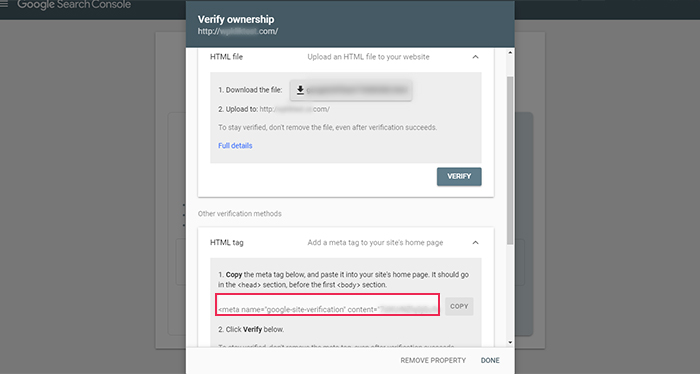
After that, you will be prompted to verify your website’s ownership. Here, you will get to choose from multiple methods, but we suggest using the HTML tag one.
All you have to do is copy the code of the HTML tag and head to your WordPress website’s admin dashboard.
Then, you should install and activate the plugin named Insert Headers and Footers.
Once you do so, go to Settings >> Insert Headers and Footers and add the previously copied code in the field named “Scripts in Header”.
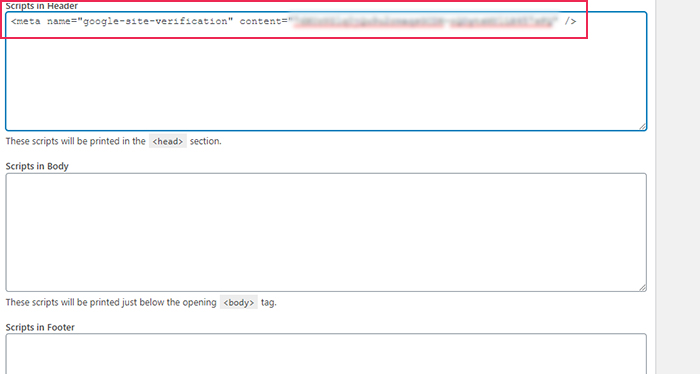
Hit the Save button to apply the changes.
Next, head back to the Google Search Console screen and click the Verify button. This will make Google check your website’s verification code and then insert it to your account.
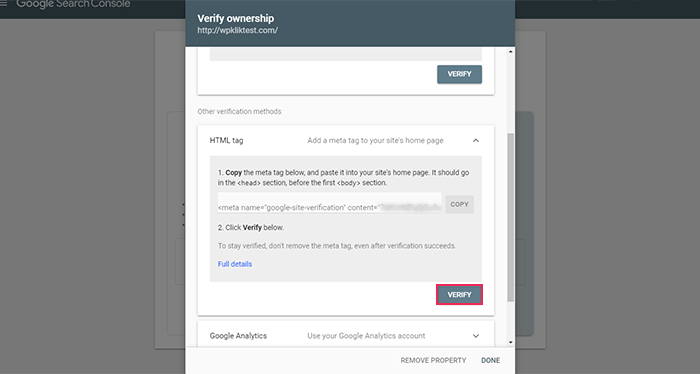
If your verification fails, we suggest clearing your cache and then try to repeat the process once again.
After verifying your website’s ownership, you should go ahead and add your XML Sitemap. Access the dashboard of your Google Search Console’s account, and click the Sitemaps option.
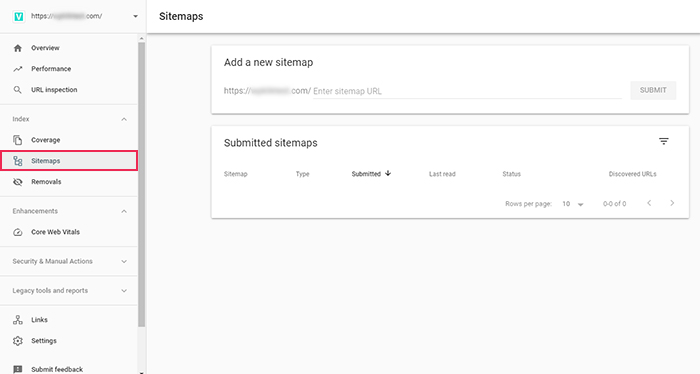
Next, enter the last bit of your sitemap URL in the Add a new sitemap field and click SUBMIT.
You will have to wait a certain period for Google to crawl your website. Once this happens, you will be able to see some sitemap data here, including the number of links Google managed to find, the number of links that got indexed, etc.
Submitting Your WordPress Sitemap to Bing
Just like Google Search Console, Bing offers its own set of Bing Webmaster Tools you can use to notify Bing about your WordPress XML sitemap.
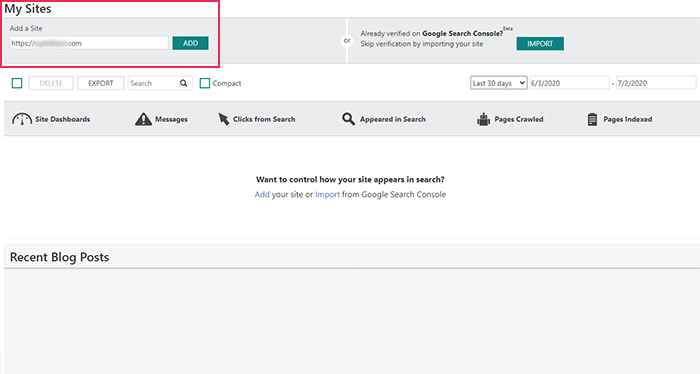
Go to the Bing Webmaster Tools site and create an account there. Then, in the Add a Site box (located in My Sites section in the upper left corner of the screen), you should enter your website URL and click the ADD button.
This will make a new screen appear where you will be able to enter some additional info together with your XML sitemap URL.
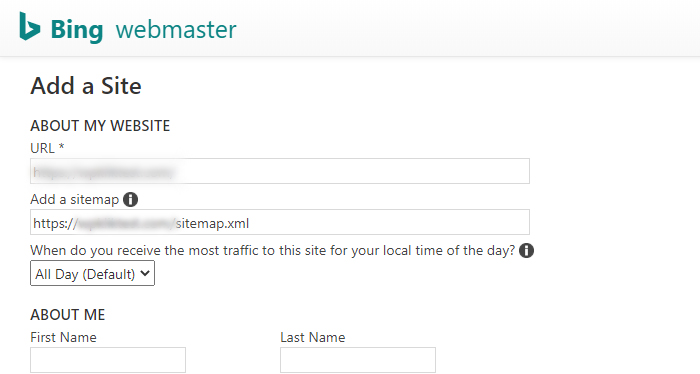
Hit the SAVE button when you’re done filling in your info.
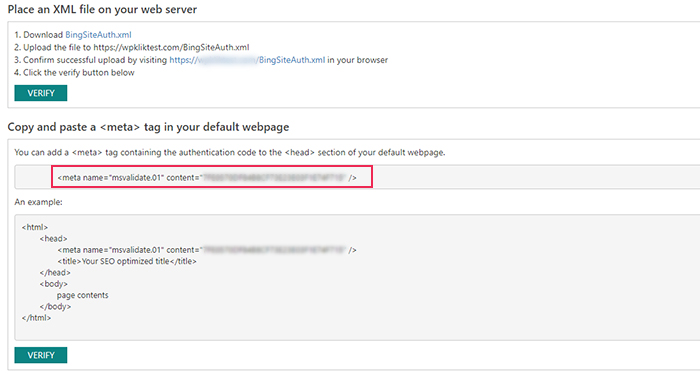
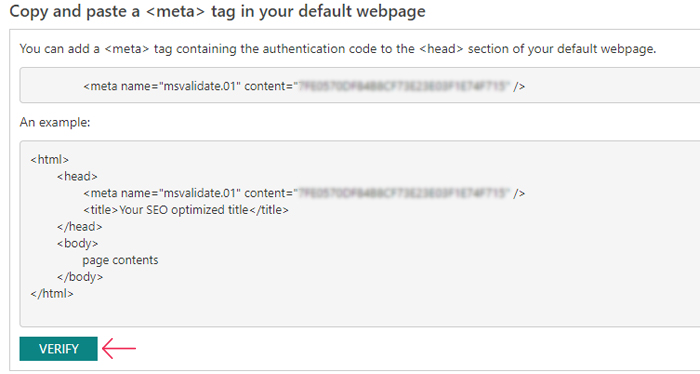
Next, you will be asked to verify the ownership of your website. If you ended up doing this on Google Console first, Bing will allow you to verify your site by simply connecting it to your Google account. But in case you didn’t do this, no worries – you will be provided with a few different methods nonetheless. We suggest that you use the Meta tag method.
All you need to do is copy the meta tag located here.
Head to Settings >> Insert Headers and Footers (install and activate the Insert Headers and Footers plugin first if you haven’t already done so), and add the copied code in the section called Scripts in Header.
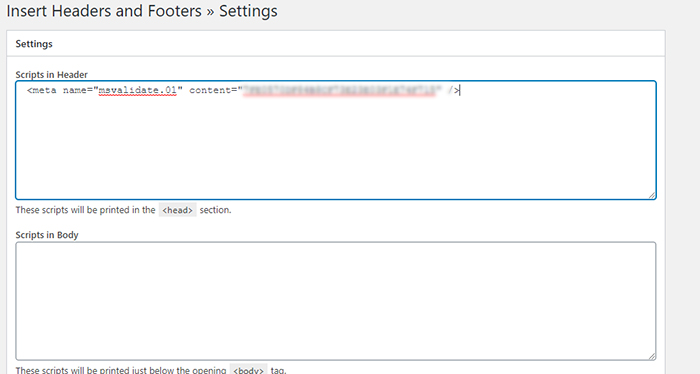
Click the Save button to store your changes, and then go back to the Bing Webmaster Tools screen. Finally, hit the Verify button and you’re all set.
Wrapping Up
While an XML sitemap is not a method that improves your search engine rankings, it does improve the overall visibility of your website in search engines. Apart from ensuring that search engines are able to find your most valuable pieces of content, a WordPress sitemap can also help you improve your website’s crawl rate. We highly recommend using one of the two plugins we introduced above for the best possible results. Finally, don’t forget to submit your XML sitemap to Google and Bing, as this will guarantee that your content doesn’t go unnoticed.
