How to Add a Dynamic Copyright Date in Your WordPress Footer

A copyright notice in the footer of your WordPress website helps you protect against infringement. There are many versions of this notice, but, in most cases, it contains a copyright symbol, a copyright year (or date), and your company or website name. Webmasters that choose to add a copyright notice will need to update the date on it regularly to avoid visitors assuming that the website is outdated or not maintained regularly. While it’s possible to edit the copyright date manually, it is much easier to add a dynamic copyright date that will change automatically. In this article, we will discuss the ways to add WordPress copyright code easily.
Qode Themes: Top Picks
View Collection


How to add a dynamic copyright date in your WordPress footer
There are several ways to have a dynamic copyright text with a date in your footer. Some themes opt to include this functionality, so you should first explore whether your theme has it. Consider the options of your current theme as well as its custom theme widgets. If you find out that this functionality isn’t included within your theme, or you aren’t satisfied with the provided options, you should turn to the two most common alternatives for adding a dynamic copyright date. Those are WordPress plugins and the use of custom code. We will explain both below.
Using plugins
Thanks to the abundance of WordPress plugins, you can find a plugin for practically any purpose, including adding a dynamic copyright text with a date in the footer. One of the plugins you can use, that’s made specifically for this purpose, is the Current Year and Copyright Shortcodes plugin. It is a very lightweight plugin that offers the following shortcodes:
[y] – showing the current year,
[m] – showing the current month as a word,
[d] – showing the current day as a number,
[c] – showing the copyright symbol and
[cy] – showing the copyright symbol followed by the current year.
These shortcodes can be inserted within the page or post content and within widgets, too. We have opted to use the latter, so our explanation below will show you how to use this plugin’s shortcodes to add WordPress copyright text to the footer.
After installing the plugin, navigate to Appearance > Widgets and locate a footer widget area where you can insert the copyright text. The name of this widget differs based on the theme you are using and whether it is a custom widget area. On the Lekker theme, which we’re using, the area we chose is called Footer Top Area – Column 2. Once you’ve located the appropriate widget area, add a Text widget inside it. Then add a text that “calls” the shortcodes enabled by this plugin, which you’ve chosen to use for your copyright notice. When you’re done, press the Save button at the bottom of the widget.
In our case, we have included [c] that shows the copyright symbol and [y] that shows the current year, as well as a bit of accompanying text. The exact wording of a WordPress copyright notice comes down to personal preference. Regarding the date within this notice, some users opt to use only the current year, while others choose to show the time their website or business has spanned. We have opted to show the latter.

Depending on your theme, the result will be similar to the one displayed below.

Using custom code
If you have tried the previous options but didn’t like the result, you can always custom code this functionality yourself. Even though these kinds of solutions are generally geared towards more advanced WordPress users, creating a WordPress copyright code for your footer, or anywhere else, is quite easy.
For this article, we have created a custom code solution that you can use to add a dynamic copyright notice in your WordPress footer. As there are many versions of WordPress copyright text in the footer, you can use the code we provided as is or customize it to your preference. Our explanation covers the process step-by-step and thoroughly describes the structure of the code, so you will have all the information necessary if you opt to make any changes. But, make sure to explore your options and understand the code fully before making any edits.
This, and any similar code, should be inserted either in the functions.php of your theme or inside a site-specific plugin. We will show you the steps for the method with the functions.php file. As it requires the use of FTP, we suggest brushing up on it, if you aren’t already comfortable with it. Additionally, we suggest making a backup of your WordPress files just in case. Once you’ve done so, we can proceed.
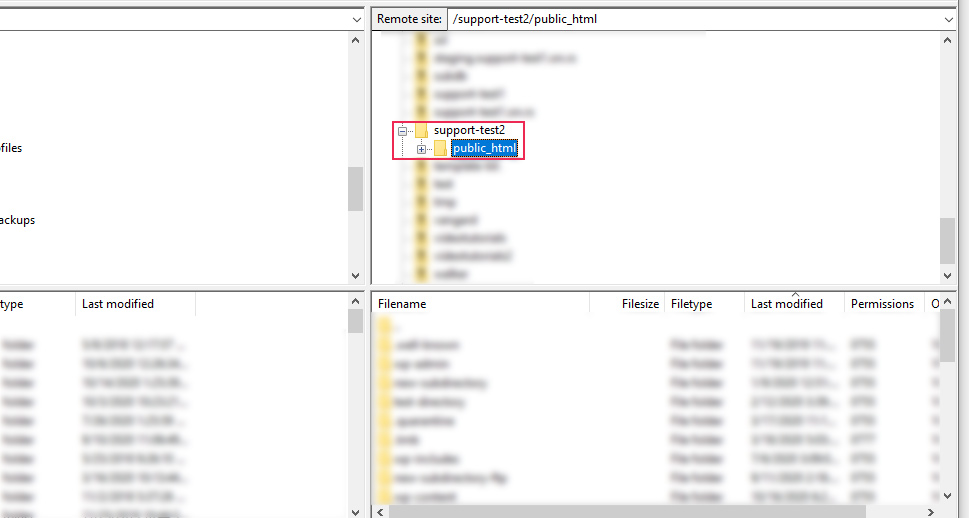
To insert the code, connect to your server using your FTP credentials and navigate to your root WordPress directory, often called public_html.
Then, navigate to /wp-content/themes directory and click on the folder of your current theme to open it. Find the functions.php file within, right-click on it, and select the View/Edit option from the dropdown.

Open the file using your preferred text editor and add the following code at the end.
// Adding a copyright text shortcode
function custom_copyright_text( $atts, $content = null ) {
$default_atts = array(
"year_from" => ''
);
$params = shortcode_atts( $default_atts, $atts );
$html = '<div class="copyright">Copyright © ';
if ( ! empty( $params['year_from'] ) ) {
$html .= $params['year_from'] . ' - ';
}
$html .= date( 'Y' ) . ' ';
if ( ! empty( get_bloginfo( 'name' ) ) ) {
$html .= '<span class = "site-title">' . get_bloginfo( 'name' ) . '</span>' . ' ';
}
if ( ! empty( $content ) ) {
$html .= '<span class="content-after">' . esc_html( $content ) . '</span>';
}
$html .= "</div>";
return $html;
}
add_shortcode( 'copyright_text', 'custom_copyright_text' );

Afterward, save the changes you made to the file and upload it back to your server to override the file that’s currently there.
Then we can take a closer look at the composition of the code.
The code we created represents a function called custom_copyright_text. Using the add_shortcode() function we have registered it as a custom shortcode called copyright_text.
function custom_copyright_text( $atts, $content = null ) {
// Some code
}
add_shortcode( 'copyright_text', 'custom_copyright_text' );
The content of the custom_copyright_text() function can be divided into two sections. The first section is where shortcode attributes are extracted and the second section creates the output that is later returned.
In the first section, the default values of all attributes are stored in the associative array called $default_atts. The shortcode is rather simple, it only has one attribute – year_from, and its default value is an empty string.
We have used the shortcode_atts() function to compare the default and user-inserted values and store the result into the associative array called $params. Meaning, the user-inserted value for the year_from attribute will be stored unless it was omitted by the user. If that is the case, the default value will be stored instead.
Additionally, we should mention that this shortcode is an enclosed one. This means that, apart from attributes, it also accepts user-inserted input, if any has been added. That input is contained in the $content variable that we will later use.
$default_atts = array(
"year_from" => ''
);
$params = shortcode_atts( $default_atts, $atts );
As we mentioned previously, the second section of the custom_copyright_text() function creates the HTML output of this shortcode. The output starts with the word Copyright, followed by a copyright symbol. If you insert the year_from attribute then the output will contain a span of years. They will be displayed in the form of year_from – current_year. Otherwise, only the current year will be shown.
If the site has a site title, it will be added as well. By site title, we are referring to the entry under the field called Site Title found in the Settings > General section of your admin dashboard. Finally, if the user has inserted additional input, it would be added at the end. Also, every distinct part of the output is separated by a blank space, to ensure the proper display of all possible variations of the output.
$html = '<div class="copyright">Copyright © ';
if ( ! empty( $params['year_from'] ) ) {
$html .= $params['year_from'] . ' - ';
}
$html .= date( 'Y' ) . ' ';
if ( ! empty( get_bloginfo( 'name' ) ) ) {
$html .= '<span class = "site-title">' . get_bloginfo( 'name' ) . '</span>' . ' ';
}
if ( ! empty( $content ) ) {
$html .= '<span class="content-after">' . esc_html( $content ) . '</span>';
}
$html .= "</div>";
return $html;
Now, let’s cover the use of this shortcode.
First of all, as it is a shortcode, you can use this WordPress copyright code inside the content of your pages and posts, as well as inside a widget area. The example we’ll be using involves adding the shortcode inside a Text widget, which is placed in one of the widget areas belonging to the footer.
As such, the first step would require you to navigate to Appearance > Widgets and find the appropriate footer widget area where you wish to place the copyright notice. The name of the widget area can differ depending on the theme you are using. And if you added custom widget areas, then they would have custom names. When you find the appropriate widget area, add a Text widget into it.
To show the shortcode output, you will need to “call” that shortcode. We will show you three different calls of this shortcode which we believe will be the most useful to you.
First, you can simply call the shortcode without using its attribute, the starting year, and without adding any content after. You can do so by inserting [copyright_text][/copyright_text]. Assuming that you have inserted a site title in Settings > General, the output would look similar to the one below.

On the other hand, if you include a starting year, you will get an output similar to the one shown below. This is done by inserting [copyright_text year_from = ‘start-year’][/copyright_text] where the start_year is replaced with a numerical value for the actual year.

Finally, if you also include some content between the opening and closing shortcode call, you will achieve an output similar to the one shown below. This is done by inserting [copyright_text year_from = ‘start-year’]your-content[/copyright_text] where the start_year and your-content are replaced with appropriate content, as shown below.

We should mention that depending on the theme you are using, some additional CSS code might be needed to stylize the output of the shortcode. As the shortcode is rather simple, you will likely only need to make minor (if any) adjustments with CSS.
You can use the CSS classes we included inside the code to help make the stylization easier. Afterward, insert the CSS under Appearance > Customize > Additional CSS. In case the CSS code you use to stylize the content is longer, we suggest placing it in a separate file and enqueueing it using wp_enqueue_style.
Final Thoughts
The copyright notice is an important part of every WordPress website, but one that needs to be regularly updated. The best way to do so is to include a copyright notice with a dynamic date in the footer. Doing so isn’t a difficult task, especially if you follow the advice given in this article. Whether you find suitable theme options, use a plugin, or insert WordPress copyright footer code, we are confident you will complete the process in a couple of minutes after reading this article. Before you leave, we suggest you bookmark it for use on future websites.
