How to Save WordPress Posts to Your Computer

From server failures to malicious, targeted attacks, reasons for backing up your content abound. If you are running a WordPress website, chances are your content is mostly in your posts. It‘s easy enough to back up your website, but you won‘t get discrete, easily readable files. Suppose, though, you don‘t want to back up your entire website, but save an individual WordPress post, and that in a format which can be easily shared and read by people without coding knowledge?
Fortunately, there are several ways to save WordPress posts to your computer, or any other storage independent from your server. We will show you how to do it. In several different ways, in fact. All of these methods deal with saving your content for different reasons, so feel free to skip to the section that interests you.
This is what we will be discussing:
WordPress has a function you can use to export your content as an XML file. This format is mainly useful if you want to migrate your website or export part of your content to a different WordPress website.
First, reach the Export screen by selecting Tools/Export form your WordPress dashboard menu.
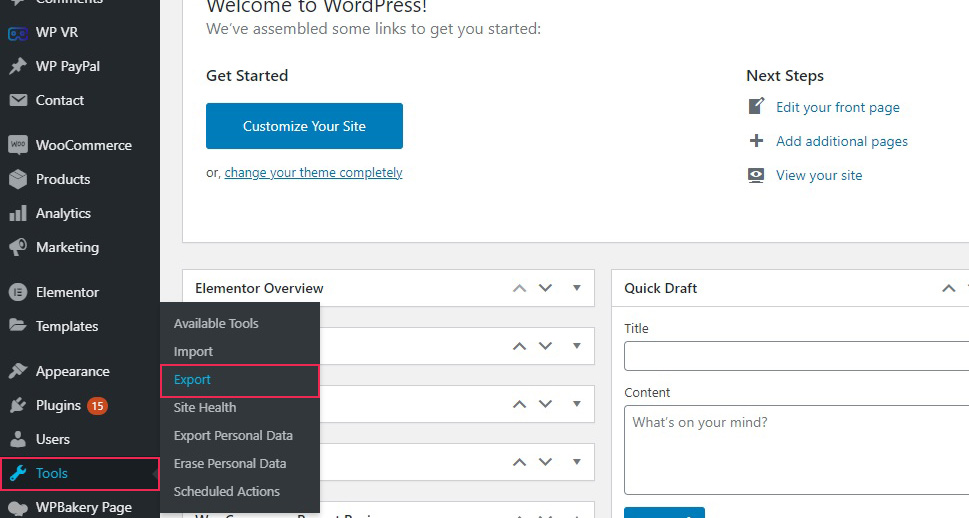
From here, you can choose to export all your content, including posts, pages, media, and other data, or only certain content. For instance, if you wish to export your posts, you can filter them by category, author, date, or status (draft, scheduled, published, and so on).
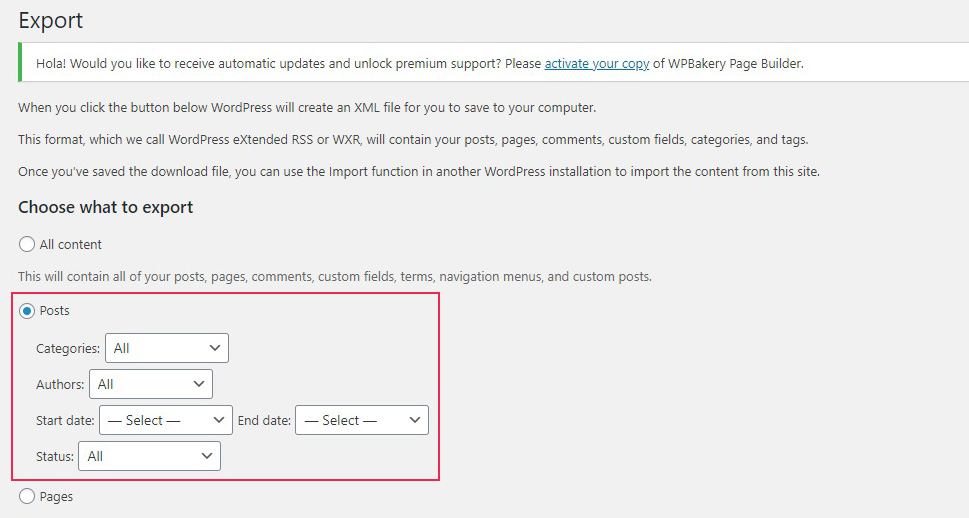
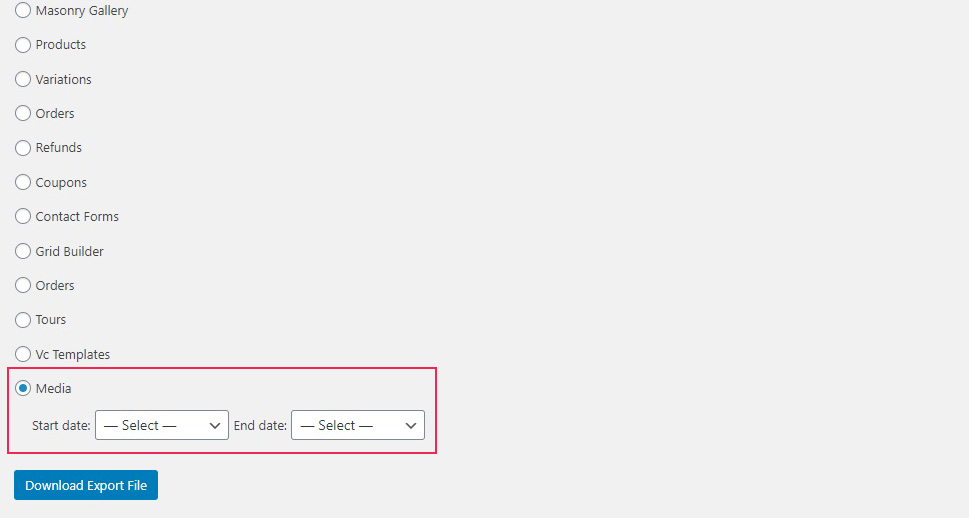
When it comes to your media library, you can only filter by date. This way, you can download XML files which contain the entirety of your post content or media library, or very specific parts of them. Simply click Download Export File, and save the XML file for later use (import into another WordPress website, for instance).
You can save an individual post as PDF from your browser. Simply load a post, and hit Ctrl+P if you are a PC user, or Command+P if you are a Mac user.
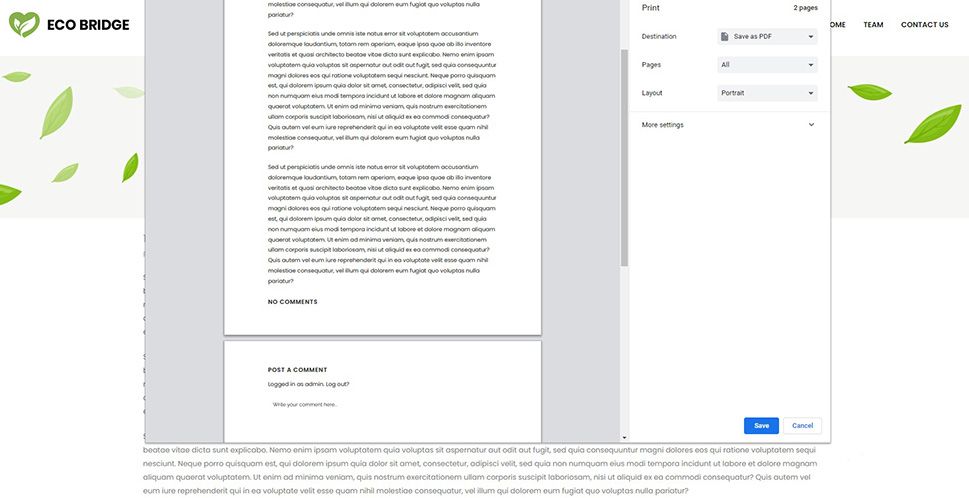
This is a command for printing physical copies of your content, but it also allows you to Save as PDF and configure the layout and the range of pages you want to save. When you then click the Save button, you simply need to name your file and select a save destination.
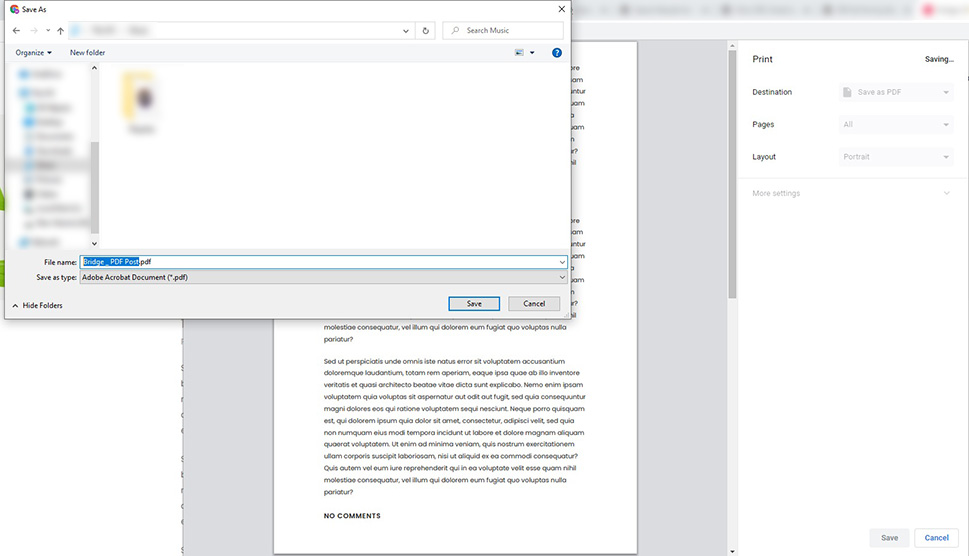
This is how you can easily use your browser‘s functions to save or print individual posts.
But what if you have a massive amount of content and want to save it all in the PDF or eBook format? To do that, you‘ll need a plugin, and the plugin we will be using is Print My Blog. Not only does this plugin remove menus, sidebars, and other content you don‘t need in an eBook or a printout, it also has a broad range of options if you are looking to make your posts available offline or to eBook reader users.
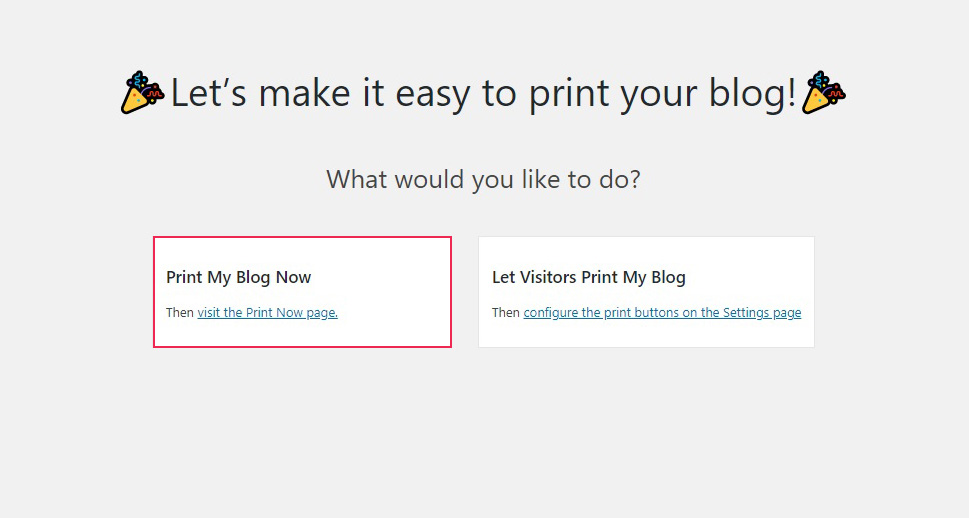
Once you install and activate the plugin, you will be taken to the plugin‘s page. Select the visit the Print Now page.
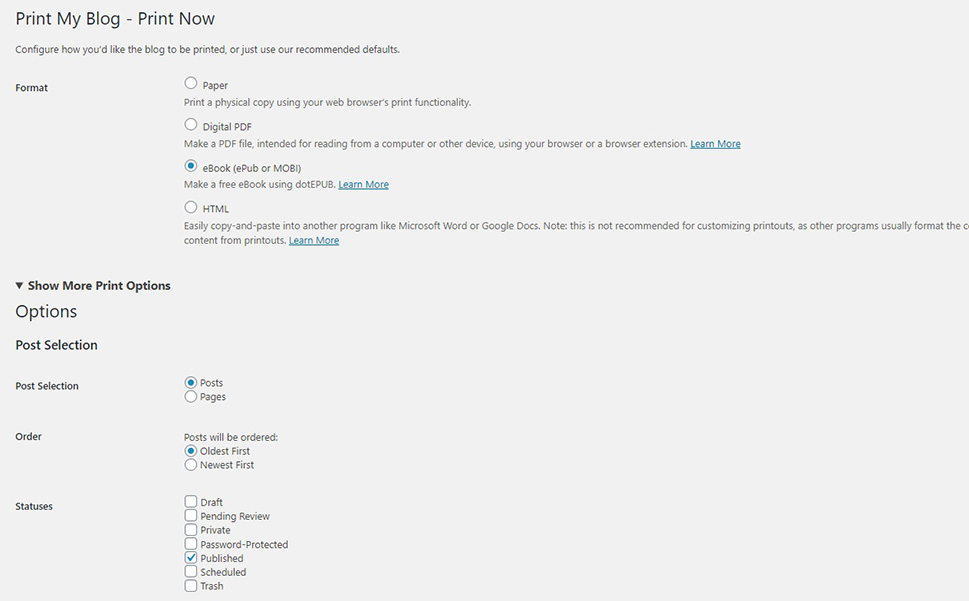
Once on the Print Now page, you will find the various formats in which you can save your posts: PDF, ePub, MOBI, and HTML, as well as the option to print physical copies. Clicking on Show More Print Options will, not at all surprisingly, display more print options, making it easy for you to tailor your finished product.
The first set of options is the post selection, where you can choose whether to convert and save pages or posts, set the order (older to newer or the other way around), and the status of converted posts (the default is published, but you can also include drafts, scheduled, trashed and other post statuses).
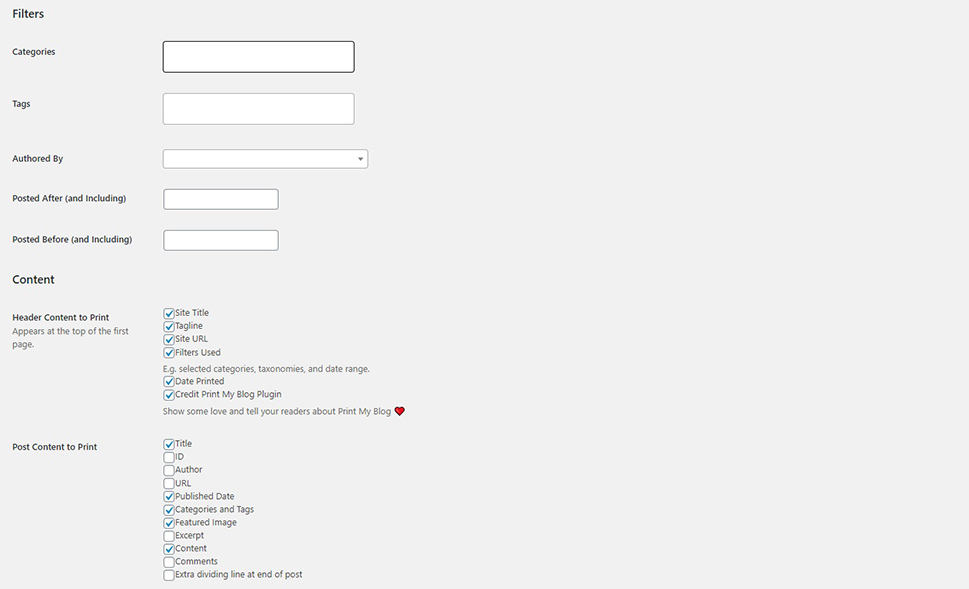
Next down, you‘ll find the filtering options. You can filter your posts by category, tag, author, and date. If you leave this blank, all your selected posts will be included in your PDF or eBook. You can also select parts of the header and post content you wish to include, from site title and URL to publication dates and featured images. Depending on the kind of finished product you want, you may want to include or exclude some or all of your post data.
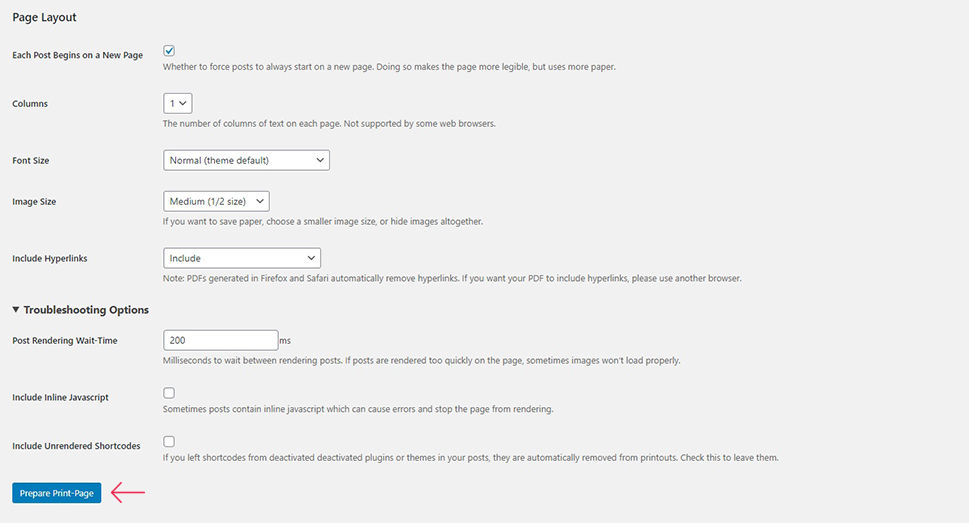
Finally, you will find your page layout options. You can choose to set a page break for each post, and change font and image size, or include or leave out hyperlinks. For instance, if you want a physical copy on paper, you may choose smaller images or hide them altogether to save on paper and ink, and also remove hyperlinks. You might not have similar concerns if you are only looking to distribute your content only digitally. Note also that, with the (completely free) method we will be using, you will only be able to create text-only eBooks.
At the bottom of the page, you will find the troubleshooting options. You can set your post rendering time to avoid errors with images, if any, or include JavaScript or unrendered shortcodes, both of which may cause errors if included.
When you are done, simply click the Prepare Print-Page button.
You will be taken to the preview page. The exact results will vary depending on your selected options and format. For paper copies and PDFs, you can simply click a button to print or save your content as a PDF.
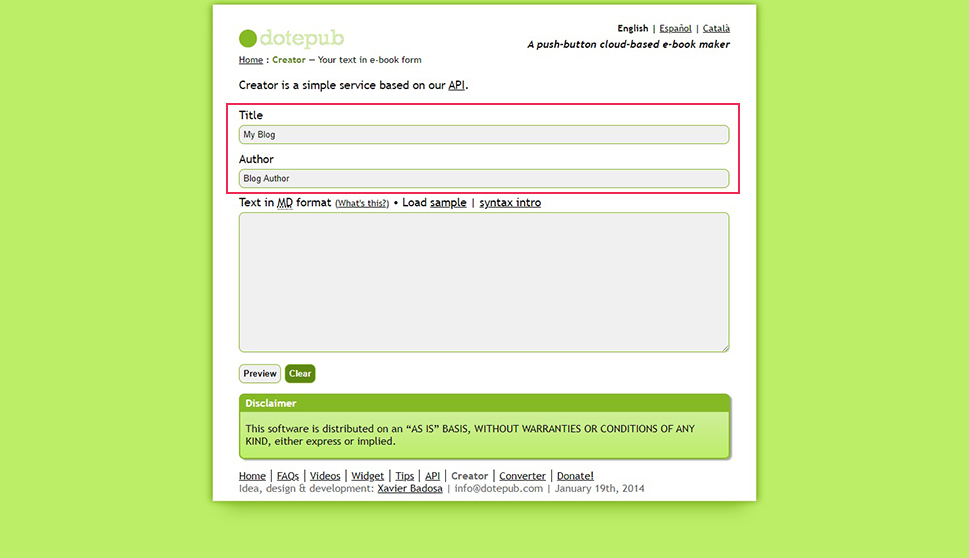
If you have selected eBook for your format, though, you will be prompted to use dotEPUB, a free and user friendly eBook generator, to create an eBook. To do that, simply go to dotEPUB‘s Creator page.
There, you can enter your title and author data.
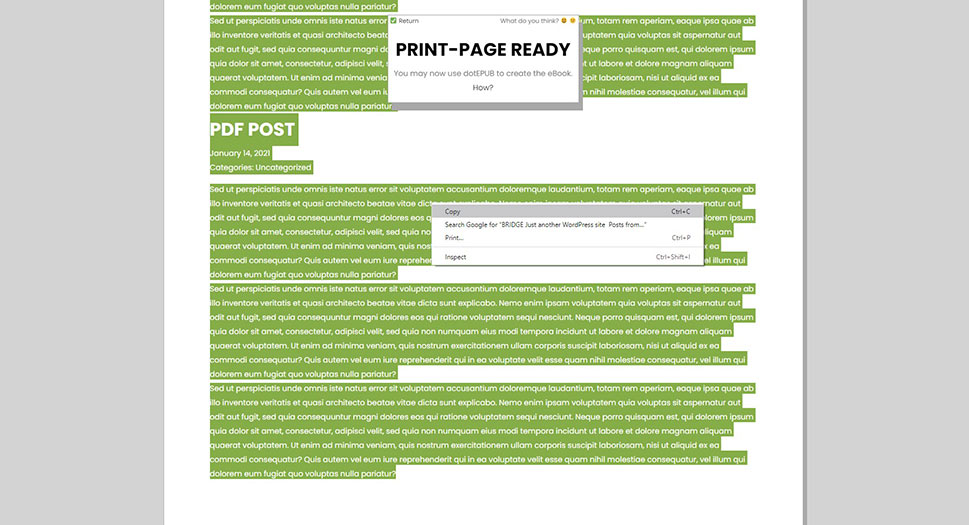
Now, the plugin has converted your post data as set up into a format compatible with dotEPUB. Simply select and copy all your content from the preview page…
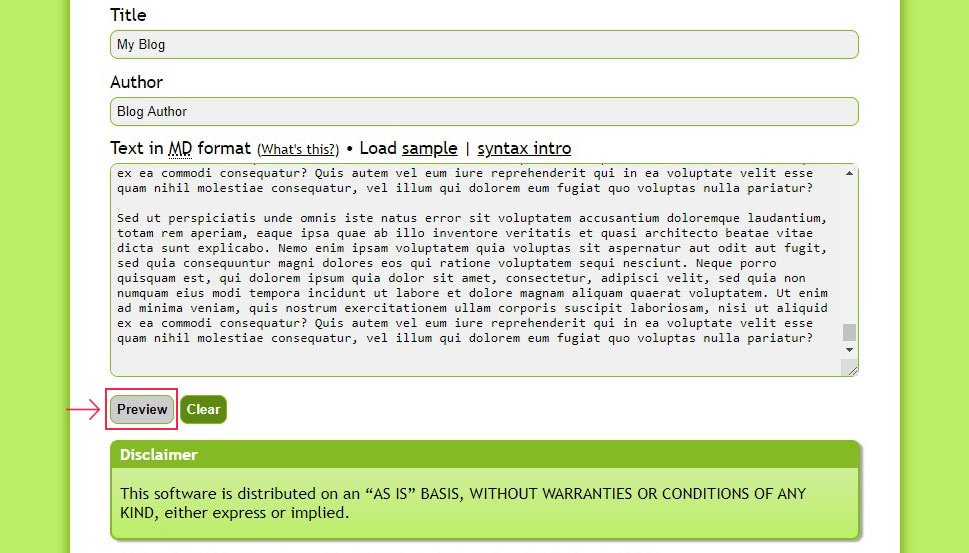
…and paste it into dotEPUB‘s text window.
Click Preview to continue.
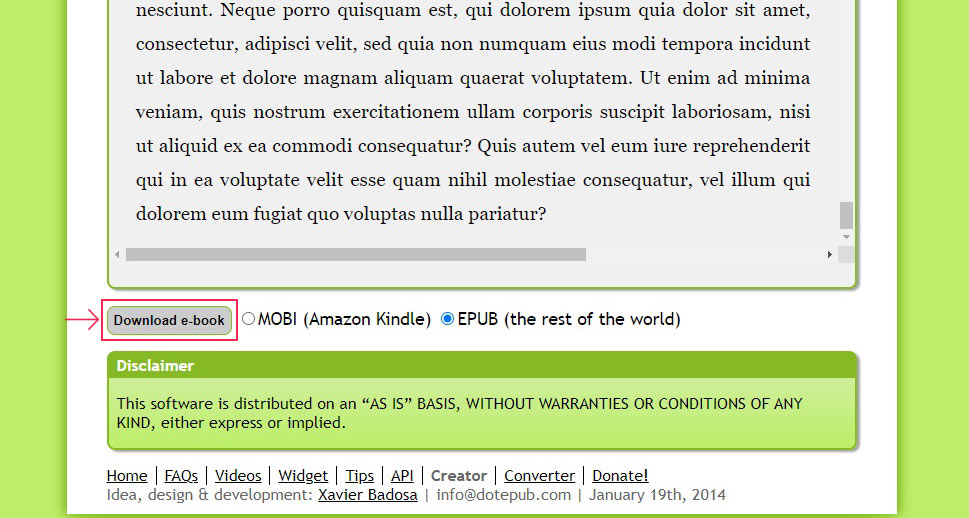
You will then be prompted to download your converted content as either MOBI, a Kindle format, or EPUB, which is what most mobile, tablet, and desktop applications are made to read. Simply select your preferred format and click the Download e-book button. Your download will start automatically.
And now you can have your posts ready to distribute in a human-readable format (a PDF), a hard copy, or an eBook.
Finally, you may want to convert your posts into a format which will allow you to move it to another website. There are many reasons why you may want to do so: cost-cutting, website redesign, server space, host bandwidth, rebranding, to name a few.
Unfortunately, this is where we run into compatibility issues. If you are moving your content from one WordPress website to another, you should be fine. Simply export all the content you want, as we have explained above, and import it into your new website. We won‘t go into the details here, as it would take up a lot of space, but we have in-depth tutorials on how to install WordPress and how to use FTP to upload files to a server.
If you are trying to migrate your website from another platform, that‘s a whole different kettle of fish. Again, trying to cover the details of each possible migration would take up an inordinate amount of space. Instead, we have separate tutorials for SquareSpace to WordPress, Wix to WordPress, and Medium to WordPress, each covering the different specifics of such migrations, including instructions for saving your posts.
Still, if you don‘t feel safe doing it all yourself, there is also a number of plugins you can use to assist you in migrating your website.
In Conclusion
So, there you have it. WordPress being as versatile as it is, it comes as no surprise there is a number of ways for you to save your content for a variety of uses. Migration-ready databases? Sure. Posts as PDFs? No problem. All your textual content in an eBook? By all means. A hyperlink-free version of your website printed on thinly sliced dead trees? Yes, that too. Whether you are simply moving house (switching websites or hosts), redesigning your website, or even shutting it down, you can do it relatively easily while still retaining all your post data.


