How to Export Orders in WooCommerce

WooCommerce is unquestionably one of, if not the best eCommerce plugin for WordPress. This practical and powerful platform is packed with every feature you may need to start an online store with ease, including product, shipping, and order management. Moreover, it also comes with many great addons that allow you to enhance your WooCommerce-powered store even further. Still, despite all its advanced and flexible features that include a built-in order management system, WooCommerce still provides no options to export orders out of the box.
Sometimes, you may need WooCommerce export orders simply because your dropshipping providers seek more info about your orders. Other times, you may need to analyze your order data to see what you can do to improve relations with your customers. Or, you might want to migrate your entire online store from one platform to another, or even backup your order data to ensure it doesn’t get lost.
Regardless of why you may need to export your orders, you’ll be happy to hear it’s rather easy to do if you use the help of a suitable WordPress plugin. We are going to use this opportunity to show you how to easily export all your order information in WordPress. Make sure to keep reading as we go through all the steps necessary to do so.
eCommerce WordPress Themes
View Collection


Exporting Your WooCommerce Orders Using a Plugin
If you want to export your WooCommerce orders, we recommend that you use the plugin called Advanced Order Export For WooCommerce. This WooCommerce order export plugin allows you to export WooCommerce order data with the utmost ease. You can pick different file formats, including CSV, JSON, XLS, PDF, and XML. The contents of the exported file include the summary order details, order data, customer details, and product attributes, among others. You can use the Advanced Order Export plugin to analyze your own order data, update your accounting system, and export orders to send order data to third-party dropshippers.
There’s also the pro version of the plugin (available at $25 a year per one website) that comes with some additional features. For example, you will have the ability to create multiple order export profiles and export them using bulk actions in WooCommerce >> Orders. Moreover, you will get to export WooCommerce orders based on the order status change, use a flexible schedule and decide the best time to get automated exports, and send your results to various destinations, including email, FTP, sFTP, and HTTP URL.
Before we begin, we have to note that we will be using the free version of the plugin. That being said, this version will be more than enough for the purposes of this tutorial. So, without further ado, let’s see how you can handle WooCommerce export orders. Make sure to keep reading as we cover:
After installing the plugin and activating it, you can go to WooCommerce >> Export Orders located in the admin dashboard to use the plugin’s settings. Once there, you will have access to different options that will help you customize the export file according to your preferences.
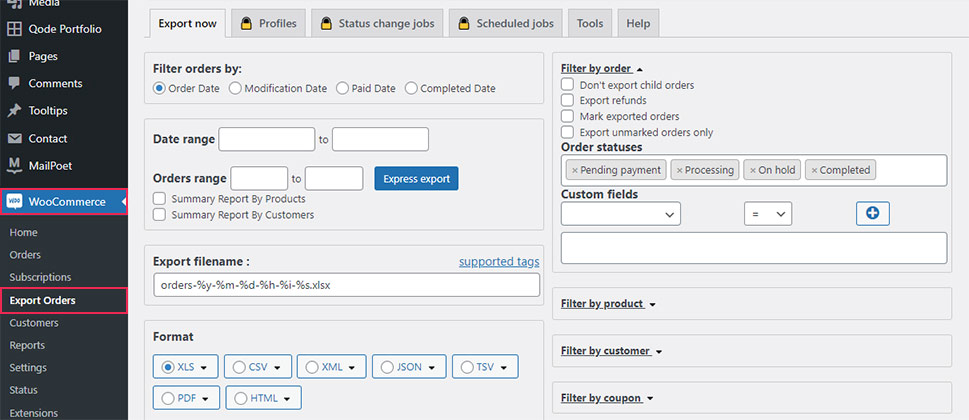
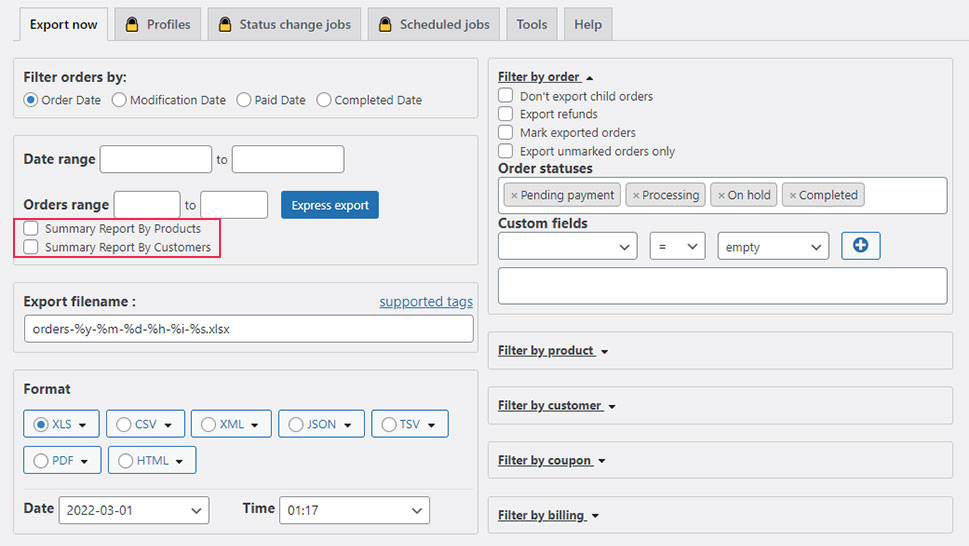
In the Export now tab, you will find several important useful options. The first one is called “Filter orders by:” and it allows you to do so by order date, modification date, paid date, or by completed date.
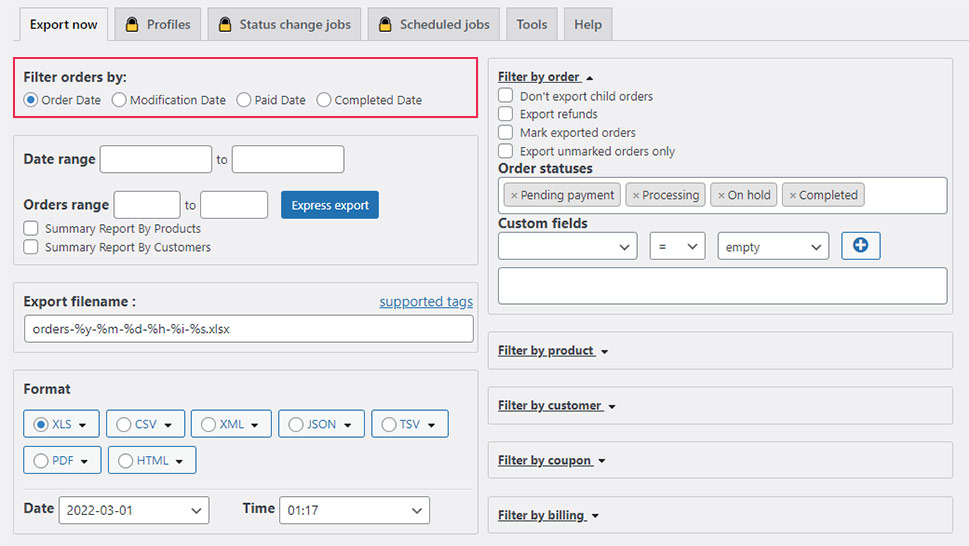
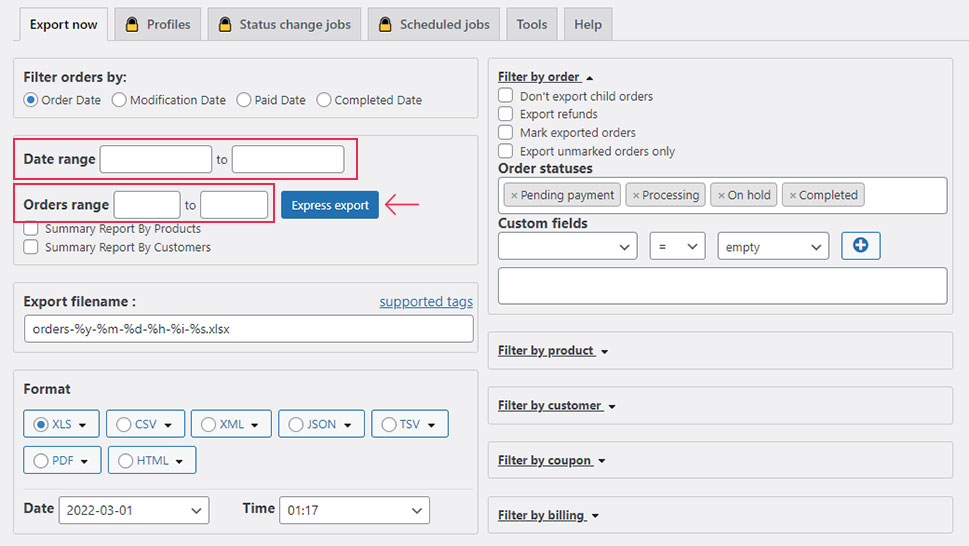
You will also be able to insert your preferred date and/or orders range and hit the Express Export button to quickly create your export file.
Immediately underneath, you will see the checkboxes which you can mark if you want to create summary reports by products and/or by customers.
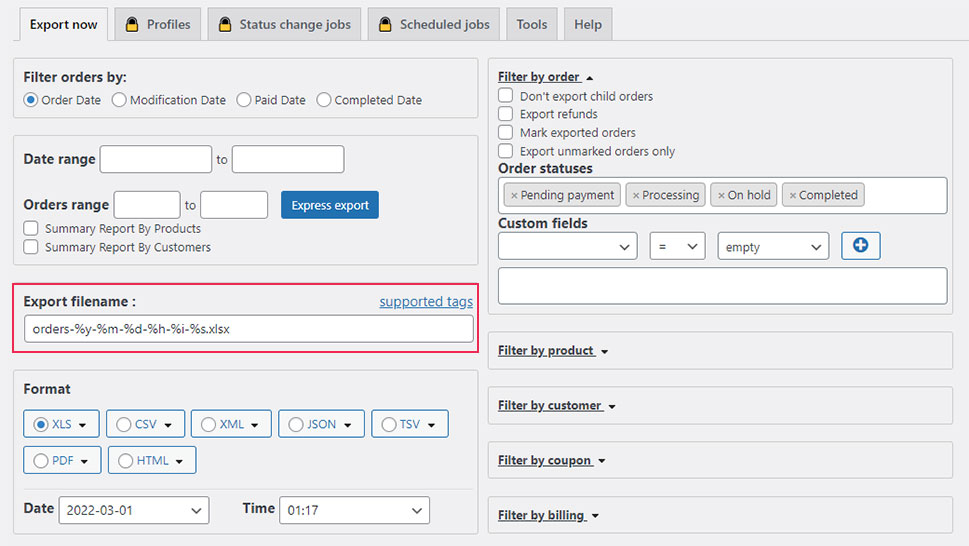
Lastly, you can enter the export filename. You can pick and insert different tags that will allow you to customize your file name further, including order id, order name, date and time, and so on.
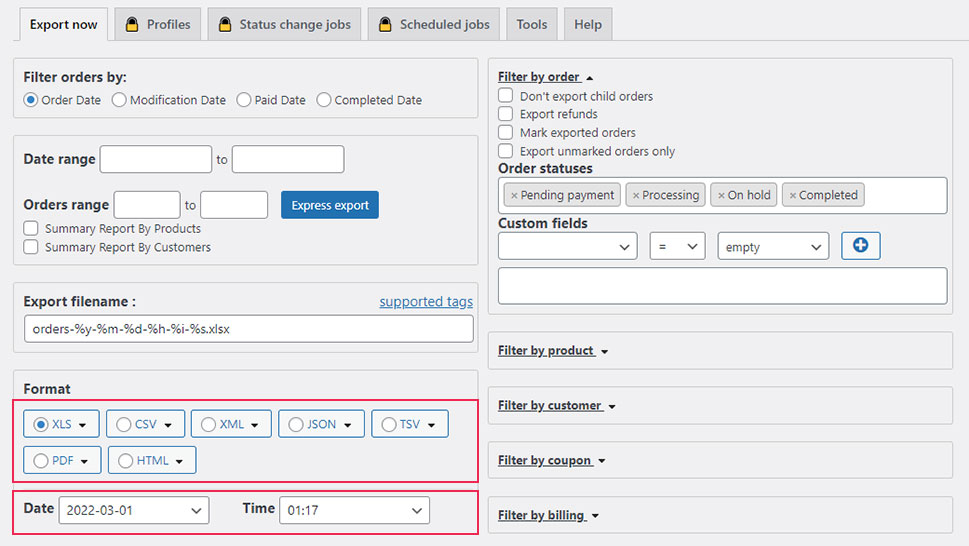
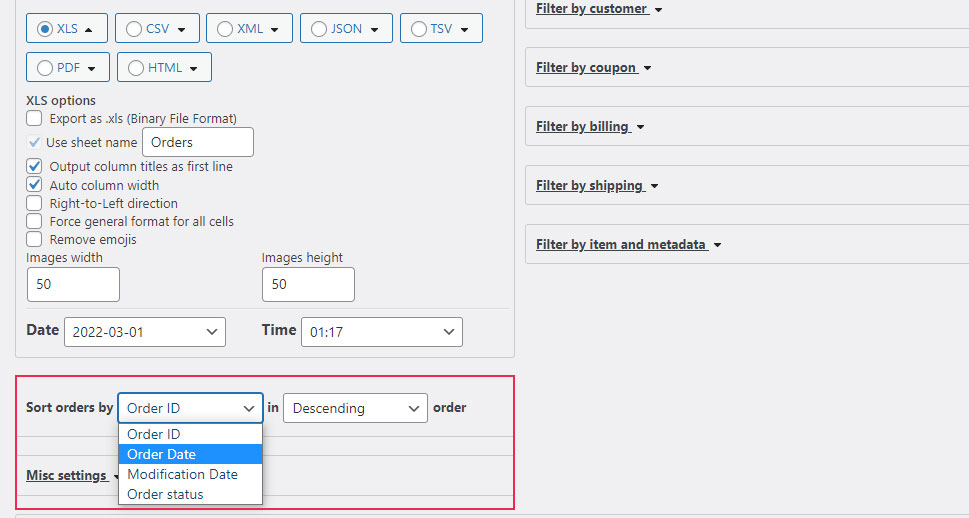
Next, there’s the section that contains the Format option. Just like its name indicates, this option will allow you to pick the desired export file format. You will be able to choose from XLS, CSV, SML, JSON, TSV, PDF, and HTML file formats. In addition, you will get to pick the appropriate date and time format.
Every file format contains options that will allow you to customize your file further. Also, every format may contain options specific to that format only.
Simply extend the desired file format to view and set its options.
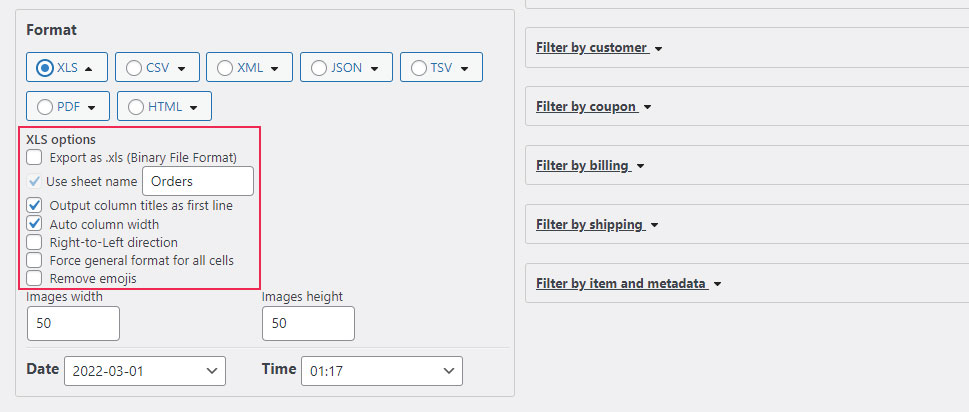
For example, the XLS format lets you select the auto column width, output column titles as first line, choose a right-to-left selection, and more.
Then, you can proceed to sort orders in your export file. The “Sort orders by” option contains different parameters you can choose, such as Order ID, Order Date, and so on. There’s also the option to select the order in which the orders will be listed (Descending, Ascending, etc.).
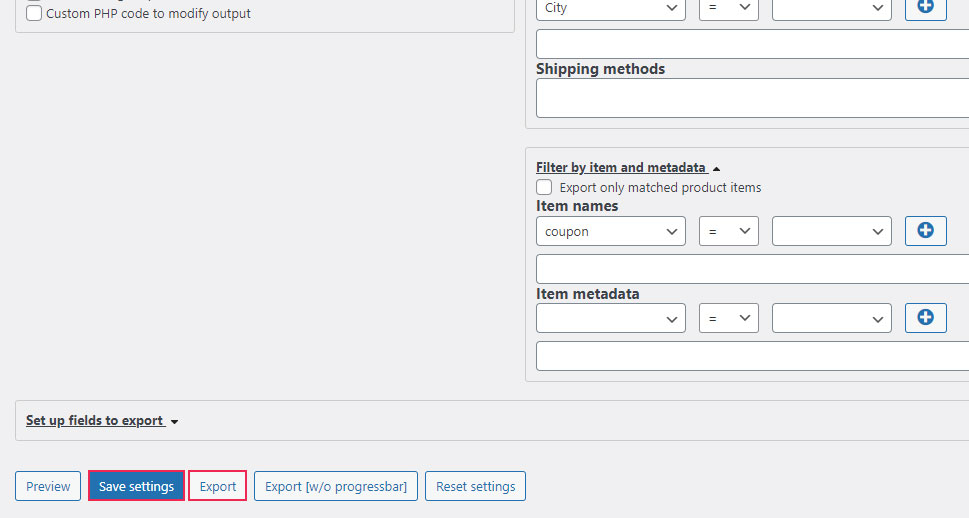
Now, the Set up fields to export option, as its name suggests, allows you to select various fields for exporting. Once you expand this option, you will be able to find all the fields available for the export on the left. You can change the order of these fields with a simple drag-and-drop.
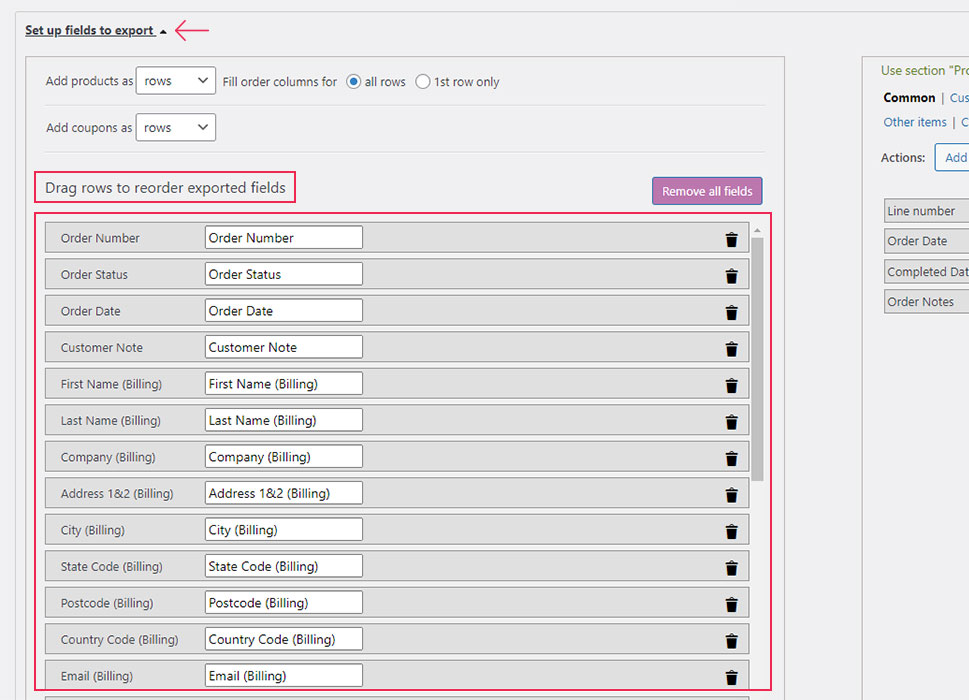
On the right, you will be able to see various categories under which all available export fields are classified. Once again, if you want to add any of these fields into your export file, you can simply drag them from the right to the left side of the screen.
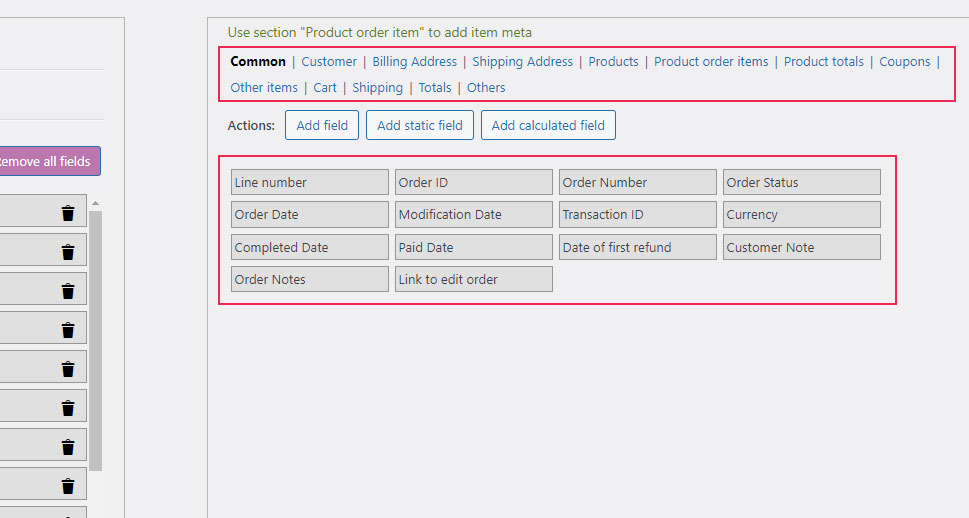
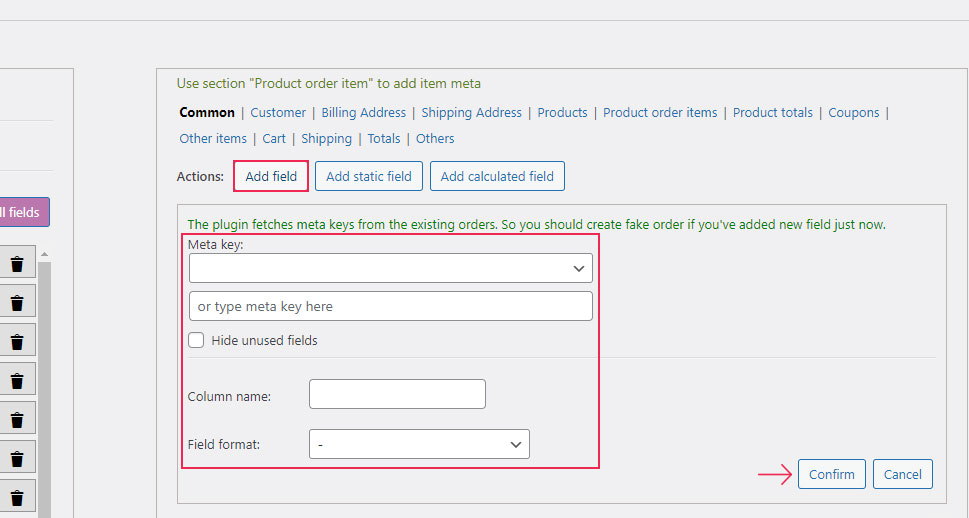
If you want, you can even create a new field by hitting the Add field button and adding its meta key, as well as column name and field format. Click on Confirm once you’re done.
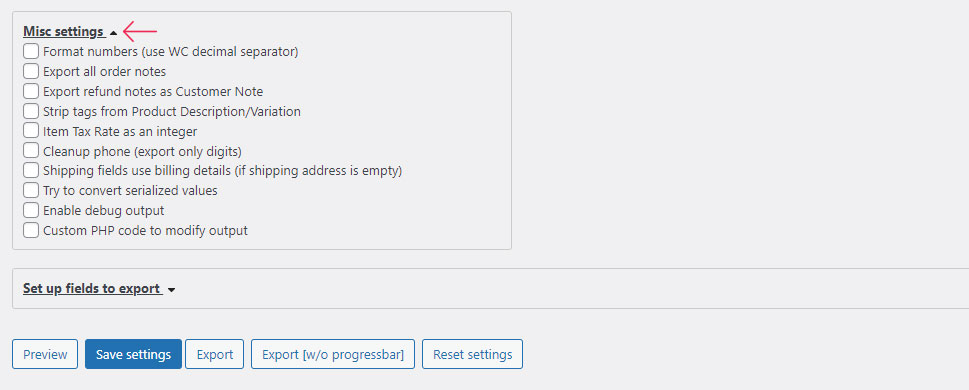
Last but not least, the Misc settings section will allow you to select some additional export options that will help you customize your export file even more. These include the ability to format numbers, export all order notes, export refund notes as Customer Note, enable debug output and plenty more.
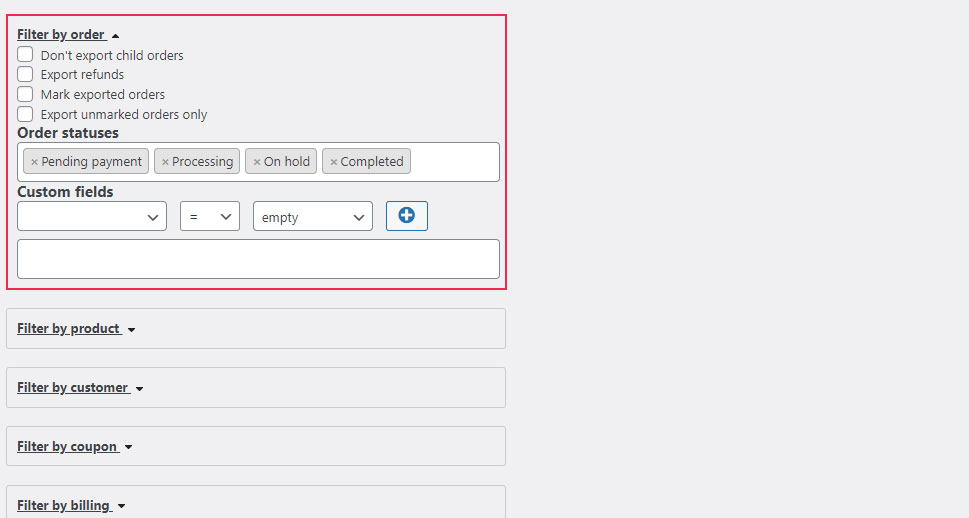
This plugin also comes with the ability to use filters, allowing you to decide what you want your file to be filtered by.
The “Filter by order” section contains a few options such as “Export refunds”, “Mark exported orders”, and “Don’t export child orders”. The Order statuses field will let you filter your orders according to the order status. Simply add the parameter you wish to apply (pending payment, on hold, etc.). If you want, you can even use custom fields to classify your order in more detail.
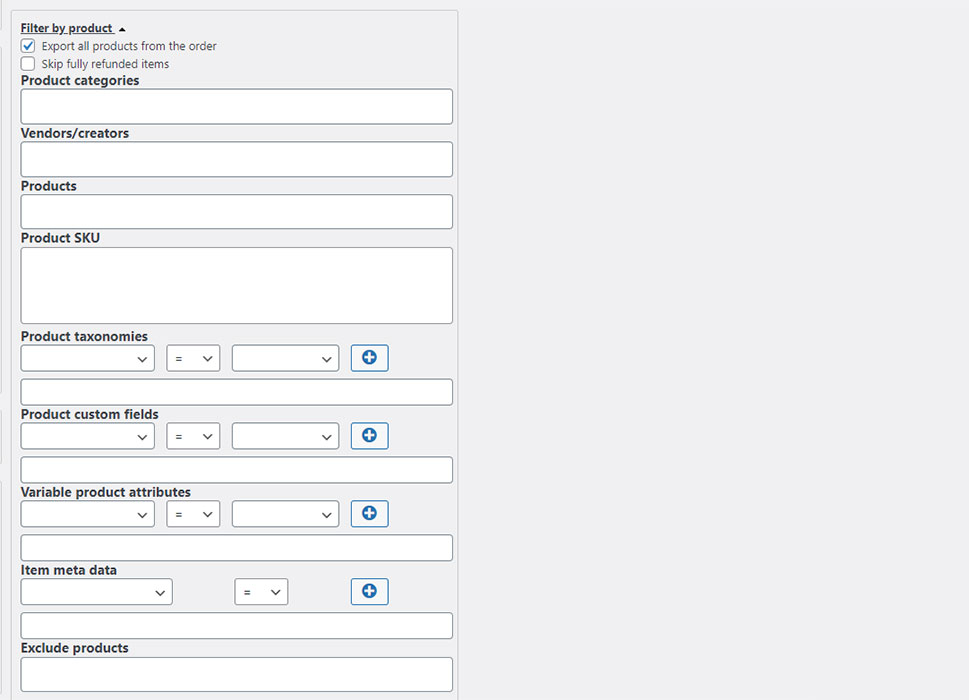
Filter by product is the filter that will allow you to customize the file for export according to the product data. Here you can select all products to be exported, skip files that are fully refunded, and add parameters to filter files by adding different product categories, product names, SKU, taxonomies, and so on. Finally, you can even eliminate specific products, if you want to.
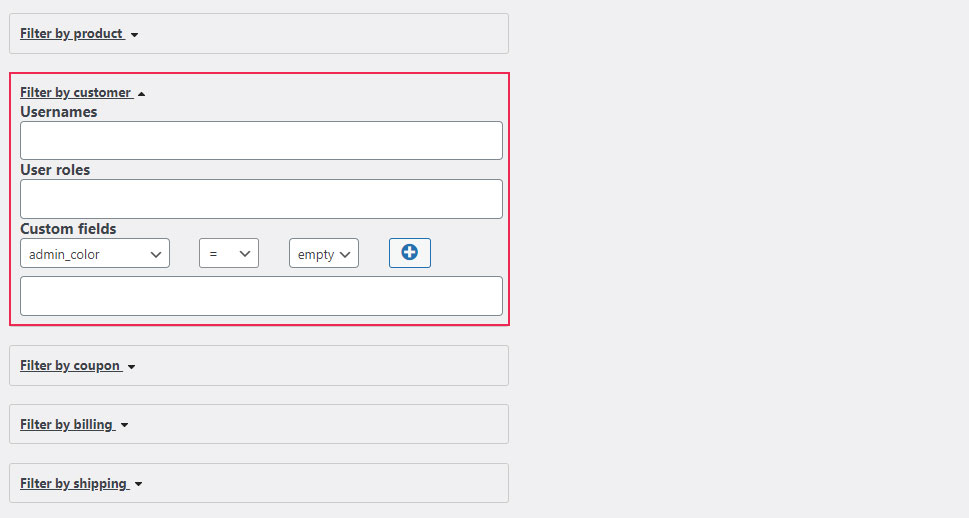
Another great option you will be able to use is Filter by customer. It allows you to filter your file according to your customers’ usernames, user roles, or custom fields.
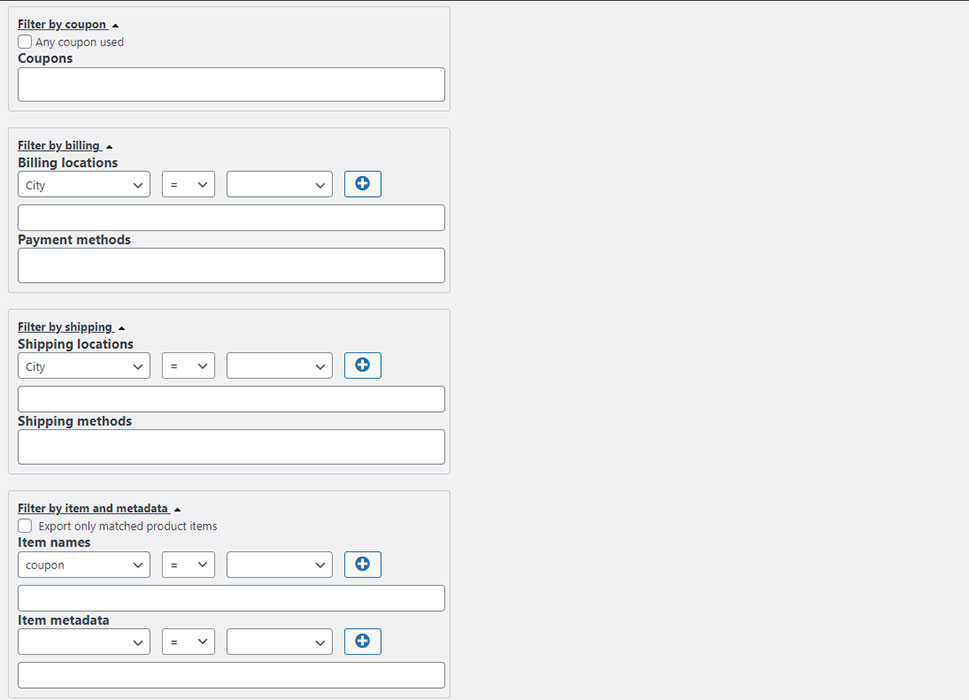
Other available filters include Filter by coupon, Filter by billing (which includes locations and payment methods), Filter by shipping, and Filter by item and metadata. Feel free to expand any of these filters to start using their options.
Finally, after you finish adjusting all the options and filters according to your preferences, you can hit the Save settings button (located at the bottom of the page) and then select Export to download your file. Once you do so, make sure to open the file with the exported WooCommerce orders to check whether it contains all your preferred information.
In Conclusion
That completes our guide on how to export your WooCommerce orders. No matter if you need to migrate your entire online store from one site to another, or you simply want to export your order data to your dropshipping suppliers, Advanced Order Export for WooCommerce is a perfect plugin for the job. The plugin’s free version alone is packed with plenty of great options that will allow you to do anything from choosing various file formats and selecting specific fields to export, all the way to using additional filters to customize your orders even further. We advise you to use our detailed guide to inspect most of the plugin’s options and learn how to smoothly export your orders as soon as you install the plugin on your WooCommerce store.
