How to Create WooCommerce Product Bundles

WooCommerce is the most popular platform for ecommerce, and for good reason: it is free, user-friendly, and, perhaps most importantly, flexible, offering a great deal of options and functionalities out-of-the-box. You have all the options of a proper brick-and-mortar store at your fingertips, and so do your shoppers.
WooCommerce product bundles are just one of the functionalities WooCommerce has, but it is nonetheless one we have decided to devote this tutorial to. But what are product bundles? What do your shoppers stand to gain from them, and how can you provide them with a better shopping experience and increase your profits in turn? We will attempt to answer all of these questions. Here’s what we will be talking about:
eCommerce WordPress Themes
View Collection


As simply as we can put it, WooCommerce product bundles are just a type of product consisting of two or more products.
On a slightly less technical level, they are groups of products that the shoppers can only buy as such, rather than separately. They are sometimes called packages or grouped products or indeed a variety of other names. The core of the matter is that WooCommerce allows you to do what ordinary shops can do as well: from buy one – get one free schemes to discounts for a full set of items only.
While this particular article is not dedicated to discussing sales strategies, there are some commonsense answers as to why a store would offer products as a bundle.
Perhaps you have overestimated the demand for one product, or you’re trying to introduce a new product into an active market. In that case, you can bundle it with a product which is thematically connected but more popular. If the unpopular product actually has quality, and if you offer it as part of a good deal, maybe the demand for the product itself will rise through word of mouth.
Or maybe you have stocked up on a seasonal product, and wish to replenish your stock with something new. In that case, discounts and bundles are typical ways of clearing some space in a warehouse.
Whatever your motivation, creating product bundles with WooCommerce is easy. Let us show you how.
This tutorial presupposes you have already created and set up your WooCommerce store and added the products you wish to bundle together. If you don’t know how to set up a WooCommerce store and create products for it, you can find all the information you need in our Ultimate Guide to WooCommerce. Once you have set up your store and created the products you need, you can continue.
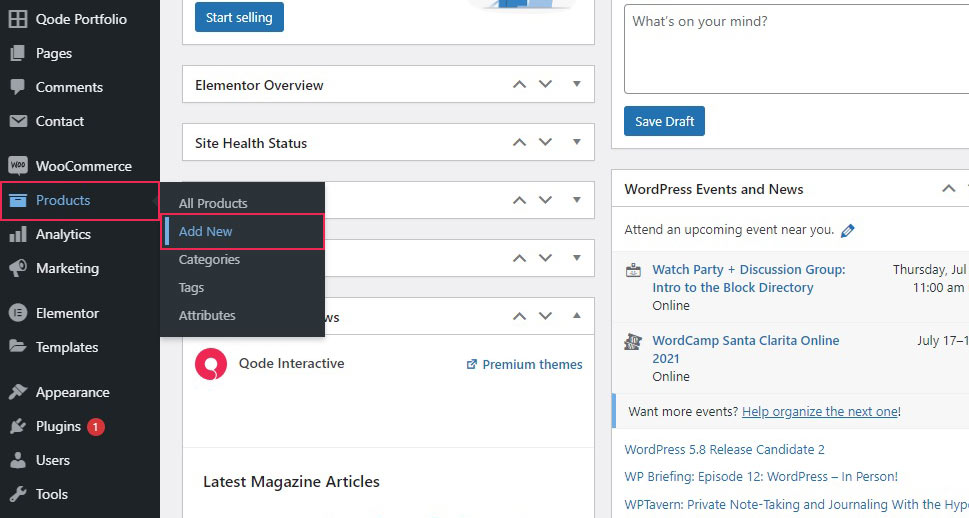
As we’ve said before, taken from the technical side, a bundle is just another type of product. This is why you need to begin by navigating to Products/Add New from your WordPress dashboard.
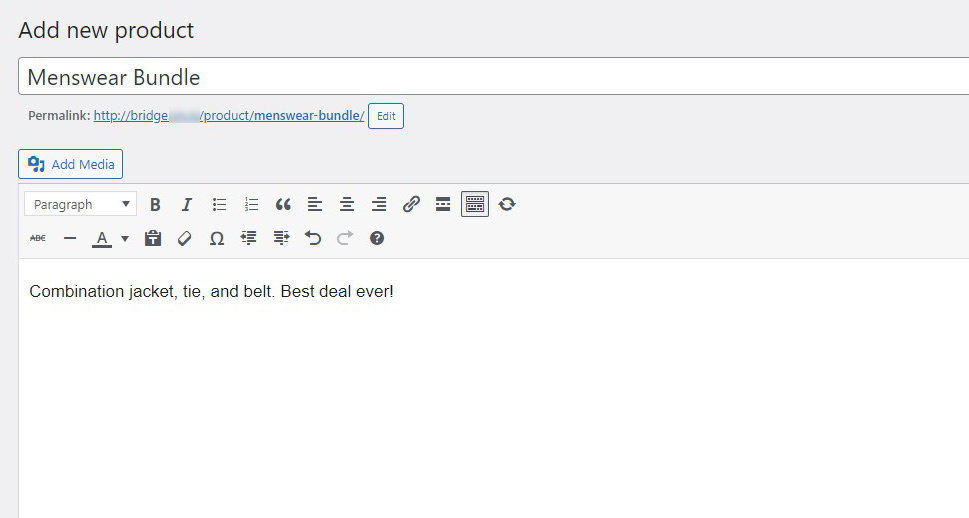
You will then need to think of a name and description for your bundle. The name ought to be suggestive of the fact that it is a bundle, while the description should clearly state what the bundle is, and whether it is on a discount, as this will motivate your shoppers to buy this bundle instead of the individual products in case they are available.
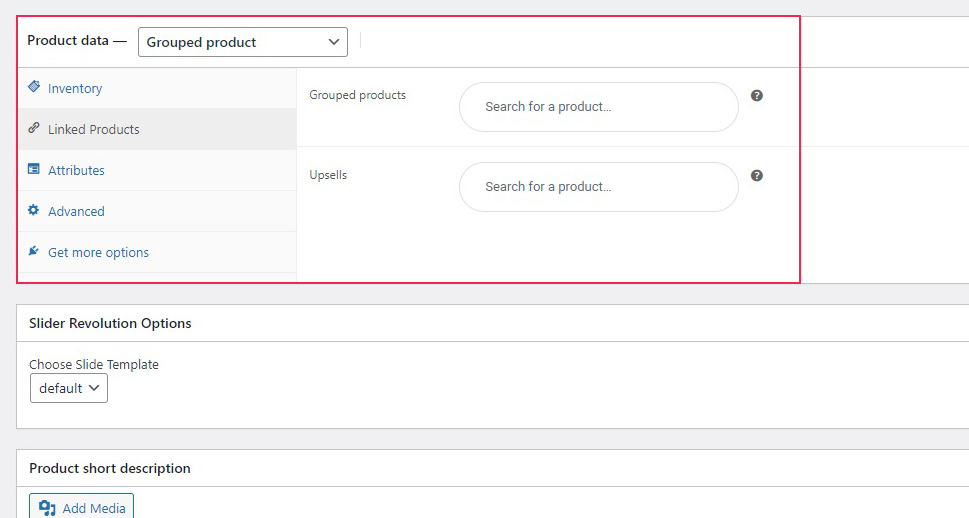
In the next section down, you need to fill out the Product data. First, select Grouped product from the drop down menu. Next, in the Linked Products tab, you will find the Grouped products field. Use it to search for the products you wish to bundle.
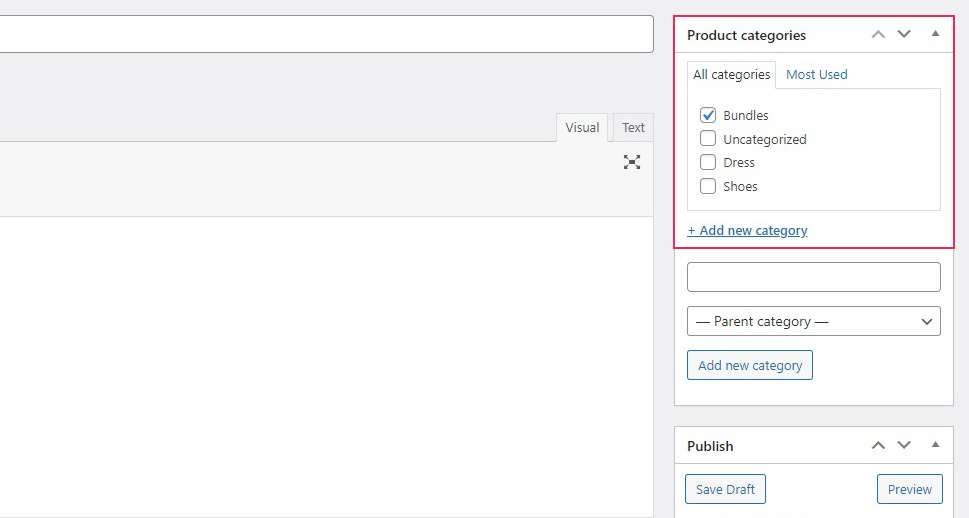
Once you have done that, move to the right-hand side. In the Product category section, create a category for your bundles, and select it. We have gone with Bundles, but you can, of course, call it whatever you like.
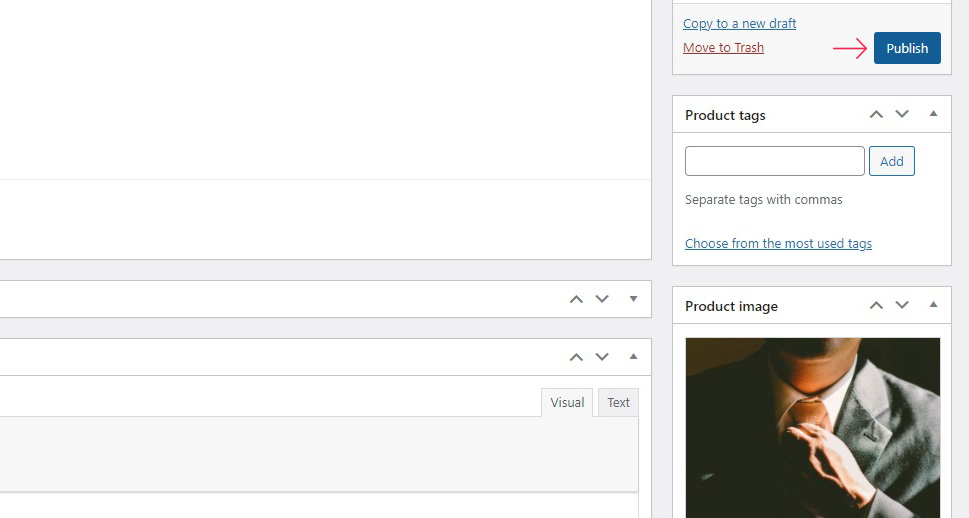
Further down, you can select a product image for your bundle. There’s a lot we could say about what makes a perfect WooCommerce image – and we have. We will limit ourselves here to noting that you can use a photo of all the products together, or you can photoshop all the bundled product images, or even use a graphic. It is up to you.
Once you are satisfied, you can Publish your bundle.
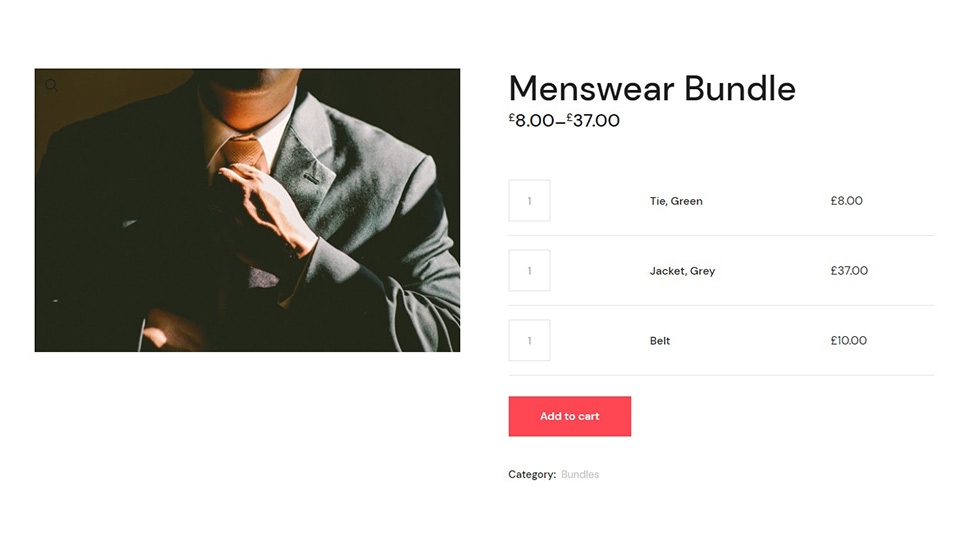
And that’s it! Your customers can now shop for any amount of bundled products and add them to their cart. Once they do that, each item is billed separately, as if it were a regular product.
As you can see, with WooCommerce alone you are perfectly capable of creating basic and practical product bundles. We should point out, though, that there is a good deal of WooCommerce bundle plugins and extensions out there which expand WooCommerce’s capabilities. Some of them might provide you with just the tweaks you need.
Bundling products in the way described above is just a convenient way of selling several items together. If you want to really make it worth your shoppers’ while, what you need to do is offer them a discount for the bundle.
You can make the discount conditional on the bundle, meaning that only a shopper who buys the bundle (or all the items from a bundle) will be able to use the discount.
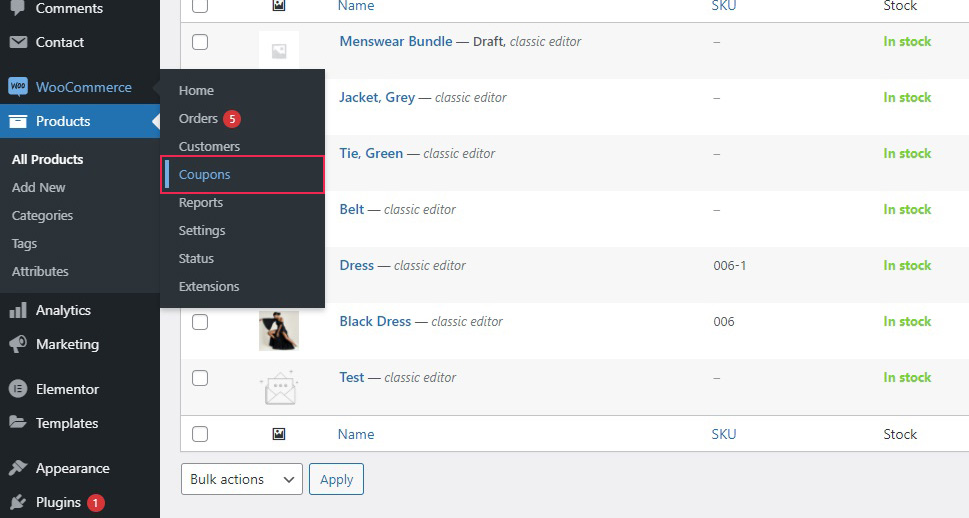
In order to do so, you need to create a Coupon. Navigate to WooCommerce/Coupons from your WordPress dashboard.
Once there, click Add coupon.
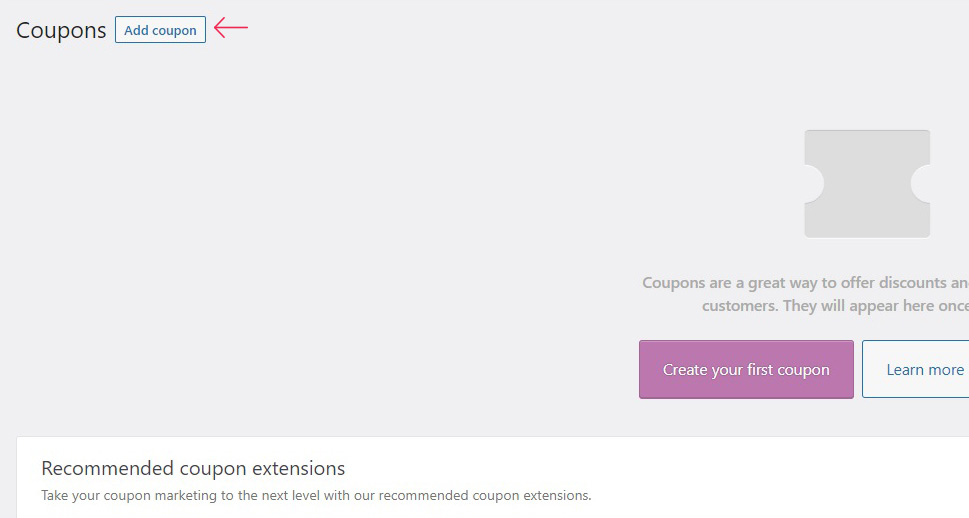
You can then enter or generate a coupon code, as well as a description.
Say you want to sell your entire bundle at £10 off. In the General tab of the Coupon data section you need to set the discount type to Fixed cart discount.
The Coupon amount you need to set to 10 (or whatever discount amount you choose), and you can also check Free shipping or set an expiry date for the coupon, if you like. We will not be using these settings, but you can, it should go without saying, choose what works best for your sales strategy.
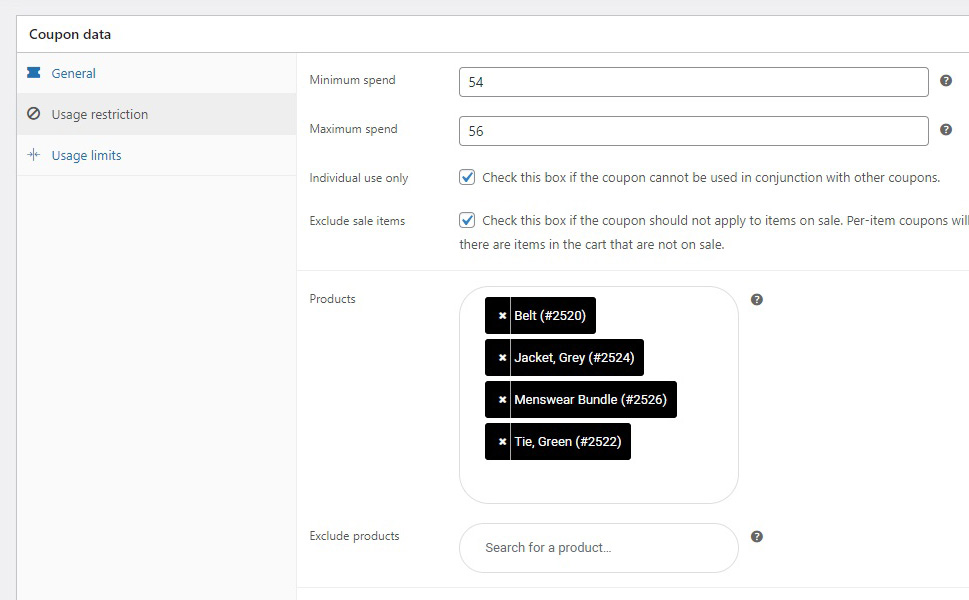
In the Usage restriction tab, you can set the restrictions for your coupon. For instance, you probably do not want to grant a discount to a person who only buys a single item from the bundle.
Say we want to grant a discount for a single bundle bought, but no more. The total amount for all the items in our bundle is GBP 55. Setting Minimum spend to 54 and Maximum spend to 56, while also checking Individual use only and Exclude sale items will guarantee that GBP 10 will be the only amount any shopper will be able to save on a discount: only the bundle discount applies.
If you leave the Individual use only box unchecked, a shopper might be able to get more than one discount (for buying multiple bundles, for instance), but then you also need to adjust the Maximum spend control. Leaving the Exclude sale items box unchecked will mean that any other discount may also apply (that item discounts and bundle discounts may stack). If you want to allow this, you will need to adjust the Minimum spend control also.
In the Products section, you need to enter all the products (including the bundle) for which the discount applies. The same goes for Product categories.
Once you are done, click Publish.
And now, once a shopper has added the bundle (or all the bundled items) to their cart, they will automatically register a 10off coupon and pay GBM 45 for the entire bundle, instead of the full price. If the shopper attempts to remove an item from the bundle from their cart, the discount will no longer apply and WooCommerce will display an error.
In Conclusion
As you have seen, it is very easy to bundle products in WooCommerce and offer your shoppers great deals and enticing discounts. All of this is achievable with WordPress’s and WooCommerce’s built-in functionalities, and these don’t cost you a penny. Now that you know how to set up and discount bundles of products, all you need to come up with is a sales strategy which suits your business the best, and put it to good use.
