How to Create an Online Course with WordPress

The online courses market is thriving. Over the last few years, the eLearning industry has been on a constant rise, what with so many people wanting to improve their skills and gain new knowledge.
Regardless of what you have a knack for, now is the time to seize the opportunity and share your skills with others. Remember the adage – knowledge is power? You could use that power and your expertise to help others in their private and professional lives while enjoying the perks of an online business that can easily become your source of steady income.
To become an edupreneur (i.e. education entrepreneur), you first have to build a solid LMS (Learning Management System) platform. Now, we don’t want to leave you in the lurch, so we’re going to show you how to create an online course with WordPress. We’ll dive deep into this matter and we’ll discuss the following subjects:
Without any further ado, let’s begin…

The planning phase is essential, and as such, it can seem a bit intimidating. You’re about to start a new endeavor, and it’s normal to be scared. But regardless of what kind of course you’d like to teach, there are some basic steps you should follow:
-
Choose the course topic
-
Decide who your audience is
-
Organize your course
-
Select course content
-
Decide how to assess learners
-
Set the price for your course
-
Test the course
Choose the Course Topic
If you’re thinking of creating an online course with WordPress, you probably have a pretty good sense of what you want to teach about. However, it’s important to think that idea through thoroughly before you plow ahead.
It’s in human nature to seek knowledge. We’re all deeply curious beings and we’re looking for ways to grow and improve every day.
So ask yourself – what goals could I help others achieve? Are you someone’s go-to person for resolving a particular issue?
Most people want to learn about something very specific. Do your research before starting. Join forums, sites, and groups on the subject, try to understand the doubts and challenges most people come across, and be the one to offer them a solution.
If you have a solid social media following, you could ask people what they want to learn about. You can also send emails or create polls using Google Forms to find that out. Make sure the topic you want to talk about has high market demand, such as for example a digital marketing course.
Decide Who Your Audience Is
Once you determine the topic of your online course, think about defining your audience. This should become apparent through your research as well.
Are you going to address the absolute beginners? If so, try to think of yourself as a rookie and remember all the questions you had when you were starting out.
If your course is intended for more advanced learners, do your best to understand what bothers them the most. Learn what are some recurring issues they come across time and time again but can’t resolve. In that case, maybe you don’t have to teach about the basics on the subject, as that might bore them. Try to go straight to the point and give them the answers they need.
Deciding who your course is intended for leads us to the next point.
Organize Your Course
Will you do the course for all audiences? If that’s the case, consider creating a complete course and break it down into several modules and lessons. That way anyone can choose what they wish to learn about depending on what they already know and what they’d like to master.
If you plan on including only a specific group of learners, the organization should be less complicated. Still, it’s always good to split the course into sensical parts so that people can understand what you’ll teach about.
Select Course Content
When you decide on what kind of an online course to create and how to organize it, it’s time to pick the content you’ll use for your lessons. And that pretty much depends on what kind of course you wish to run.
Video content is usually everybody’s favorite because it’s very engaging and attention-grabbing. But, other content forms such as audio files, PDFs, and texts shouldn’t be neglected either. Don’t forget to make your online course suitable for audiences with disabilities. For instance, if you opt to upload video content, make sure to include video transcription for the hearing impaired.
You can also make your course more interesting by including quizzes, organizing webinars, live streams, or by chatting with your audience.
Decide How to Assess Learners
To measure how well learners have understood and grasped your course, think about the ways to assess them. How often will you quiz them? Will you do it after each lesson, or less frequently? Take a look at the course organization and decide when’s the best time to launch quizzes.
Set the Price for Your Course
Now’s the time to decide on the pricing. If you offer your course for free, you’ll probably attract a larger audience. But people tend to doubt things that come for free so they may question the quality of your course. Higher prices usually make them feel they’re getting something of great value. Moreover, if you’d like to earn money from your online course, set a price tag on your classes. Test your market and determine just how far you can go with the prices.
Test Your Course
Before you put your course on the market, you should test it with smaller audiences first, to get their feedback on what you’ve created. Running an online course means continuous market research, reviewing the needs of the audience, and regularly updating content. It’s not exactly nuclear physics, but it is a long-term commitment.
Now that we covered these basic guidelines, we’re one step closer to showing you how to create an online course with WordPress.

Before you start setting up your website, you need to decide on a domain name. Think it through carefully as the name represents your brand on the internet. You may have to pay a few extra bucks to obtain the one you want, but that’s (usually) a one-time decision, so don’t regret investing money into something so important for your business.
Another crucial thing you should take care of is finding a place for all of your files to live. That’s what web hosting services do – rent you space on their servers where you can store your website. You may or may not know that WordPress.com hosts your site for free. But, in the WordPress.com vs. WordPress.org game, as far as we’re concerned, the latter is the undisputed winner, regardless of the fact that you need to find a hosting service on your own. There are so many other benefits, such as being fully in control of your site, that definitely make up for having to find a hosting service.
It’s important to understand that a reliable hosting service is crucial for the success of any website. If you’re on a tight budget, you can start off with a free hosting plan, but those come with limited bandwidth, storage space, and speed. Think of what you’ll use your site for, take into account all the files and features you’ll need for your course, and choose a plan that pays off in the long run.

WordPress is, by far, the best platform for making websites, including online courses. But before you start crafting your own site, you need to install WordPress. That doesn’t have to be a strenuous affair at all, especially if someone can show you how to do it. We previously wrote a detailed tutorial on how to install WordPress using the famous 5 minutes install method, and this article will provide you just the guidance you need.
You can also install WordPress on your local PC. In this case, the installation will be visible only on your computer, and it won’t be public. This means no one else will be able to see what you’ve done with your site. A local WordPress installation is an excellent solution when you wish to test and modify various themes and plugins, as well as understand the way WordPress operates.
To create an outstanding online course with WordPress all you need is a top-notch LMS theme. Though there are many online course platforms dedicated to course creation, they all have recurring costs. Knowing this, we’ve built several online learning WordPress themes you can use to make your online course with ease. But today, we’ll show you how to do it using Academist, our top-selling education and learning management system theme.
Before we start, make sure you’ve installed this WordPress theme and activated all of its plugins.
By taking a glance at your dashboard, you can understand that Academist is stacked-full with practical features any well-built online course needs. Plus, the theme packs an assortment of customizable home and inner page layouts you can use to present your course, classes, yourself (and other teachers, too, in case more of you will be involved with the course) in a variety of ways.
You can also start forums and create bulletin boards. Users can easily join the platform by creating an account, which they can use to leave comments on topics of their interest, review orders, manage their details, etc.
The theme is compatible with the Events Calendar plugin so you can display info about the classes and any upcoming events. Furthermore, Academist is also fully compatible with the powerful WooCommerce plugin. That allows you to effortlessly create an online store and sell books, or any additional material students could use for the course.
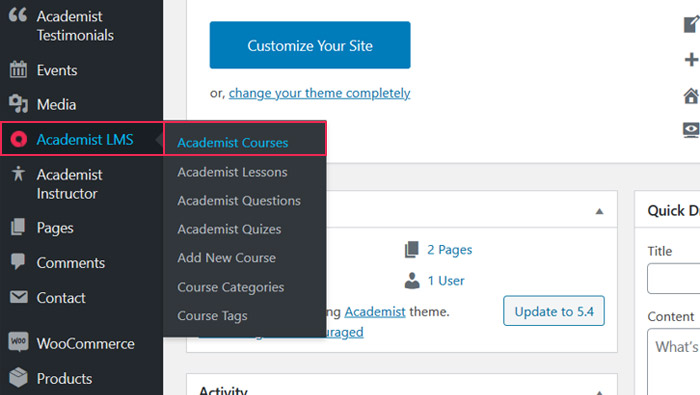
To start creating your first course, go to Academist LMS > Academist Courses.
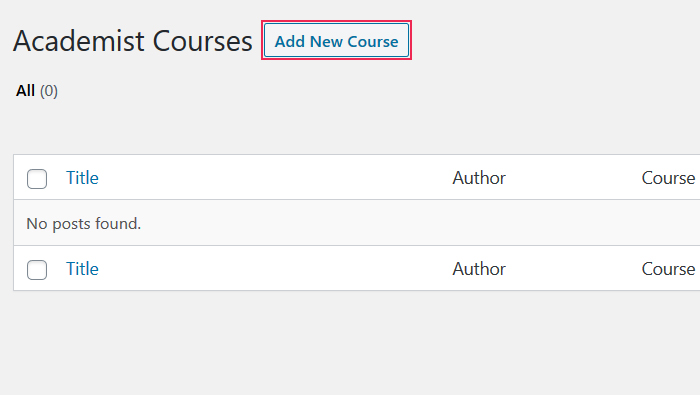
Then select Add New Course.
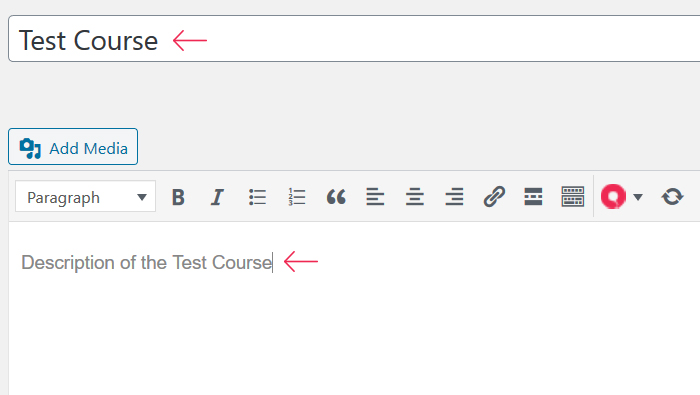
Add the title and the description of your course.
If you’d like to add an excerpt i.e. a summary of the course content, you can paste it in the Excerpt field (it’s placed right below the title and description boxes).
It’s also possible to enable comments and allow trackbacks and pingbacks on your course.
The number of customization options this theme comes with is truly staggering.
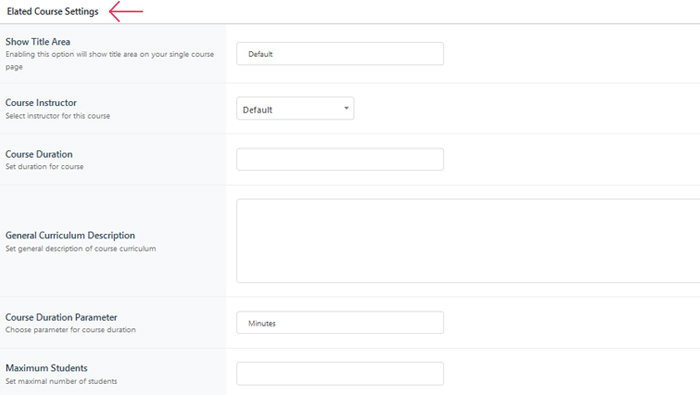
There are elements that allow you to:
-
set the course duration
-
choose the duration parameters (minutes, hours, days, etc.)
-
set the maximum number of students that can participate in a course as well as the maximum number of those who decide to re-take it.
If you’d like for your students to complete a particular course before joining your classes, use the Pre-Required Course option. You can also set a value that students need to reach to complete the course, decide on the course price, link each course to a specific forum, etc.
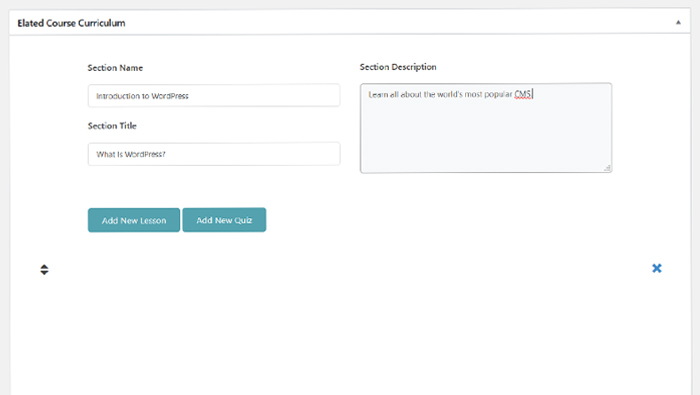
In the Course Curriculum box, you get to create sections your course will be divided into. You can input a name, title, and description, as well as add lessons and quizzes to each section.
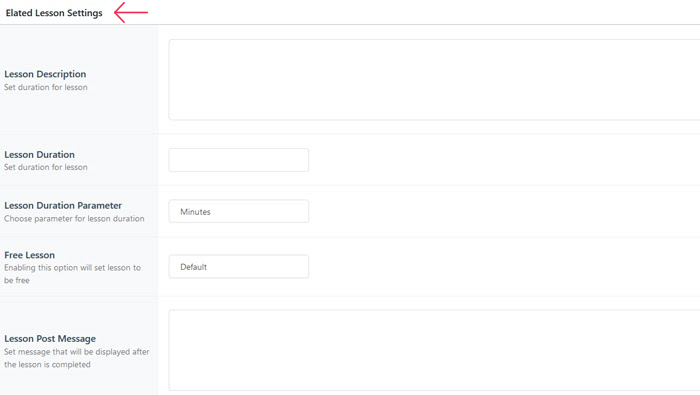
Lessons, quizzes, and questions for the course can be created and edited by selecting Academist LMS from the menu.
For example, Academist Lessons lets you set the lesson duration, choose the duration parameter, enable the option that’ll offer the lesson for free, set a message that students will see once the lesson is over, etc.
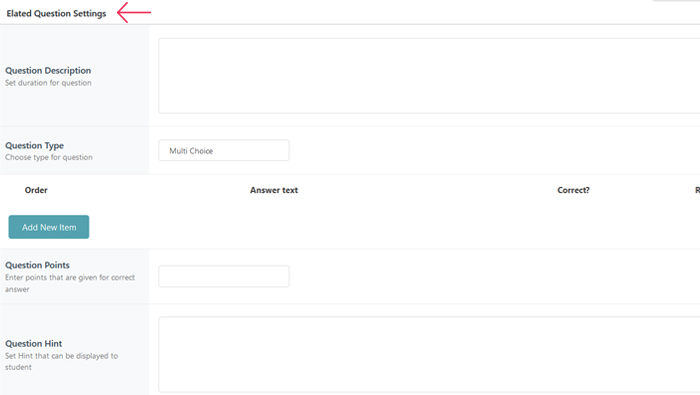
Academist Questions comes with its own set of options, such as choosing the question type (text, multiple choice, single choice), entering question points, as well as setting hints for each question.
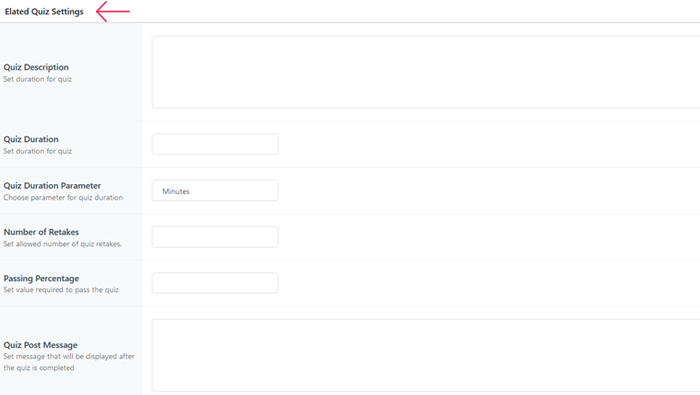
To create a quiz for your course, go to Academist LMS > Academist Quizzes. Enter the quiz description, set the duration, add a passing percentage, and much more.
You can also add categories and tags for each course.
In case there’s going to be more of you teaching, you can use the Academist Instructor option to add details regarding each teacher, such as their short bio, contact details, resume, etc.
Once you’ve set up your courses and tweaked them to your needs, it’s time to show them somewhere on your site. We’re going to put ours on our home page.
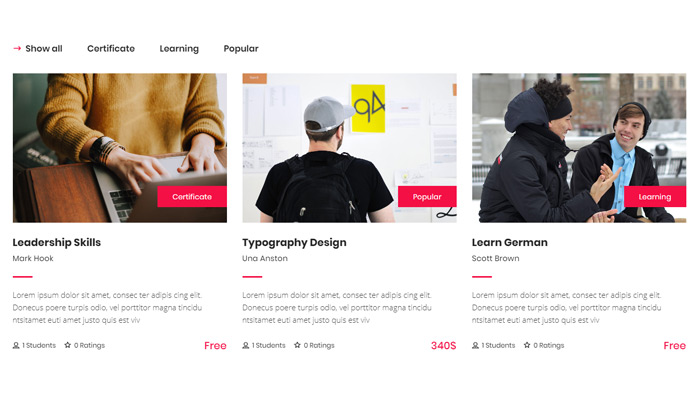
From the back-end of the page you want your courses on, choose the Course Table shortcode. There are numerous settings here that allow you to customize the way your courses will be displayed, so set them according to your needs. When you’re done, save the changes and click Publish.
At the end of the day, this theme really is all you need to craft a stellar online education website. It’s regularly updated and jam-packed with all the features an LMS platform could ever need, but you certainly won’t go wrong if you opt for another Qode Interactive online education theme.


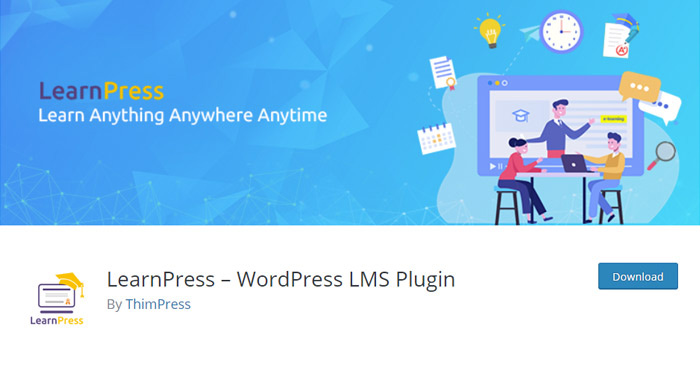
Another way of creating an online course with WordPress is by using plugins. While there are terrific premium solutions out there, such as LearnDash, we’ll show you how to create a course using one of the best free LMS plugins on the market – LearnPress.
We also have an article on the best WordPress LMS plugins, so make sure to give it a look, in case you’d like to use some other plugin for building your online course.
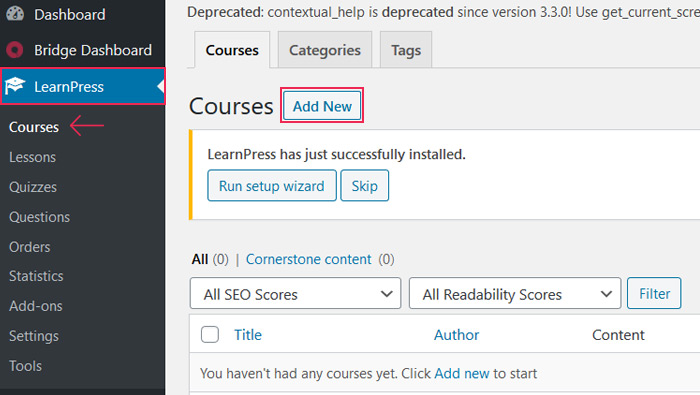
Upon downloading and activating the plugin, go to LearnPress > Courses and select Add New.
Then add the title and the description of your course.
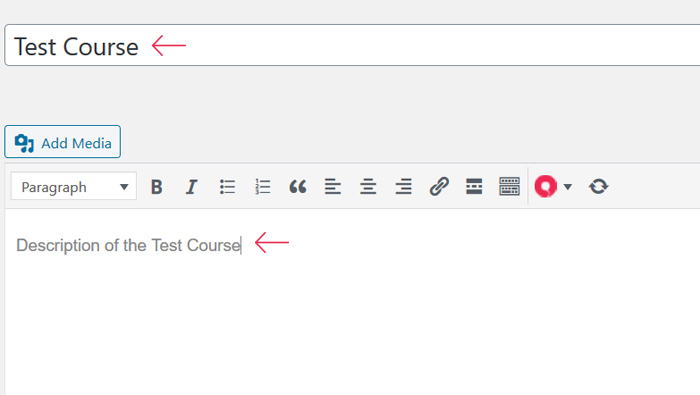
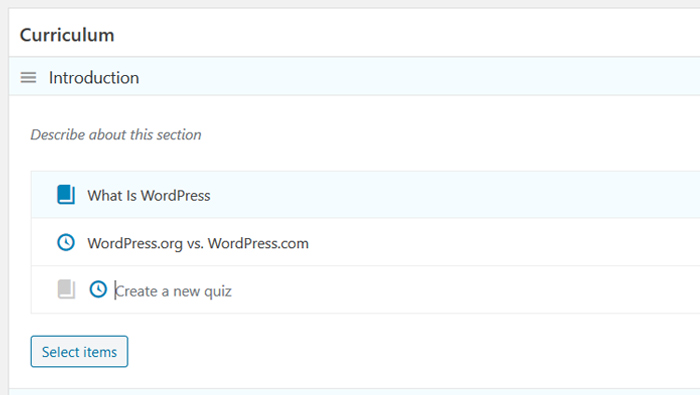
This Description field is followed by the Curriculum box. That’s where you can insert the sections your course will be divided into. Enter the name of the first section and press Enter. More options will then appear, and you’ll be able to describe each course section and insert lessons or quizzes.
To add a lesson or a quiz to your course, click on the book and watch icons, respectively. Alternatively, you can press the Select Items button, which will allow you to insert lessons and quizzes you’ve previously created.
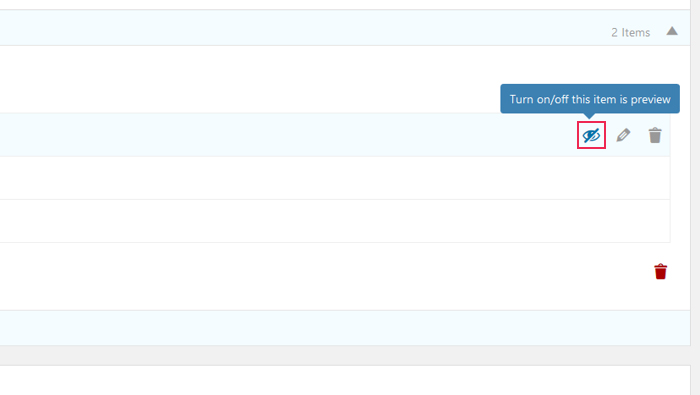
By clicking on the eye icon that’s placed in the same line as the lesson you’ve created, you can disable students from viewing the lesson preview.
To add content to lessons and quizzes and to edit them, click on the pencil icon.

As for lessons, you can add titles, content, set lesson duration, etc. For quizzes, you can create questions (and choose question types – true or false, multi choice, single choice), enable pagination questions, set the quiz duration and the passing grade, and much more.
In case you wish to remove a lesson or a quiz, press the trash bin symbol.
Next up is the Course Settings section.

Here we have multiple sections – general, assessment, pricing, review logs, and author. Explore them all and tweak the course according to your requirements. For example, in the General tab, you can set the duration of your course, determine the maximum number of students that can attend it, block lessons content once students complete the course. To determine how you’ll evaluate students, head over to the Assessment tab. If you don’t set the price in the Pricing tab, the course will be free.
The prices are displayed in USD currency by default, but you can change that in LearnPress > Settings. To set a different preferred currency, click on the General tab.
LearnPress Add-ons
Another great thing about this plugin is that it integrates with many add-ons, some of which are free (e.g. bbPress, BuddyPress, etc.), while others are premium. Speaking of the latter, LearnPress integrates with currently the best membership plugin on the market – MemberPress. You can install a paid MemberPress add-on that’ll enrich your online course with the membership feature. That way, users will have to create an account in order to join your course.
You can also install a paid WooCommerce add-on for LearnPress, to give users more options when choosing a payment gateway for the course. By default, LearnPress supports payments via PayPal, but with WooCommerce, you can enable payments via credit card, checks, bank transfer, etc. There are also add-ons that allow payments via Stripe, Authorize.net, and 2Checkout.
LearnPress is an incredibly powerful plugin that allows you to create lessons, quizzes, and questions for your online course free of charge. Explore all the amazing features LearnPress has to offer, create your online course without spending a dime, and make waves in the online LMS community.

Once the work is done and you’re satisfied with the online course you’ve created, it’s time to market it.
Social media is your friend when it comes to promoting a business. For example, you could post short video snippets of your course on Instagram and Facebook. Or share posts describing why your course is the next best thing since bread came sliced.
Don’t forget about email marketing either. You can send out newsletters to your contacts, to let them know about what you’ve created and how they could benefit from it.
Be honest about what you have to offer and in which ways people can grow by attending your course.
Ready to Create Your Online Course with WordPress?
We wanted to share with you tips on how to plan your course, which steps to take before you start to craft it, how to create an online course with WordPress, and lastly, how to promote it. While all of this may seem a bit overwhelming at first, don’t let it scare you off. Do things step by step, without rush, and work towards achieving your goal.
Whether you’ll decide to create your online course using a premium WordPress theme or a plugin, it all comes down to your preferences, and perhaps the budget. But at the end of the day, our advice would be to go with a WordPress theme that’s specifically made for your niche, with all the options and elements you need for creating your online course already built in.
