How to Properly Update WordPress

If you are running a WordPress website, chances are high that you have already updated WordPress on your site at least once. Updating WordPress is a regular task of every webmaster. Even though a WordPress update may seem easy, it always carries a certain amount of risk that it will break your website. This is why some WordPress users decide not to update WordPress. However, we would argue that the advantages of updating WordPress greatly outweigh the risks. This is why, in this article, we will explain why you should not miss the latest WordPress updates. And we will cover how to properly update WordPress in a way that minimizes potential risks and what to do if something were to go wrong. We will also show you several different update methods so you can pick the one you prefer:
Why you should update WordPress
Many developers from all around the world are regularly making contributions to improving the WordPress core files. As a result, WordPress is becoming faster and more secure with each new update. Therefore, there are a lot of reasons why you should update WordPress, and why you should do so regularly.
Firstly, WordPress developers often add new features or functionalities in their updates. This is especially true for major updates. Additionally, WordPress updates will contain fixes for known issues that have cropped up, either due to some major update or otherwise.
Most importantly, WordPress updates often provide fixes for security vulnerabilities. Since most websites worldwide use WordPress, a hacking threat is always present. Luckily, the WordPress team is always quick to address potential security issues. Ultimately, improving the WordPress code and adding newer features improves the website performance overall.
Qode Themes: Top Picks
View Collection


How to properly update WordPress
Now that it’s clearer why updating WordPress could help your website, let us explain how it can be done. We will show you how to update WordPress using the one-click update feature within the admin dashboard, as well as how you can do it manually, via FTP, in case you can’t access the dashboard. Additionally, we will cover the steps for implementing automatic WordPress updates.
But, before we proceed to the main section of this article, you need to make a complete backup of your website. This includes WordPress core files, your database, plugins and themes, media files, and other website-related files and folders. Furthermore, make sure to store that backup in a secure location other than your server. Having a backup will ensure that you can manually restore the website to its previous state if it were to break.
An additional way of ensuring no harm is done to your actual website is to set up a staging website and update WordPress on it first. Then, in the case of errors after the update, you would be able to troubleshoot them on the staging site. After solving them, you would be able to update your actual website and implement the same solutions there. Otherwise, if no issues appear on your staging site, you can proceed to update WordPress straightaway on your actual website using one of the methods described below.
Having said that, if you don’t want to use a staging site, we suggest at least making a backup as a form of security. Once you’ve done that, you can proceed to the following section of this article.
Updating WordPress via the one-click update option is the easiest and the most recommended way of updating WordPress. Therefore, if you have access to the admin dashboard, you should try to update WordPress using this method.
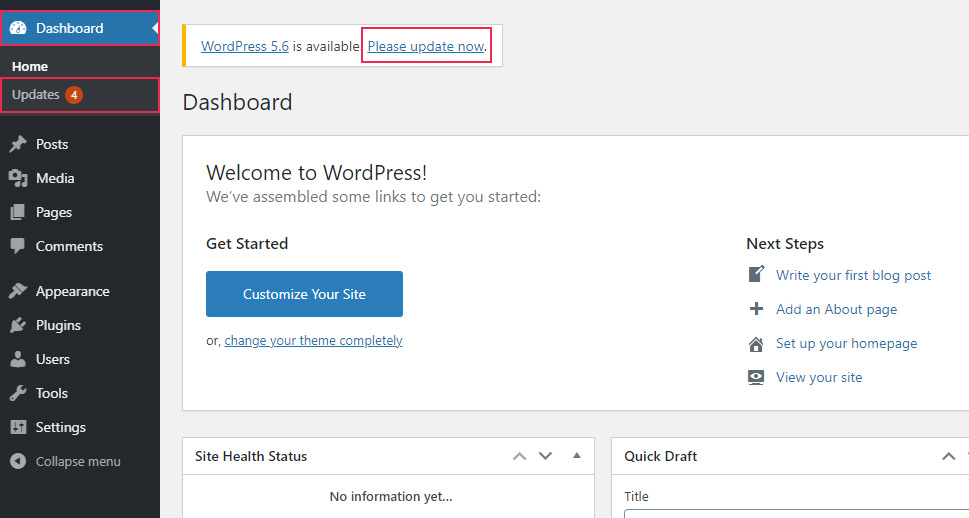
First, log in to the admin dashboard using your credentials and check for the notification near the top of your screen. If a new WordPress update is available, the notification will appear and you will be able to access the Updates screen by clicking the Please update now link. Alternatively, you can access the same Updates screen by navigating to Dashboard > Updates from the left-side menu.
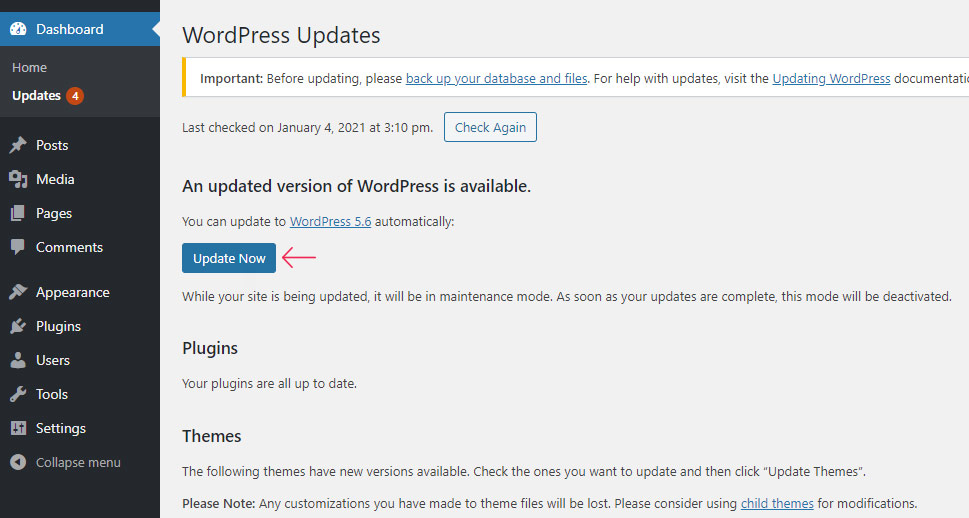
If you want to update your WordPress to the latest version, press the Update Now button found on the following screen.
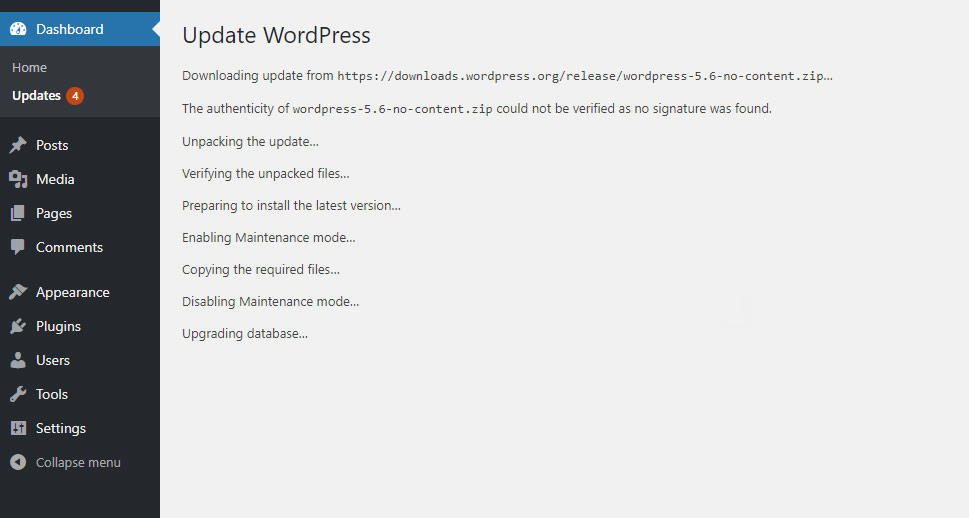
Afterward, you will need to wait a bit until the update is done. You will see the event log on your screen notifying you what actions are being run.
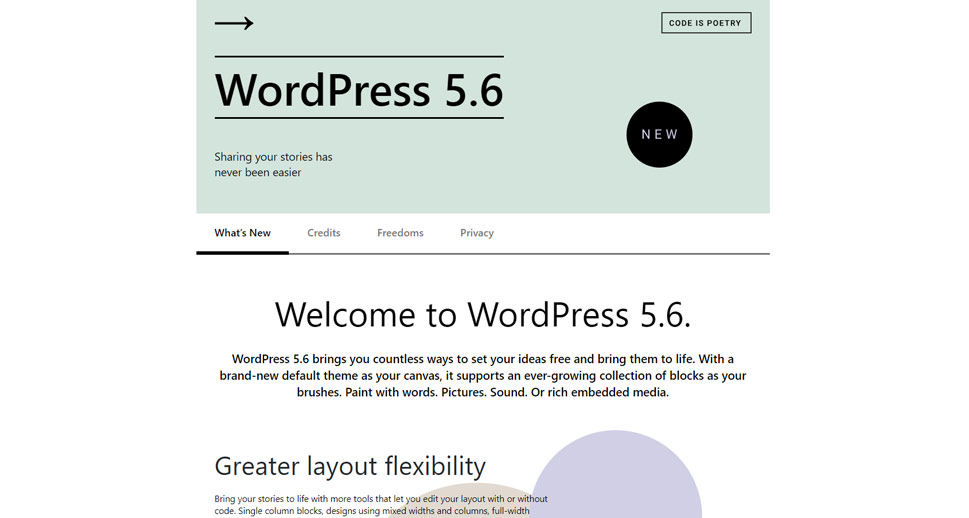
Once the update is complete, you will see the Welcome screen where you can find a list of all the features and bug fixes implemented in the newer WordPress version.
If for some reason you weren’t able to update WordPress using the previous method, or you simply don’t have access to the admin dashboard, you should try updating WordPress via FTP. This method is slightly more challenging, as it requires you to know how to use FTP.
To update WordPress via FTP, first, navigate to the WordPress’ Downloads section and click on the Download button found in the middle of the screen to get the latest version of WordPress.

This will download a .zip file named wordpress-version.zip to your computer, where the version part will be replaced with the current version number. For example, the .zip file that we downloaded for this article was titled wordpress-5.6.zip.
After you download the .zip file, you should unzip it. If you prefer, you can unzip it in a more convenient place than the Downloads folder, which is the most likely location where the .zip file was stored. For example, you can unzip it on your Desktop, as we have.
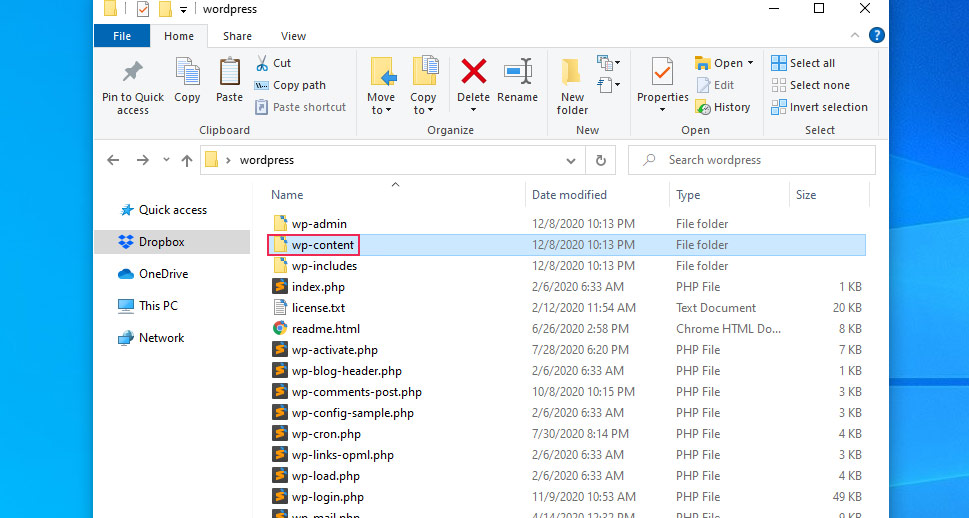
Once you’ve done so, you will see a folder named wordpress. Open that folder and locate the wp-content subfolder within. You will need to delete this subfolder as you don’t want to accidentally override the wp-content folder on your server with this one. Otherwise, your themes and plugins will get overwritten in the update process. To delete the wp-content subfolder, right-click on it and select the Delete option from the dropdown menu that appears.
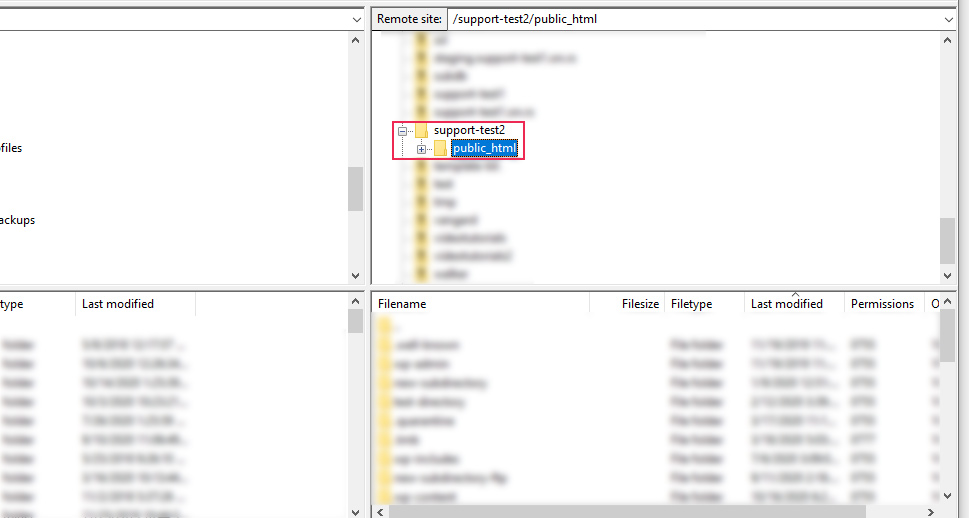
Afterward, you will need to upload the remaining files and subfolders from the wordpress folder onto your server. To do so, log in to your server using your FTP credentials and navigate to your root WordPress directory, often called public_html.
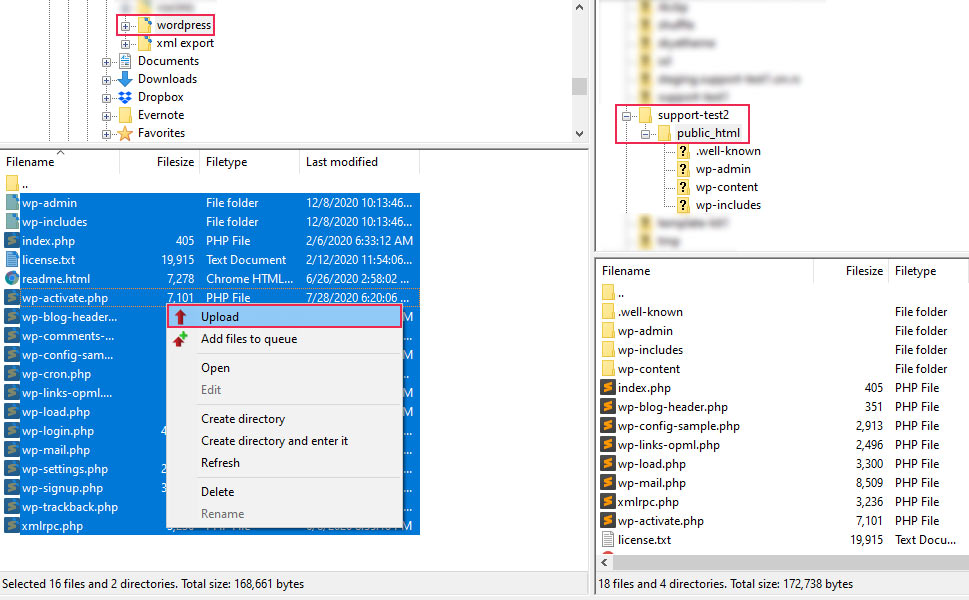
In the left section of your FTP client, which shows the file and folder structure on your computer, locate the wordpress folder. Click on it to position yourself within that folder. Then, select all the files and folders found within. This includes the two folders – wp-admin and wp-includes and all the files that are located below. You can select all files and folders using a keyboard shortcut, which is CTRL + A for Windows users or Cmd + A for Mac users. Then, right-click on one of the files or folders and select the Upload option.
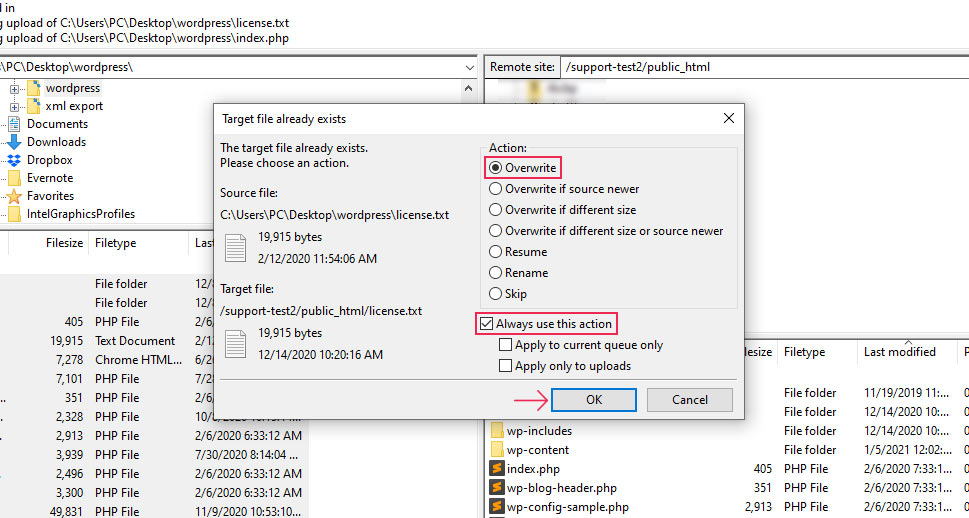
Since all files and folders are selected, this option will apply to all of them. But, as the older versions of those files and folders are already located on your server, you will be prompted to overwrite them with the ones you are uploading. To do so, select the Overwrite action and tick the checkbox next to Always use this action to apply the choice for all files and folders. Then, press the Ok button below.
Afterward, you will have to wait for a bit until all the files and folders are uploaded. You can monitor the status of files and folders that are being uploaded in the top section of your FTP client. Or, you can see how many remain for upload by observing how many files are queued in the bottom left section.
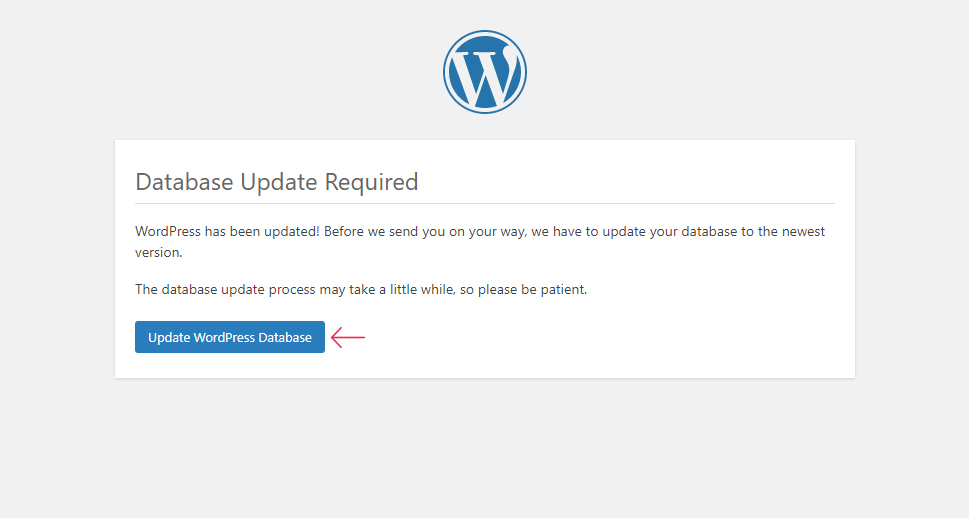
After all the files and folders are uploaded, you log in to the admin dashboard of your WordPress website. Then, you will be prompted to update your database to match the WordPress Core update you just performed. To do so, press the Update WordPress Database button.
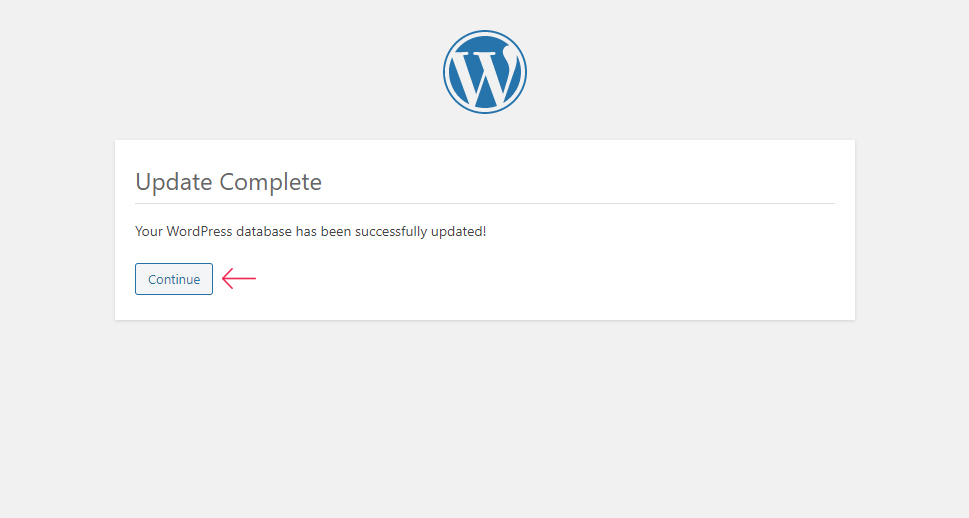
After that, you will need to press the Continue button to finish this process and safely log in to your admin dashboard.
WordPress also has a feature that enables automatic updates of its core files. This is done relatively easily by adding a single line of code into your wp-config.php file. However, you should weigh the pros and cons of automatic updates before enabling them.
Enabling automatic WordPress updates will save you a lot of time and stress that comes with manual WordPress updates. But, as we mentioned previously, every WordPress update comes with some risk. That being the possibility of breaking your website due to an incompatibility with your current plugins and themes or with some custom code you inserted. This is especially true for major WordPress updates. Making backups of your website can help with that issue, especially if they are scheduled regularly and stored in a safe location. Meaning, if your website were to break because of a WordPress update, you would be able to restore it using a previous backup.
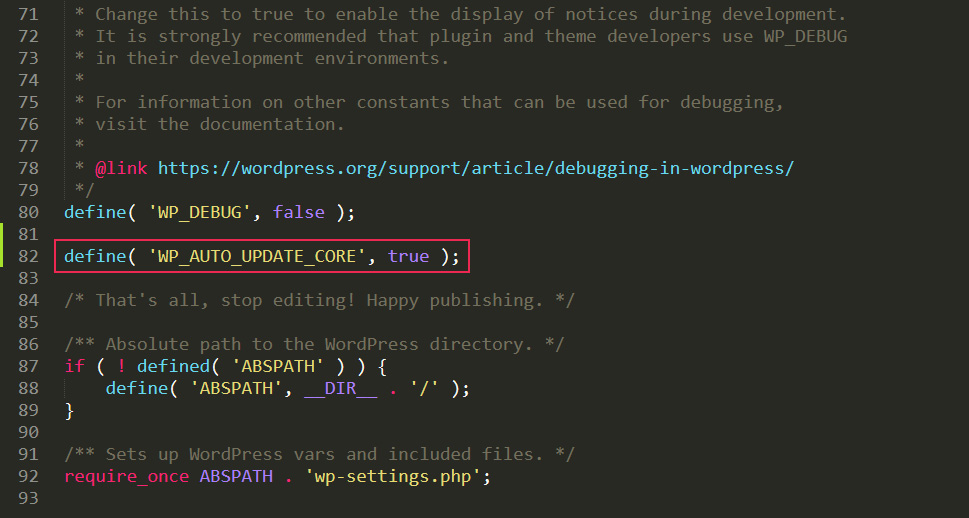
With that being said, if you want to enable automatic WordPress updates, you will need to add the following code into your wp-config.php file:
define( 'WP_AUTO_UPDATE_CORE', true );
It simply sets the WP_AUTO_UPDATE_CORE constant to true.
The other possible values this constant could have are false and minor. By setting it to false, you will disable all automatic updates of WordPress Core files. And by setting it to minor, you will enable automatic WordPress updates only for minor update versions. In those cases, the line of code that you would need to add would look like this:
define( 'WP_AUTO_UPDATE_CORE', false );
or like this:
define( 'WP_AUTO_UPDATE_CORE', minor );
Whichever code you choose to add, you will need to add it above the /* That’s all, stop editing! Happy publishing. */ line of code.
We advise reviewing our article on editing the wp-config.php file for more guidance on the steps you will need to take.
What to do after you update WordPress
Once you have updated WordPress on your website, make sure to examine it and see if everything is functioning properly. Review both the admin dashboard and the frontend of your website thoroughly using multiple browsers. Make sure to clear the browser cache before checking your website to ensure that you are viewing the latest version of it.
If the latest WordPress update has caused your website to break, the most likely reason is an incompatibility between the code of your theme, plugins, or custom code you added with the new WordPress core code. To figure out which files are to blame, examine the error logs of your website. If the error logs point to a file within your theme or some of your plugins, notify their authors about this and ask for help.
Additionally, if your business can’t afford the downtime caused by an error, restore the backup you made before the WordPress update. Otherwise, if there are no errors (which is most often the case), you should be satisfied to know that WordPress was successfully updated on your website.
Final Thoughts
WordPress developers issue updates of WordPress core files quite frequently. These WordPress updates serve to improve the existing files, add new functionalities, or solve some security vulnerabilities that were discovered. Therefore, webmasters should be inclined to perform regular WordPress updates. In this article, we have outlined steps you need to take to update the WordPress core on your website while ensuring nothing is lost if the update causes an issue. We shared the steps you should take before the update, such as creating a website backup, as well as what to do after the update—thoroughly test your website. By following those steps, you will be able to properly manage a WordPress update on your website without the stress that often accompanies it. And, since this is a very common task for every webmaster, we advise bookmarking this article for future use.
