How to Translate WordPress Plugins

WordPress has a wide range of quality plugins for nearly any purpose, but most of them are in English. If your target audience and website visitors aren’t predominantly English-speaking, you could be missing out on a lot of traffic and possible conversions by leaving the labels of your WordPress plugins in English. To avoid that, you should translate your WordPress plugins (and your site content) into a language that most of your visitors understand. You can also provide translations into several different languages, if your website has a more global reach.
In doing so, your website will be ranked higher in local search results, which will help it grow more quickly. Furthermore, you will be able to properly localize each translation for maximum appeal to local visitors.
However, making customized WordPress plugin translations requires a lot more work than simply changing the website’s language option in the backend. As such, we created this article to thoroughly explain how to translate a WordPress plugin into your chosen target language. We will be considering several ways of doing so:
Qode Themes: Top Picks
View Collection


How to translate WordPress plugins
Now that you have a better idea of how translating your WordPress plugins can benefit you, let’s explore the possible ways of doing so. These include contributing to an existing WordPress.org plugin translation or making custom translations only for your website using a WordPress translation plugin or translation software. Carefully review all the methods we covered before choosing the one that best suits your skill level and the amount of time you wish to spare. With that being said, let’s begin.
WordPress.org allows anyone to contribute to translating any WordPress plugins that are hosted with them. When a specific plugin has 100% of its labels translated by contributors and those translations are deemed acceptable by their respective translation teams, those translations will be available within WordPress for all its users to enjoy. As such, WordPress users are highly encouraged to contribute to the translation of WordPress plugins, as well as other parts of WordPress.
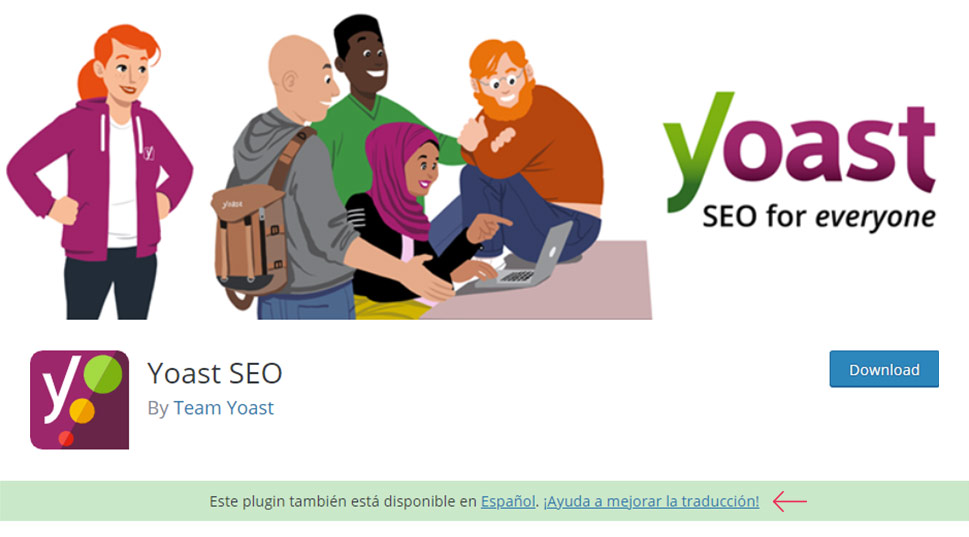
If you wish to contribute to translating a specific WordPress plugin, you can do so by directly accessing the plugin’s page and clicking on a notification similar to the one shown below. Of course, the notice you see will be in your local language. Clicking the notification will lead you to the plugin’s page within the Translating WordPress page. From there, you will be able to choose the plugin’s sub-projects and strings that you could contribute to with your translation.
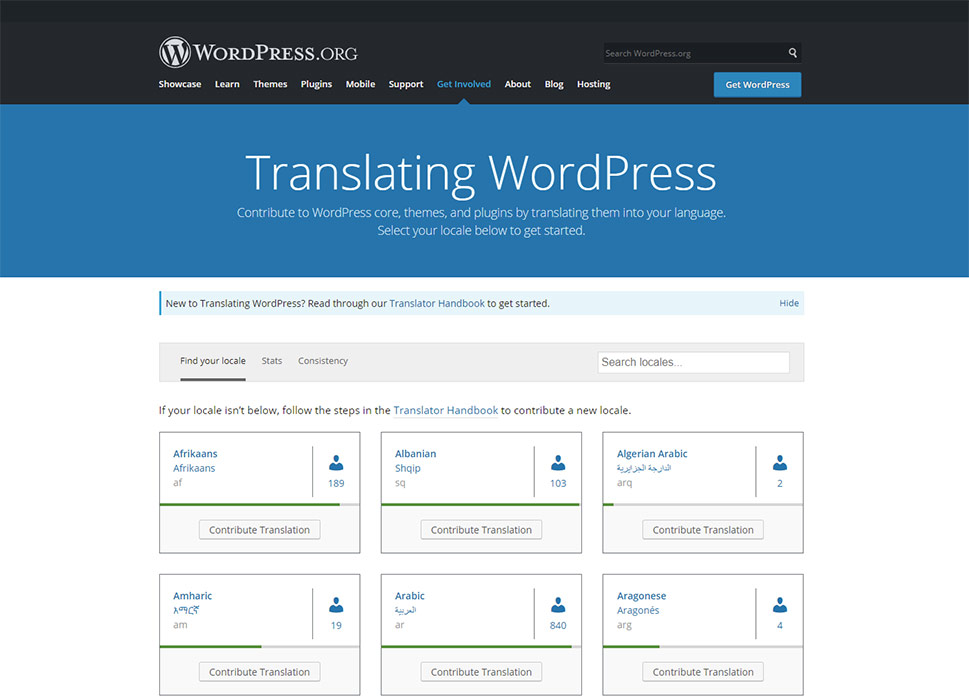
If you don’t see an invitation to translate the plugin on its page, you can also visit the Translating WordPress page manually. There you will see a list of all the languages available for translation that are currently supported by WordPress.
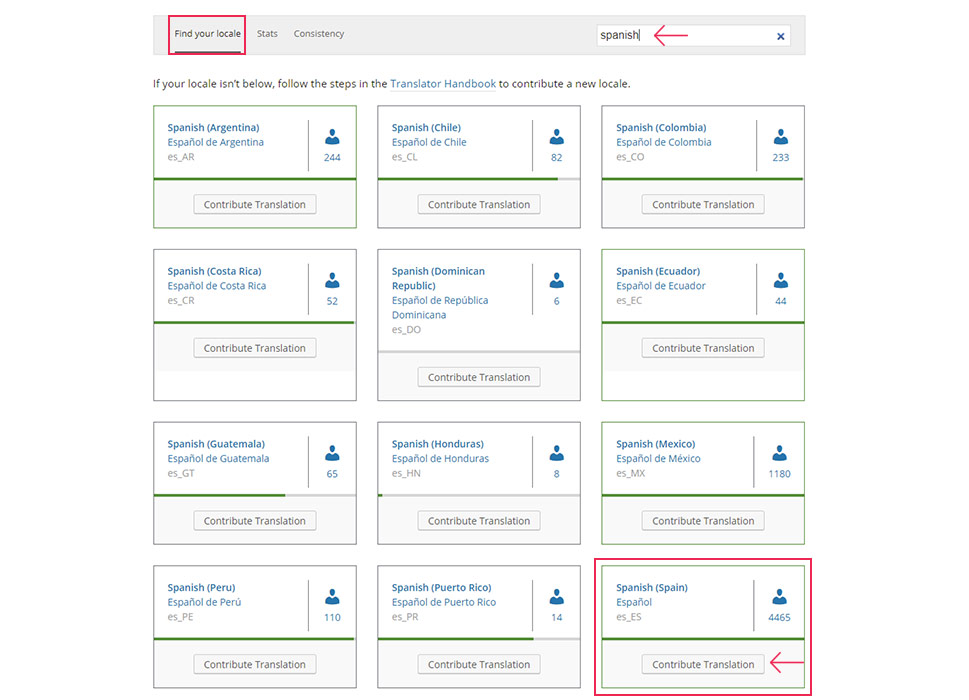
Find the language, i.e. locale, in which you wish to translate a specific WordPress plugin and click on the Contribute Translation link next to it.
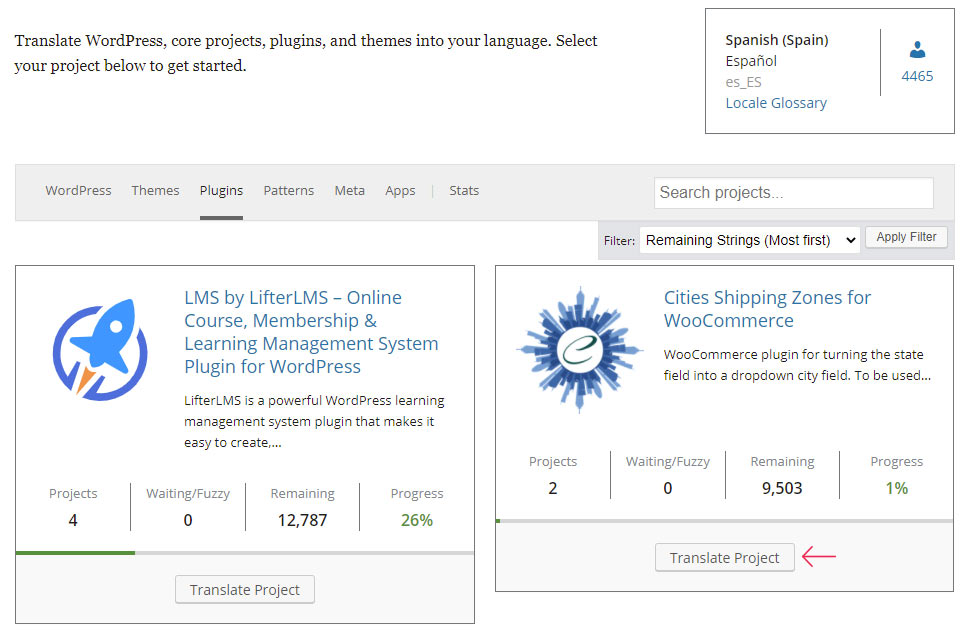
On the following page, you will see where you can contribute your translations, such as the WordPress core, themes, and plugins. The WordPress core tab will be selected by default, but you can switch to any tab you wish.
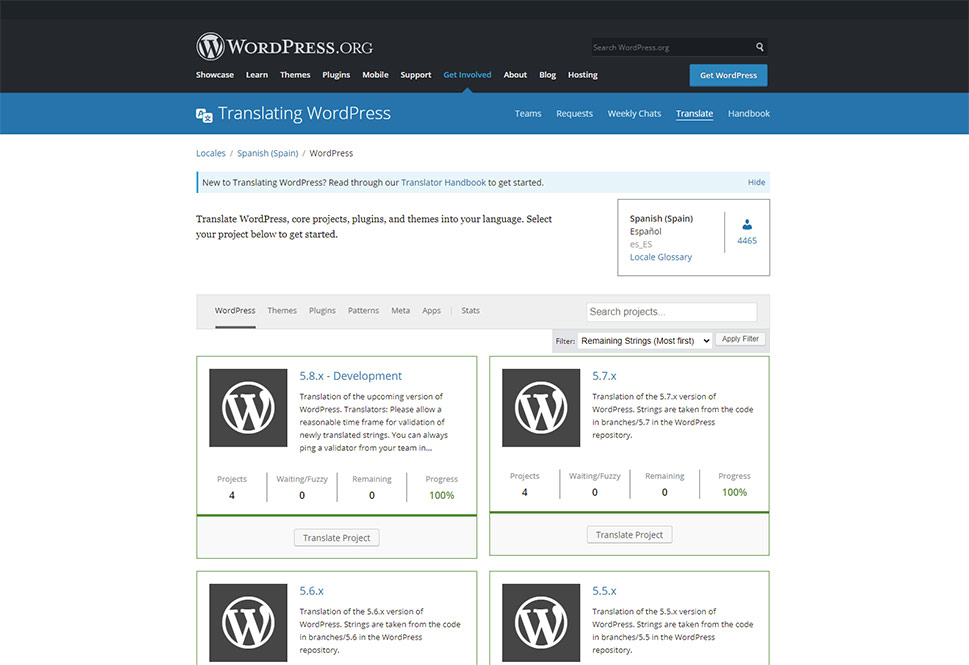
Given that our focus in this article is on WordPress plugins, you should select the Plugins tab. Then find the plugin that you wish to contribute your translations to. And click on its Translate Project link to proceed.
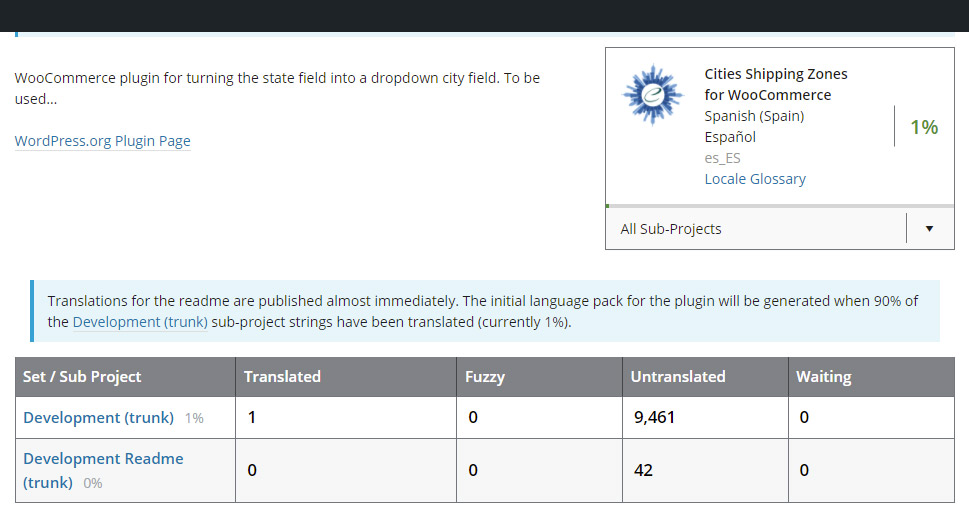
On the following plugin translation page, you will see a list of sub-projects containing strings that require translation, as well as the current translation progress of that sub-project. Select a sub-project whose strings you wish to translate and click on it to proceed.
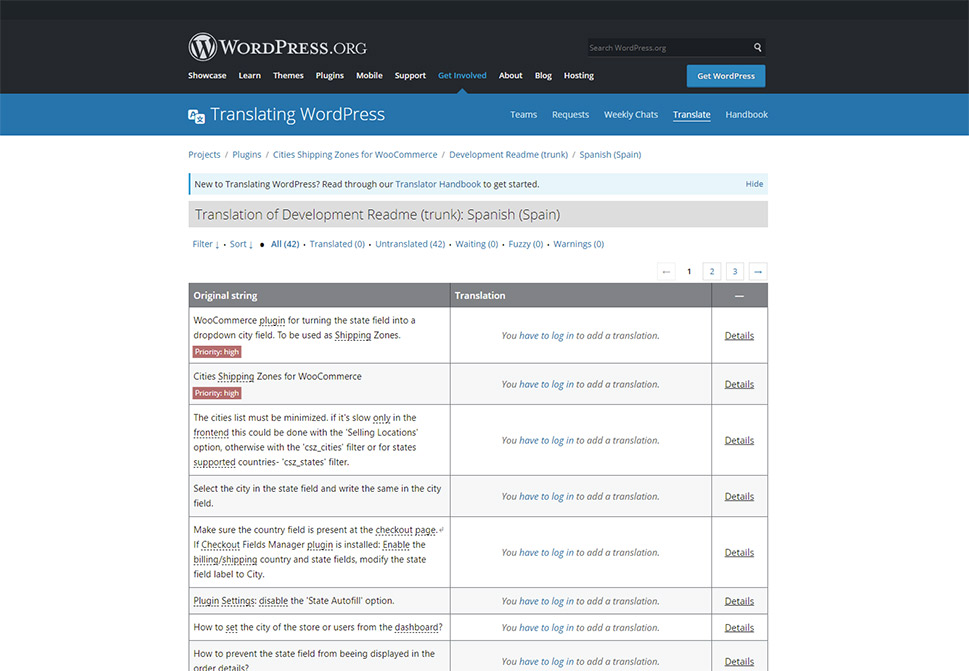
Finally, you will see a list of plugin strings that need translating. However, to add your translation of those strings, you will need to log in to your WordPress.org account first, as you can see from the screenshot below.
Finally, any translations you contribute have to be approved by the corresponding WordPress locale translation team, while the overall conversation is done using a specific Slack channel tied to each WordPress-supported language.
And, when the translations are approved, i.e. deemed 100% stable, they will automatically be added to the wp-content/languages/plugins folder. And you will be able to use them simply by switching your site language. Provided, of course, that you have the appropriate plugin installed and activated.
WordPress users that don’t want to or don’t have the time to contribute to translating WordPress plugins and waiting for the translation team’s approval can still translate plugins for personal use on their website. There are two ways of doing so. The first is translating the website directly from the dashboard using a suitable WordPress translation plugin like Loco Translate. The second involves making the translation separately and uploading it to the server. This is done using a translation app like Poedit which can be downloaded to your computer. The benefit of the latter is that you can outsource the translation work itself if you aren’t confident in your language skills.
The Loco Translate plugin is a very popular freemium translation plugin with a built-in translation editor that is accessed from the WordPress admin dashboard. It can extract translatable strings, and create and manage translation files of all parts of WordPress. It can also compile .mo files natively by default, offer a “safe” subdirectory within the wp-content/languages/ directory for storing the translation, and integrate with translation APIs like Google, Microsoft, DeepL, and Yandex. If you opt for the free version of this plugin, you should know it offers only up to 2000 translations spread across two projects. You can unlock more with their premium, monthly pricing plans.
To translate a plugin using Loco Translate, you need to navigate to the Loco Translate > Plugins section after installing the plugin. Then, you will see a list of all your website’s translatable plugins. There will also be additional information regarding translation, the most important of which is the plugin’s text domain. With that being said, locate the plugin you wish to translate from the list and click on it to proceed.
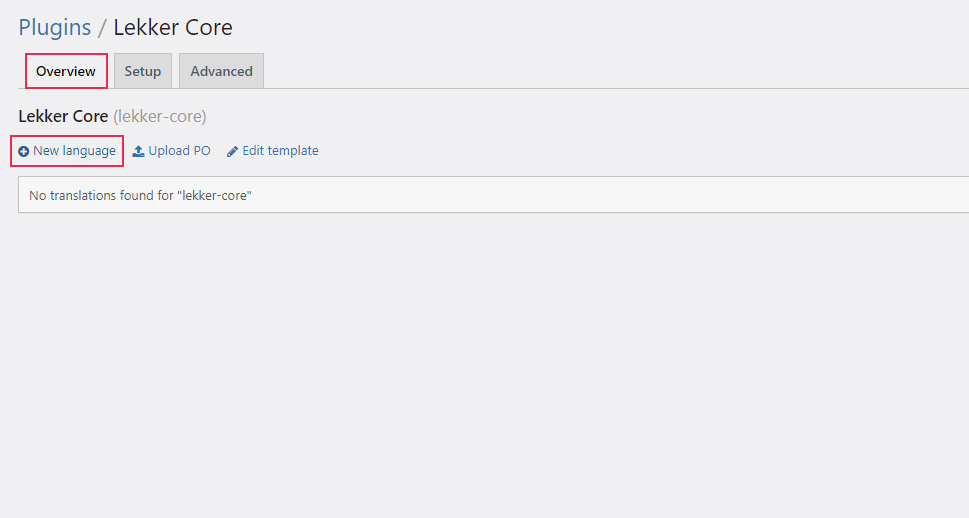
On the following page, you will see a list of already available translations and their respective progress. These include both the translations you previously made using the Loco Translate plugin, as well as the WordPress.org contributed translations that a plugin might have. If your translation target language is located within the list of existing translations, you only need to click on it to edit it. However, if your target language isn’t among the existing translations, then you need to click on the New language link to create a translation in that language for your website.
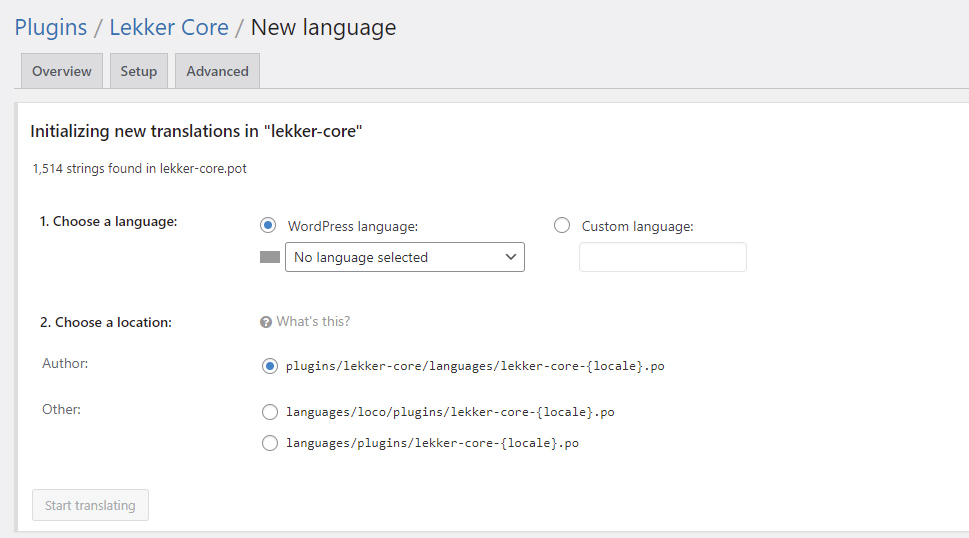
In the following screen, you will need to select your translation language—you will get the option to choose one of the WordPress-supported languages or insert your custom one. The same screen will also ask you to choose the location (of the three that are possible) where you wish to store the .po translation file that will be created during this process.
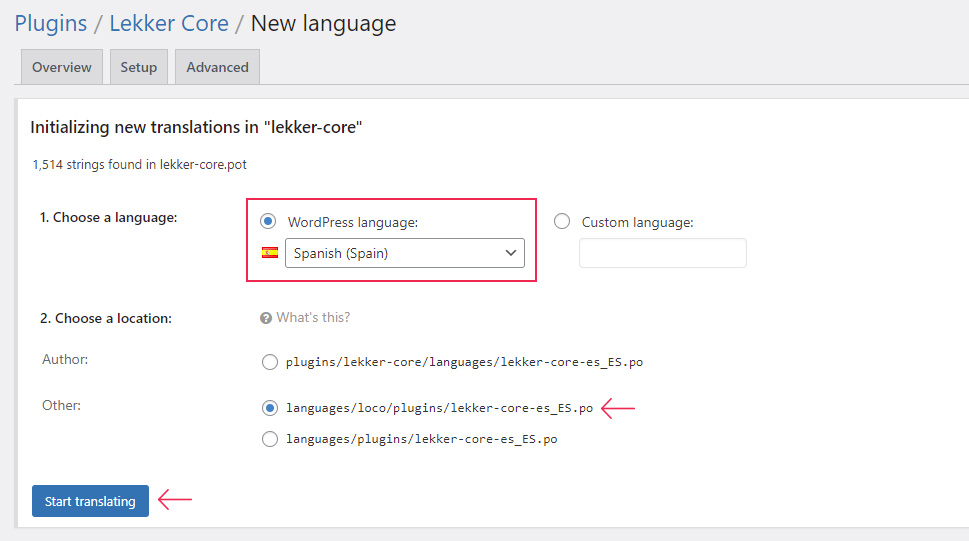
Select your language and the location where the .po file will be stored. The Loco Translate plugin suggests using either its custom location—the wp-content/languages/loco/plugins/ directory, or the WordPress system location—the wp-content/languages/plugins/ directory since they are safer against plugin updates. We opted to store our .po file in the Loco plugin’s custom location, the wp-content/languages/loco/plugins/ directory.
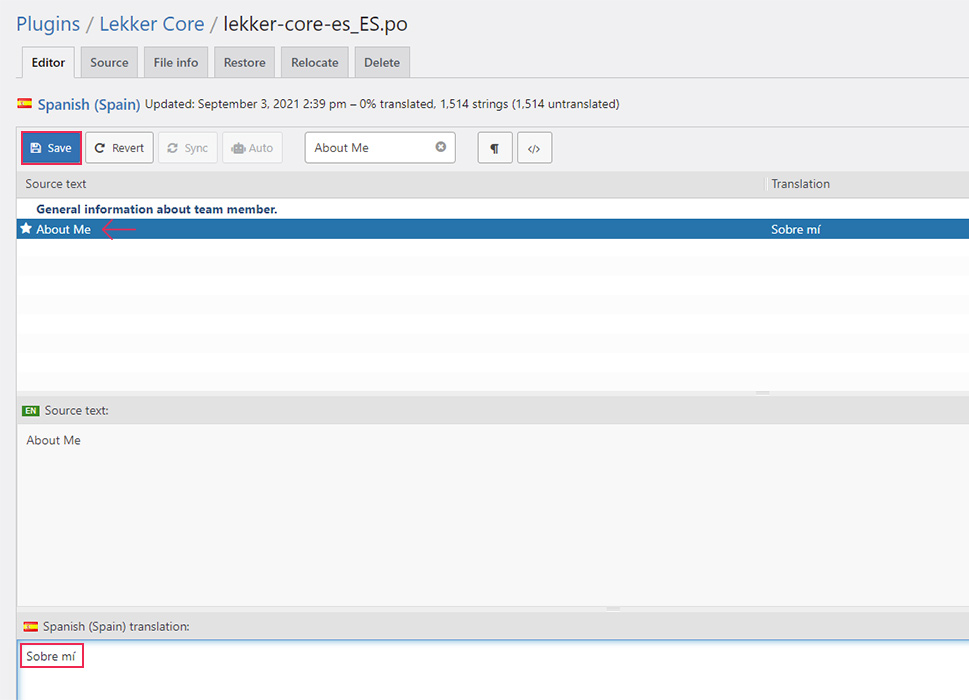
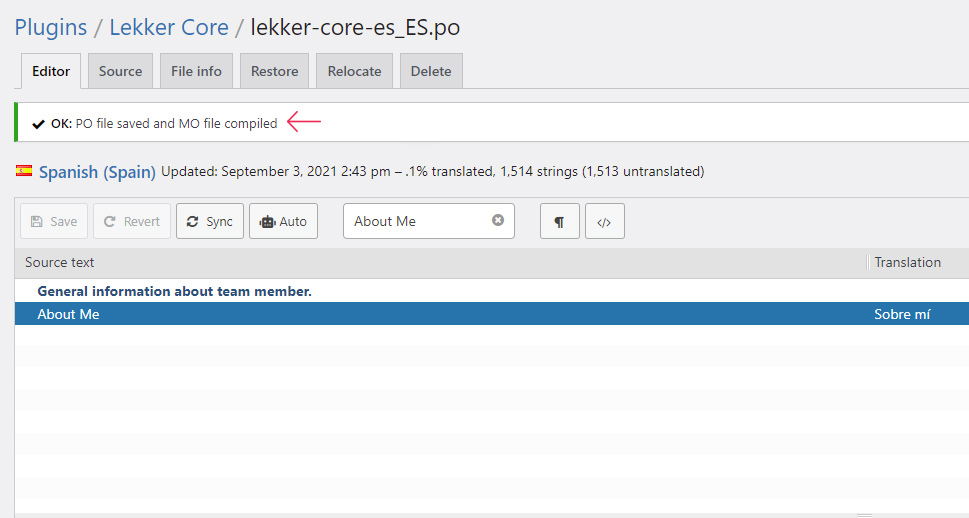
Then, the translation begins. You will be able to see a list of available translation labels within the Source text section in the top part of the page. As an example for this article, we opted to translate the About Me label, which is a part of the widget created by the plugin we are translating. To locate it more easily, we used the search functionality provided by the plugin. We suggest using this functionality as much as possible as it makes the translation of specific labels easier. If you’re working on multiple similar labels, make sure to use the exact letter capitalization rules that were used in the label you wish to find. Doing so will help you make your translation work more efficient.
After finding the exact label you wish to translate, click on it and insert your translation in the translation section below. Then, to save your progress, press the Save button.
Once you’ve done that, you will see a success message stating that the .po and .mo translations files have been compiled. They will be stored in the server location that you selected earlier.
With that being said, before we go any further, we want to briefly clarify what those translation files are. Firstly, for a WordPress plugin to be translatable, it has to have a .pot file (Portable Object Template) which contains all the English-written labels created within the plugin code. From that .pot file, a .po file (Portable Object) is created for each language individually by adding specific headers and a translate section next to each of the labels. Finally, from the .po file that contains the labels and their respective translations, a .mo file (Machine Object) is compiled. This file is, in fact, a binary representation of the .po file that the gettext functions use to create the translation.
At this point, the usual next step would be to review the status of your translations on the website. However, this is not the case now. If you were to visit the appropriate page on your site right now, you would see that the corresponding label hasn’t been translated yet.

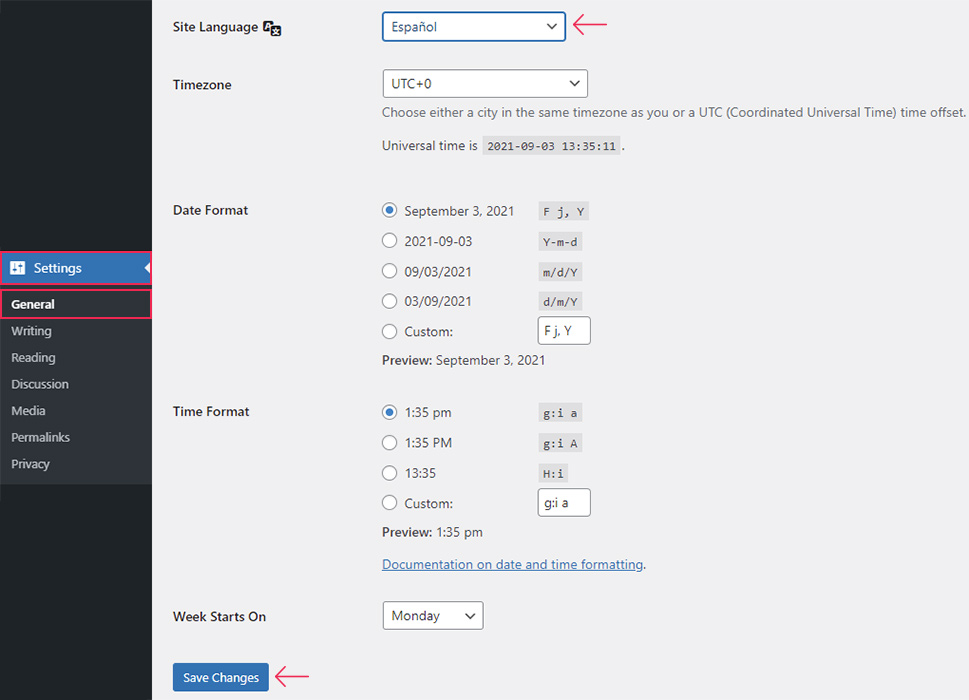
The reason why the translation didn’t automatically appear is that you first need to change your website’s site language to your translation target language. This is done by navigating to the Settings > General section and locating the Site Language option.
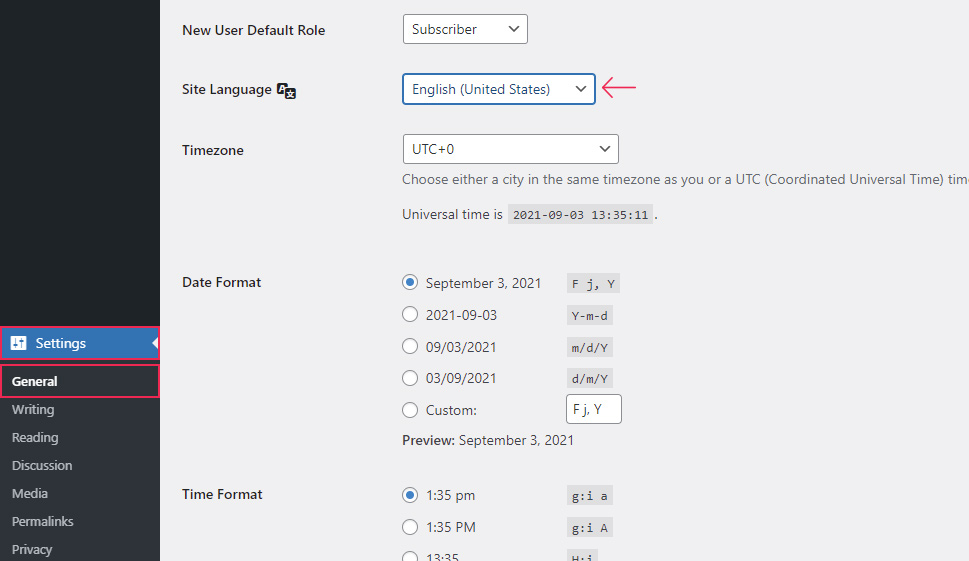
By default, it will be set to the language you picked during the WordPress install, but you should change it to your translation language and press the Save Changes button to apply the change.
At this point, you should notice that most of the labels within your dashboard have changed—they are using the contributed translations that are considered 100% approved. As for your own translation, you should refresh the website page that you were previously looking at and see how the translation you made looks on your website.

Completing the steps described above means that you have successfully started to translate a WordPress plugin into your target language. Your translation will appear in the list of existing translations within the Loco Translate options. You will need to click on it from that list to edit it and to translate all the remaining labels that are found in the plugin’s .pot file.
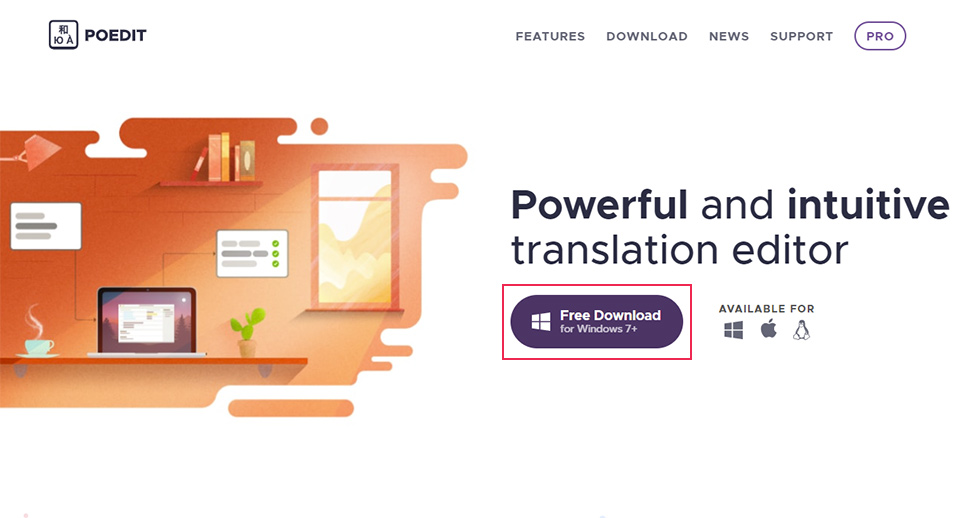
An alternative way of translating WordPress plugins is to use applications that are found online and that rely on the gettext translation system. One such piece of translating software, which is popular among WordPress users, is the Poedit app. It comes with a minimalistic, beginner-friendly interface that offers translation suggestions, while still offering a way to generate a template and manage translation files for more advanced users.
To use Poedit, you will need to navigate to the Poedit website and download its app by pressing the Free Download button, which is available for Windows, Mac, and Linux.
After downloading the app, you will need to install it according to the instructions given in the installation window. Then, you will be able to start your translation. However, to use this translation tool properly within WordPress, there are two additional requirements, apart from downloading and installing the software.
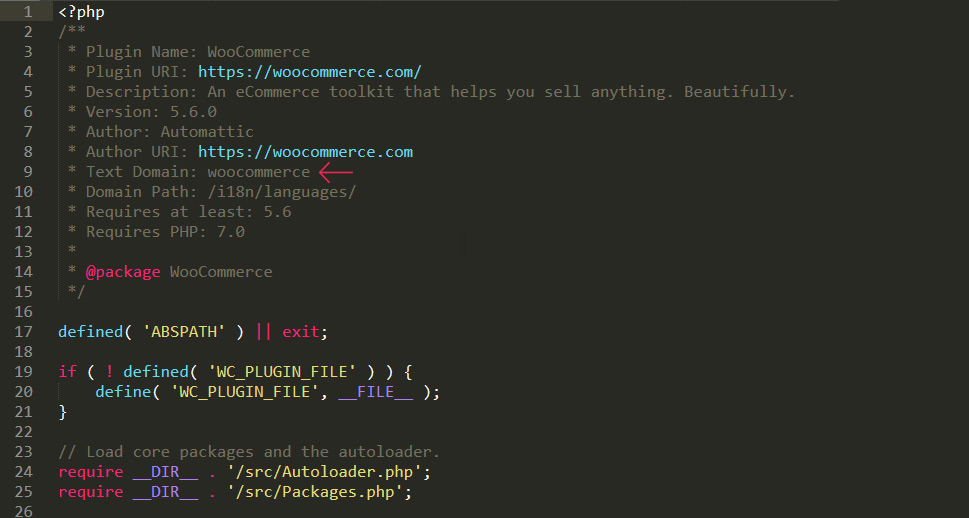
First, the WordPress plugin that you plan on translating must be translatable. That means it must contain a .pot translation template file from which the .po and .mo files will be generated. If this file exists, its most likely location is the plugin_name/languages/ subfolder, unless the plugin itself has defined a custom location where the .pot file is stored. For example, the WooCommerce plugin uses a custom location—its .pot file could be found within the /i18n/languages/ subdirectory.
In any case, you will need to locate the plugin’s .pot file and download it to your computer using FTP. If you aren’t able to find the .pot file for the plugin you wish to translate, or if one doesn’t exist, you should consult with plugin authors about obtaining the plugin’s .pot file.
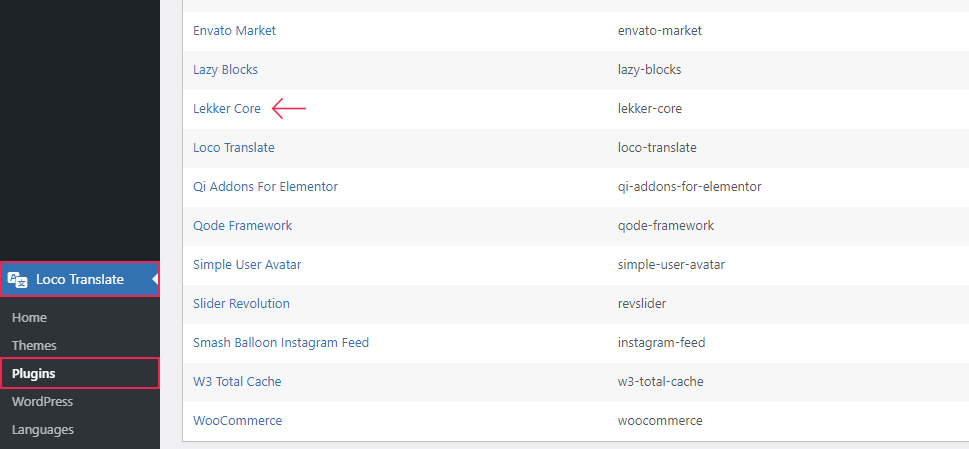
Besides that, you will also need to know the plugin’s text domain, which is used for translation purposes. This wasn’t something you needed to worry about when using the Loco Translate plugin, as the plugin would name the appropriate .po and .mo files according to the WordPress translation guidelines. However, for the WordPress translation to work, these files need to be named in the following manner: {text_domain}-{locale}.po and {text_domain}-{locale}.mo. The respective placeholders should be replaced with a plugin’s text domain and language code, in that order.
As an example, in the case of the Lekker Core plugin, the text domain is lekker-core. Our target language is the standard Spanish language, which has the language code es_ES. This means the file names would be lekker-core-es_ES.po and lekker-core-es_ES.mo, respectively.
To figure out the text domain of a certain plugin, you can also ask its authors about it. Alternatively, you can examine the plugin’s folder using an FTP client. In most cases, it will contain a file that is named the same as the plugin, or as close to it as possible. At the beginning of this file, you will see a comment block, similar to the one in the screenshot below. This is referred to as the plugin’s header.
The plugin header is necessary for WordPress to interpret a certain folder as a plugin and it contains relevant information regarding it. Among other things, it will contain the plugin’s text domain and, in some cases, the domain path if the plugin uses a custom translation folder structure.
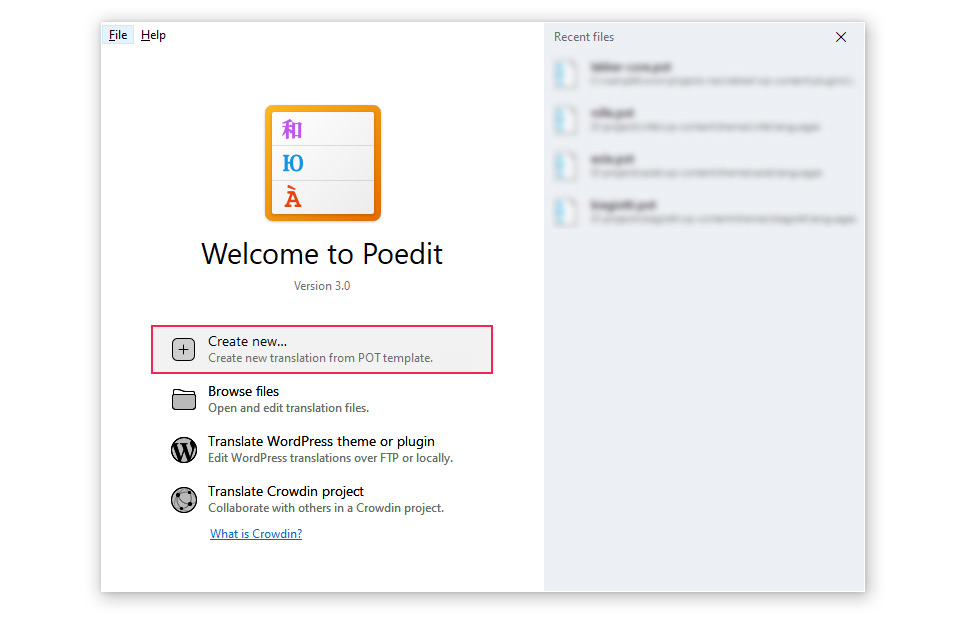
Now that you laid the foundation, you are ready to create a translation of your chosen WordPress plugin using Poedit. Open the app on your computer, where you will see a welcome screen similar to the one shown below. To create a new translation, press the Create new… option which will let you select the .pot template file that is used as a basis for the translation. Alternatively, if you’ve already done some translations with Poedit, the most recently used translation files will be accessible through the Recent files section.
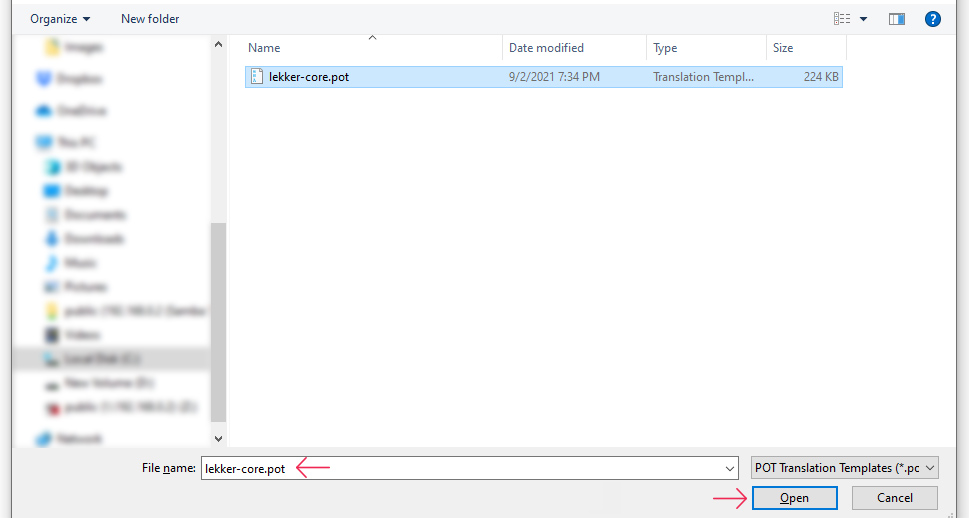
Then, you will need to locate and select the .pot file from your computer using the file dialog window. The plugin’s .pot file is the one you’ve previously downloaded from the server, via FTP, from the plugin’s language or localization folder. After selecting the .pot file, click on the Open button to open it in the Poedit app and begin your translation.
When you open the .pot template within the Poedit app, you will see all the labels available for translation. Furthermore, you will be asked to select the target language of your translation within a small popup window that appears. Choose the language you wish to translate into and press the OK button.
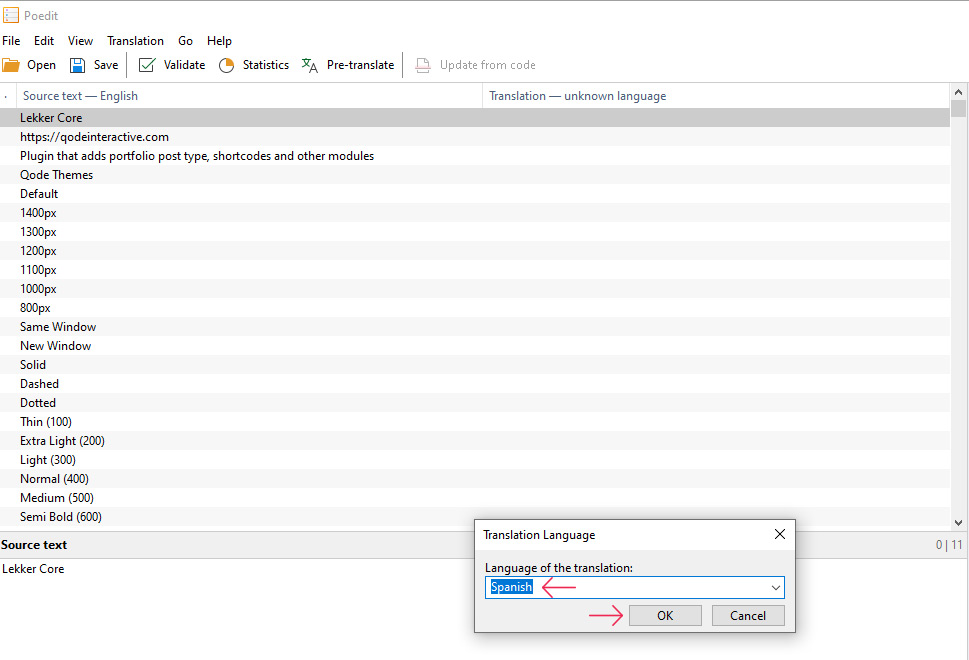
This will transform the file into one with a .po extension, which you will be able to see in the top left corner of the app after the language selection. Then, you will be able to translate it by selecting a label with a mouse click and typing out its translation within the Translation field at the bottom.
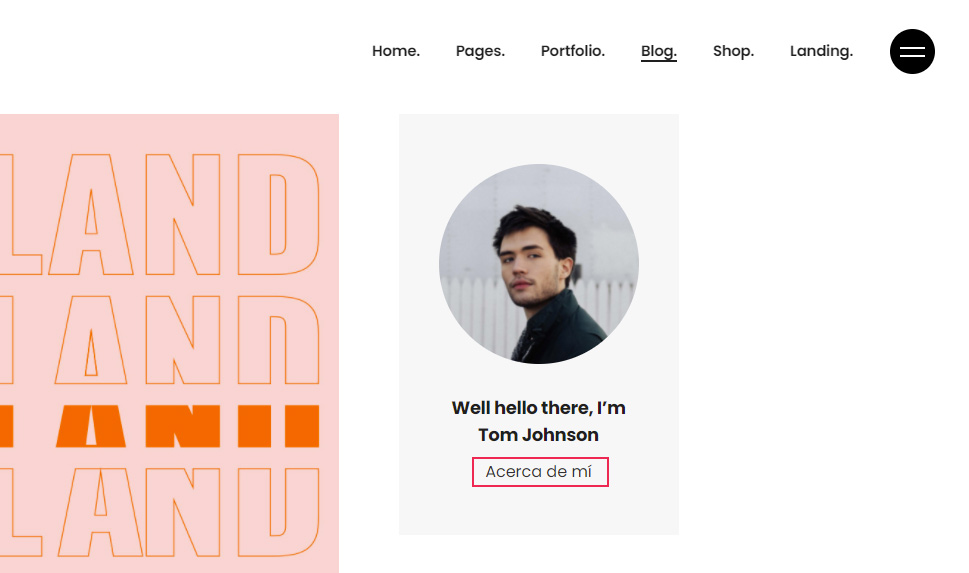
Again, we will use the same About me label as an example. As you can see on the screenshot below, on the right-hand side of the Poedit app, you will be given translation suggestions for that label. You can pick one of them (we used the second suggestion) or make your own translation.
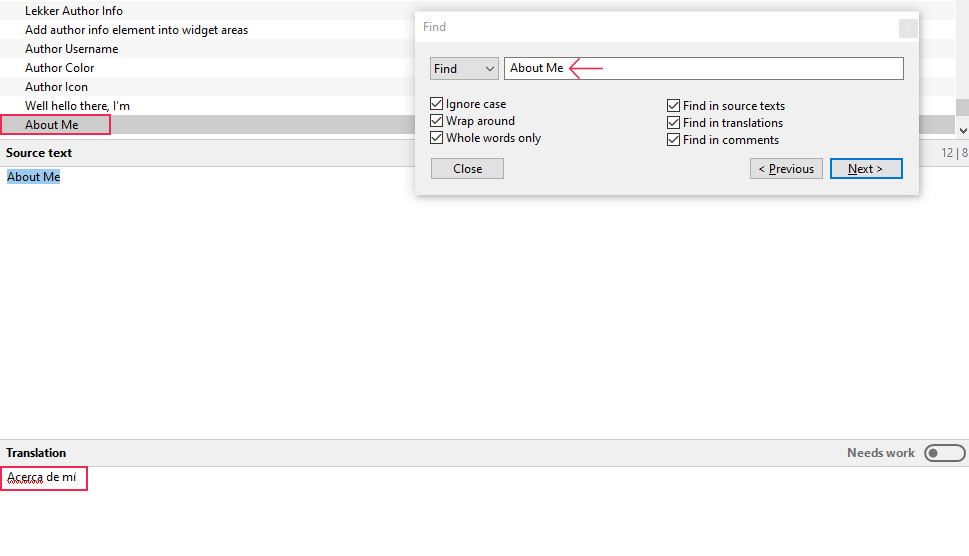
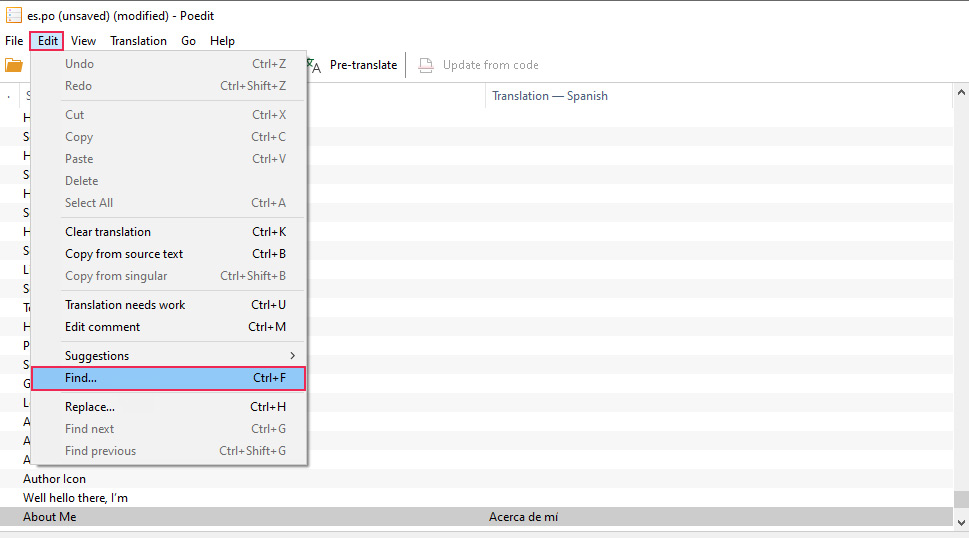
Additionally, we advise using the Find feature within the Poedit app, especially if you are looking for a specific label. This feature can be accessed by simultaneously pressing the Ctrl/Cmd and F key on your keyboard or by navigating to Edit > Find… within the app’s options.
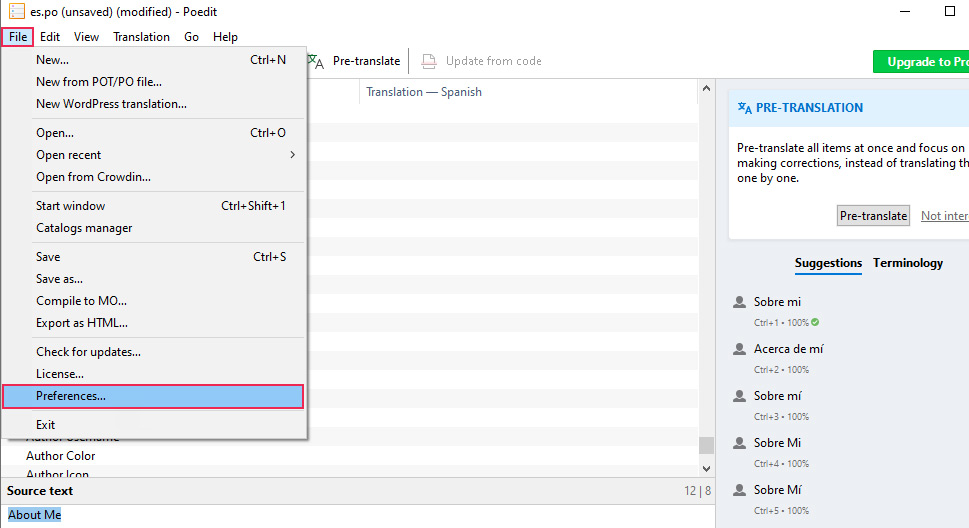
Once you’ve made the necessary translations, it’s time to save the file. However, as WordPress translations require a file with a .mo extension as well, you will need to make sure that the corresponding .mo file is generated when saving the .po file. To ensure that, navigate to the File > Preferences… section.
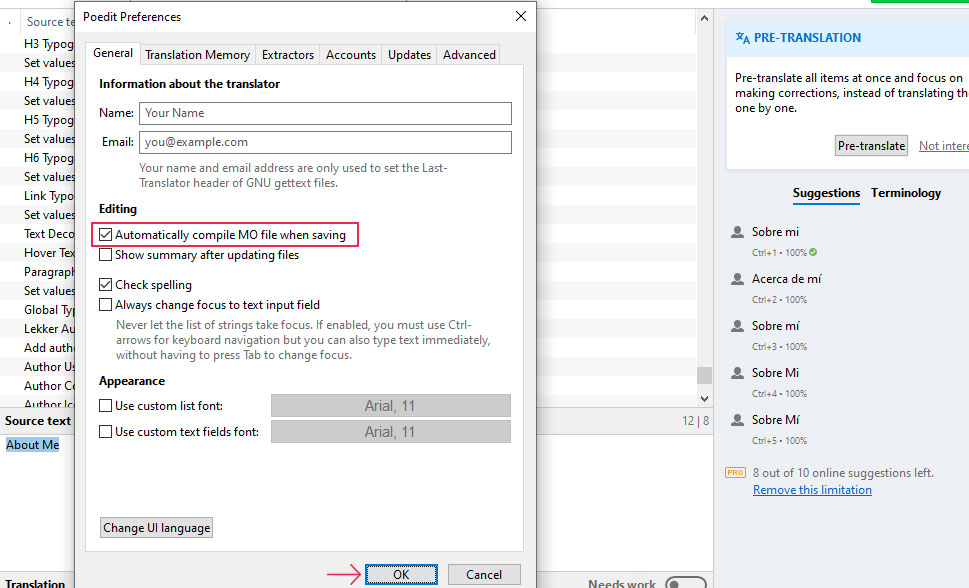
This will open a new popup screen that contains various advanced app options that you can set. The option we are interested in is the Automatically compile MO file when saving. Find this option and make sure the checkbox next to it is ticked. Then, press the OK button to save your preferences and exit the popup screen.
After that, you can save the file by clicking on the Save option located near the top of the Poedit window.
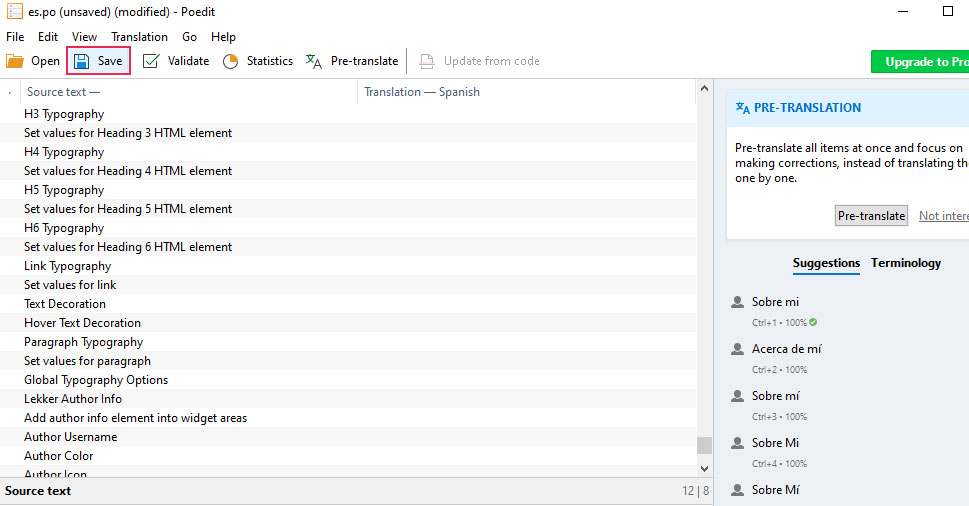
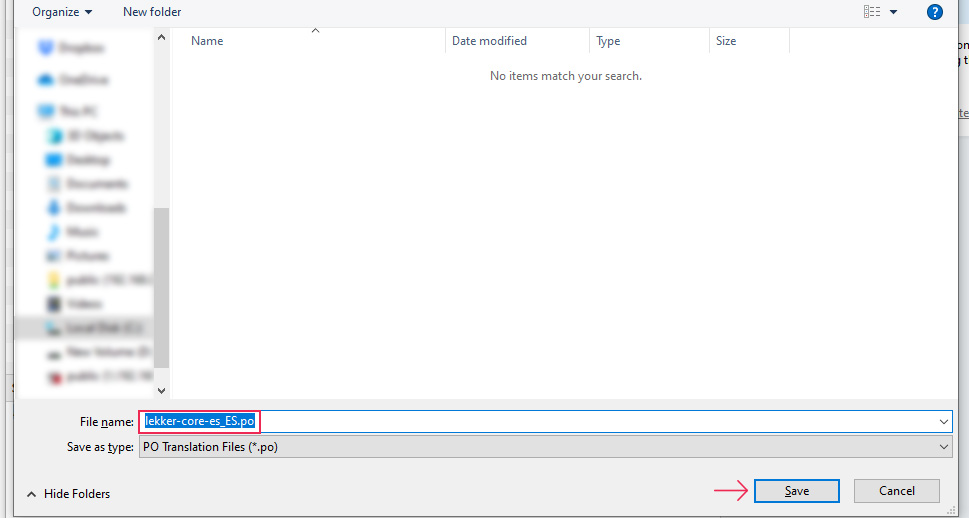
This will open the Save as… file dialog with the file’s default name preselected. However, you will need to delete the default file name and replace it with one that adheres to the WordPress translation file naming convention. Namely, the file should be named in the {text_domain}-{locale}.po manner, with both the plugin’s text domain and the appropriate language code properly set.
Given that we’re using the Lekker Core plugin and translation into standard Spanish, our file is named lekker-core-es_ES.po. At this point, you can also change the location where the file will be saved on your computer. Simply make sure to select one that is more convenient for you. Then, press the Save button to save the file.
Since we enabled an option that will automatically compile a .mo file when saving the .po file, the .mo file that’s generated will be placed at the same location on your computer. After that, there are only two things that remain to be done.
The first is to upload both files (.po and .mo) into the appropriate directory location on your server. Since this translation method doesn’t involve using the Loco Translate plugin, it means only two possible locations are available—the author location or the system location.
The author location refers to the wp-content/plugins/plugin_name/languages/ folder or any custom translation subfolder within a specific plugin’s folder. On the other hand, the system location is the default WordPress location for translating plugins, i.e. the wp-content/languages/plugins/ folder. For this article, we opted to use the WordPress system location. As such, we uploaded the .po and .mo files we saved into the wp-content/languages/plugins/ directory of our website using an FTP client.
The last thing that remains is to log in to your website and navigate to the Settings > General section to change your site language accordingly. To do this, locate the Site Language option and change its setting to the language that you picked as your target for translation. This will allow your translation to take effect.
Afterward, you should review your website to see if all the labels that you translated within Poedit are shown properly on the website.
To avoid any unnecessary back-and-forth, we advise that you fully translate the labels within the Poedit app before uploading them to the server. If you want to update an incomplete translation made using the Poedit app, you will need to save the updated versions of the .po and .mo files on your computer once more. And then upload them to the server into one of the two previously mentioned locations, which will override the .po and .mo files that you uploaded there previously. Therefore, the simplest way is to make all the translations you want before adding the files to your server.
Final Thoughts
Translating a WordPress website into a language that most of your audience understands will help you improve the user experience on your website, connect with your target audience, and boost your SEO ranking in local searches, all while increasing visitors and bringing higher conversions. This applies in particular to translating WordPress plugins, which are one of the most essential parts of every WordPress website.
In this article, we covered the process of translating WordPress plugins using various methods. Depending on the method you choose, you can opt to translate a plugin for all WordPress.org users, or only for your website and its visitors. And, while the process might be lengthy, by carefully following the steps we outlined, we are sure you will be able to get your WordPress plugins translated into your target language and reap the benefits these customized translations provide.
