How to Redirect Users after Login in WordPress
If you ever logged into an eCommerce or membership website, you may have noticed that after you log in, you are redirected to some website-specific page. This is because some webmasters choose to redirect their users after they log in to the website. Even though it might seem strange at first, this feature, which was introduced in WordPress 3.0, is very useful and constantly gaining in popularity.
In this article, we will cover how to use WordPress to redirect users after login, as well as examine the reasons why you should do so. By carefully studying the situations when login redirection is used, we hope to convince you of the usefulness of this feature, and inspire you to try it out yourself. With that being said, let us proceed.
Reasons for redirecting users after login in WordPress
After logging in to a WordPress website, users are, by default, redirected to the admin dashboard. However, there are many situations in which you might want to use custom redirections after the user logs in. This, of course, is based on the specific user, his user role, or some other factor relevant to your site. Let us explore some of those situations and the reasons for redirecting users.
The most obvious reason for WordPress redirect after login is to streamline the user experience on the website, especially if this is their first time logging in. If your website has a lot of subscribers or customers, allowing them to access the WordPress dashboard first might leave them clueless as to what their next step should be. Instead, it would be better to, for example, redirect customers to a shop page and subscribers to an announcement page.
Additionally, you can choose to redirect some of your users, after login, to your premium or member-only content. This feature is useful for websites in various niches, but especially for membership communities or educational websites. Furthermore, you could even make different tiers of access to your premium content based on the given user role or even on a specific user.
Finally, you can use the WordPress redirect after login to allow only a handful of authorized users to edit your existing content. At the same time, this would disallow content editing for any other unauthorized user. Instead, all such users would be redirected to alternative dashboard pages, based on their user role and capabilities. This is particularly useful for listing websites, for example.
Apart from redirections after login, you can implement various other kinds of redirections in WordPress. We will mention some of them, like redirections on logging out of the website, but our focus will stay on the redirections after login.
Qode Themes: Top Picks
View Collection


How to redirect users after login in WordPress
As with most new features that you could add to your WordPress website, redirecting users can be accomplished either with the use of plugins or through custom code. It is worth mentioning that, depending on which theme you are using, user redirection after login could be included with the theme. Therefore, it’s a good idea to first explore the features offered by your theme as it might spare you from having to use additional means such as plugins or custom code.
Using a plugin
WordPress plugins are a go-to solution for most WordPress users when looking to add a new feature to their website. Thanks to the abundance of plugins, you are bound to find a suitable one (free or premium) for almost any purpose. As such, we advise browsing the WordPress plugins repository first, which we’ve done as well.
One of the plugins that we found which enables WordPress redirect after login is Peter’s Login Redirect plugin. It allows you to implement redirections both after login and logout. We will cover them both, as the steps for enabling them are the same using the plugin options. If you wish to enable redirections only after a user logs in, simply leave the appropriate logout URLs empty.
To start, you will need to install the plugin first. Then, navigate to Settings > Login/logout redirects, where you will find all the options for managing redirect rules.
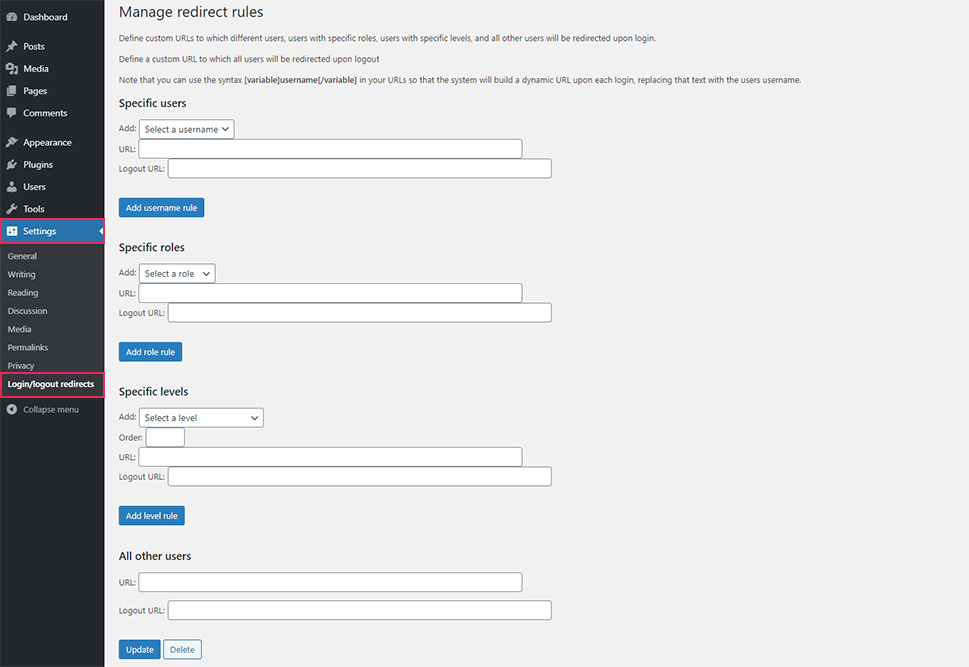
As we mentioned, this plugin offers the option to adjust the URLs a user accesses after he logs into the website or logs out of it. There are settings for specific users, user roles or levels, and privileges a user can have. You can also specify the URL users will access after registering to your website or URLs for users that fit certain conditions.
Additionally, this plugin supports custom redirect rules. WordPress users that want to implement custom rules should carefully study the How to extend section of the plugin’s official page. In the following paragraphs, we’re going to cover how to use these options.
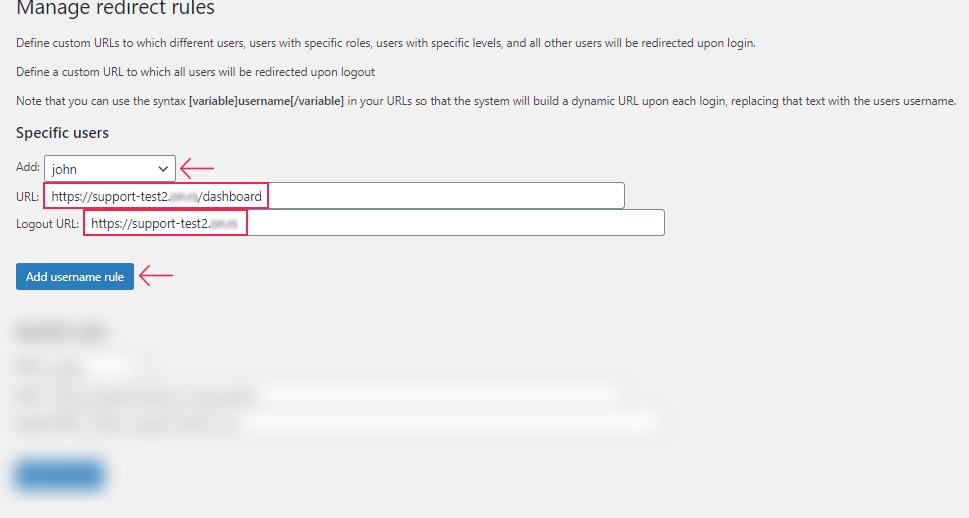
If you want to assign a specific URL where a user will be redirected after logging in or after logging out, you can do so from the first section, called Specific users. Using the available dropdown, select the user for whom you wish to specify the redirect URLs. Then manually insert the after-login URL in the URL field. Then, if you want, you can add the after-logout URL in the Logout URL field. When you’re done, click on the Add username rule button below.
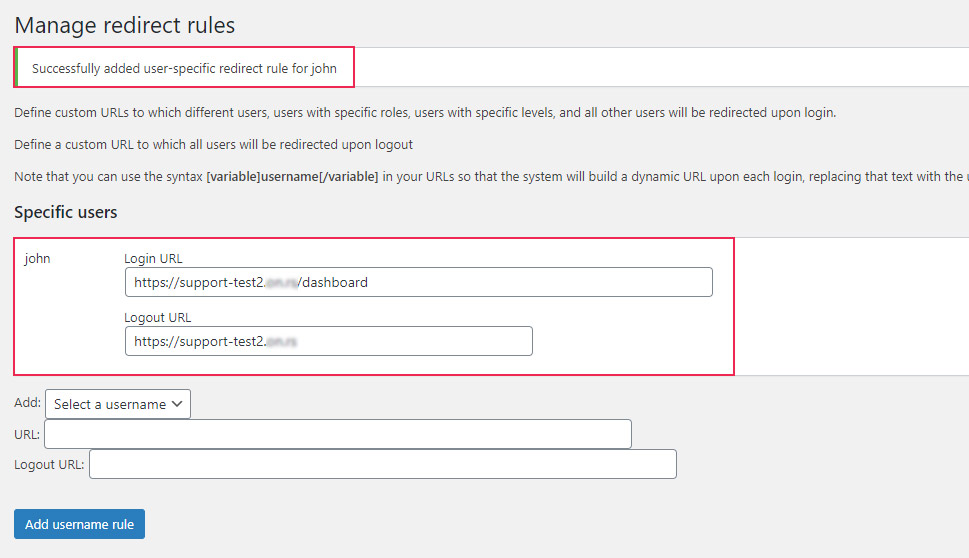
Shortly after, you will receive a success message, and the redirect rule that you added will be shown at the top of the section. You will be able to further edit it or delete it, should you need to.
Following the same steps, you can keep adding new rules, as well.
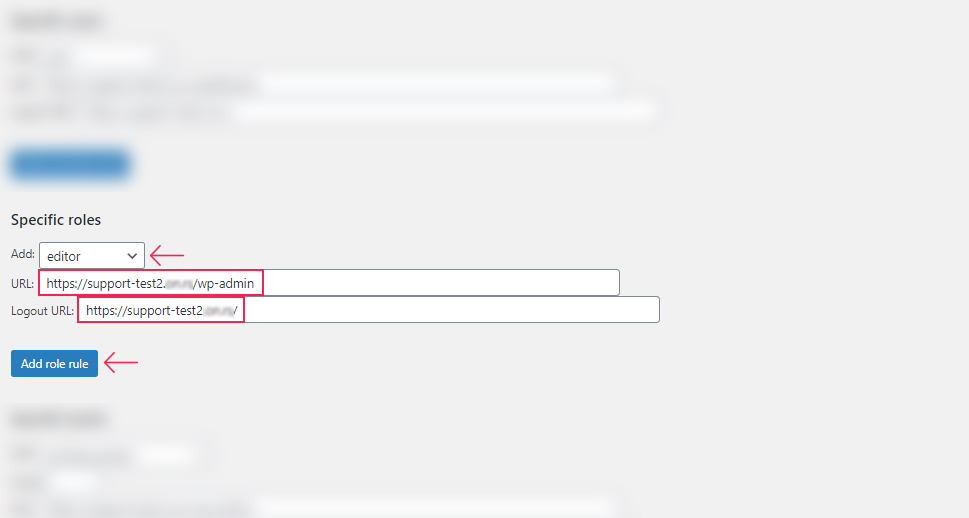
Similarly, if you want to add rules concerning after-login and after-logout URLs for various user roles, instead of specific users, you should do so within the Specific roles section. The plugin supports the default user roles, as well as any custom roles added by other plugins or themes.
To add a new rule based on a given user role, choose the user role from the dropdown of available user roles. Then insert the appropriate URL(s) and press the Add role rule button below.
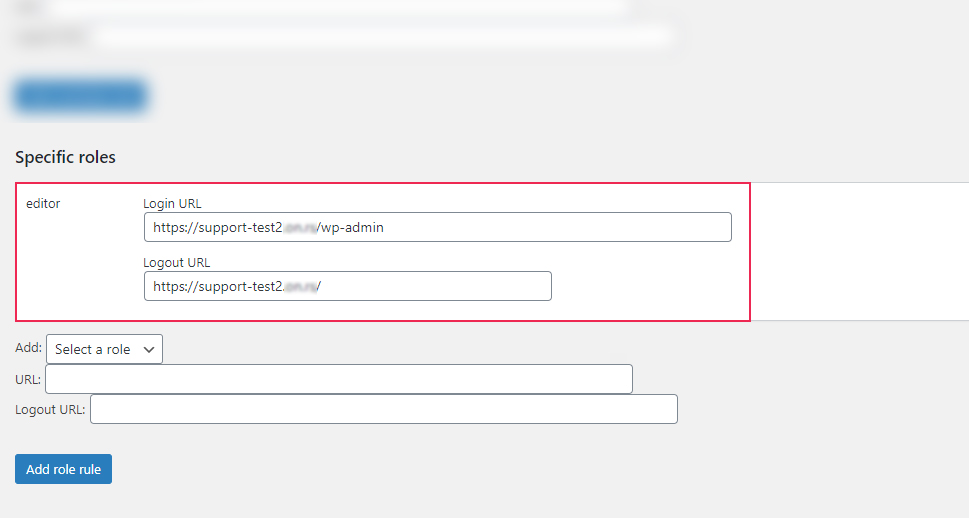
After a brief period, the option will be saved and shown at the top of that section. You will be given the option to edit this rule or delete it, same as before. You can, also, add new rules about specific user roles following these same instructions.
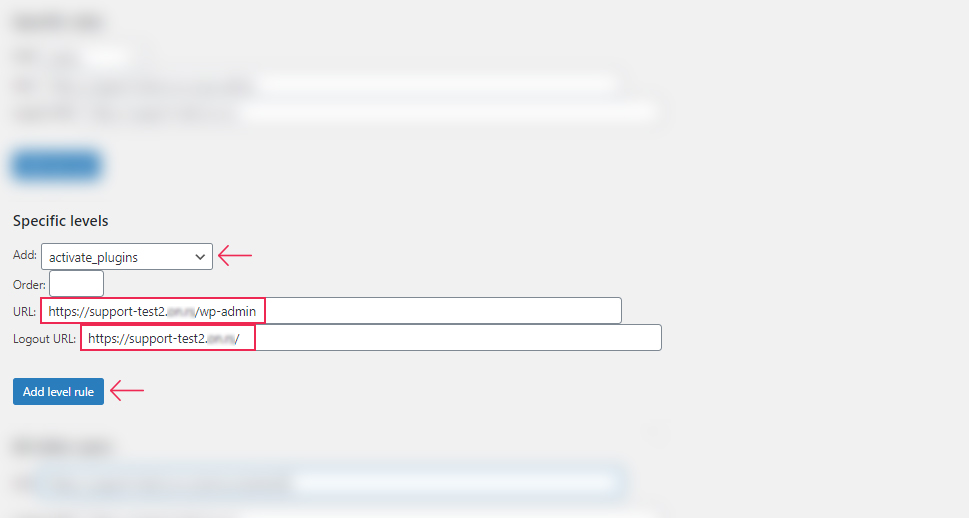
If you want to implement rules concerning user’s permission levels, you can do so within the Specific levels section. You can use these rules to set URL(s) for users with a custom capability or to set URL(s) for specific user role groups, as opposed to manually creating a rule for each user role. This option is similar in use to the specific user role option, and they are often used in conjunction.
To add a rule for user permission levels, select the permission level from the dropdown, add the appropriate URLs, and press the Add level rule button below. We have omitted to fill in the Order field, but you can insert a value if you wish—the order field accepts numbers starting from 0. Inserting the order will allow you to specify the position in which the given rule will be shown when placed in the list of existing user permission level rules.
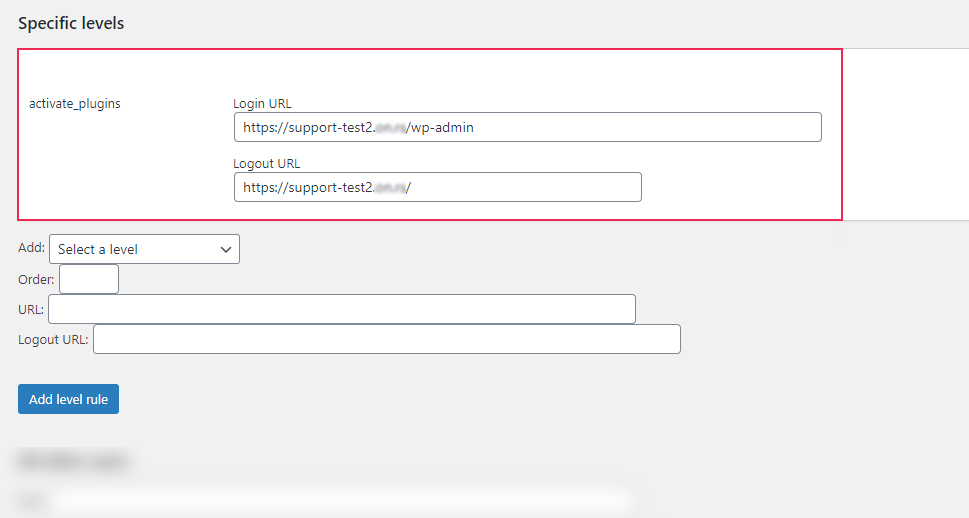
The rule will be saved shortly after you press the Add level rule button. Same as with the others, you can choose to edit or delete this rule after adding it, or to create new rules by following the instructions given above.
Now, let’s take a quick look at the Post-registration section. Usually, webmasters choose to redirect their users after logging in to a Welcome or Thank you page, or send them to a landing page that offers various products or services. Registering to a site is often paired with a small discount for users to provide further incentive.
To add a post-registration redirect rule, navigate to the Post-registration section, add the redirection URL, and press the Update button below.
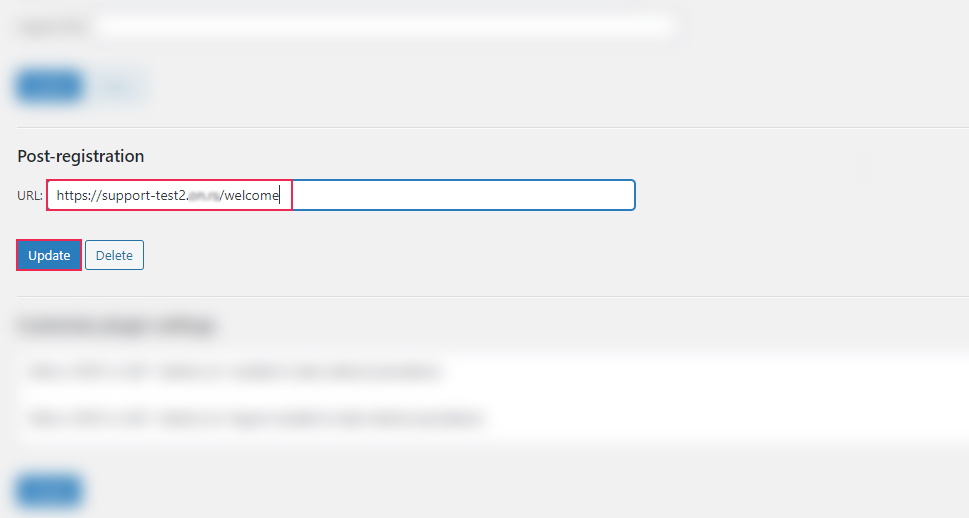
Unlike the previous section settings, the URL here will simply remain tied to this option after pressing the Update button. If you ever wish to edit or delete the post-registration URL, you can do so using the Update and Delete buttons, respectively.
Finally, you can choose to redirect users that are not covered by any of the previously implemented rules to a specific page using the option found in the All other users section. Simply add the after-login and/or after-logout URL and press the Update button.
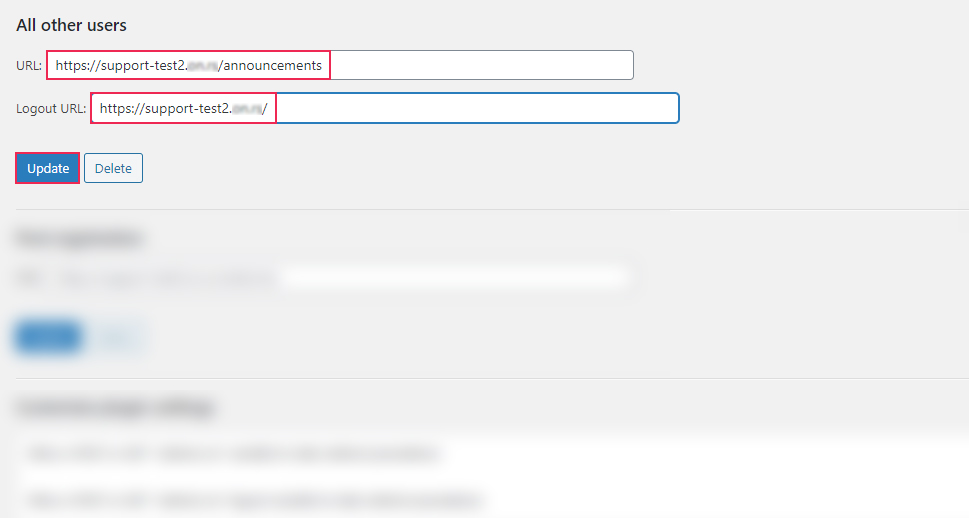
Like the option before it, the URLs will be saved after pressing the Update button. If you wish to edit them afterward, you can do so by using either the Update or Delete button.
Using custom code
Another way of adding WordPress redirections after login is to do it using custom code. Please note, this method is more inclined towards more experienced WordPress users, or those that simply don’t want to add another WordPress plugin to their site.
However, the benefit of using custom code is that you can implement the redirections exactly as you want them. Furthermore, depending on the redirections that you wish to set, this can be done quite quickly and easily. Let us explain how.
For this article, we have created the following code as an example.
function custom_login_redirect( $redirect_to, $request, $user ) {
if ( isset( $user->roles ) && is_array( $user->roles ) ) {
if ( in_array( 'administrator', $user->roles ) || in_array( 'editor', $user->roles ) || in_array( 'author', $user->roles ) ) {
$redirect_to = admin_url();
} else if ( in_array( 'customer', $user->roles ) || in_array( 'shop_manager', $user->roles ) ) {
$redirect_to = home_url( '/shop' );
} else {
$redirect_to = home_url();
}
}
return $redirect_to;
}
add_filter( 'login_redirect', 'custom_login_redirect', 10, 3 );
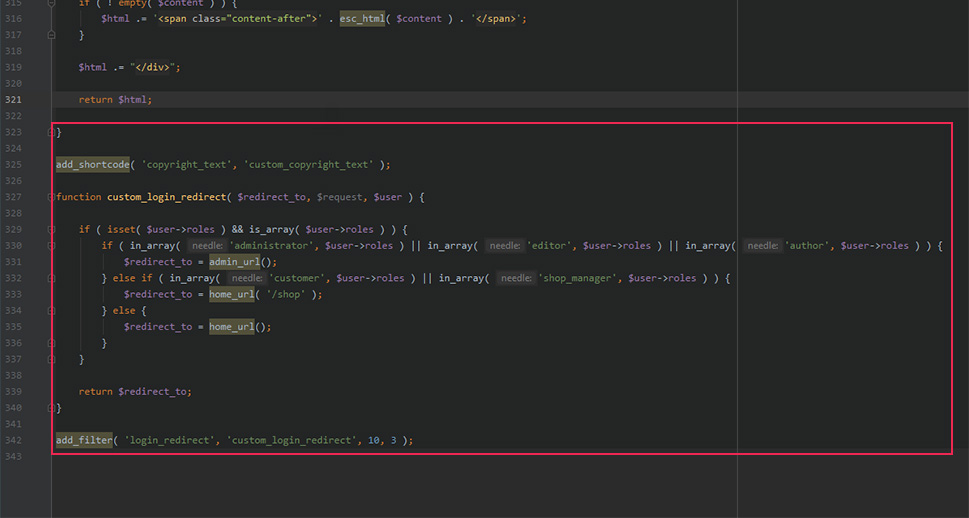
This code represents a function called custom_login_redirect that is “hooked” onto the login_redirect filter hook. Its purpose is to change the default URL that is accessed after login for various user roles. First, we are checking whether the logged user has a set user role and if the role is an array. The main part of the code is processed only after passing both checks. Otherwise, the original $redirect_to URL is returned, meaning no custom redirections will be made.
function my_login_redirect( $redirect_to, $request, $user ) {
if ( isset( $user->roles ) && is_array( $user->roles ) ) {
// Main part of the code goes here
}
return $redirect_to;
}
add_filter( 'login_redirect', 'my_login_redirect', 10, 3 );
In the main code section, there are also a couple of checks that are performed. First, if the logged-in user is an admin, editor, or author, they will be redirected to the WordPress dashboard, as usual. Otherwise, if the logged-in user is a customer or a shop manager, they will be redirected to the Shop page, i.e. to the your-website-url/shop page.
Please note, customers and shop managers are two user roles created by the WooCommerce plugin. As such, if you don’t have WooCommerce installed on your website, this part of the code won’t be executed. However, if you have the plugin, make sure that a Shop page exists on your website. Also, please note that you should adjust the code to reflect your page’s slug if it’s something other than shop. Finally, all users that don’t fall under the previous two conditions (those whose user role isn’t admin, editor, author, customer, or shop manager), will be redirected to the homepage.
if ( in_array( 'administrator', $user->roles ) || in_array( 'editor', $user->roles ) || in_array( 'author', $user->roles ) ) {
// Admins, editors and authors are redirected to the WordPress dashboard
$redirect_to = admin_url();
} else if ( in_array( 'customer', $user->roles ) || in_array( 'shop_manager', $user->roles ) ) {
// Customers and shop managers are redirected to the Shop page
$redirect_to = home_url( '/shop' );
} else {
// Everybody else is redirected to the homepage
$redirect_to = home_url();
}
As you can see, this is a rather straightforward piece of code. Having understood what it does, you can further improve or edit the example we offered to your liking.
After you are done adjusting the code to your needs, you can insert it either in the functions.php file of your theme or inside a site-specific plugin. We will show you how to do the former, as it’s quicker and simpler.
However, before proceeding, we advise making a backup of your website, just in case. Also, if you need to, you should brush up on your knowledge on the use of FTP beforehand.
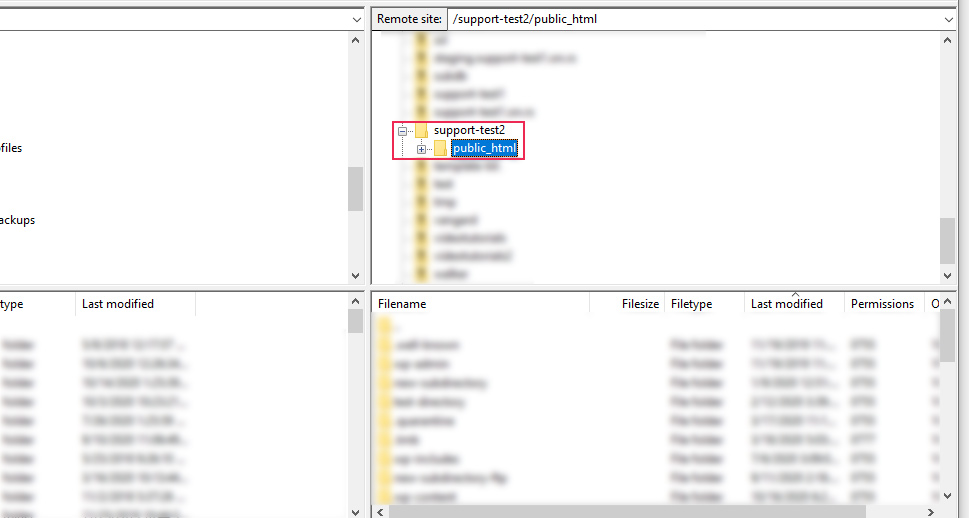
Then, log in to your server using your FTP credentials and navigate to your website’s root WordPress directory, often called public_html.
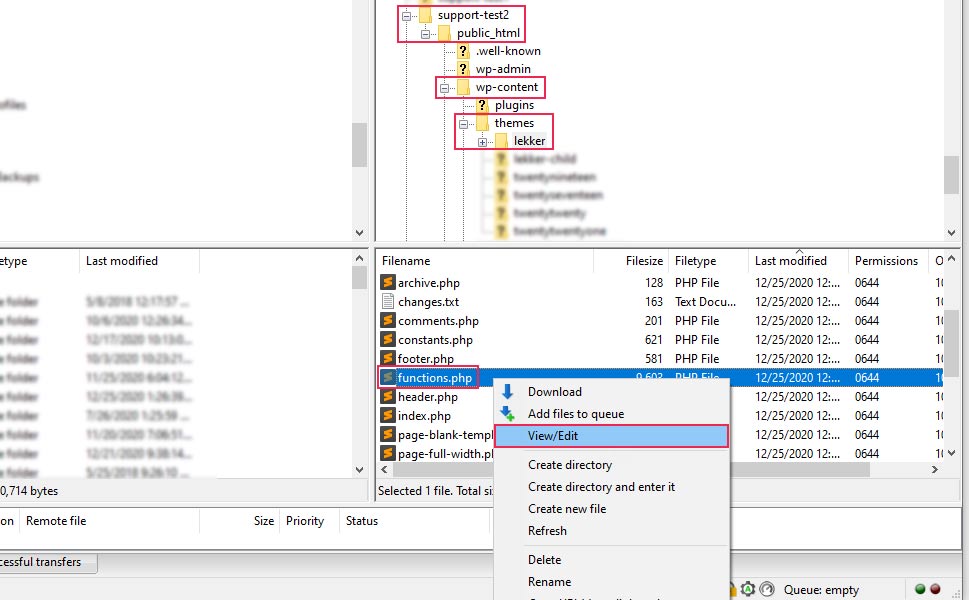
Afterward, navigate to /wp-content/themes and click on your current theme’s folder to open it. Then, locate the functions.php file within that folder, right-click on it, and select the View/Edit option.
Open the file using your preferred text editor and insert the code we included above at the end of your functions.php file.
Afterward, save the changes you made and upload the file back to your server, to override the old one that’s there. Finally, you should test to see if all the redirections are working properly for all user roles you listed in the code.

Final Thoughts
Using WordPress redirect after login has many advantages, including improving the user experience of your customers and subscribers, managing a large number of users, or protecting your admin dashboard and the content found within against unauthorized edits. And, as you have seen from this article, you can implement it quite easily using appropriate plugins or custom code. No matter which of the methods you choose, we are confident that you will be able to redirect your users to the appropriate pages after login, and in record time. As such, we recommend you bookmark this article for any future instances where you might need to implement redirection of users after login.
