How to Create Custom Excerpts in WordPress

If you’re using WordPress and want to let your visitors know what your content is about in a quick and precise way, you can easily do so by adding an excerpt to your posts.
In a nutshell, excerpts represent a short extract or description of a post that can be easily displayed on different parts of your web page. And while it is possible to let WordPress generate post excerpts for you, they may end up not looking so good. So, you might want to consider creating a custom excerpt instead, as this is the only tried and true way to get your post excerpts to look the way you want them to.
Just like how WordPress allows you to easily reorder your blog posts, it also comes with an integrated function that makes the process of adding custom excerpts relatively simple as well. In fact, there are a few different options at your disposal, and this time around, we’re going to list them all.
Why You Should Add Custom Excerpts to Your Posts
As we already mentioned, an excerpt is basically a small summary that is supposed to indicate to users what they can expect if they click on a specific post on your website or blog. So, in that regard, the benefits post excerpts can bring to the user experience are clear. Excerpts will help users determine whether they are interested in the topic at hand, which is why creating a custom excerpt can be particularly beneficial for user engagement. This way, you can provide pieces of info related to your article that you find the most engaging and informative, in turn driving users to click on the article in question and read more.
Also, there are some free default WordPress themes that display the entirety of your posts on your home page, blog page, and/or archives by default. So, if you use any of these themes, this can take a toll on your website’s speed. Worse yet, it can even confuse search engines and wrongly signal to them that you have duplicate content on your site.
If you display excerpts instead of whole articles, your pages will load faster and your users will get to your content more easily, which can only result in increased views. Plus, search engine bots won’t detect any duplicate content on your site, which is always good news for your website’s SEO.
With that said, let’s take a look at all the different options you can use to add custom excerpts in WordPress:
Many premium WordPress themes are set to automatically create an excerpt for your posts. While this may seem useful at first glance, the theme still determines the excerpt in your stead, which means you may not be satisfied with the end result. This is where a custom excerpt may come in handy.
To edit a custom excerpt in WordPress, all you have to do is make a new post, or acces one of the old ones in your backend.
If you’re using the Classic editor, once you’re in the edit screen of your post, you should find the Screen Options tab (located in the upper right corner of your screen) and check if the Excerpt box is ticked.
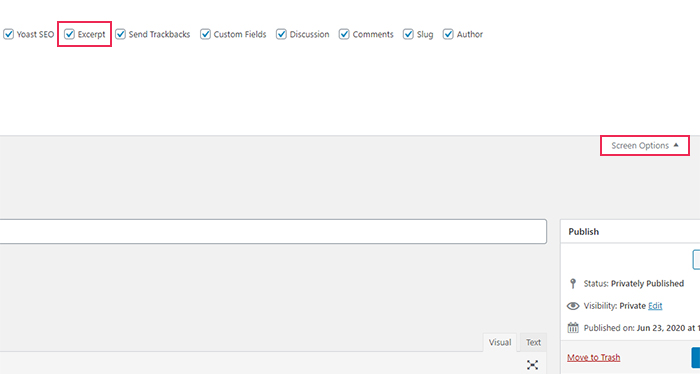
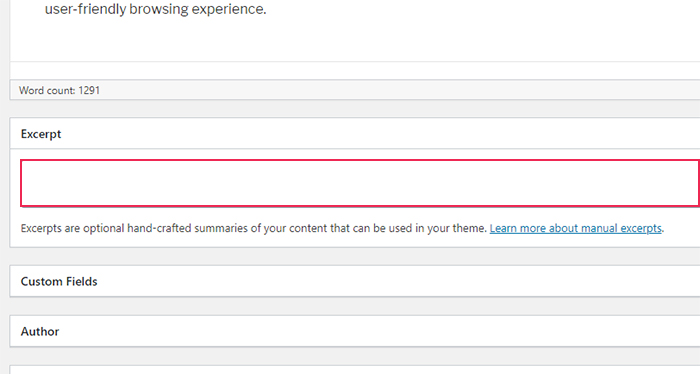
Ticking this box will trigger the Excerpt field to appear under your post editor. Here you will be able to insert any text you’d like to have as your post excerpt. If you end up not adding anything into the box, WordPress will automatically take the first 55 words of your post and use it as your excerpt.
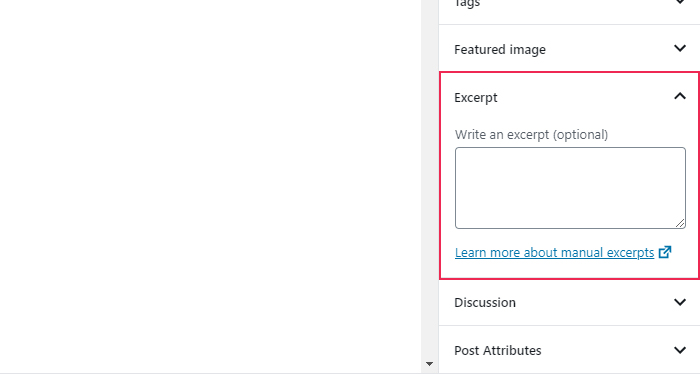
If you’re using the Gutenberg block editor, the Excerpt field will always be displayed in the Settings section on the right side of the editor, in the Document tab. If you can’t see this section, click the gear icon and your Settings will appear.
Scroll down a bit and you’ll be able to see the Excerpt dropdown. Click on it to expand it and insert your excerpt in the “Write an excerpt (optional)” box.
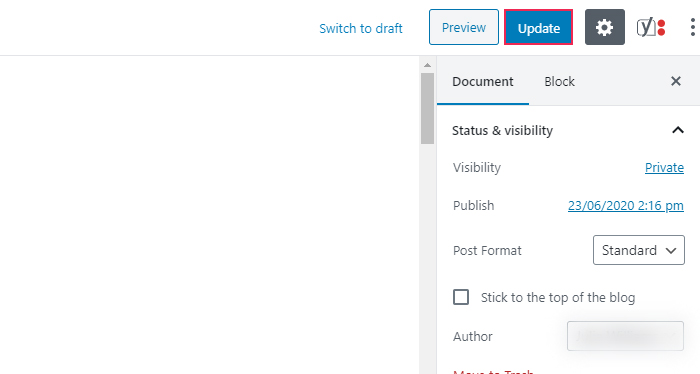
Don’t forget to hit the Publish/Update button for the changes to take effect (of course, the same applies if you’re using the Classic editor).
Now, here comes the potentially tricky part. Some WordPress themes simply don’t display the custom excerpt you set up. In that case, regardless of the type of editor you used to add your excerpt, you will have to manually edit your theme files in the Appearance >> Theme Editor. Depending on the theme file, this can be a file like archive.php, content.php, category.php, etc. For example, for the Twenty Seventeen theme, you should edit the content.php file.
All you have to do is find the following code within your theme file:
<?php the_content(); ?>
Then, simply replace it with this line of code:
<?php the_excerpt(); ?>
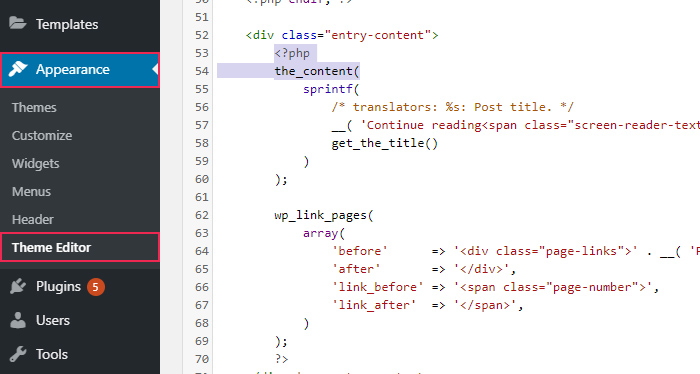
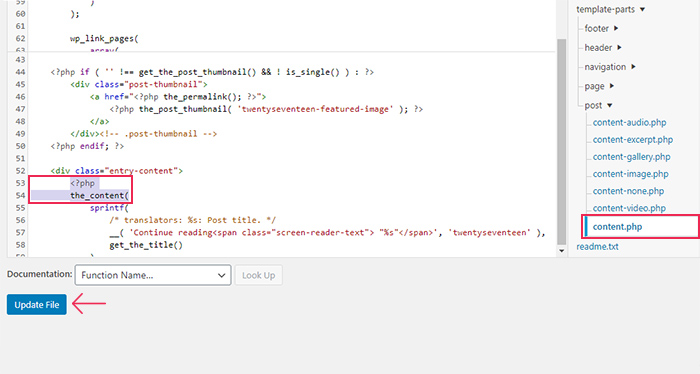
Hit the Update File button once you’re done, and that’s it. Now, your WordPress theme will allow you to display custom excerpts of your posts.
The Read More tag in WordPress has a very similar function to that of an excerpt. The only main difference between the two is that an excerpt represents the ability to add a short description of your post that can be set to appear automatically, while a Read More tag must be manually activated for every post you want to use it on. Also, with this tag, you don’t have the option to enter custom text, but you can still easily select any bits of your text you wish to display as your excerpt. Plus, you don’t have to bother with adding any code to your theme files.
To add this tag in the Classic editor, select the place where you want to break your post with your mouse. Then, click the button called “Insert Read More tag” as we did in the picture below (the button’s title will appear on hover).
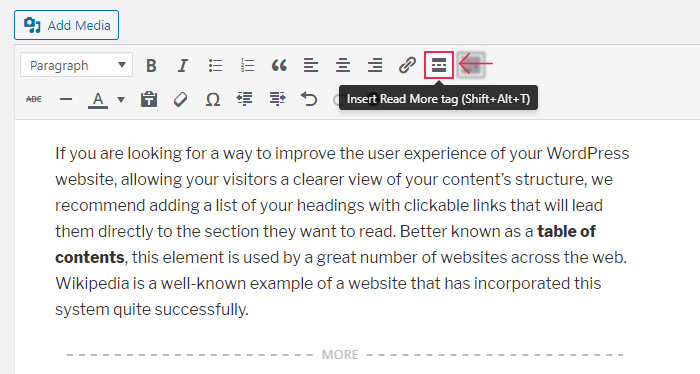
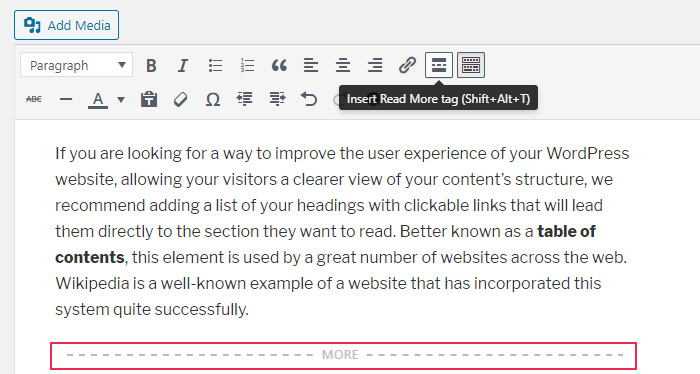
Once you do this, you will notice the appearance of “– – – MORE – – –“ line in the editor. The text above it will be used and displayed as the excerpt of your post.
As for the Gutenberg editor, you need to click the (+) icon below the text you wish to use as your excerpt and find and add a block called More.
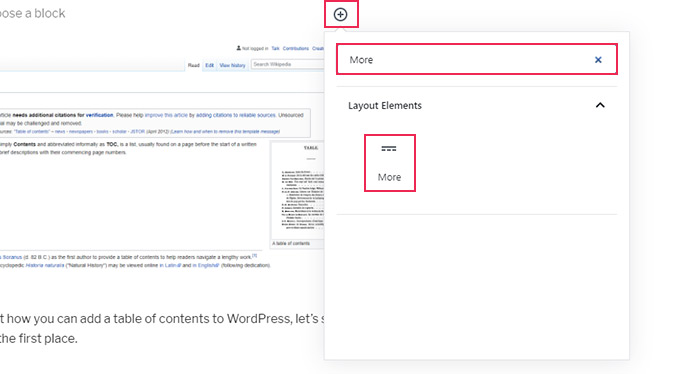
The – – – READ MORE – – – line will now be added to your post, indicating the place where your excerpt ends.
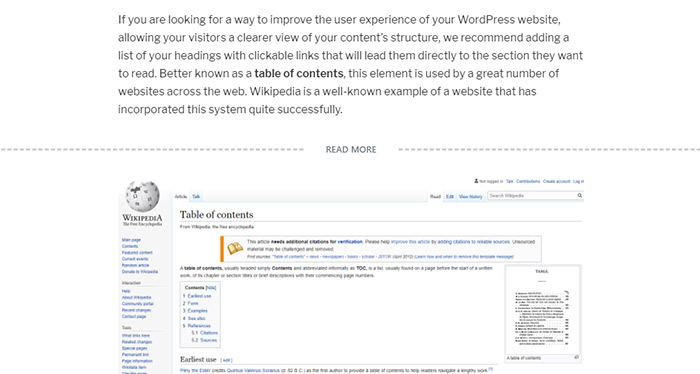
Don’t forget to save your changes once you’re done with setting your Read More tag.
In case your theme still does not display your Read More tag (or the standard custom excerpt) properly, there is one other method you can use – a plugin called Advanced Excerpt.

First, install the plugin and activate it. Then, configure the plugin settings by heading to Settings >> Excerpt.
The plugin comes with various options that will allow you to take care of any problems you run into while trying to add your excerpt. For example, you can determine the excerpt length, prevent it from cutting a word or a sentence at the end, strip or keep any WordPress shortcodes in your excerpt, disable excerpt filtering on certain page types, and so on.
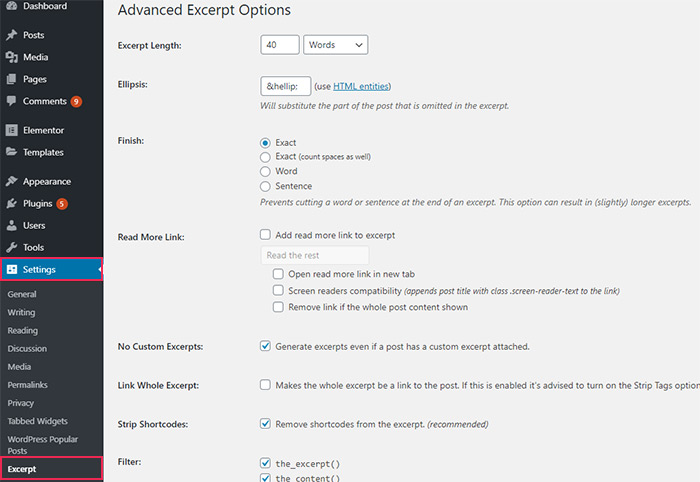
All the options are pretty straightforward and self-explanatory, so you will easily adjust them to your liking.
To store your changes, hit the Save Changes button located at the end of the Advanced Excerpt Options page. Then, you can go ahead and see how the changes you applied have affected your excerpts.
Conclusion
If you want to display a shorter, summarized version of your website posts, there are a few different ways to do it in WordPress. Regardless if you opt for using a custom excerpt feature or decide to go with the Read More tag, this simple but useful feature can only bring benefits to your website in the long run. And if any of the two methods we listed above don’t work properly, you can always use a plugin to further polish the look of your excerpts and ensure that everything is running smoothly.


