How to Block Certain IP Addresses on Your Website

Website security is one of the most important aspects of running a successful WordPress website. To defend your site from potentially harmful users, you will need to use different means of protection. Those include certain hosting features, plugins, custom code, and more. In this article, we will be taking a closer look at one of those features, namely how to block an IP address on your WordPress website. We will discuss the reasons why it might be needed and how to implement it. To make it easier to tackle this topic, we’ve broken it down into several smaller steps:
Qode Themes: Top Picks
View Collection


Why and when you should block certain IP addresses on your website
Before we dive into the methods you can use to block IP addresses, we want to clarify what an IP address is and why you might need to block one or more of them.
An IP address (Internet Protocol address) is a unique identifier assigned to any computer connected to a network. It serves to tell the servers where the data should be delivered, and in that sense, fulfills the same role as an email address. Currently, two internet protocols are in use—IPv4 and IPv6.
An IPv4 address is, most often, represented in a dot-decimal notation. So, it looks like XXX.XXX.XXX.XXX, where each of the blocks (XXX) represents a number between 0 and 255.
On the other hand, an IPv6 address is represented in a hexadecimal notation. It has eight groups of four hexadecimal digits, separated with a colon(:). However, the full address is often shortened using various techniques.
Currently, the predominantly used protocol is IPv4 although there is a gradual shift toward IPv6. The reason for this is the scarcity of IPv4 addresses. This protocol was designed decades ago and at that time the assumption was that 4+ billion unique addresses would cover the world’s needs. However, it soon became obvious that the growing numbers of internet users and various computing devices will exceed the available address space. So, a new protocol, IPv6, was introduced that supports trillions (more precisely, 2128) of unique addresses.
However, the two protocols aren’t compatible for direct communication, so a gradual transition aided by various mechanisms is ongoing. Given that IPv4 is still the most common type of protocol, we will focus on examples that use it. However, the same principles can be applied to IPv6 addresses, in case you are using them.
There are several reasons why you might want to block some IP addresses. The two most common reasons are eliminating spam or dealing with hacking threats using IP blocking.
Spamming is a very frequent issue every webmaster must deal with. It is particularly common in the form of comment and email spam. Even though there are quite a few suggestions on how to deal with spam (including using anti-spam plugins like Akismet), blocking IP addresses or spamming bots is quite useful as well. This lets you spare the server resources that would have been wasted on saving spam comments or messages in your database.
Moreover, blocking an IP address is a great way to defend against potentially malicious user activities like brute force or DDOS attacks. Examples of situations when you might be under such attacks include an increased amount of login attempts or requests for sensitive information on your website coming from the same IP address. The symptoms of these attacks are extremely slow-loading pages or your site often not being able to load. If you notice that’s the case with you, then blocking the traffic from malicious IP addresses to your WordPress site is the best course of action.
How to block certain IP addresses on your website
With that being said, let us explain how you can block certain IP addresses. We will also discuss possible ways of pinpointing suspicious IP addresses, as well as some precautions you should take to enhance the security of your website.
There are two common ways of figuring out potentially malicious IPs that present the risks we mentioned above. Those ways are—investigating the IPs of all commenters and investigating all IPs within an access log.
-
Commenter IPs
WordPress notes the IP addresses of every commenter. If you wish to see the IP addresses of all who commented on your posts, you need to navigate to the Comments section within your admin dashboard. Then, you should examine the author column where the IP address is located for every comment author. The address will be located at the end, after the author’s name, and e-mail address.
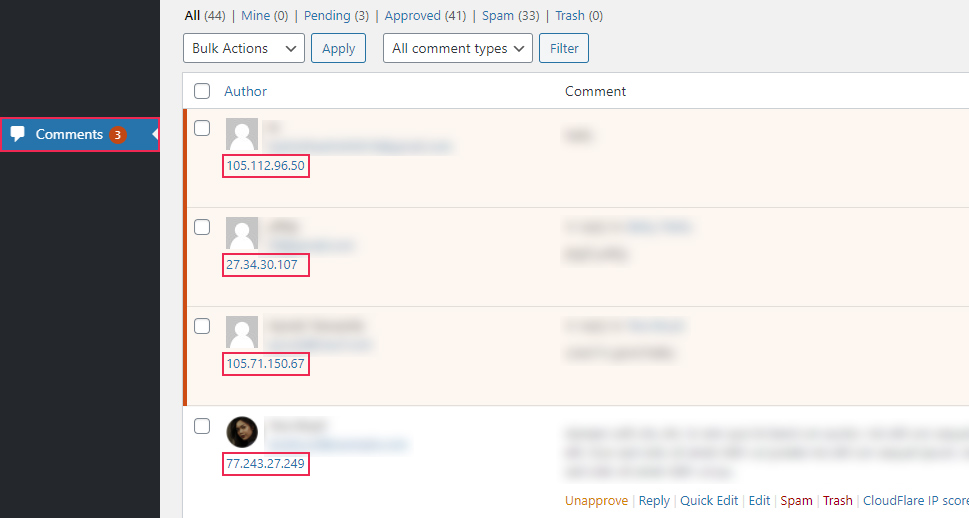
Make sure to examine the content of the comments as well. This will help you find ones that contain suspicious links or content that isn’t relevant to the article to which they were posted. Then, you can choose to block IP addresses corresponding to the comments you determined were spam or malicious.
-
Raw access logs
If you were exposed to a brute force or a DDOS attack, you should try to identify and block the IP addresses where the attack(s) originated. To do so, you will need to review the raw access logs of all IP addresses that accessed your website. You will be able to do so in the options of your hosting control panel. In our case, that’s cPanel.
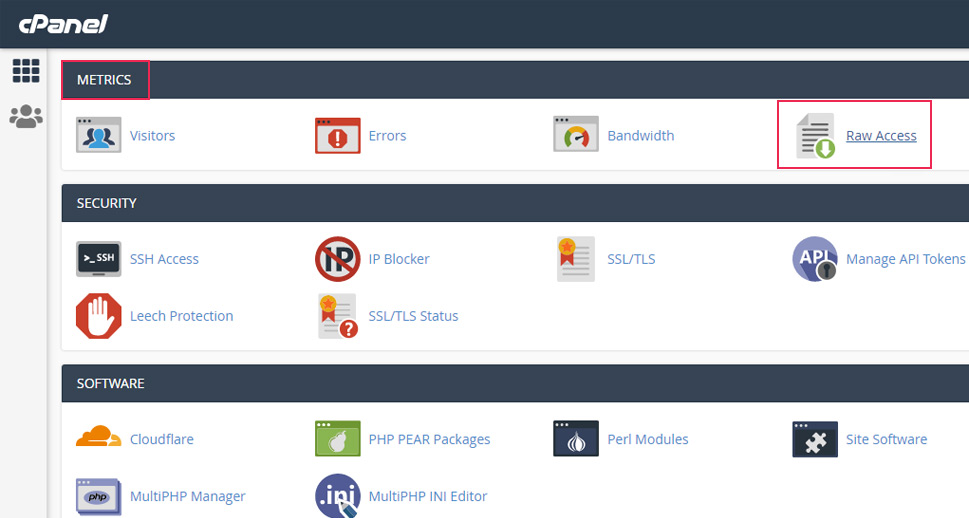
To start, connect to cPanel using your credentials, find the Raw Access option located in the Metrics section, and click on it.
Thanks to this option. you will be able to see the current raw access log that contains data only from the last few hours, as well as the archived log. The archived log contains all the information on requests to your site made in the current month and the previous ones unless it’s been configured otherwise.
Clicking on the Raw Access option will download a .gz zipped file. Make sure you have a program that can handle zipped files of this type to be able to open it (e.g. 7-Zip). Within the zipped file, you will find a log file that can be opened using your preferred text editor.
All distinct lines of code within the log file show all the times a user has accessed some part of your website and include the IP address of that user at the start. Therefore, these are the addresses you will need to review and pick out those that seem suspicious. But, to prevent mishaps such as blocking yourself or any other valid users, we suggest using an IP lookup tool. There are several available online and you can use them to cross-reference the IP addresses, one by one, using the blacklist check feature available within the tool.
Since you now know how to inspect IP addresses, we can review the methods you can use to block some of them. Those include using plugins, employing cPanel options, or editing the .htaccess file.
-
Blocking an IP address using plugins
Whenever you wish to enable a new feature on your website, you should look into possible WordPress plugins for it first. This option is very convenient for the majority of WordPress users, especially for those with less of a technical background.
Thanks to the number and variety of WordPress plugins, it is very easy to find one to cover almost any feature or functionality. In the case of IP blocking, you should take a look at some security plugins, as this feature is often included within security plugins. Depending on which plugin you choose, IP blocking could be included either with the free or the premium version of it.
A security plugin that we found useful for this purpose is the All In One WP Security & Firewall. It is a very user-friendly plugin that is also free. It also includes various quality security features: IP blocking, backup scheduling, monitoring of user accounts and files, firewall protection, anti-spam options, and much more. Because of that, we have opted to use this plugin in the following example.
Install the plugin, then navigate to WP Security > Blacklist Manager. You must read and apply the precautionary measures before using this feature. You can see what those are by clicking on the link at the top. Afterward, tick the checkbox next to the Enable IP or User Agent Blacklisting option. Insert the IP address you wish to block and press the Save Settings button below. If you click on the More info button below the IP address field, you will get information regarding how to properly insert IPs. As you can see from the screenshot below, you can insert multiple IP addresses at the same time, so long as each is in a new line.
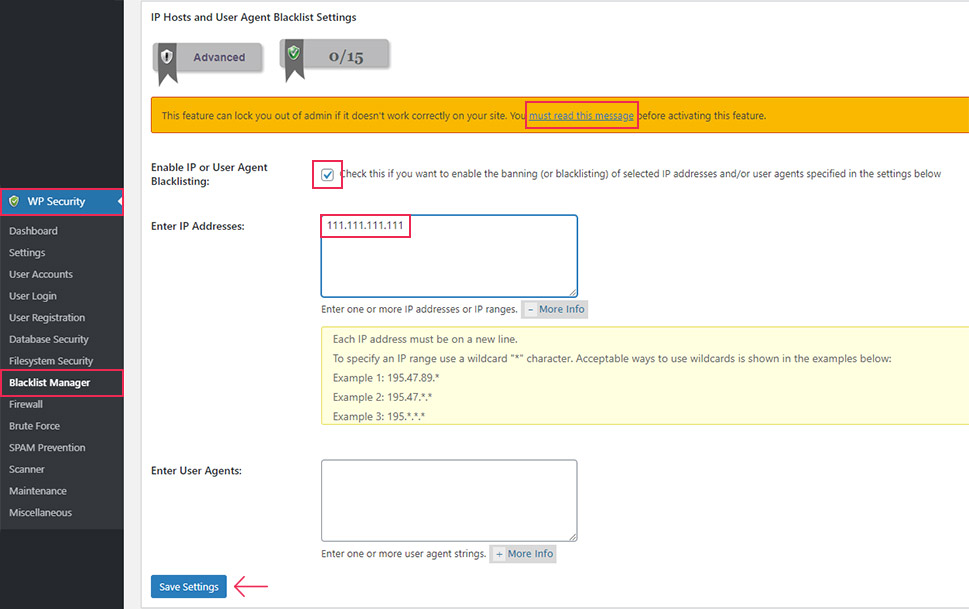
Similarly, if you wish to remove an IP address from the block list, simply remove the line that contains it, and press the Save Settings button afterward. However, if you don’t want to block any IPs, you should uncheck the box next to the Enable IP or User Agent Blacklisting option and then press the Save settings button.
-
Blocking an IP address using cPanel
Another way of blocking IP addresses is via the options of your hosting control panel. As we mentioned earlier, we will be using cPanel for our showcase.
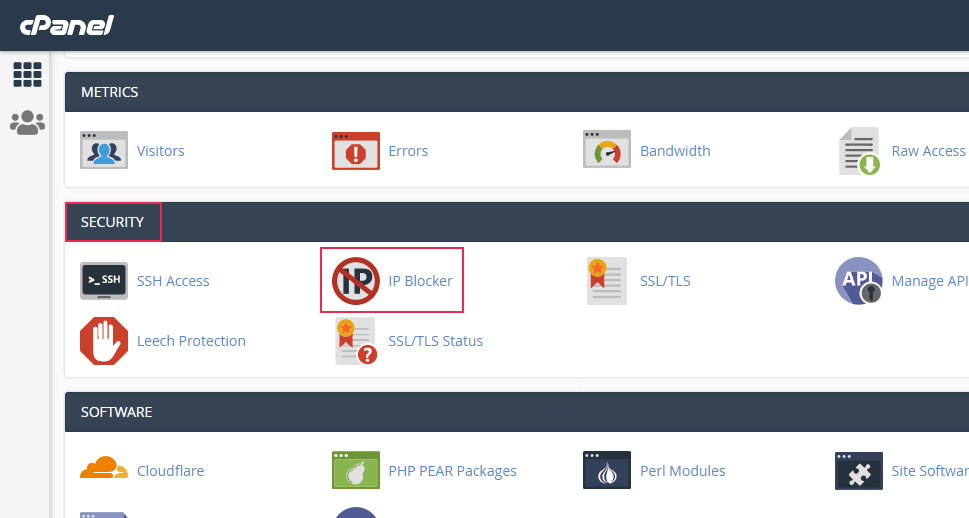
To carry out the steps, log in to cPanel using your credentials and click on the IP Blocker option, located in the Security section.
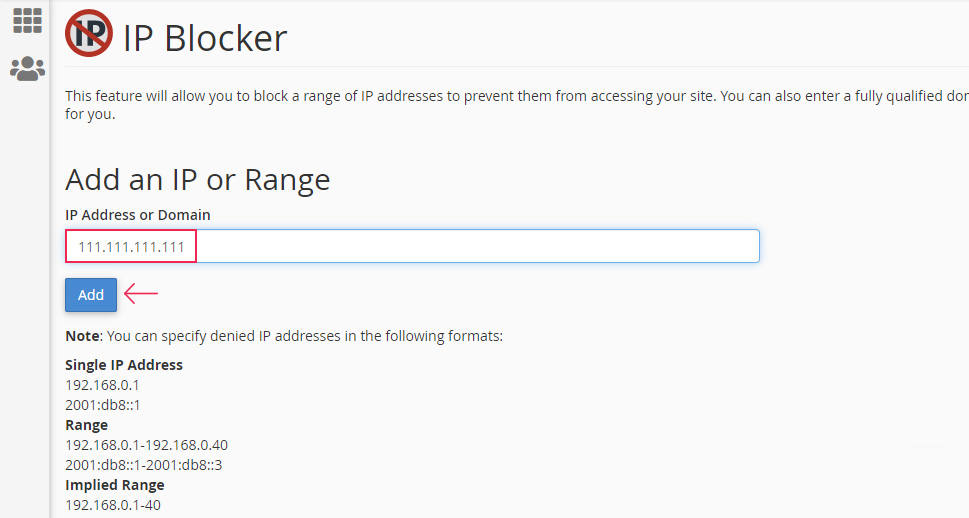
At the top of the page that opens, insert the IP address you want to block into the appropriate field and press the Add button. Below this button cPanel helpfully lists the suitable formats for inserting IP addresses, both IPv4 and IPv6. It gives instructions for single IP addresses, addresses range, CDR format, and wildcard operators. Make sure to review those notes if you aren’t sure how to enter the IP address(es) you want to block properly.
Shortly after successfully performing all the steps, you will see a confirmation message.
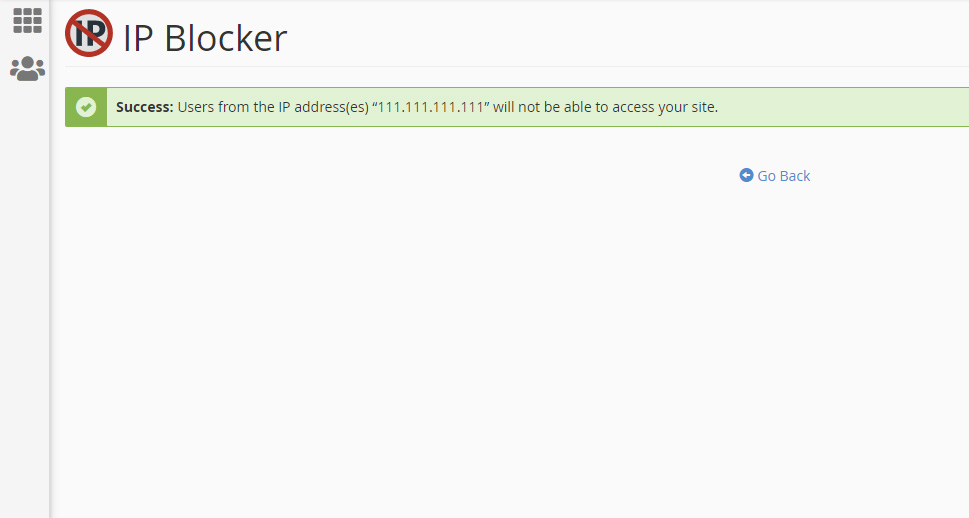
As you can see, the process is rather simple. You can click on the Go Back button if you wish to return to the previous page and block more IP addresses.
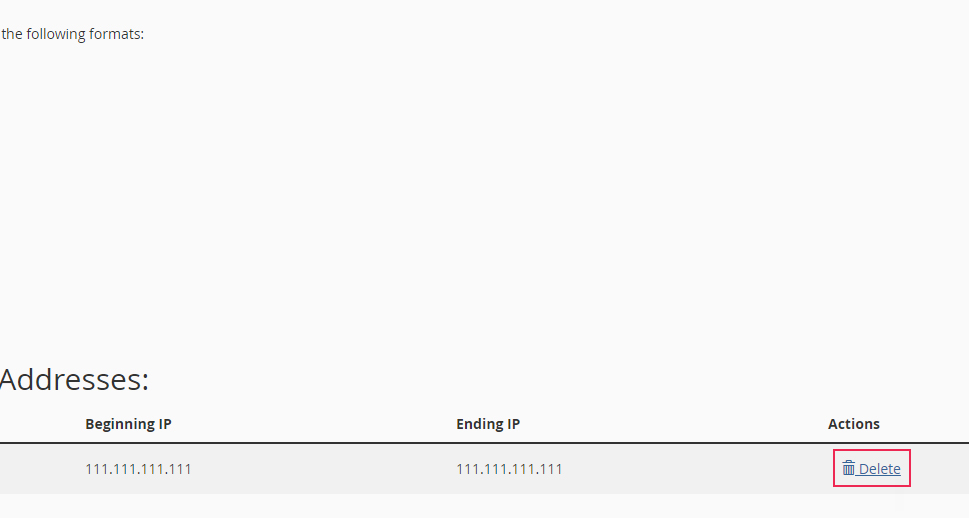
Additionally, the IP that you blocked will be added to the list of blocked addresses shown on the IP Blocker page, near the bottom. From there, you will have the option to enable access to an IP address that you previously blocked. If you want to do so, you just need to scroll down to the Currently Blocked IP Addresses section, locate the IP address you wish to remove from the list, and press the Delete button next to it.
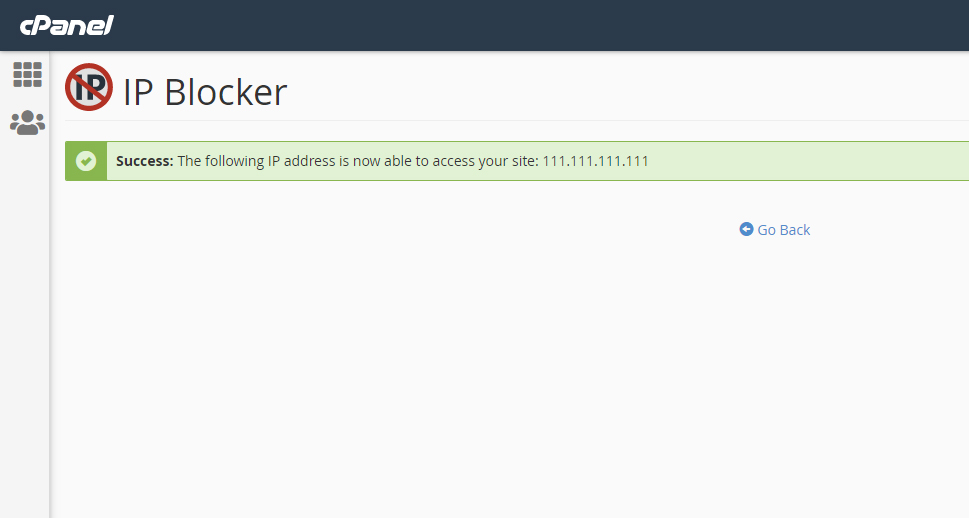
To confirm your choice of whitelisting an IP address, press the Remove IP button that shows afterward.
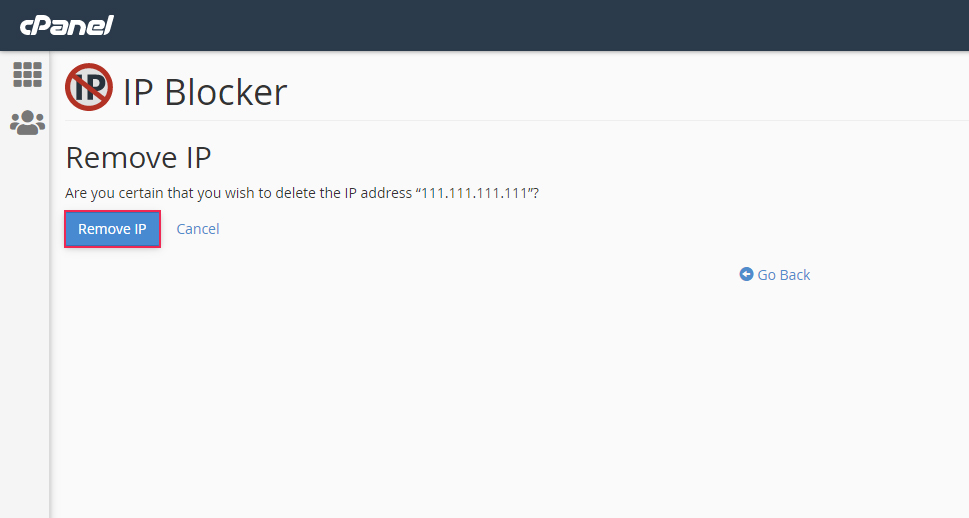
When that’s done, you will see a success message.
-
Blocking an IP address by editing the .htaccess file
IP blocking is just one of many things you can achieve by editing the .htaccess file. We will show how to edit this file using FTP. As a requirement for this approach, you need to know how to use an FTP client and you need to have one installed. Additionally, as the .htaccess file is hidden, you will need to enable the options for showing hidden files in your FTP client. Also, we suggest making a backup of your site as a safety precaution beforehand.
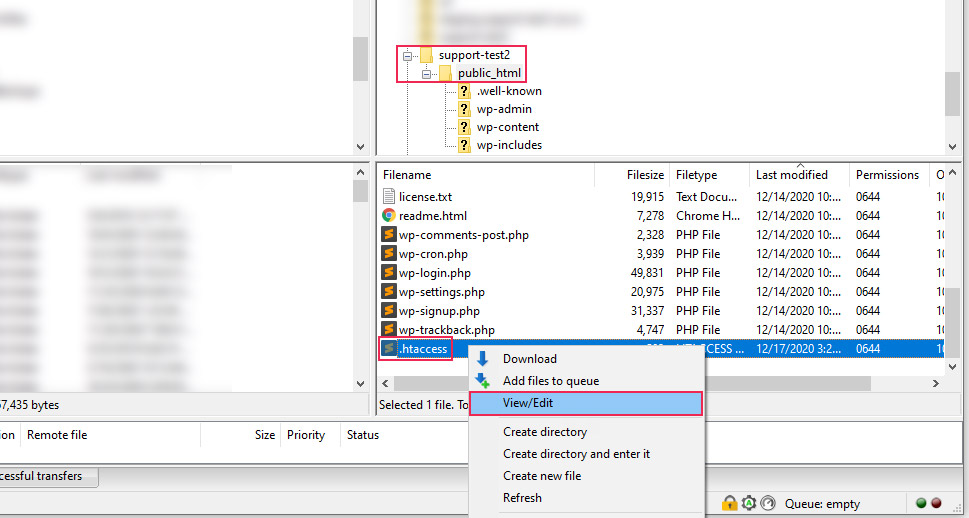
Then, connect to your server using your FTP credentials and navigate to your root WordPress directory, often called public_html. Within it, locate the .htaccess file, right-click on it, and press the View/Edit option from the menu that appears.
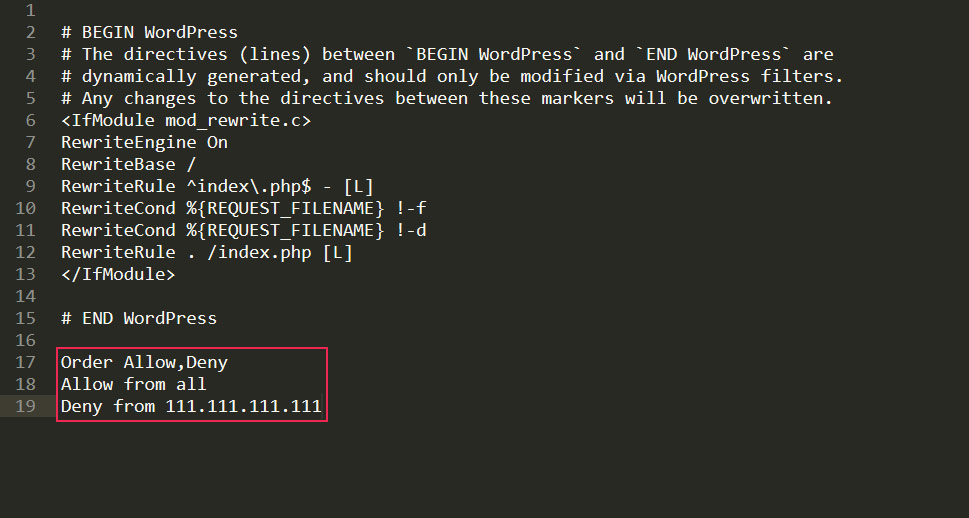
Then insert the code given below. Make sure to replace the XXX.XXX.XXX.XXX part with a valid IPv4 address. If you wish to block an IPv6 address, replace the XXX.XXX.XXX.XXX part with a properly written IPv6 address. In case you wish to block multiple IPs, simply put additional Deny statements, one below the other, each with a valid and distinct IP address you wish to block.
Order Allow,Deny
Allow from all
Deny from XXX.XXX.XXX.XXX
After inserting the code, save the changes you made. Then upload the .htaccess file back to your server, which will override the older version of that file.
Additionally, if you wish to re-enable access to the IP address you blocked, you can do so simply by removing the block of code you added. In case you inserted multiple Deny statements, you can remove only the one that contains the IP you wish to whitelist.
Even though IP blocking is quite useful, as it can block single addresses and even regions, it doesn’t keep your site safe against all malicious activity. It can work wonders against spam, but more sophisticated hacking attacks won’t be deterred by IP blocking. As such, we advise looking into additional measures such as firewalls with strict security rules. These can be set by your hosting provider or through the use of one of the top quality security plugins.
Final Thoughts
Inspecting and blocking IP addresses is a simple and effective way of battling against spam and hacking attempts. In this article, we have carefully covered three possible ways you can block an IP address in WordPress. The methods are quite straightforward, and we are confident you will be able to apply them and improve your site security in no time. This is only a part of having tight site security, so we suggest you implement other measures in addition to this to keep your peace of mind.
