How to Minify CSS and Javascript Files in WordPress

If you ever explored the best ways to optimize your website, you have probably come across the terms minify or minification. The term minify refers to methods used to reduce the size of the files on your website. This is accomplished by removing white spaces, lines, and unnecessary characters from the source code.
In this article, we will explain what minification encompasses, what its benefits are, and some of the most popular minification solutions. From there you will be able to decide the best way to tackle performance and speed improvements for your website.
Websites are made up of many different files arranged in folders located on the server. Those files contain code that determines the appearance and functionality of your site. In order to make your site light-weight and fast-loading, the code it’s using needs to be optimized. Specifically, your JavaScript and CSS code. Minifying your files is one way to accomplish that. If you ever tried testing the speed of your website using GTmetrix or PageSpeed Insights, you likely got a recommendation to minify some of your site files—namely, the CSS and JavaScript ones.
When we check the code in a website’s files we all expect that it’s written in an understandable way to make it easier to interpret. However, the computers that execute that code don’t care if the files contain comments, formatting, white space, or new lines. When they come across any unnecessary characters in the website files, they just ignore them—only the code that needs to be executed matters.
This is when minification enters the scene. Minification is a computing term that basically means removing superfluous characters, those that aren’t needed to execute the written code. Minification works by analyzing and rewriting the code. This reduces the overall size of the files and, by extension, the size of the website itself, so it can load faster in the user’s browser.
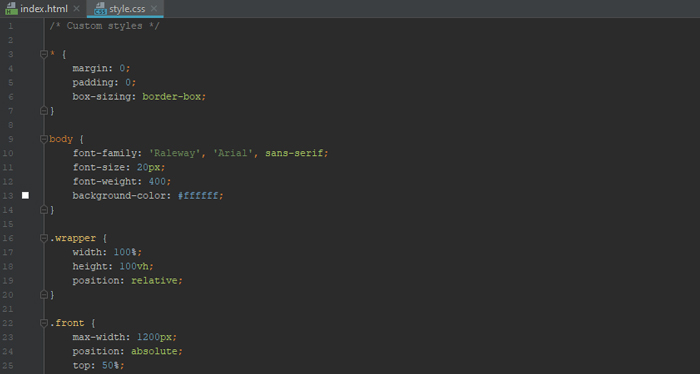
For example, if you have a stylesheet file intended to style your website with CSS code that looks a bit like this:
Its minified version would look like this:
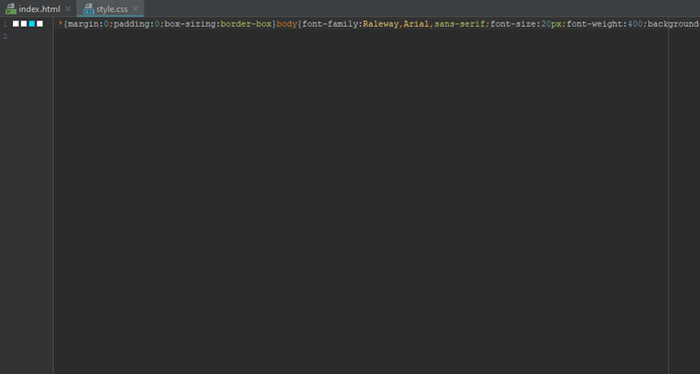
As you can see the difference is significant—the minified version is in one line and takes up far less space than the original version of the code.
Minification takes place on the web server before a response to a client’s (web browser’s) request is sent. After minification, the web server uses smaller, minified, and much faster CSS and JavaScript files instead of the original ones. This results in improved page loading speed without losses to functionality.
How to Minify Your WordPress CSS and JavaScript Files
Before you start minifying your website files, we recommend that you first back up the entire website or just make a backup of individual files. Also, if you have a staging site or a local test environment, it would be good to first minify your website files there. That way you can check if everything is working properly before you make changes to the live site.
Moreover, you should check the page speed of your website before and after minifying the files. Then compare the results and see if the minification has helped with improvement. You can do this using GTmetrix; it’s a very useful testing tool that generates results and gives recommendations for website optimization improvements.
To minify files, you can use a plugin or do it manually with an online tool. We’re going to explain both those methods in more detail in the sections below.
Minifying Files Using Plugins
Using a WordPress plugin for minification is the easiest way to minify CSS and JavaScript files on your website. The most commonly used plugins are:
Autoptimize

Autoptimize is one of the more popular plugins for minification that you can find. It is very easy to use and offers a lot of possibilities, and on top of that, it’s free. This plugin can combine scripts, minify, and cache your code.
Download and install this plugin via the WordPress admin panel. When you activate it, find the Settings > Autoptimize option, and in the optimization options tick the boxes for the CSS and JavaScript options.
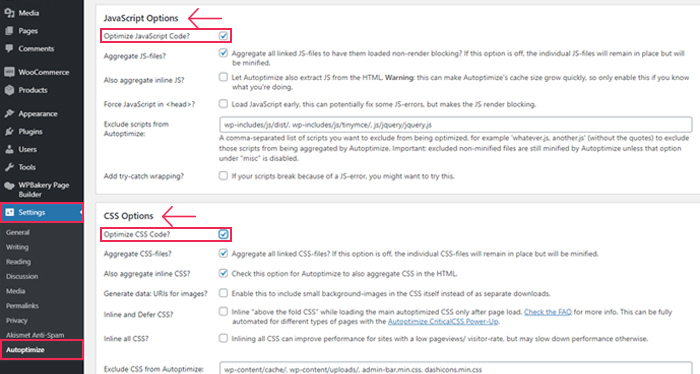
You will also notice additional options below for optimizing these files. You can activate them and additionally customize file minification. In the end, all you have to do is click the Save Changes and Clear Cache button.
Fast Velocity Minify

Fast Velocity Minify is another popular, free, and useful plugin. It works by minifying and combining your CSS and JavaScript files to reduce the HTTP requests to your server. It merges the files into a group and tries to use as few of them as possible. There are additional optimization options available, but the default settings are enough for most websites.
When you install and activate this plugin, your website files will automatically be minified and optimized.
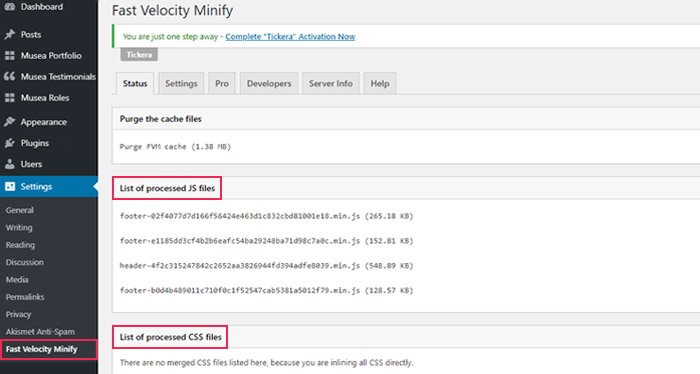
You can use the Settings > Fast Velocity Minify option in the admin panel to access the plugin settings and check all available options. Under the Status tab, you can see a list of JavaScript and CSS files that Fast Velocity Minify processed.
And you can use the Settings tab to tailor how your files will be optimized. Since grouping CSS and JavaScript is enabled by default, after activating the plugin you can use the settings to adjust the default options or disable minification for certain types of code. You even have the option to optimize Google Fonts and Font Awesome icons.
WP Super Minify
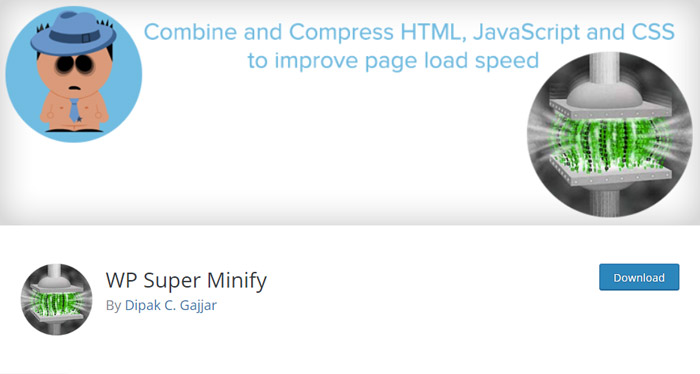
WP Super Minify is a minification plugin that can minify, combine, and cache your website’s CSS and JavaScript files.
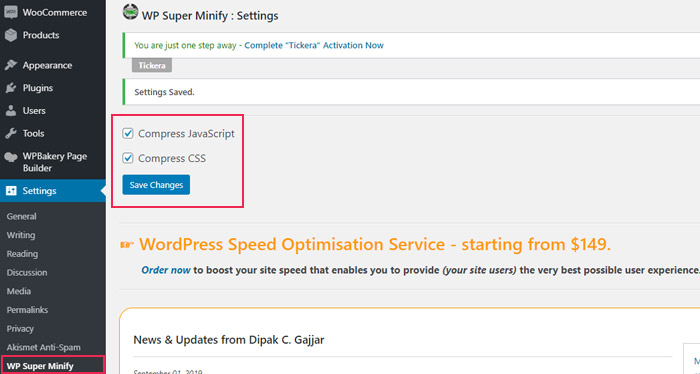
After activating this plugin, it will automatically compress all inline JavaScript and CSS code. So the file size will be smaller which will help to improve the loading speed of your website. Using the Settings > WP Super Minify option, you can choose whether to minify both JavaScript and CSS or just one of those two file types.
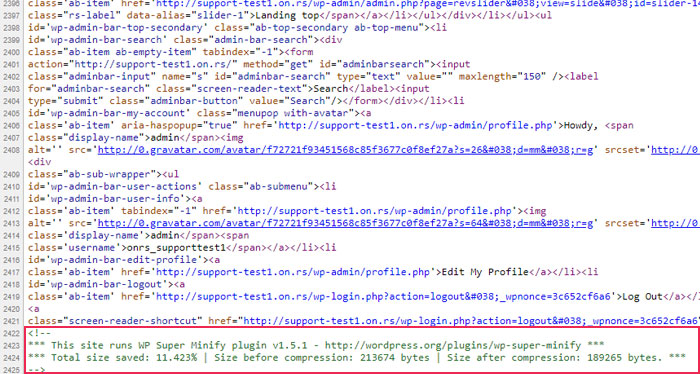
To make sure this plugin is working properly, simply examine your website’s source code. The easiest way to do this is by opening your site in a browser and pressing Ctrl + U (for Windows) or Option + Command + U (for Mac). If everything is alright, you should see the following message at the end of the source code:
Ultimately, whichever plugin you choose to use, all you need to do is select the files you want to minify and the plugin will do all the work for you in the background. Every minification plugin on the market offers different functions in addition to minification, so you should try several plugins and choose the one that suits you best.
Furthermore, minification is a virtually standard feature of caching plugins, such as W3 Total Cache and WP Super Cache. So you can try using them as well to minify your website’s CSS and JavaScript files.


Minifying Files Manually
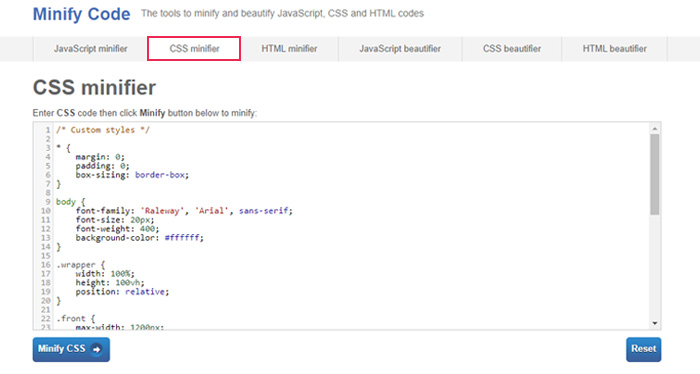
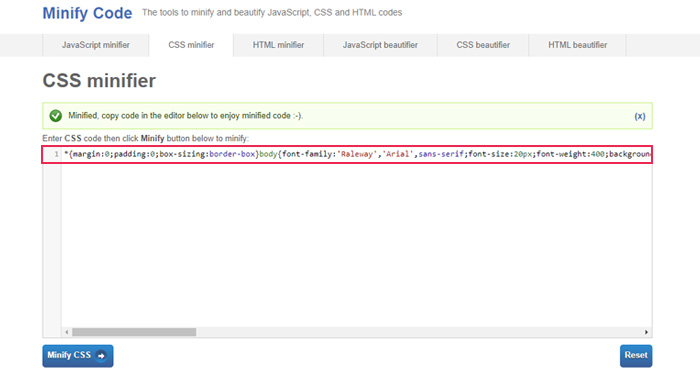
Firstly, manually minifying files does not mean that you manually go through every file on your website and remove white or empty spaces. Manual minification actually involves using one of the popular online tools for this purpose. One of them is Minify Code, which we’re going to use to show the steps you’d need to take to minify your code. This tool has a pretty simple and user-friendly interface. And many online tools of this type have a similar, or same, procedure for minification. Here are a few you can try out:
If you choose to use the Minify Code tool, first you need to select the tab you need. Depending on which code you want to minify, there is a tab for CSS minifier and JavaScript minifier. After deciding, paste your code in the available window and press the Minify button.
After a few moments, you will see the minified version of the code you entered. You can simply copy it and transfer it to your original file. Just a reminder—be sure to back up your files before overwriting the original code with the minified one.
Manual minification is primarily useful if you want to minify only certain files or some code you’ve written. For example, if you are using a child theme to customize your website, then the CSS file with your custom code would be a good candidate for minification. In that case, you can make a backup of the original file, then use the online tool to minify its code and replace it directly in the file.
If you decide to change something later, you can always do it in the backup file you saved. Minify it again with the changes made and replace the code in the file on the server. That way you’ll always have a ready backup file that you can edit and the minified file will be on the server doing its bit to optimize your site as much as possible.
Final Thoughts
If you want to improve the performance of your website and achieve better page loading speeds, then minifying CSS and JavaScript files will go a long way in helping you. Using minifying tools available online, you’ll be able to easily minify your website’s code. Moreover, with WordPress websites, you can always install one of the many plugins on the market and with just a few clicks automatically minify CSS and JavaScript files. If you’re already using a caching plugin, you can check if it has any minification options in its settings and use it instead of adding a bunch of new plugins.
There are multiple options you can use to minify CSS and JavaScript files, you just need to decide which one is best for you. We hope you found this article helpful and that, by employing our advice, your optimized site will soon rise in the rankings.
