How to Eliminate Render-Blocking Resources (JavaScript and CSS) in WordPress

Website speed is one of the many things that affect your Google Search rankings. Also, since it dramatically impacts whether a visitor will stay on your site or not, it’s no wonder that website owners continuously strive to improve it. Some of the methods of improving your page loading speed include having a good web hosting service, using caching plugins, and eliminating render-blocking resources like JavaScript and CSS on your WordPress website. Therefore fixing render-blocking issues is quite important. Since knowing how to do that isn’t common, we prepared this article to explain what it means to have render-blocking resources and how to eliminate them. For easier navigation, we divided this article into several sections:
What It Means to Have Render-Blocking JavaScript and CSS Code
When a user visits your website, their web browser will start to load the page from top to bottom. The upper section of the page, that is loaded and seen first, is called above the fold (ATF) content. If the browser comes across a CSS stylesheet or a JS script during the loading process it will pause the page loading in order to parse those resources, thus slowing the overall page load speed. Only the CSS stylesheets or JS scripts that are loaded while above the fold content is loading, but are considered non-relevant to its functioning, are the ones we call render-blocking. A solution to counteract this is to delay the loading of unnecessary resources. You can do this by loading your JS scripts, which are responsible for interactions and functionality rather than style, in the footer (before the closing </body> tag). CSS stylesheets should still be loaded at the top (in the head section) in order to avoid the so-called flashes of unstyled content (FOUC). FOUC is a short moment where above the fold content is loaded with default browser stylization, which can look unappealing to visitors and cause them to turn away from your site.
Since all plugins and themes add both CSS and JS, some of which may be render-blocking, you need to tackle this issue as efficiently as possible. We’re going to introduce you to several plugins you can use to address render-blocking scripts and stylesheets. Additionally, we’re going to quickly cover what some of those plugins are doing behind the scenes so you can grasp what you need to do. The explanations might seem a bit complicated but are necessary in order to understand the options offered by certain plugins.
When it comes to the elimination of render-blocking JS scripts, one of the solutions is to add async or defer attributes to them. Async and defer achieve the same purpose – downloading JS scripts while parsing HTML content. The main difference between the two is that when using async the script is executed after it is loaded (by pausing the HTML parsing) whereas when using defer the scripts are executed after the HTML parsing is done. Both methods have their pros and cons. Defer is better suited for scripts with a dependency, as it preserves the order in which they are defined. Async is better suited for scripts without a dependency, as they are executed as soon as they are loaded. Additionally, before you employ either of those methods, make sure to exclude jquery.js as it needs to load with ATF content. Deferring or asynching jquery.js can result in your site breaking since there are scripts dependant on it running properly. Spamaller scripts can either be combined and then asynced/deferred or loaded inline with HTML.
When it comes to the elimination of render-blocking CSS stylesheets, the solutions include loading smaller CSS inline with HTML, use conditional CSS-specifying viewports and widths (with the use of media queries), and asynchronously loading the remaining stylesheets, which has become a common WordPress practice.
How to Eliminate Render-Blocking JS and CSS Code
You can use WordPress plugins to eliminate render-blocking resources. Depending on the extent of the issue, you can opt to use free or premium plugins. You could also eliminate render-blocking resources manually, but that requires a great deal of advanced WordPress knowledge, and, as such, we will focus on plugin-based solutions. Using plugins can make the process of removing render-blocking resources simple. It includes the following steps: testing the site to establish which resources are render-blocking, enabling the proper plugin options, and re-testing to verify if the issue is gone. If needed, the process can be repeated several times by testing additional plugin options to get the best results.
The first step of every successful troubleshooting attempt is finding the problem. Luckily, there are many good website-testing tools. We will take a look at two such websites – GTmetrix and PageSpeed Insights. Other options you can try include Pingdom Speed Test, WebPage Test, and KeyCDN Website Speed Test. Before we move on to testing, you should be aware that website-testing tools might crawl your site more slowly the first time. Because of that, they may end up showing higher page load times. Therefore, we suggest running several tests and using the average result as the yardstick.
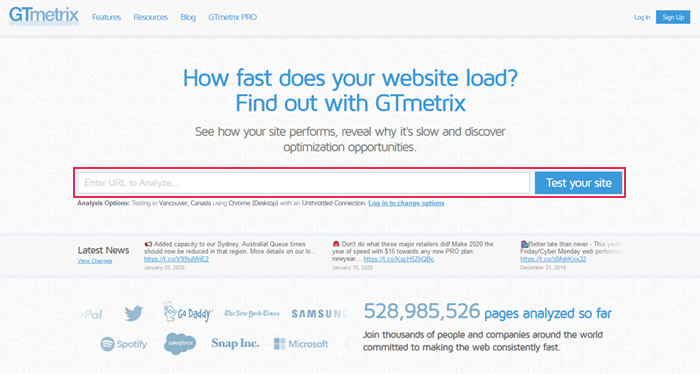
GTmetrix is a very detailed website-testing tool—it checks the PageSpeed and YSlow metrics and shows the waterfall visualization of your page load. If you register (which you can do for free) you also get access to page load timings, video playback of your loading process, as well as the history of previous tests you made. Additionally, while being logged-in, you get to edit analysis options. Those include the browser type (Chrome and Firefox), mobile testing (Galaxy Nexus, Android system using the Chrome browser), seven different locations to choose from, types of connection, and the use of an Adblock.
To test your site, visit the GTmetrix page, insert your URL, and click the Test your site button.
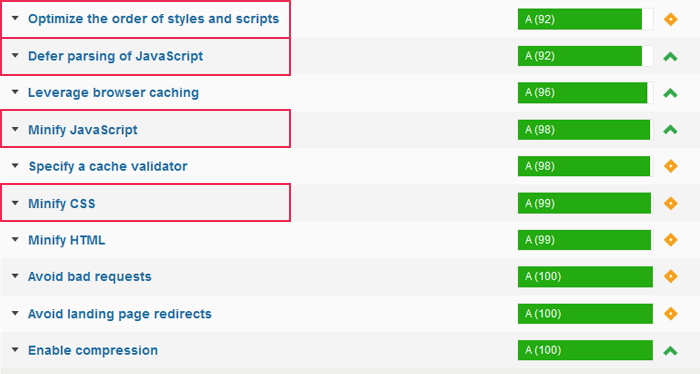
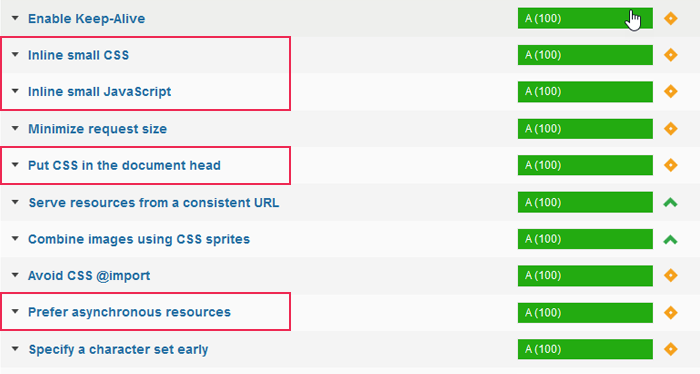
By clicking on the Page Speed tab you can see all the recommendations and your current grade for each. To locate all render-blocking CSS and JS resources, check the relevant lines regarding inline code, minification, and optimization. We marked all the options you should look for in the screenshots below.
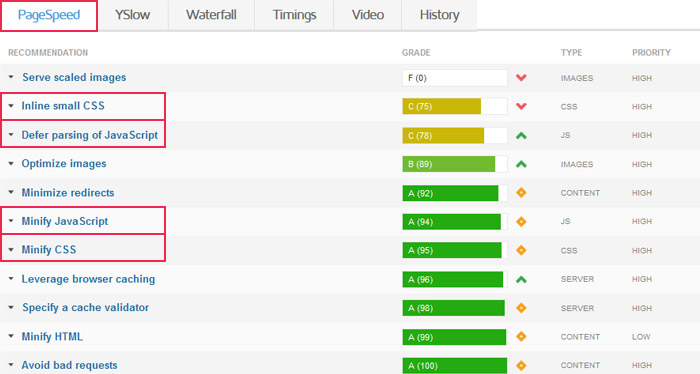
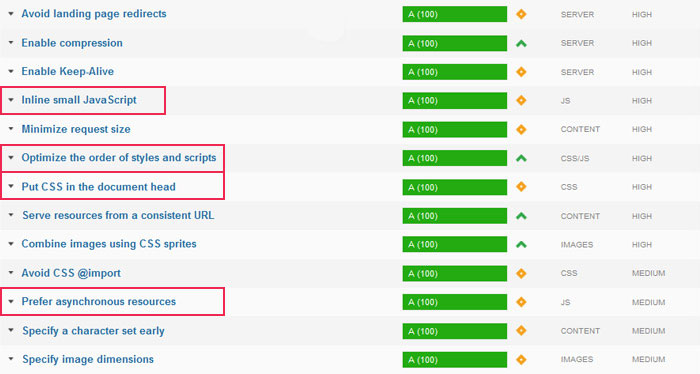
In most cases, the last two options we marked (Put CSS in the document head and Prefer asynchronous resources) can be ignored. That is because both those options are currently default WordPress practice.
If you click on any of the recommendations, it will show a list of resources that need to be improved. For our purposes, it will be a list of stylesheets or JS scripts. Also, hovering over the What’s this mean? button will show a small excerpt of an article clarifying the meaning of the recommendation, accompanied by a Read more link to the complete article for further explanation.
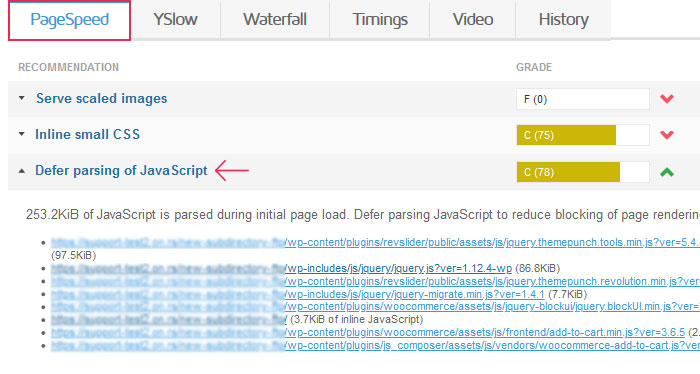
You should save a list of the stylesheets and scripts you get in the results as it will be helpful in the steps to come.
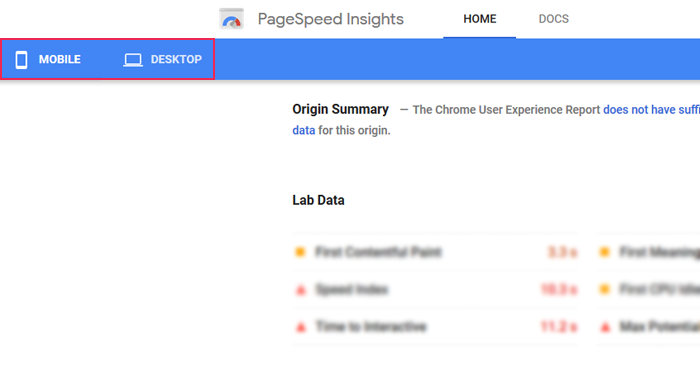
Another often-used website tool is the PageSpeed Insights website. PageSpeed Insights reviews your site—both the desktop and mobile versions—on a scale of 0–100. It reviews above-the-fold loading time as well as full-page loading time. Similar to GTmetrix, it provides suggestions for improving your website loading time. Moreover, it takes into account information from the Chrome User Experience Report to score your mobile website by considering the font and button sizes on mobile as well as the viewport configuration.
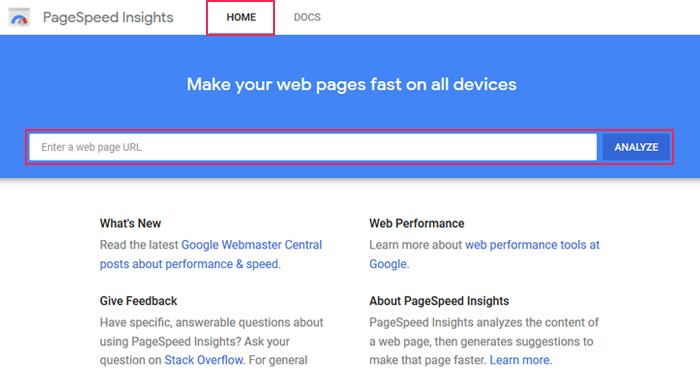
To test your site, visit PageSpeed Insights, insert your website URL, and press the ANALYZE button.
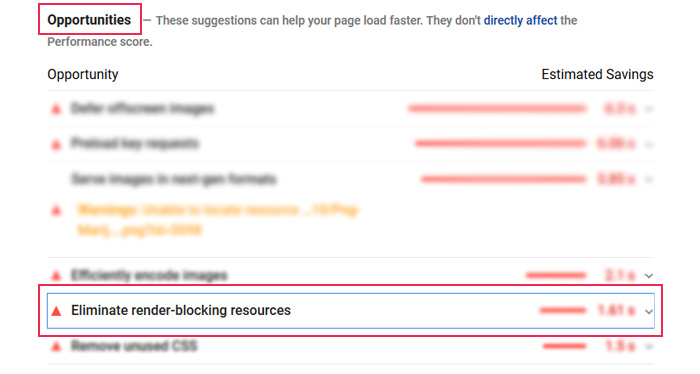
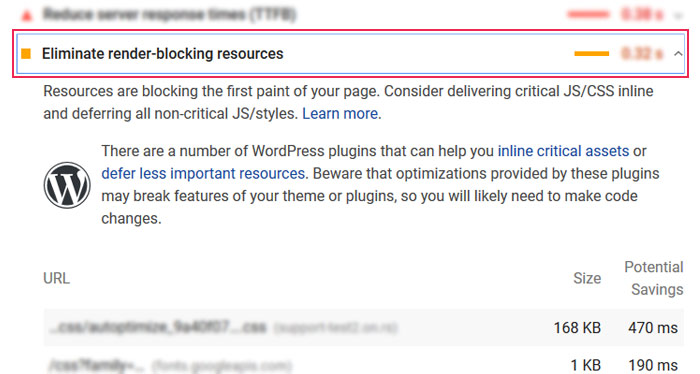
Navigate to the Opportunities section to see where you can make improvements to get a faster page load time. PageSpeed Insights offers a more concise report regarding the removal of render-blocking resources, shown in a single subsection. You only need to search for the Eliminate render-blocking resources subsection/tab.
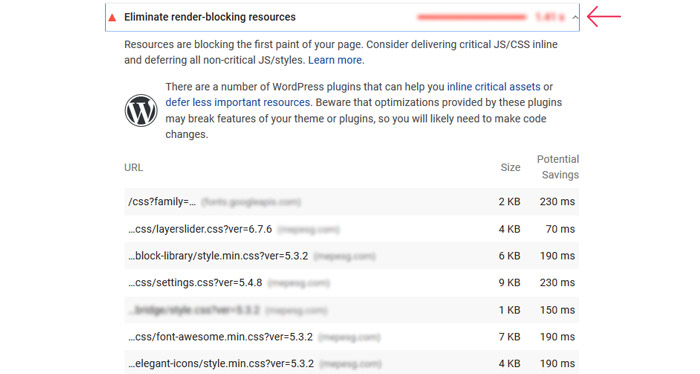
Clicking on it will open its content. There you will find a short explanation regarding render-blocking resources, including links to possibly helpful plugins. Most importantly, it contains the list of all render-blocking stylesheets and scripts which you will need later on.


One of the many benefits of WordPress is the multitude of plugins for almost every purpose. Fixing render-blocking resources is no exception, so we turn to caching and site-optimization plugins for help. However, before you proceed, we strongly advise you to make a backup of your site. Removing or changing the order at which some resources are loaded in order to prevent them from being render-blocking could negatively impact your website or, more precisely, break your theme. So make sure you have a backup ready just in case, and then we can move on to the main section of this article. We will take a look at two plugins – W3 Total Cache and WP Fastest Cache, and give you some additional suggestions and alternatives in the section afterward.
-
W3 Total Cache
After you install and activate the plugin, navigate to the Performance tab in your dashboard and click on the General Settings.

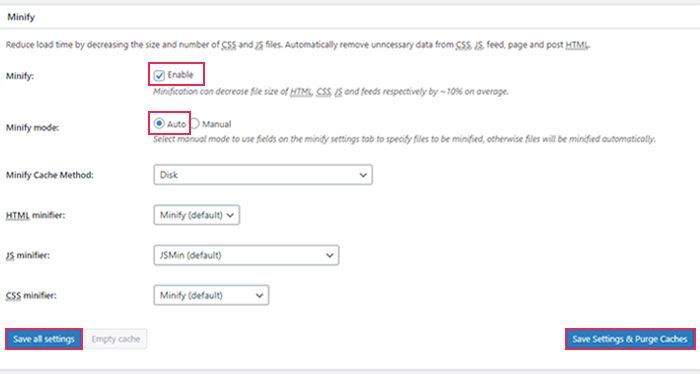
Under the Minify section tick to Enable. Select Auto under Minify mode and then Save all settings below. Finally, click the Save Settings & Purge Caches button on the right.
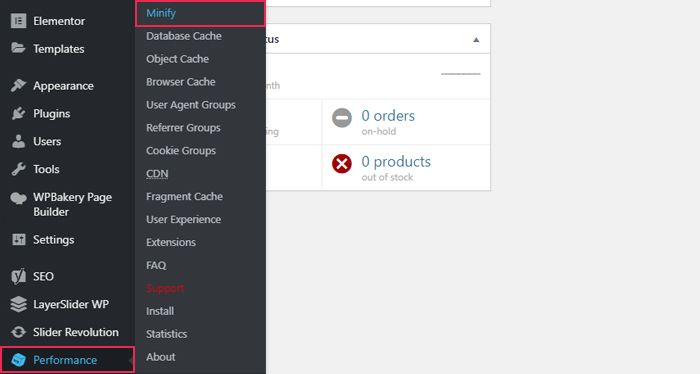
If you want to have additional control over which stylesheets and JS scripts get minified, you can select Manual under Minify mode. However, we advise against using manual minification unless you are a more advanced WordPress user or have someone to guide you through it. If you still want to try manual minification of JS scripts, then you should navigate to Performance > Minify.
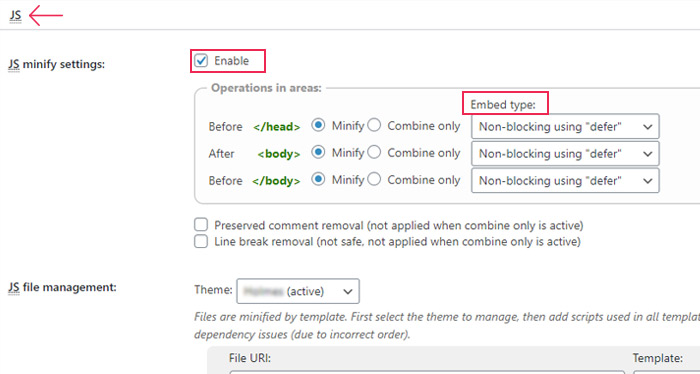
Then locate the JS section. Tick the checkbox next to Enable and choose your embed type (we suggest Non-blocking using async or Non-blocking using defer types).
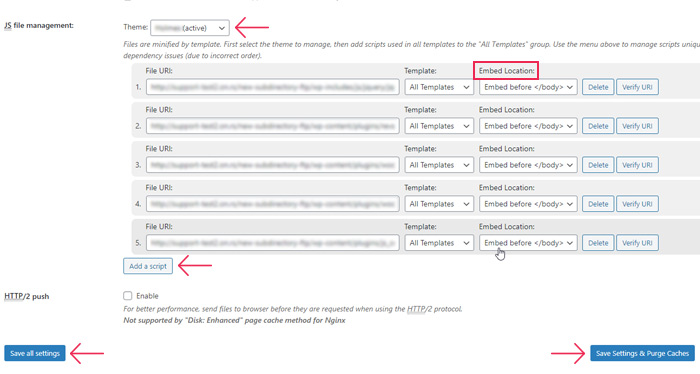
Next, select your active theme and start adding the JS scripts by clicking the Add a script button. To add a script, insert its file URL and select its embed location. The URLs are the ones you got in the previous step, either by using GTMetrix or Page Speed Insights. And the embed location for JS scripts should be before the closing </body> tag.
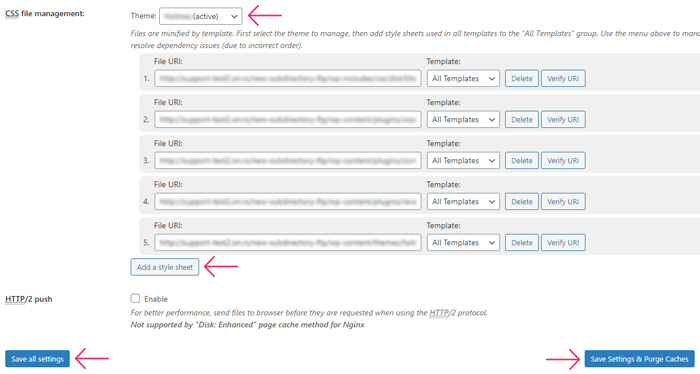
Similarly, to minify stylesheets, scroll down to the CSS section, located in Performance > Minify, and tick the checkbox next to the Enable option.

Choose your active theme and click on the Add a style sheet button. After you are done adding the stylesheets you need, click on the Save all settings button below. Afterward, click on the Save Settings & Purge Caches button on the right.
-
WP Fastest Cache
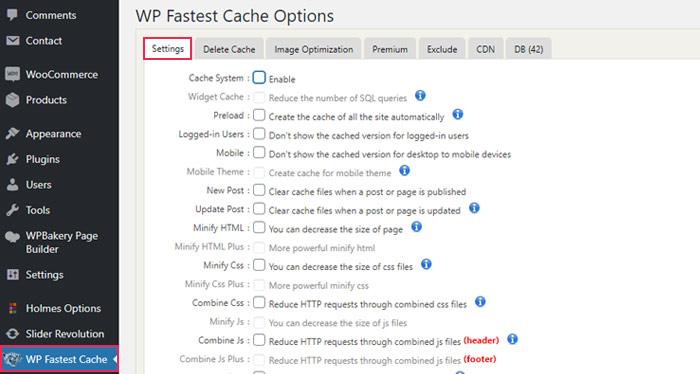
After you install and activate the plugin, open the WP Fastest Cache option in your admin dashboard menu.
Click on the Settings tab and tick all the options regarding the minification and combining of CSS and JS. Those are Minify Css, Combine Css, and Combine Js. However, please note that you need to buy the premium version of this plugin to get access to its more powerful options for fixing render-blocking. Those premium options include Minify Css Plus, Minify Js, Combine Js Plus, Render Blocking Js, and the Google Fonts option (for asynchronous load). Once you’ve selected the options you need, simply go to Submit to finish up.
After your plugin of choice completes elimination of render-blocking scripts and stylesheets, you should run another test of your website using the website(s) mentioned before. Make sure to clear both plugin and browser cache beforehand. Also, we suggest waiting a couple of minutes before running the test. Then, you can check your website using one of the website-testing tools. If you aren’t sure how to re-test your site, you can repeat the same process described under Testing your website. Make sure to run the test using the same tool, in order to be able to compare results. For our new test-run, we got the following results.
GTmetrix results:
PageSpeed Insights results:
As you can see, the results are very close to being perfect but aren’t there yet. Sometimes, this means you should run through another fix using a different plugin but, it’s more likely that you need to take the result with a grain of salt. It’s important to note that the recommendations given by website-testing tools are simply guidelines, and shouldn’t be followed blindly. You shouldn’t strive to achieve a perfect score at the cost of removing an essential JS script required for a robust WordPress website to work properly. For example, because you excluded jquery.js, you won’t get a perfect score, but that was necessary to ensure that all scripts (and by extension, your site) that rely on it are running smoothly.
Other Helpful WordPress Plugins
If you aren’t satisfied with the test results you got after your first fix, you can try using another caching or page optimization plugin. You can also consider finding a developer for further help. As with all plugins, conflicts can happen, so you should check the compatibility before adding a new one. In case of conflicts, contact the plugin authors for guidance.
We will take a look at two more plugins—Autoptimize and Async JavaScript. They are both free, designed by the same author, and often used in conjunction to optimize websites and remove any render-blocking resources. Autoptimize can minify both scripts and stylesheets, aggregate them, and inline both JS and CSS. However, Async Javascript is only useful for optimizing JS scripts. It gives you direct control over which scripts are asynced, deferred, or excluded.
Autoptimize
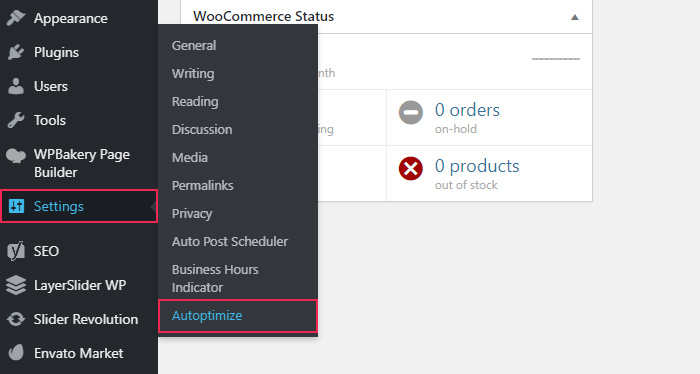
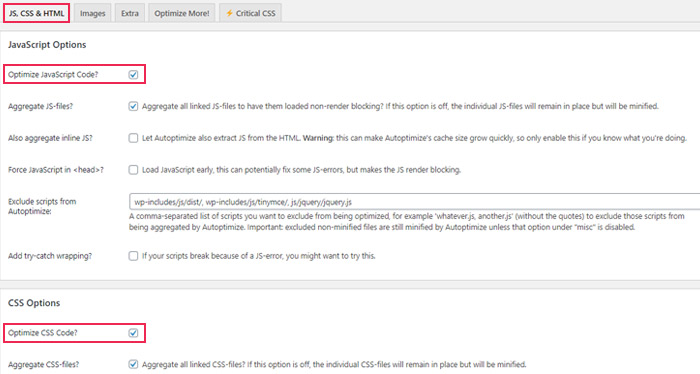
After installing the plugin, navigate to Settings > Autoptimize and click on the JS, CSS & HTML tab. You can significantly improve the impact of render-blocking JS and CSS code simply by checking the default Optimize JavaScript Code? and Optimize CSS Code? options. Also, you can tick the checkbox next to the Also aggregate inline JS? and Also aggregate inline CSS? options to fix additional render-blocking JS and CSS files. However, unless you are an advanced WordPress user, we advise sticking to the default options for optimizing the JS and CSS code.
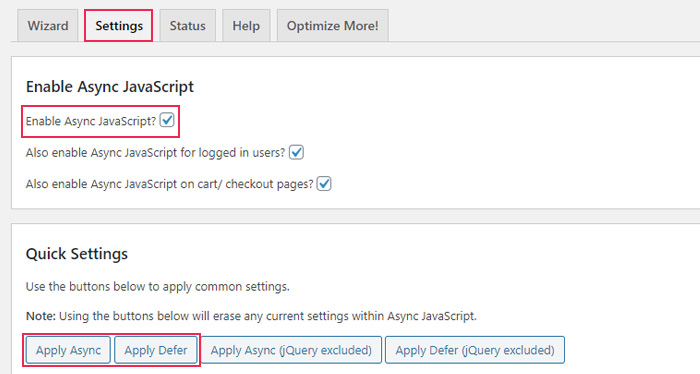
Async JavaScript
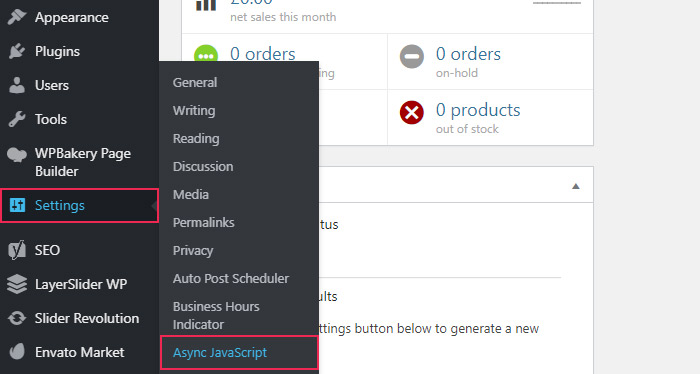
After installing the plugin, navigate to Settings > Async JavaScript and click on the Settings tab. Tick the checkbox next to the Enable Async JavaScript? option and choose either the Apply Async or the Apply Defer option from the Quick Settings section. If the Apply Async option causes issues to your website, try excluding jQuery (click on the radio button next to Exclude in the jQuery section) or simply choose the Apply Defer option. Using this plugin, you can choose which scripts to async and which to defer by manually adding them. Also, this plugin offers the option to exclude scripts from the async/defer process. This is true for both single scripts and those contained within a plugin or theme. While this plugin has its uses, it’s geared towards advanced WordPress users, so it would be best for developers.
Final Thoughts
Render-blocking scripts and stylesheets can have a significant impact on the speed of your site, so it’s important that you learn how to address them. In this article, we have taken a look at what it means to have render-blocking JavaScript and CSS code, how it loads, and some of the plugins you can use to eliminate render-loading resources. The plugins we chose include advanced website-optimization options that will help you shave down your load time. So, your site will be ready to rise in search engine rankings.
