How to Start a Site Like Teachers Pay Teachers with WordPress

Website design often relies upon the premise of making X, but better – and there‘s nothing wrong with that. In fact, that was the path to success for some major players in the tech field: very nearly every internet user is also a Facebook user, while hardly anybody even remembers MySpace or Friendster – both older products.
If you are reading this, you are looking for ways to create a website like Teachers Pay Teachers, but better. And that‘s what we‘re here to help you with. But first, what is Teachers Pay Teachers, anyway? Can their model be copied, and for what? Here‘s what we‘ll be talking about:
Education WordPress Themes
View Collection


Teachers Pay Teachers is a website used for buying and selling educational resources, typically self-made, focusing on materials designed to be used in activities by very young children. With millions of users and tens of millions US dollars made in sales, it‘s been called the iTunes of education.
Basically, what we are talking about is a marketplace much like many others; much like a street market with stalls and people flogging their wares, only with all the conveniences of online shopping. Consequently, it doesn‘t need to be about teaching at all: people can sell whichever kind of goods they like. And you could be a valued intermediary.
Now let’s get you there.

In order to start any website, you need hosting space and a domain name. You will likely be able to get both from the same provider – hosting and domain names are often sold as part of a package.
We won‘t go into the specifics of what a domain name is, but you could look at it as something like a street address for a website. You need to register it before a registrar of domain names in order to use it for your website. Your hosting provider will likely be able to do it for you.
Similarly, we won‘t be going into the details of what hosting is, but there are some things about a host you should pay special attention to: security should be an important consideration anyway, but, since you will be handling other people‘s money, it is doubly so. Also, server uptime – you don‘t want your marketplace to be unavailable to your sellers. And, finally, scalability: you want your server to be able to accommodate growing traffic.

The next things you will be doing is installing WordPress, and, to do that, you need a browser (and, if you are reading this, you are almost certainly using one), an FTP client (you can find a lot of them online for free), and database access (which will also likely be provided by your hosting provider as part of the package).
You can watch it done here:
The video is about five minutes long, and installing WordPress takes about as long. If you prefer your tutorials in text form, you can find out in our tutorial on installing WordPress.

So, you have a domain name and hosting space, and you have installed WordPress. How do you get started with a website? WordPress uses templates called themes to work. The functionalities of your website will often depend on the theme, though the basic WordPress framework remains the same.
There is no shortage of premium online store themes, though you can probably make do with a free one, as well: in fact, our own free Qi theme has the functionalities required for a marketplace, including support for downloadable and virtual product sales.
From a design point of view, the main thing is to make your theme work for you on the visual front. If you take a look at Teachers Pay Teachers, you will see that it has a distinct style. With products sold there focusing on very young children, the design choices make sense.

The first step towards creating an online store. The solution we heartily endorse is WooCommerce: even in its free version, it is a fully functional, comprehensive online store. The basic version is the WooCommerce plugin, but, as you can probably imagine, setting up even a basic online store is a big job. This is why we won‘t go into the details of how to set up a WooCommerce store – we have a comprehensive WooCommerce tutorial elsewhere on our website. You can also watch this helpful video, if that‘s what you prefer:
Some other things you would do well to consider is adding functionalities using WooCommerce-compatible plugins. There are plenty of those to choose from, and you may need some, all, or none of them, depending on your brand, online marketplace concept, desired functionalities, and other factors. Just make sure you know your options. The one you do need is WC Vendors Marketplace, as it is instrumental for our purposes here.
Another thing you should not neglect is sorting out your WooCommerce store SEO. You want your potential vendors and buyers to have an easy time locating you.
So, you have a website, you have installed WooCommerce, and set everything up just the way you like it, including installing the WC Vendors Marketplace plugin. By default, WooCommerce is a single-vendor store. This is how you convert it into a marketplace.
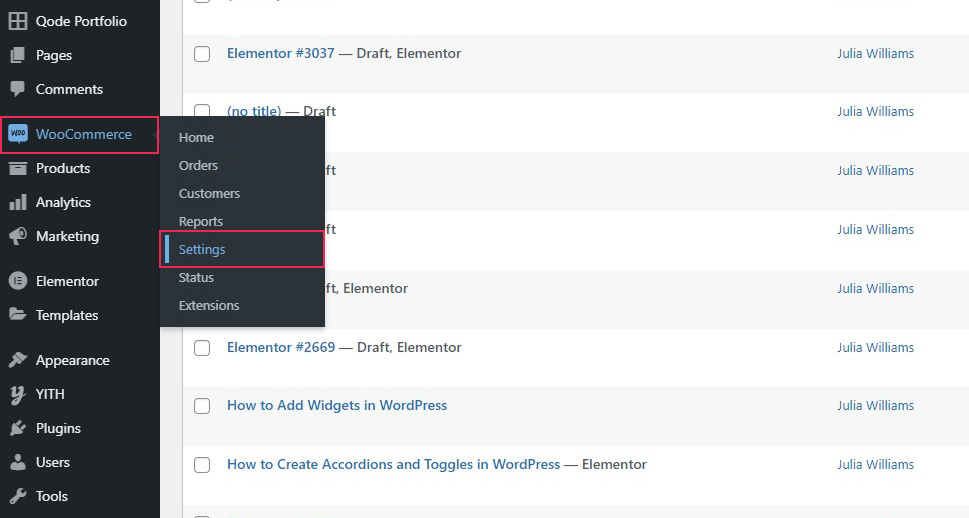
First, navigate to WooCommerce/Settings to access your store settings.
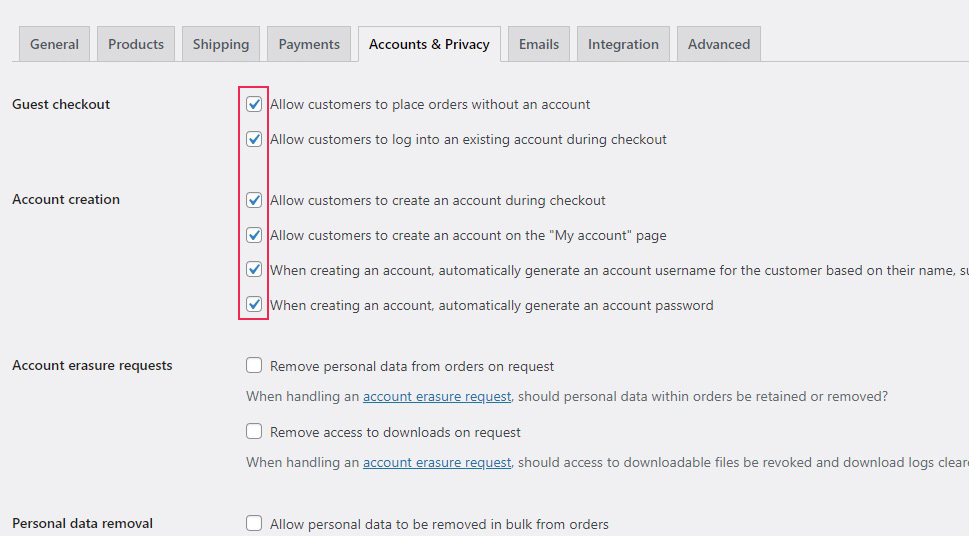
Next, access the Account & Privacy tab, and make sure all the checkboxes in the Guest checkout and Account creation sections are checked. This allows your visitors to create accounts. Scroll all the way down and click Save changes.
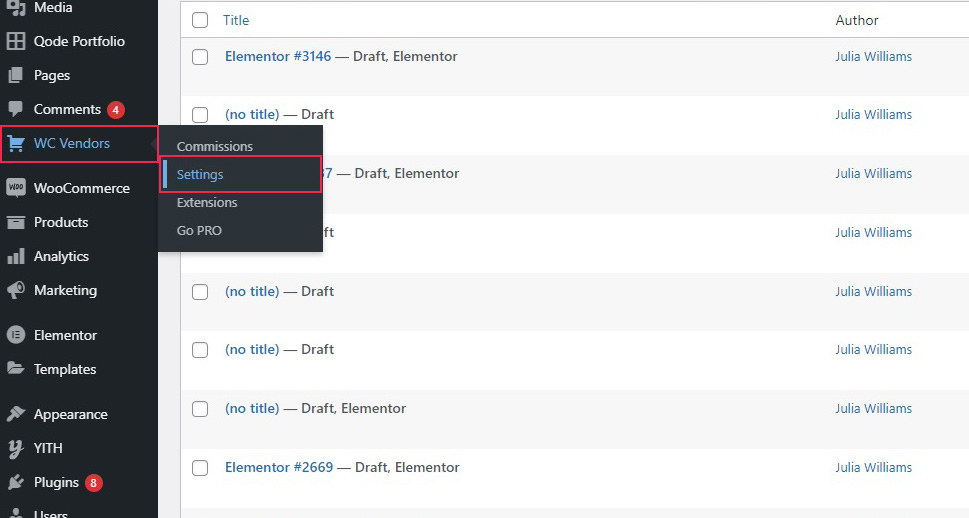
After you have done that, navigate to your WC Vendors/Settings. There are a lot of well-annotated settings so you can customize your marketplace to your liking. We will go through the basics here.
In the General tab, make sure the Vendor Registration box is ticked. This allows users to register as vendors. If you want to manually approve all vendors, tick the Vendor Approval, too. We will leave it as is. Click Save changes.
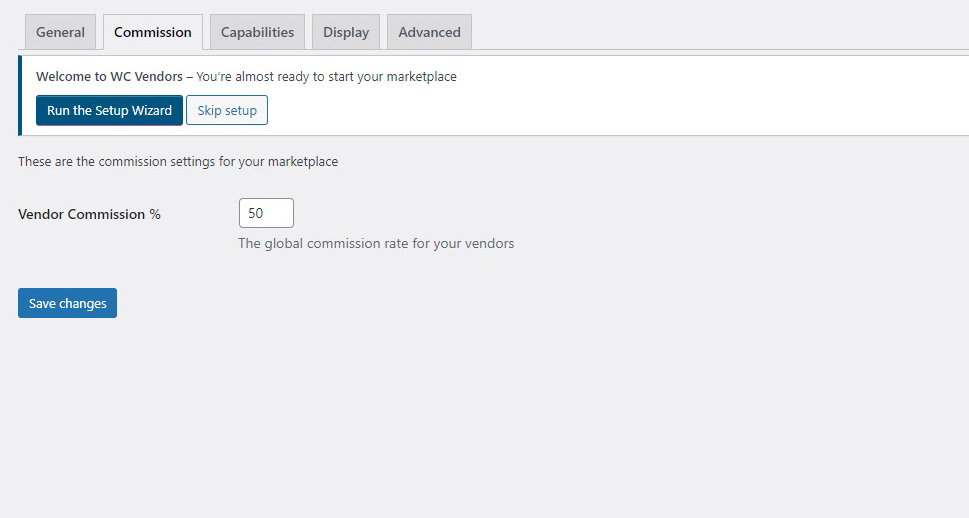
Next, in the Commission tab, you can set the vendor commission rate. The default is 50%, and that means that you and the vendor get half of each sale. According to the developer, this functionality can use whole numbers only.
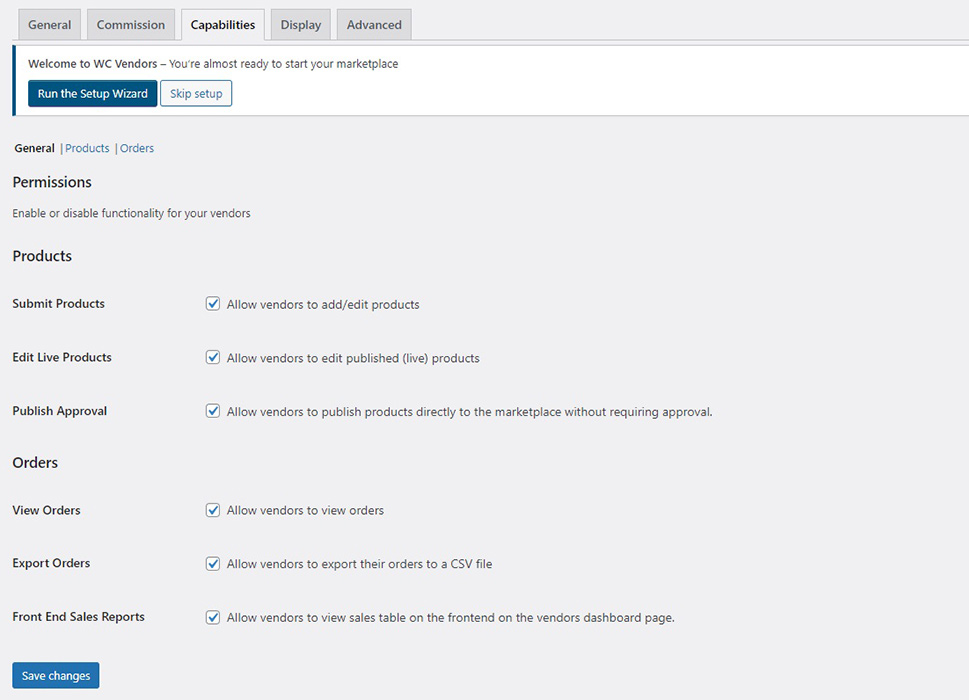
The Capabilities tab is where you give your vendors options to access the marketplace‘s functionalities. This tab has three subtabs. Under General, we will leave everything checked. This way, vendors will be able to add, edit and publish products without your approval and get reports on their sales and orders.
If you choose to do business this way, you have to be confident your visitors do not abuse your trust with inappropriate products. If you, conversely, choose to approve each and every product yourself, you better make sure you have the admin capacity to review everything. Your vendors will want their products on the market as soon as possible, and won‘t like waiting.
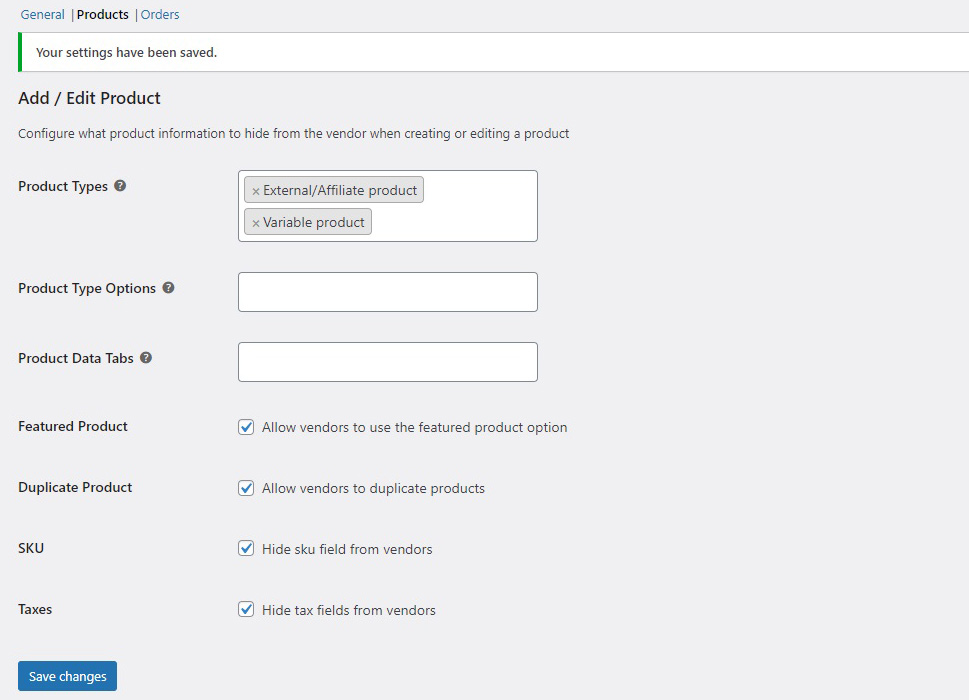
Under Products, you‘ll need to select the kind of products you wish to disable your vendors from selling by hiding certain options from the product creation interface. Since we are building something like Teachers Pay Teachers, wherein teachers sell unique, downloadable, self-made resources, we will select External/Affiliate product and Variable product for Product Types. Here you can also check to hide functionalities such as Featured Product, Duplicate Product, SKU, and Taxes from your vendors, too, as we shall. Click Save changes.
Under Orders, you can allow the vendors to access their order data. We will leave everything checked, as we want our vendors to have all the information they need and interact with their buyers directly, if need be.

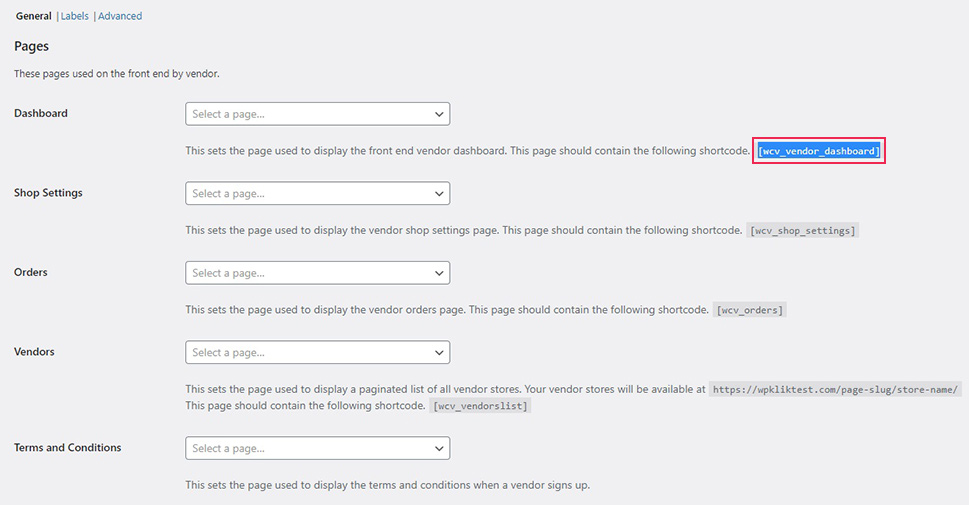
Moving on to the Display tab, we will find it also subdivided into three other tabs. Under General, you can assign your pages to vendors‘ interfaces. Sounds complicated? It really isn‘t. Simply create new pages for each category, copy each shortcode into the content field or add it using a shortcode block (for Gutenberg users) or element (for Elementor users), Publish the page, and select it from the appropriate drop-down menu.
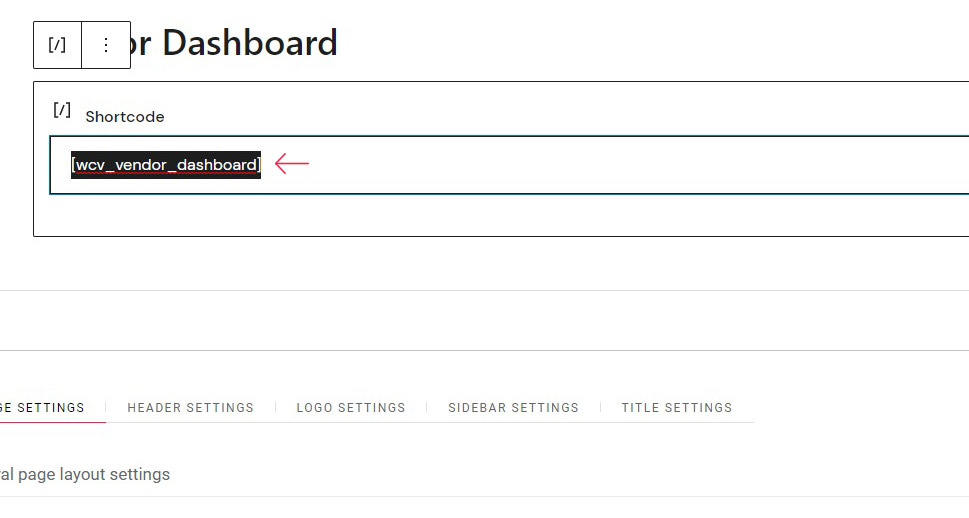
To create the vendor dashboard, for instance, copy the [wcv_vendor_dashboard] shortcode.
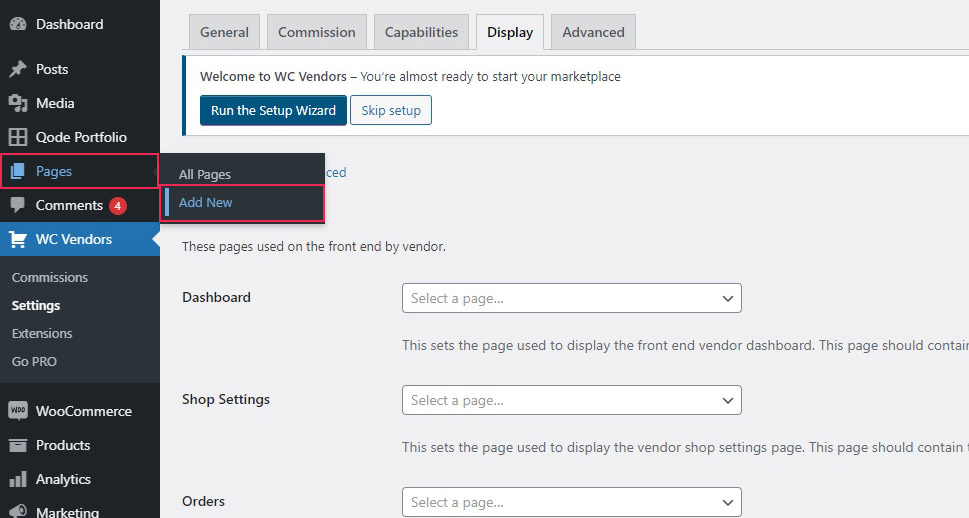
Then, create a new page by navigating to Pages/Add New to add a new page. Use right/click to open it in a new window, for convenience.
Next, name the page and add a shortcut block by clicking on the + sign and searching for the shortcut block.
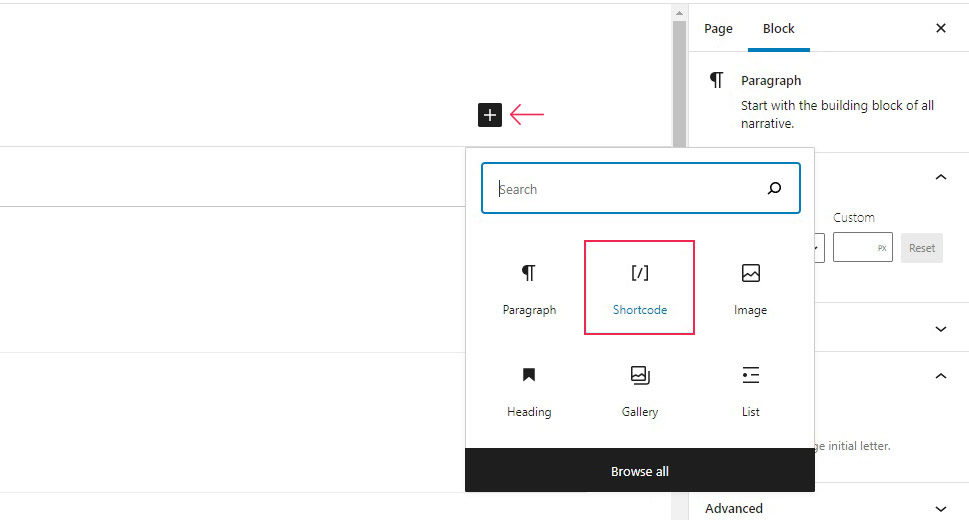
Paste the shortcut into the block‘s field, and click Publish.
Finally, in the plugin settings, under Display/General, select the Vendor Registration page.
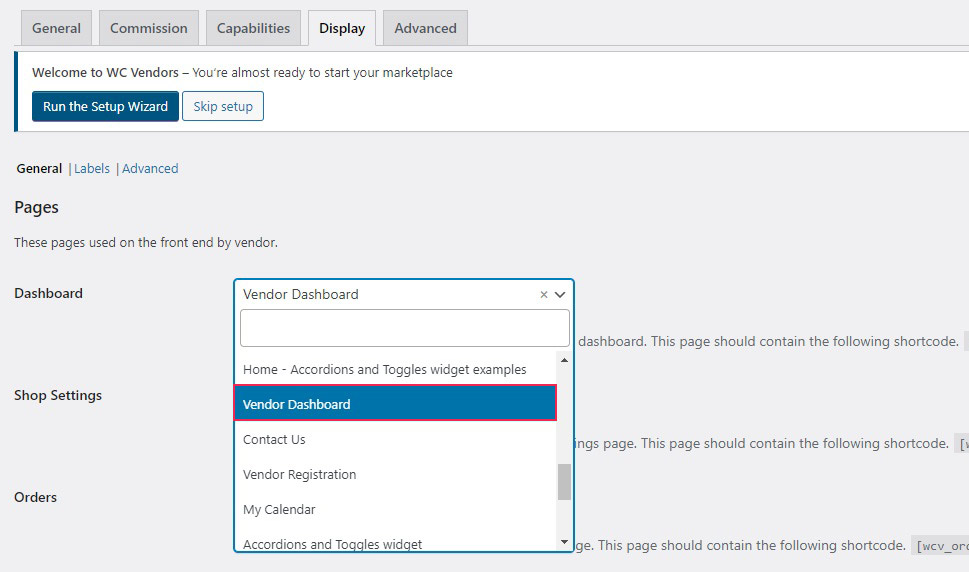
Repeat the above for all the other required pages, then scroll down. Note that the Dashboard, Orders, and Shop Settings pages are mandatory, while the others are optional.
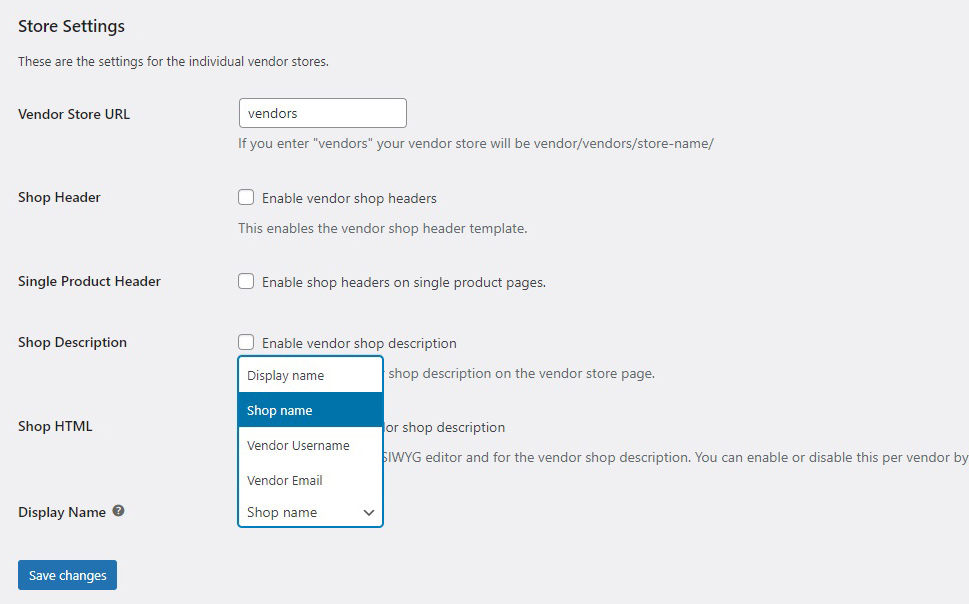
In the Store Settings section, you can further define the interface your vendors see. Under Vendor Store URL, we will leave the default vendors, but you can choose a custom URL for your vendors‘ store. You can also enable Shop Headers, Product Headers, Shop Descriptions, and the use of HTML in shop descriptions. We will leave all of these disabled. Finally, the Display Name menu governs how shoppers see the vendors. We will leave it at Shop name. Once you have set all the options on this screen to your liking, click Save changes.
Under Labels, you can set up the terminology for your website to suit your brand and style. We will leave everything as is, but you are free to customize these settings, too. The Advanced subtab is there in case you want to add custom CSS to the plugin, so we won‘t be touching that.

And that’s it, your plugin is now completely set up.
If you navigate to Users from your WordPress dashboard, you will see that you have two new user types: Vendor and Pending Vendor (with the latter useful only if you want to manually approve your vendors). The same goes for Products, in case you wish to approve all of them.
The user registration page will contain the vendor application link, and your vendors can begin trading.
In Conclusion
As you can see, creating an online marketplace such as Teachers Pay Teachers is a big job, but setting up a marketplace is just the beginning. Getting people to visit your website and sign on as traders is a whole other kettle of fish. Still, now you‘ve got the basics. If you put your shoulder to the wheel, the results… are still not guaranteed. You can‘t do better than your best, though, and, with this tutorial, you know all you need to get started.
