How to Set Up Site Kit by Google in WordPress

If you are accessing the internet at all, chances are you are using one or more of Google’s services. That’s no less likely if you are running a WordPress website. More than just a search engine, Google is a tech giant offering a multitude of services, and its popularity is beyond dispute. A large part of it is the general user-friendliness of Google’s services, and the capabilities of Google’s services to integrate with other systems. And Site Kit by Google is Google’s official plugin for WordPress integration.
With Site Kit by Google, you can integrate your website with a suite of Google’s tools and leverage them to improve the website’s user experience and overall performance. But let’s take this step by step. What is the Google Site Kit? What do you get from using it? We will attempt to answer all of these questions, and more, in this tutorial.
Here’s what we’d like to talk about:
Best Themes for Marketing
View Collection


Site Kit by Google, also known as the Google site kit, is a free plugin for WordPress. It was developed by Google to help WordPress admins and webmasters connect to and use certain Google services. There are plenty of Google tools useful to WordPress users, but this plugin doesn’t cover all of them. Instead, the developers have concentrated on tools they deem the most useful. Site Kit by Google connects your website to the following six Google services:
-
Search Console
-
Analytics
-
AdSense
-
PageSpeed Insights
-
Optimize
-
Tag Manager
You probably know what they do, but we’ll give you the low down here: Search Console optimizes your website for Google searches, Google Analytics tracks your visitors’ interactions with your website, Google AdSense outsources your ad management, PageSpeed Insights checks for loading speed issues, Optimize facilitates A-B testing of your website content, while the Tag Manager manages the tags (code snippets) used in analytics and marketing.
While all of these services are available to Google users separately, Site Kit by Google bundles them all and connects them to your website seamlessly. The first four of these services will even be available on your WordPress dashboard, while you will have to leave your website to use Optimize and Tag Manager.
As we’ve said before, this one plugin combines several of the most popular, and, from the point of view of the admin or webmaster, most useful Google services into one neat package. You have all of the most important stats and data available at a glance, and you can access them without leaving your WordPress website.
The fact that Site Kit is a WordPress plugin means that it also follows the WordPress creed: anyone can make a website, regardless of coding knowledge. While Google’s services often require some coding knowledge to set up and run properly, Site Kit by Google lets you connect to and use several important Google features without requiring you to edit the code of your website manually in any way.
Finally, a massive corporation such as Google recognizes that over 40% of all websites are run using WordPress. This is why it is not likely to become deprecated and abandoned, and if anyone can guarantee enough hands on deck, Google can. Moreover, it is completely free for the end user.
The downside, if there are any, is that for some use cases you will need to leave your website: the plugin will let you access all the details and functionalities of its services only on external websites. Still, it serves as a great indicator for the basics, making it an excellent choice for beginners or websites run by a single person or a small staff.
To use Google Site Kit for WordPress, you first need to install and activate the plugin. You also need to have a Google account and be logged into it.
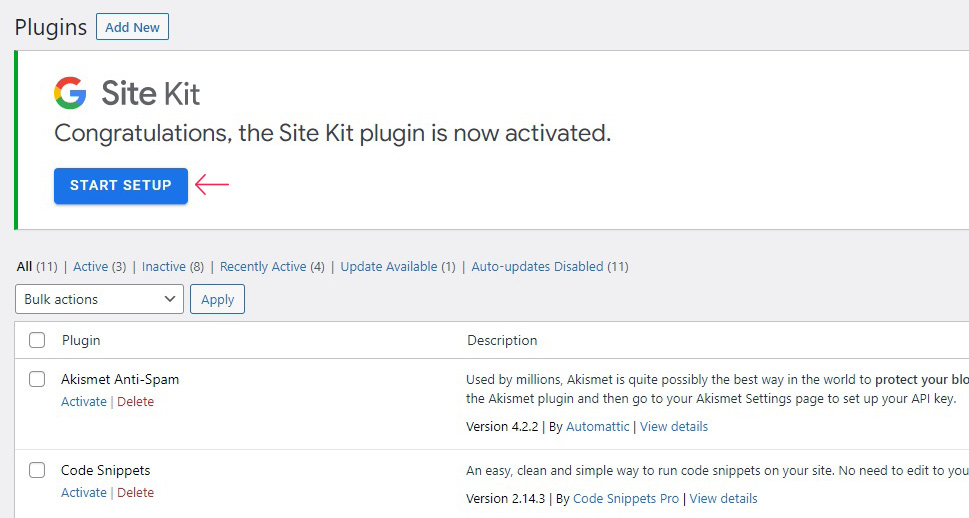
After having activated the plugin, you need to configure the plugin. Your website’s Plugins screen will show a notifications bar and the Start setup button which you need to click.
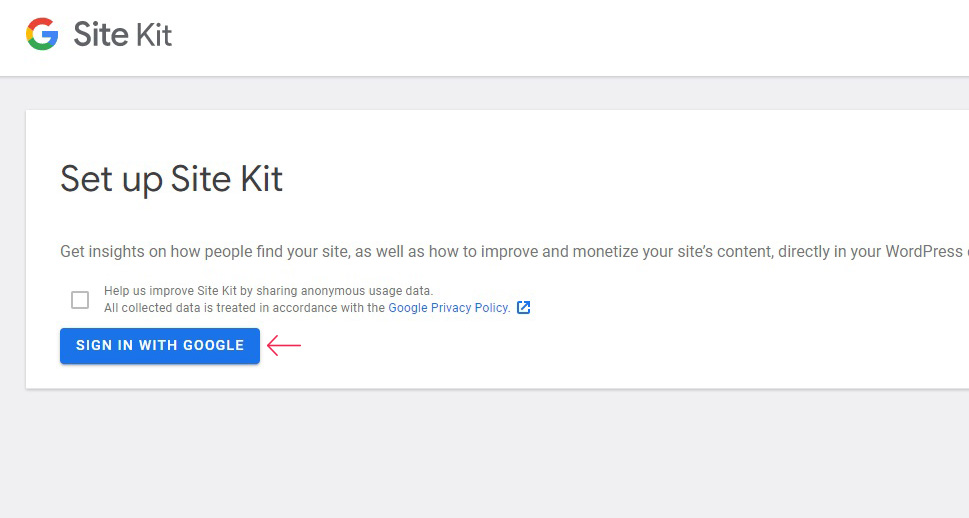
On the next screen, click the Sign In With Google button. If you want to share your usage data, you may enable Google to collect it by clicking the related checkbox.
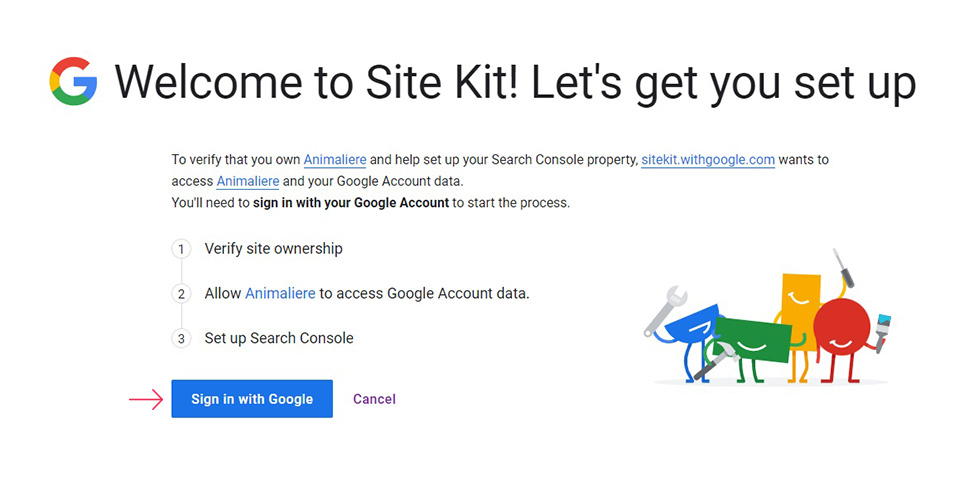
You will be taken to Site Kit’s page, where you need to opt in again by clicking on the Sign in With Google button.
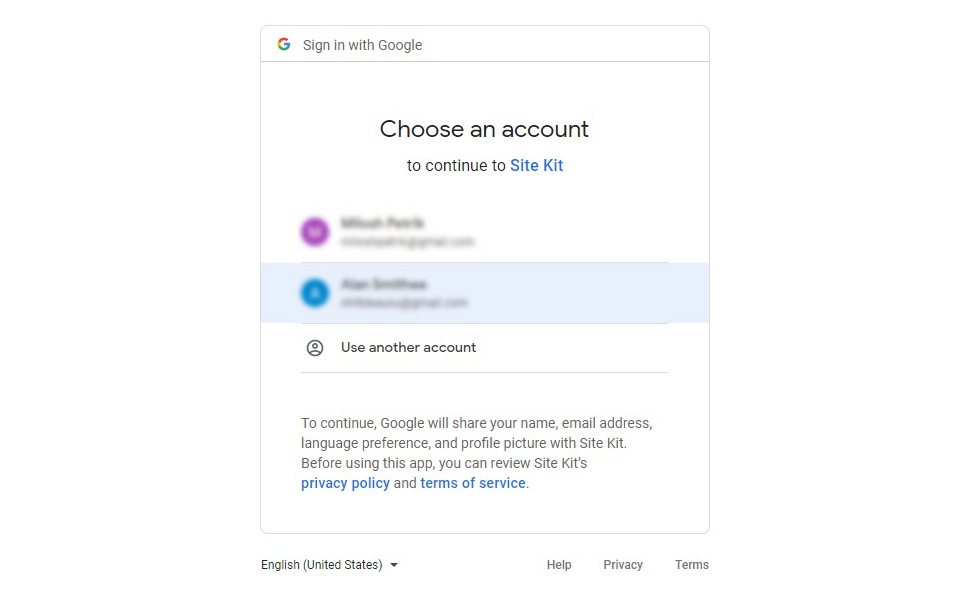
Next, select the account which you want to use to manage your website.
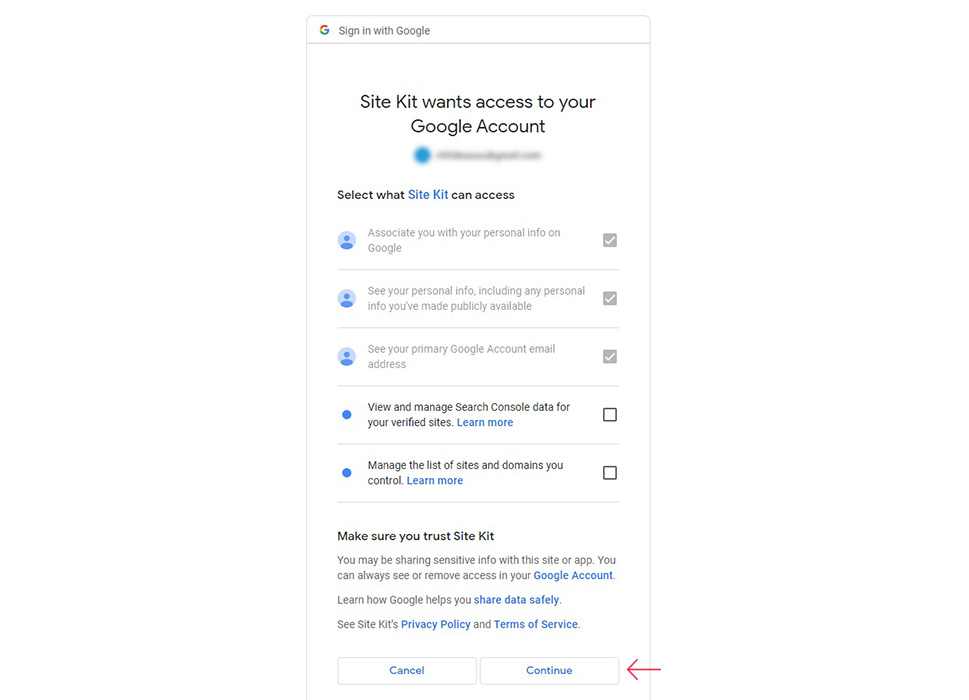
On the following screen, you need to permit Site Kit to access your data in order to function, then click Continue.
You will now be logged in. With that out of the way, let’s take a look at the operation of the plugin itself.
Navigating Google Site Kit
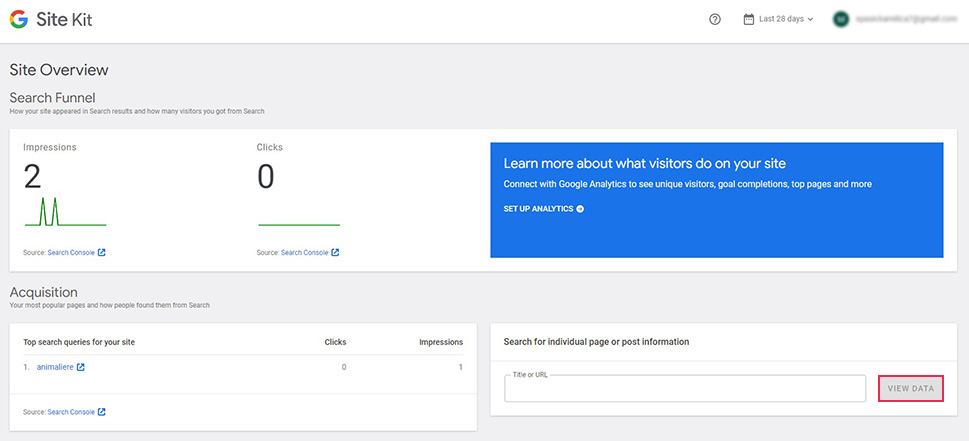
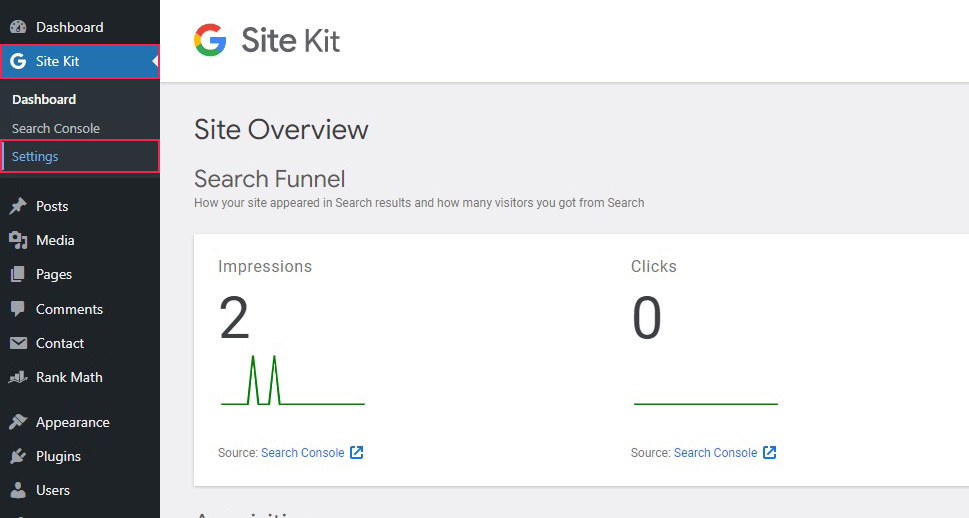
To access the data summary, navigate to Site Kit/Dashboard from your WordPress dashboard. As you can see, your website is now connected to Google Search Console and PageSpeed Insights. The results are shown in the Search Funnel and Acquisition sections for the Search Console service, and the Page Speed and Experience section for the PageSpeed Insights service.
You can see the summarized data for your website at a glance, and test all individual pages or posts by entering the URL in the field on the right-hand side and clicking the View Data button.
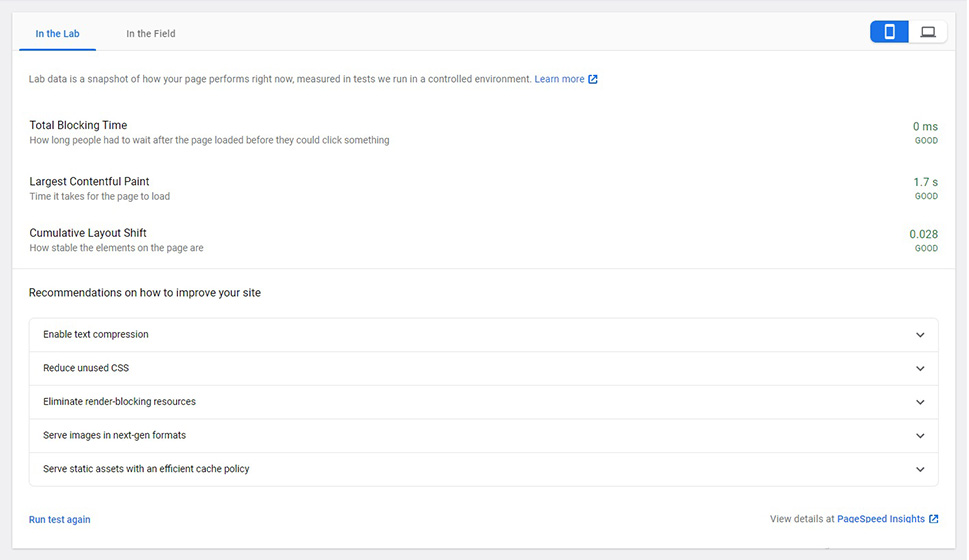
Scrolling down, you can see your website’s main metrics and recommendations on how to fix any arising issues.
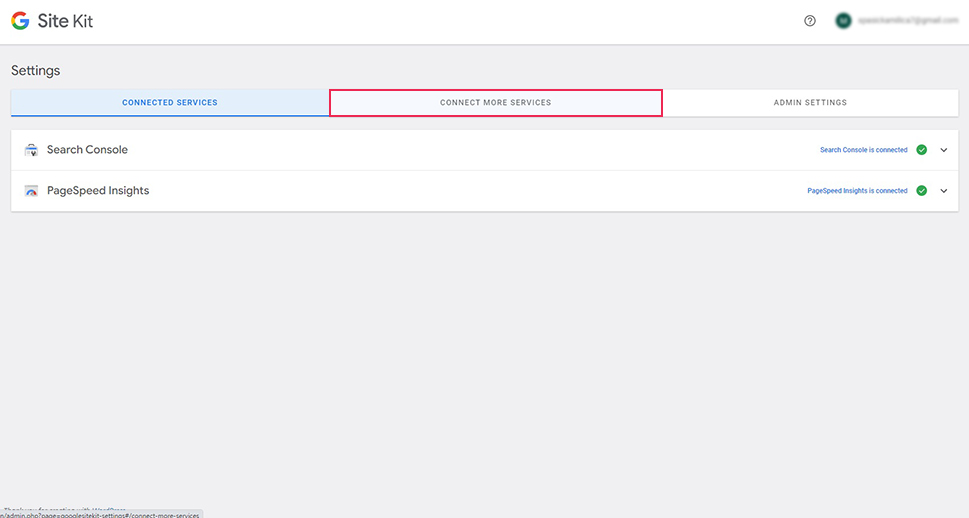
In order to connect the other available services, you need to navigate to Site Kit/Settings on your WordPress dashboard.
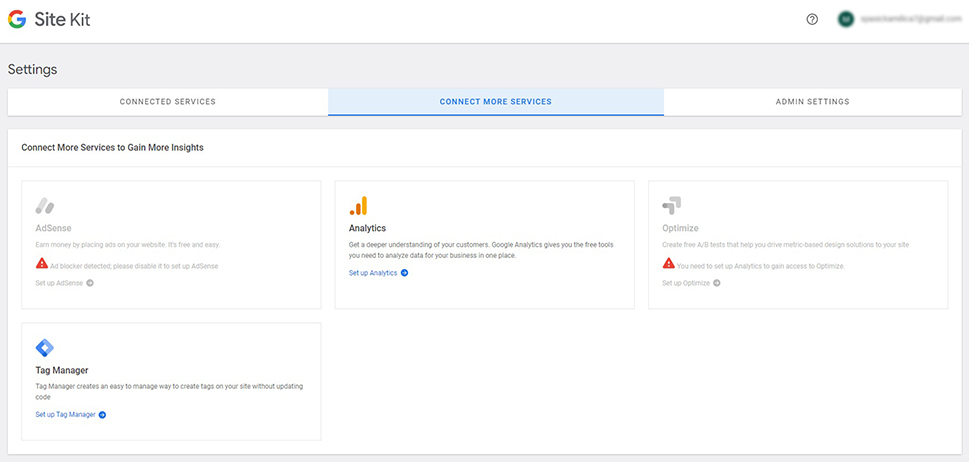
On the Settings screen, you can see which services your website is connected to. If you want to connect your website to more Google services, select the Connect more services tab.
And here, all you need to do to add a service is click on the related setup link and follow the prompts on the screen. If the service is available to you, you will see a normal blue link and the logo of the service in color. If there are issues, you will see the logo of the service in gray, a warning sign icon, and an explanation. In our case, AdSense is not available because the admin is using an ad blocker, while Optimize is unavailable because it requires prior installation of the Analytics service.
Once you add a service, the summary of the data will be available on the Site Kit/Dashboard screen.
In Conclusion
As you can see, installing and using Google Site Kit is relatively quick and easy. Google is the global leader in terms of search engine usage, so it stands to reason that, even if you oppose Google as a corporation, you need to make your website visible to its users. Site Kit by Google will let you do it quickly, easily, and without any need to code.
