How to Set Up Google Tag Manager in WordPress

With WordPress alone, you can create any kind of website you like. And let us assume you have. What’s next? If you haven’t planned it from the outset, you are probably looking into monetization. And to do that, you need additional tools. Marketers and analysts use pieces of code called tags to help them execute marketing campaigns and gauge their effectiveness. Not everyone can code, though: that’s what content management systems, such as Google’s Tag Manager, are for.
If you are reading this, you are probably looking to employ Google Tag Manager on your WordPress website and add it to your array of SEO optimization and analytics tools. But what is Google Tag Manager, exactly? How does it work? Do you really need it? These are the questions we will be answering in the first parts of this tutorial.
Here‘s what we‘ll be talking about:
Qode Themes: Top Picks
View Collection


Simply put, Google Tag Manager is an interface used to manage all the tracking tags on your website. You might say that that hardly answers anything, and you‘d be right. So let‘s get to the point: the tags we are talking about here are JavaScript and HTML tags. They are used to integrate all sorts of third party software into websites.
Tags add various functionalities to websites, including analytics, marketing campaign management, testing, personalization, conversion tracking, and more. If you are using Facebook Pixel or Google Analytics, for instance, you probably have the requisite tag as part of your website‘s code.
There are plenty of benefits to Google Tag Manager. The first great advantage we can think of is that it squares neatly with the WordPress credo: instead of manually coding each tag, you can simply use Google Task Manager to generate it and add it automatically. Not only does this help avoid human error, but you also avoid the need to employ a developer or admin to do it: your non-coding staff can add, update, and test third party scripts, and roll back any changes if necessary.
Secondly, though this could have been a firstly, the functionalities: you get more control and easy oversight of your tags: they are all in one panel for easy access and review. You can use these tags to optimize your website for Google – it being the most popular search engine by far.
Finally, it‘s free, or at least it‘s free for the end user.
This tutorial presupposes you have a Google account. If not, you should go and make one – they, too, are free for the end user – and then come back to the instruction section.
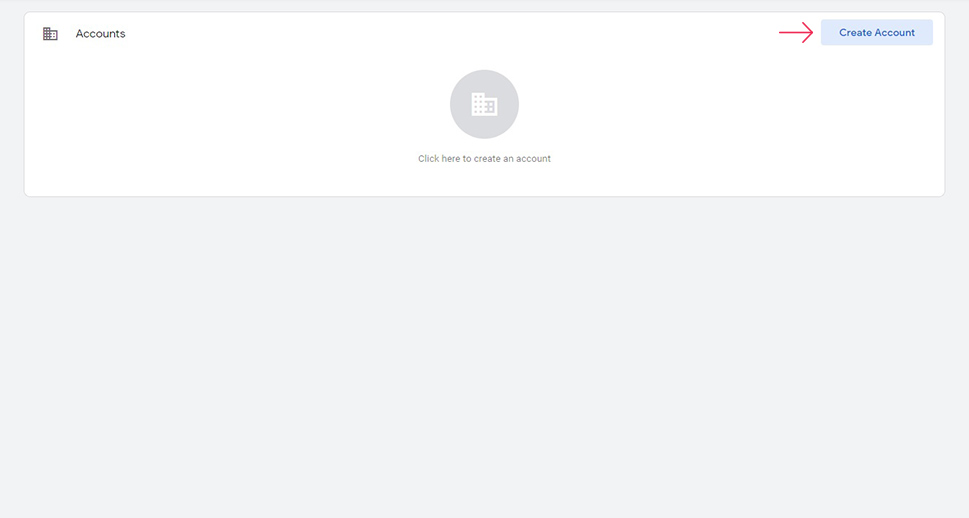
Once you have created your Google account, log into it and go to the Google Tag Manager website. You then need to create a Tags account. Start by clicking the Create Account button.
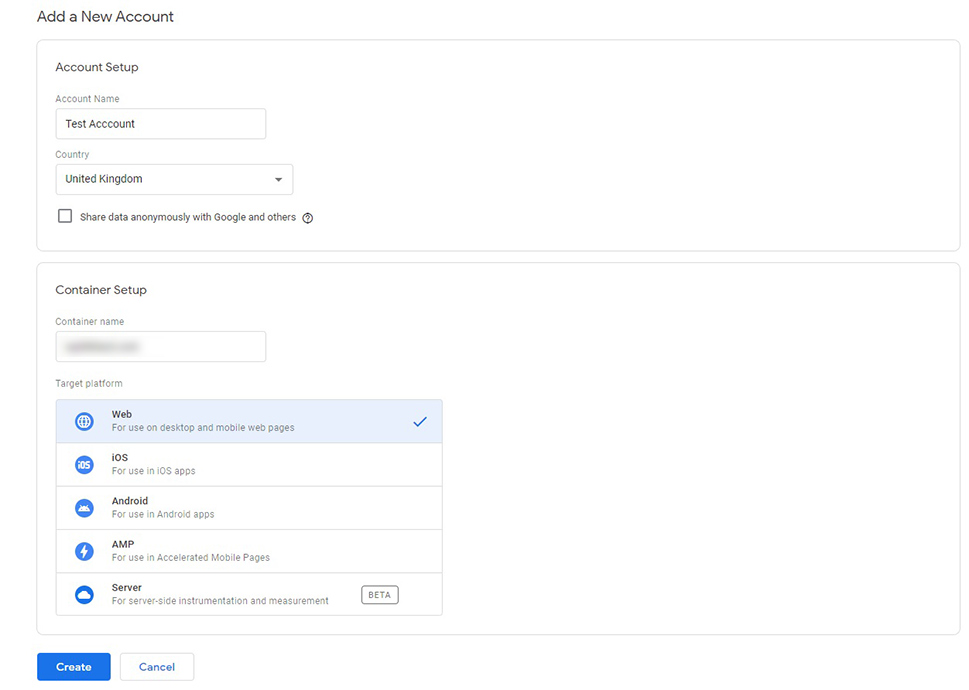
In the Account Setup section, you need to choose an Account Name and Country, choose whether to opt into sharing data anonymously with Google and others (we didn‘t), and then move on to the Container Setup section. Select a Container name (this can be anything you like, provided it does not contain special characters) and select the Target platform. Since you‘re setting up Google Tag Manager for a website, select Web. Once done, click Create.
Next, you will need to accept the terms and conditions of the service. Scroll all the way down and check to accept the GDPR-compliant data processing terms (a must in the European Economic Area; different jurisdictions may have different data processing requirements), and then click the Yes button.

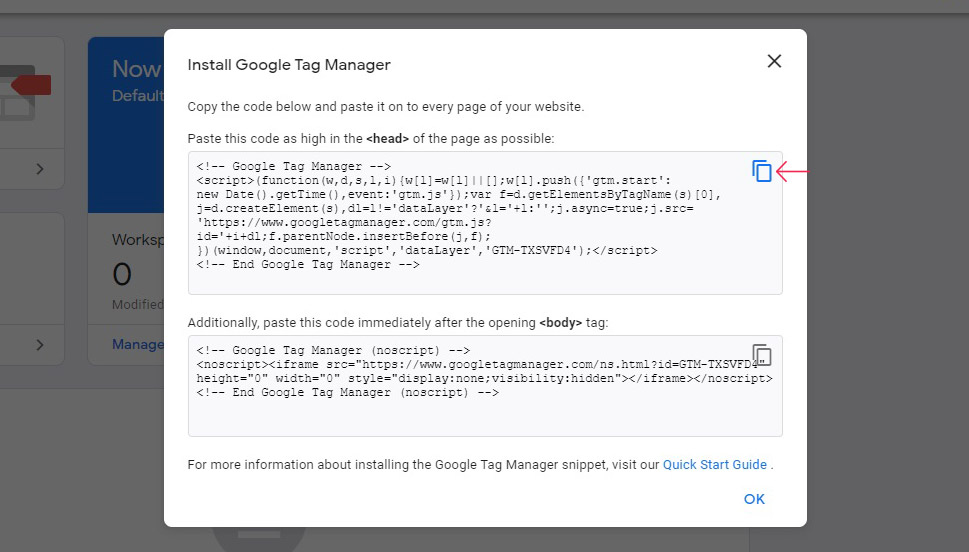
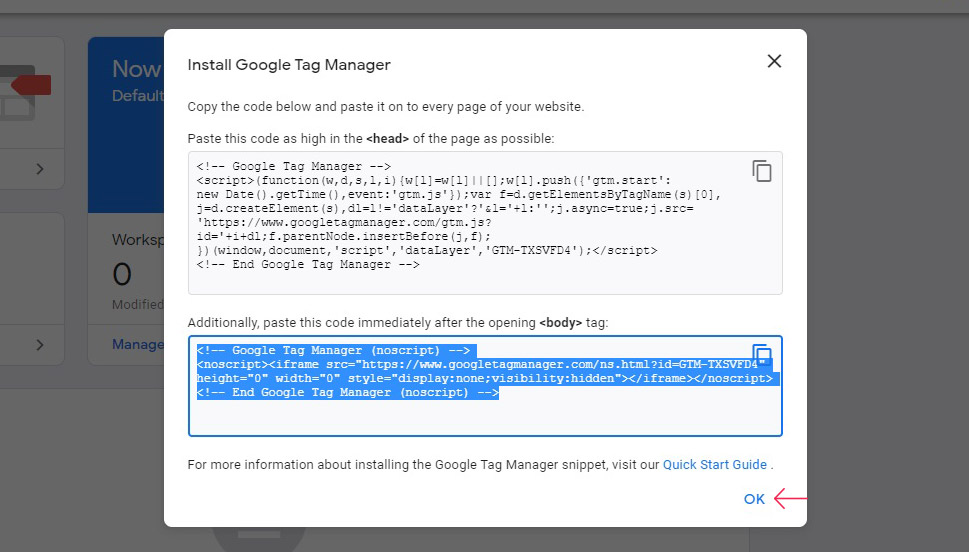
You will now get two bits of code you need to add to your website code. Leave this page open, you will need it later. Copy the first bit of code by clicking on the copy button on the right-hand side of it.
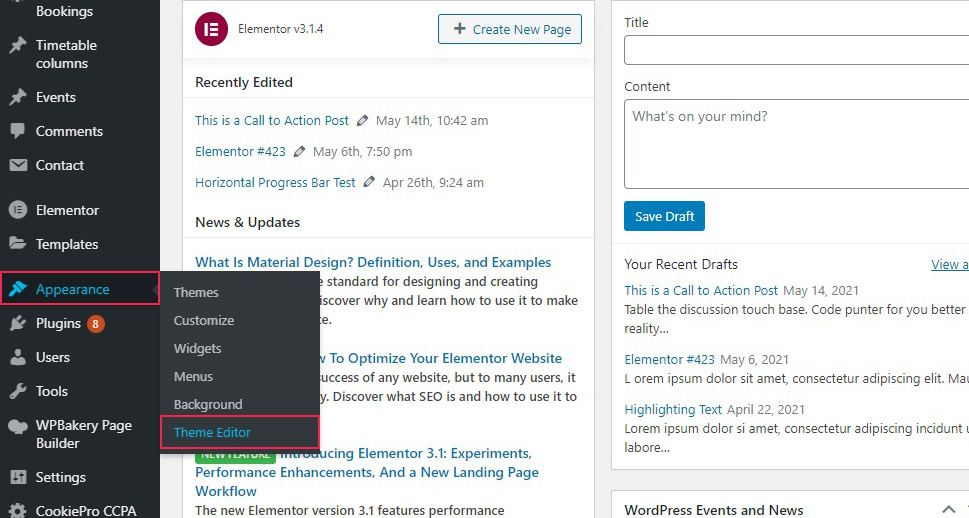
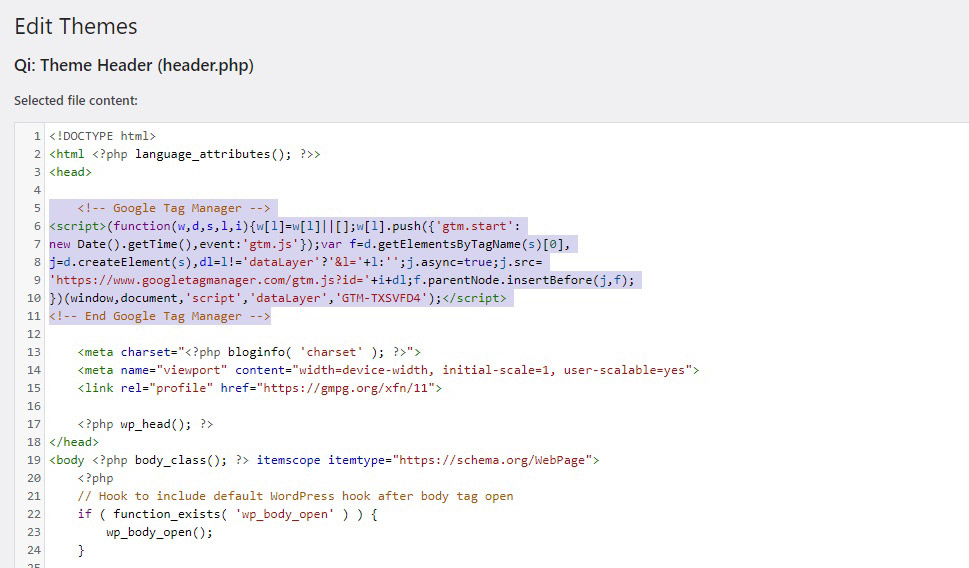
Next, navigate to your theme editor from your WordPress dashboard by selecting Appearance/Theme Editor from the right-hand side menu.
Select the website header file (header.php) from the left hand-side menu. It may have a different name depending on the theme you are using, but it will always be annotated as header.php. Paste the first bit of code between the <head> tags (between <head> and </head>, as close to the opening tag as possible), making sure not to disturb any other code. Leave this page open.
Move back to your Google Tag manager page, and copy the other bit of code. Again, leave this page open, you are not done.

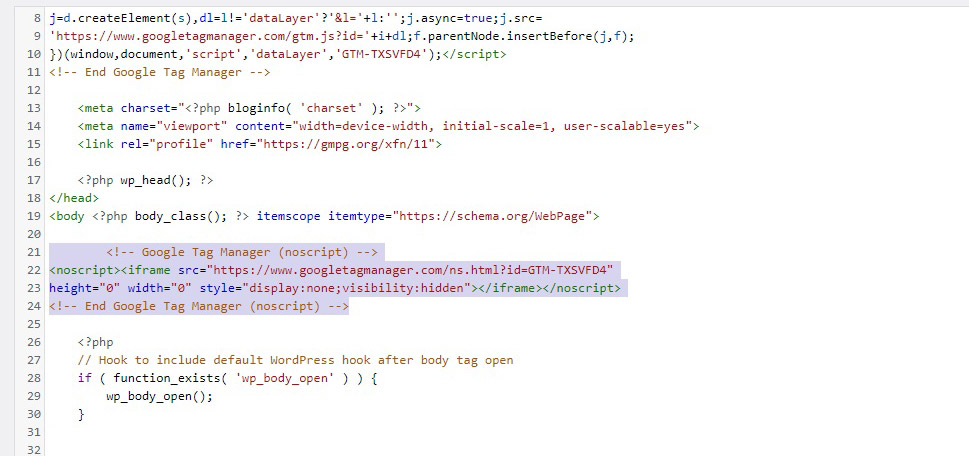
Get back to your theme editor and copy the second bit of code in the body section of your header.php file. Again, paste the code between the <body> and </body> tags, as close as the opening tag (<body>) as possible, making sure not to disturb any other code. Click Update File.
Go back to your Google Tag Manager and click OK.
And your Google Tag Manager is now all set up, easy as that!
One word of warning, though: adding code directly into your theme files will result in your having to add them back each time a theme is updated. To keep all the changes separate, you will need to create a child theme and install it and modify it instead or use a plugin to add custom code snippets such as these. Note that there is also a way to update a WordPress theme without losing customization.
Once you have set up Google Tag Manager on your WordPress website, you‘ll want to add some tags to it.
Now, a tag has two main components: the tag itself, and the trigger. The tag is a piece of code which integrates analytics functionalities with websites and apps. The trigger is a set of circumstances under which a tag is active: the situation in which the code is run. A tag can be modified using variables which further describe and define the operation of the tag.
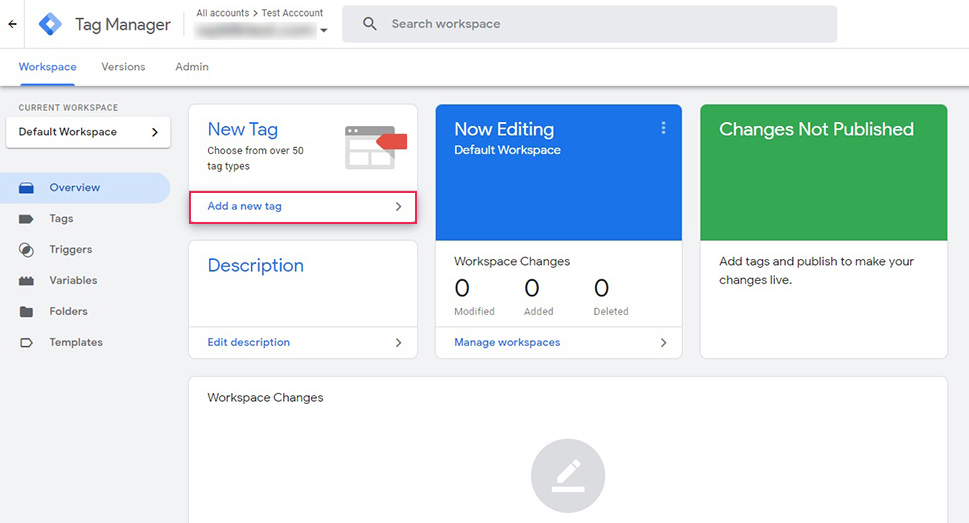
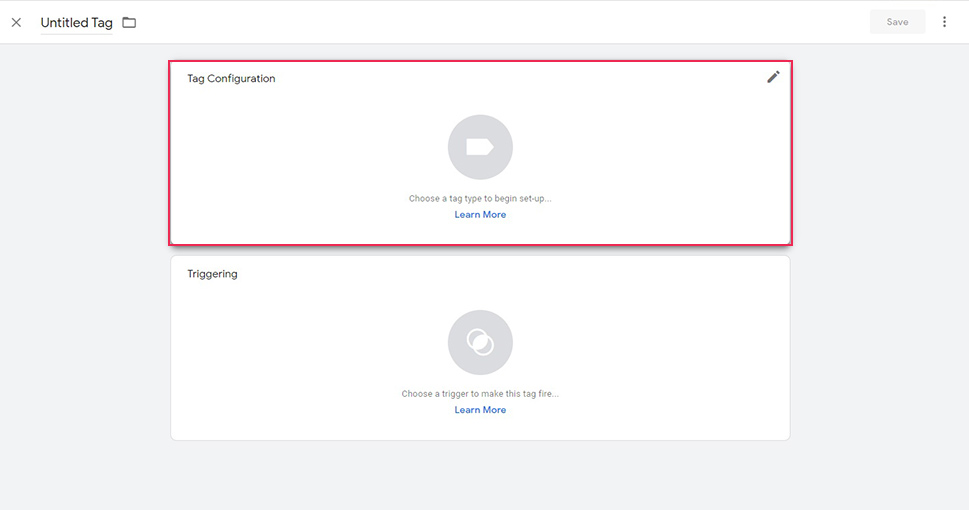
To get started with a tag, simply click the Add a new tag button.
Click on the Tag Configuration area to select a tag.
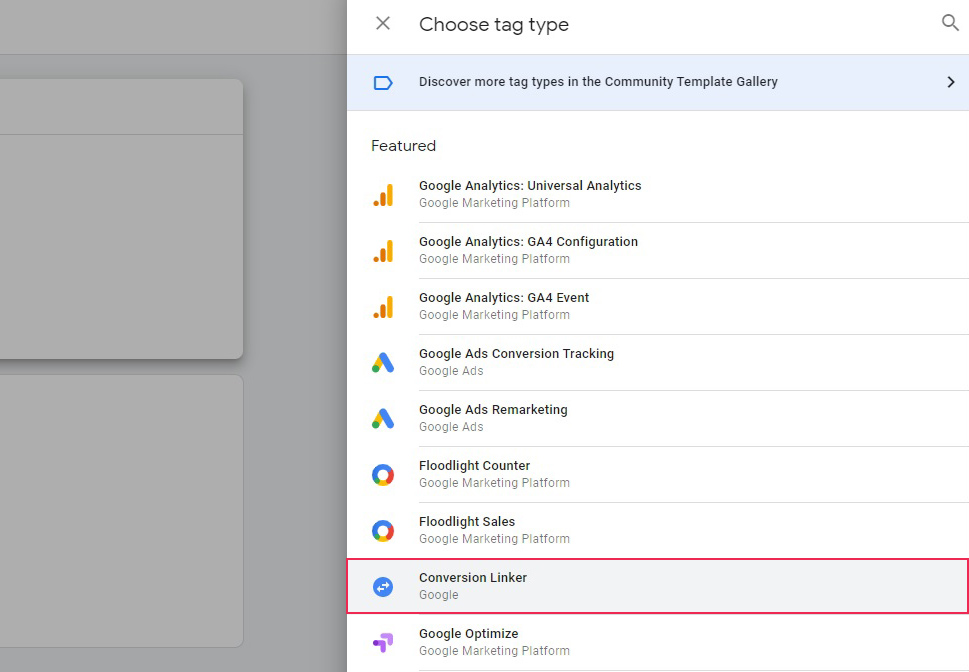
Choose a tag from the right hand-side menu. There are loads to choose from and demonstrating the ins and outs of all of them is beyond the scope of this demonstration. The tags offered in the menu are the ones created and supported by Google, but they do not represent the definitive list. Coding-savvy users can create their own.
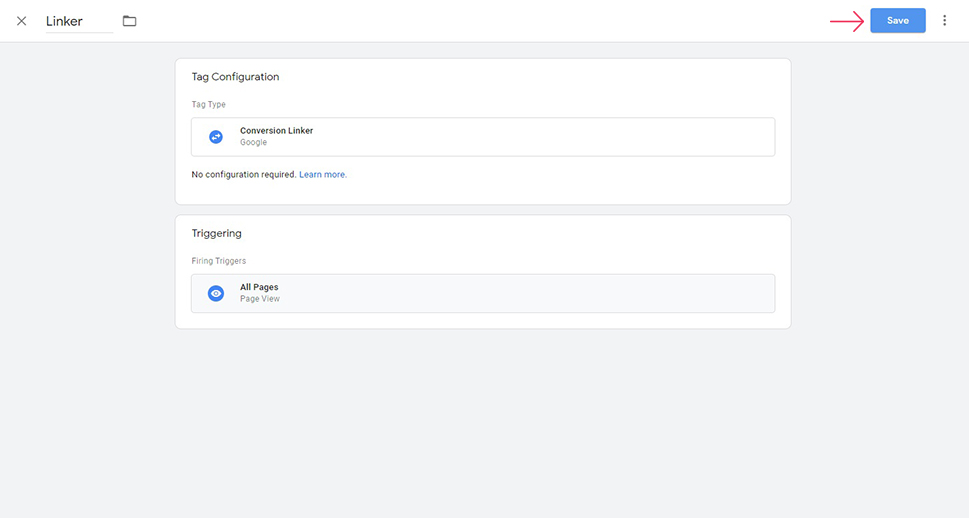
For the purposes of this demonstration, we will go with Conversion Linker. This tag is used to track clicks from ads, and you need it to measure the effectiveness of your ads.
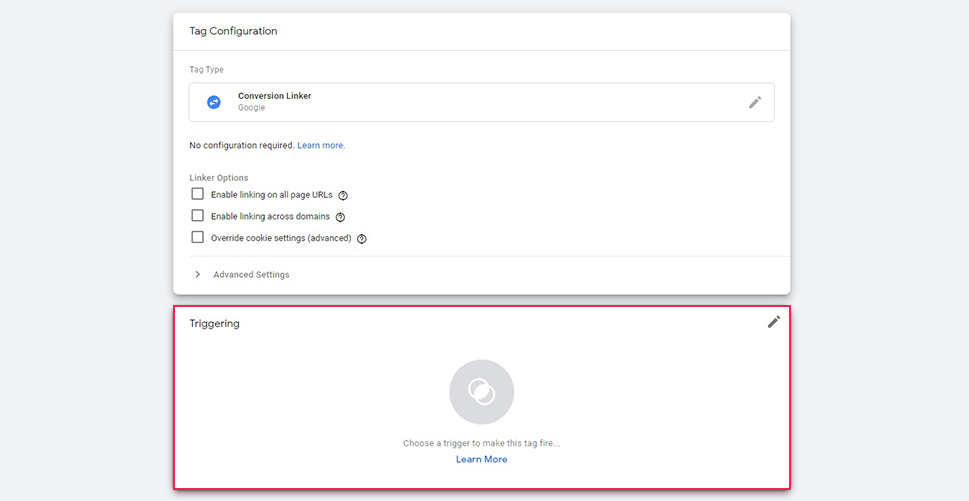
Some tags require some other data to work. The Conversion Linker does not, but it does come with some options. We will leave it as is. Click the Triggering area to customize it.
We will select All Pages so that the tag is active for each page view for all pages of the website, but each tag can have lots of different functions.
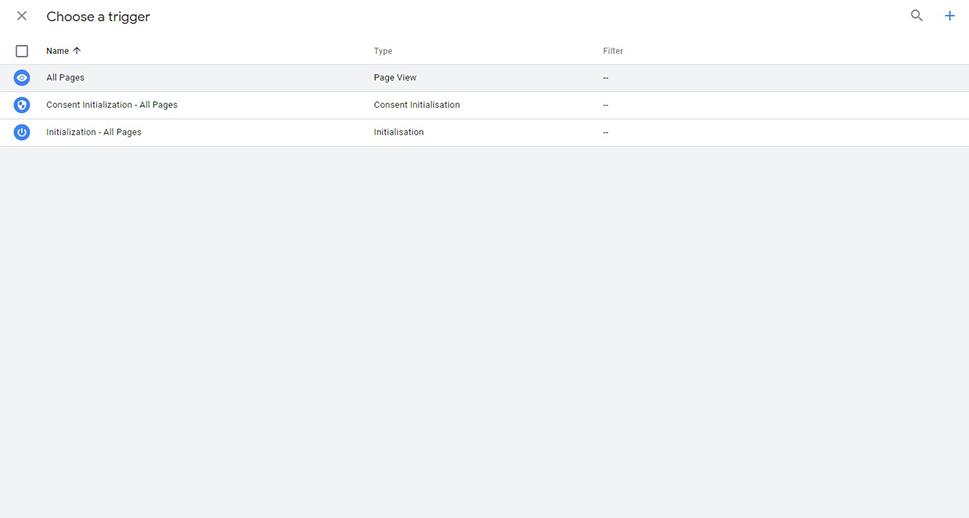
You can add exceptions (and other variables) to your trigger, but we won‘t be doing that for this demonstration. Instead, we will name our tag Linker and click Save.
Of course, this is just the default setup of a tag – our tag doesn‘t do anything actually before it‘s fully configured. The 50+ tags offered by Google Tag Manager have a myriad of functionalities and triggers, and we couldn’t hope to review all of them in the scope of one article.
We will say, by way of example, that one of the commonest uses for Google Tag Manager is to deploy Analytics events, but you can also use it to add Facebook Pixel (if you don’t want to install it using code, a plugin, or a Chrome extension) and manage your Facebook marketing efforts. Google Tag Manager can also be used to set up CrazyEgg to track user behaviour on your website, integrated with WooCommerce to fine-tune your online store, and that is just a few of the available functionalities.
In Conclusion
As you can see, setting up Google Tag Manager in WordPress is easy, free, and takes next to no time at all. If you want to leverage Google‘s awesome power to help your website reach your intended audience, you can‘t afford not to invest some time in it. Google is there whether you like it or not: all you can do is make it work for you more or better than it does for your competition.
