How to Host a Virtual Event on Your WordPress Website

If your work is centered around hosting any kind of event – be it business-related, educational, or simply meant for socialization or entertainment purposes, then having WordPress as a website platform for promoting and hosting your event is practically ideal. Namely, WordPress comes with the ability to add and expand just about any type of functionality you might need with the help of many available third-party plugins. Due to this flexibility and scalability, and also thanks to many great premium WordPress themes that can be found on the market, you can build just about any kind of website imaginable using WordPress. Of course, the same goes for event-oriented websites as well.
Now, when it comes to scheduling and hosting virtual events in particular, there are plenty of scheduling plugins for WordPress available on the web you can use for this purpose. Still, to create a virtual event on your WordPress site, doing it with the help of a plugin is simply not enough. You also have to use one of the video conferencing services (like Zoom or Google Meet, for example) that will allow you to schedule a video conferencing call with a link. Then, after creating an event using a scheduling plugin of your choice, you can connect your video conferencing service and a plugin by adding a link for the virtual event you’ve previously created.
We will show you how to go through all the steps required to successfully host a virtual event on your WordPress site using Zoom – a service ideal for hosting video and web conferencing events, including webinars, online classes, online meetings, and more. Then, we will show you how to add your Zoom link using two different WordPress plugins.
We will cover:
When it comes to hosting virtual events, one obvious benefit that first springs to mind is the fact that it requires no direct physical presence – and this results in many other benefits as well. For example, you won’t have to bother with dressing up or worry about the venue, or anything else that relates to hosting a live event, no matter its scale. This means that virtual events allow you to relax a bit more compared to physical events. Also, given that you won’t be required to take care of costs related to things like venue and transport expenses or even food for the attendees, you can expect to save up quite a bit, as well.
Moreover, by organizing an online event, you will easily have access to any kind of guest-related data since they will most probably be required to fill in some kind of information when applying for the event attendance itself. Plus, the attendees will also be able to access different types of data related to the event, like any of its materials (recordings, notes, and other data) even long after the event is over. Finally, physical types of events can easily have some capacity problems due to the venue itself not being big enough, for example. And this is not the case with virtual events as it’s way easier to have many people online present in one virtual “room” at once.
While it’s true there are many benefits to using virtual events, we cannot overlook some of their downsides as well. For starters, just the mere fact that your event is hosted online may cause many unexpected technical issues to occur. These can be related to internet connection issues, sudden server glitches, video/audio or security problems, and the list goes on. Alternatively, the issue can come from the user side as well – they can have some troubles seeing or hearing you, or may even have difficulties joining in altogether.
Still, despite all these potential downsides of hosting a virtual event, being aware of them allows you to try and solve plenty of them in advance. For example, you can take care of potential security troubles by creating stronger passwords, use encryption, etc. Also, make sure to have a backup plan in store in case user errors and other connection issues occur. Thinking of how you can overcome potential problems in advance won’t eliminate them completely, but can help you handle the situation much better so that it doesn’t inconvenience your attendees and ruin their experience.
Now, if you want to use your WordPress site to host a virtual event, there are a few things you have to take care of first, so let’s go through them.
Events WordPress Themes
View Collection


For hosting your virtual event on the WordPress platform, you need to have access to a few different tools. Aside from things like a computer and internet access, you also have to have a quality camera, headphones, and a microphone. There are plenty of those on the market, at decent prices too, so you don’t have to worry about emptying your budget on conferencing hardware. Once you take care of that, you can start thinking about your event software and a plugin. For the purposes of this tutorial, we will be using Zoom as our video calling and conferencing software of choice, but there are many other similar tools you can use as well, like Google Meet, Facebook Live, BlueJeans, etc. Just make sure that your platform of choice comes with the ability to create an invite link for your event and you’ll be able to follow the rest of our tutorial with ease.
As for scheduling plugins, we’re going to show you two popular options – The Events Calendar and Timetable Responsive Schedule. The former comes completely for free and has many professional features for smoothly creating virtual events, while the latter is a premium plugin, but comes with better customization options that will allow you to fit your website or theme design with ease. In fact, you can find many WordPress themes integrated with Events Calendar as well as themes that come with the Timetable Responsive Schedule plugin, which is only further proof of their quality.
Zoom is a great platform for hosting events because even its free version has some great features for video calling and online events. For example, it will allow you to have unlimited one-on-one meetings and can host up to 100 people at once, with group meetings that can last up to 40 minutes. Plus, it comes with some great filtering options that will allow you to brush up on your looks and be ready for any virtual meeting or social event, as well as different background features.
If that’s not enough for your virtual event needs, you can look into the platform’s premium options (starting at $149.90 a year) that offer many extended features, such as the ability to increase the number of participants up to 1000, host group meetings for up to 30 hours, social media streaming, and more.
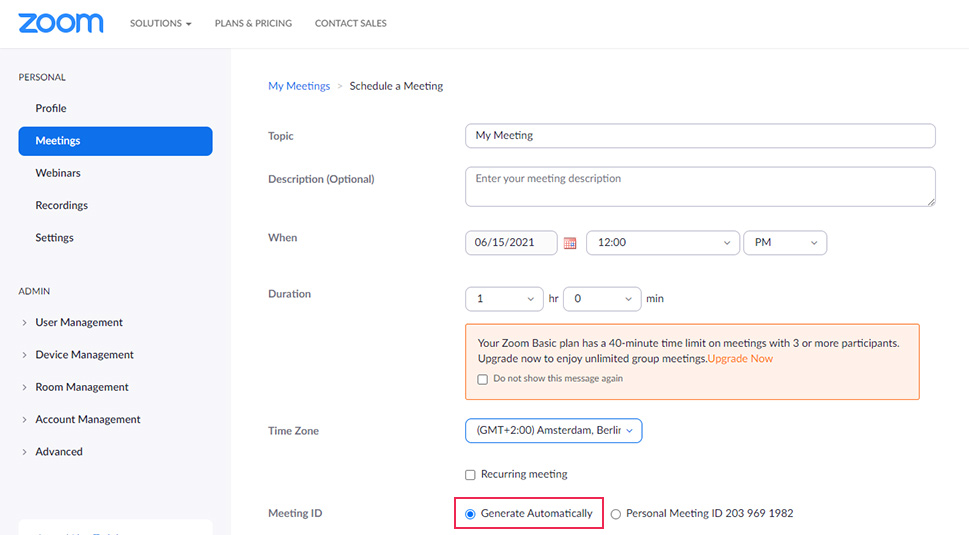
To start setting up Zoom, simply create a free Zoom account and hit the button called “Schedule a Meeting”.

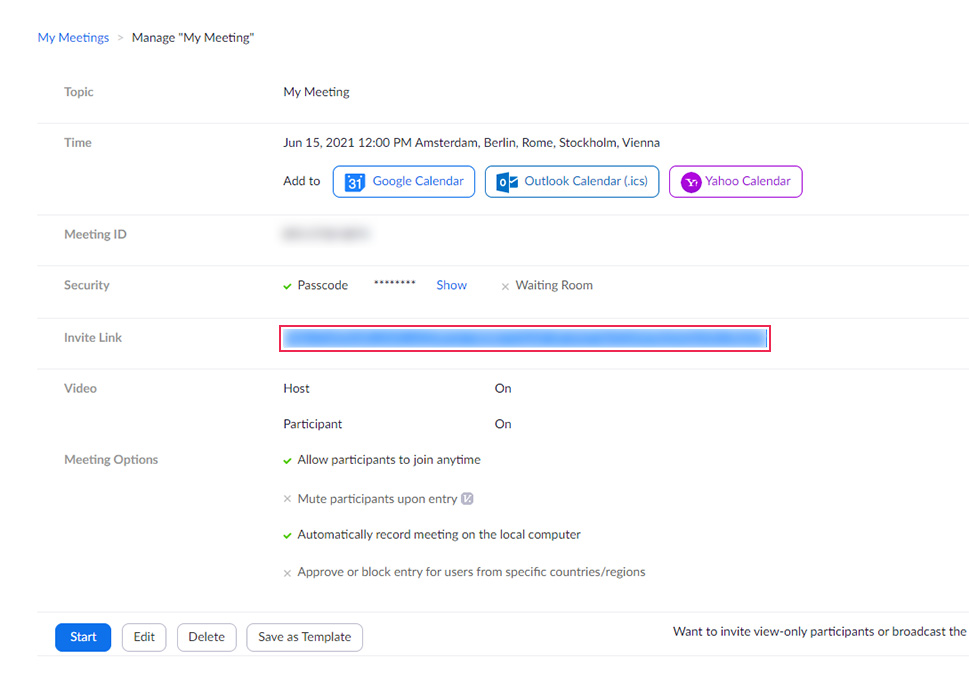
Next, enter info related to your event topic, insert your event description, date and time, as well as the time zone where you will be hosting the virtual event from. As for the Meeting ID, you should check the option that says Generate Automatically.
In case you want to have more security during your event, we suggest creating a passcode.
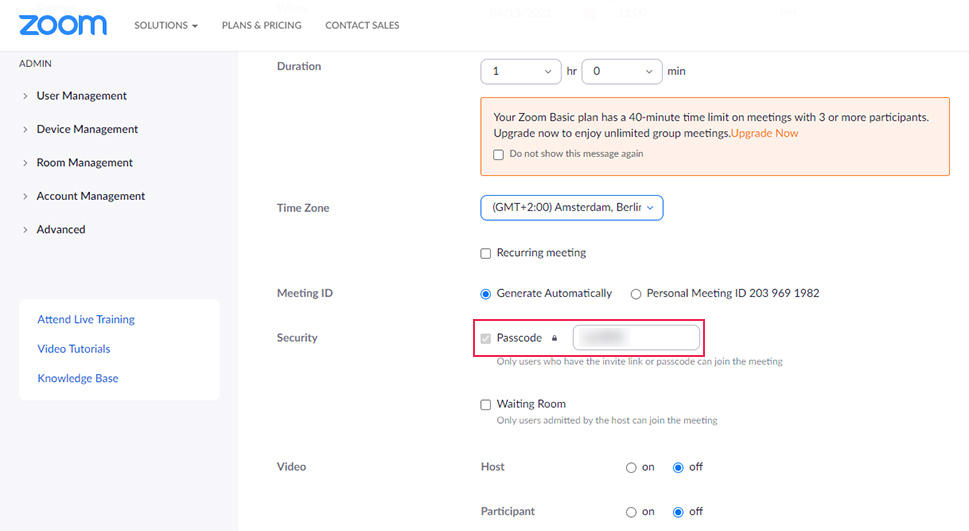
You will also be able to switch the video on or off for either the host or the participants (or both), allow them to join anytime, mute them upon entry, and automatically record the meeting on the local computer. In addition, you will be able to approve or block entry for people that come from specific countries or regions.
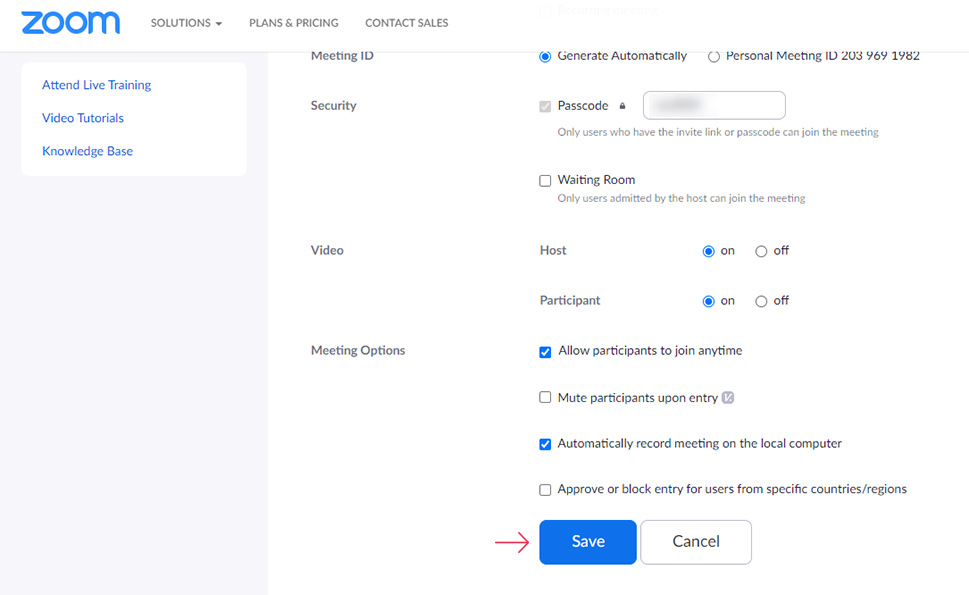
Once you’re done with setting the options for your meeting, you can go ahead and click on Save.
After creating your meeting, you can copy the Invite Link or simply save it somewhere for later use.
Like we’ve already mentioned above, The Events Calendar plugin is available for free and can be easily downloaded on WordPress.org. No matter if you need to organize a one-on-one event or a meetup on a grander scale, this plugin has everything you need to set it up with complete ease. Aside from allowing you to quickly create your events, it also comes with a Calendar month view with tooltips as well as day and event list views, Google maps, event search, and plenty more. Of course, it also allows you to publish links that lead to your virtual events.
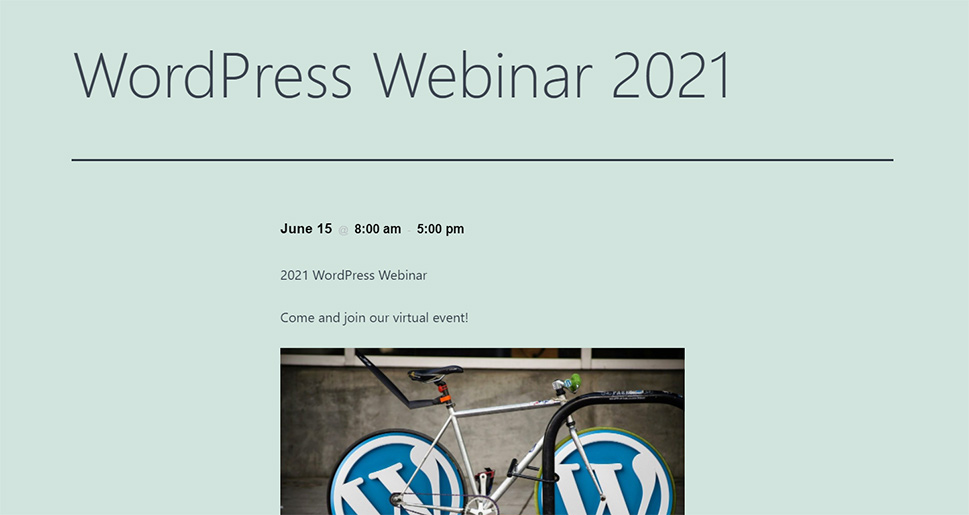
After installing the plugin and activating it, head to Events >> Add New. Then, simply add your event page title and insert your event information as well as any related media using blocks.
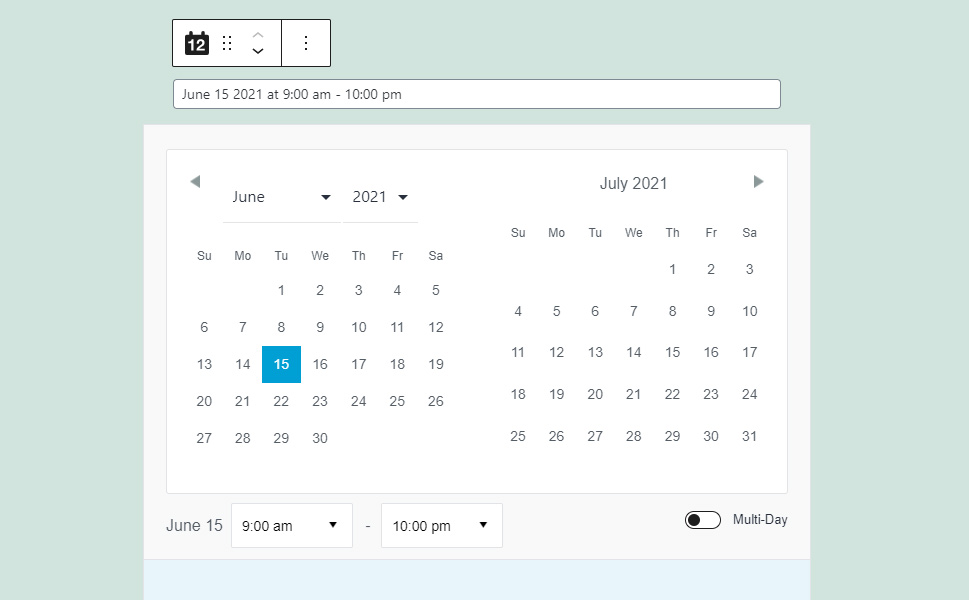
The event page already contains some fields related to your event that you will be able to fill out.
First, make sure to select the desired date and time by clicking on the date and time block (you will notice this block instantly as it already contains some default time and date).
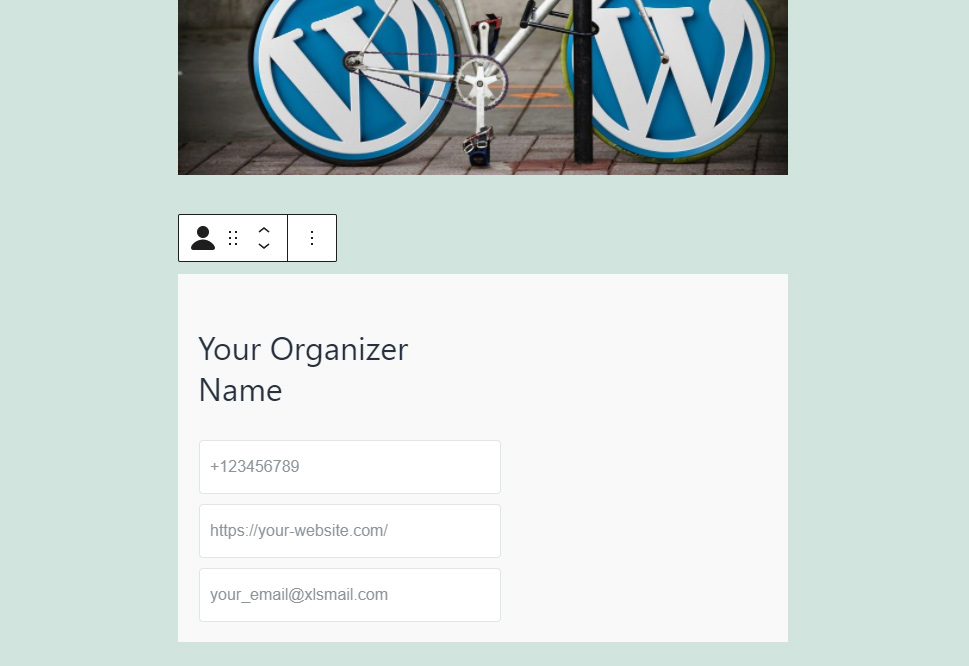
Next, if you want, you can also enter information related to those hosting the event, such as phone, mail, and website address.
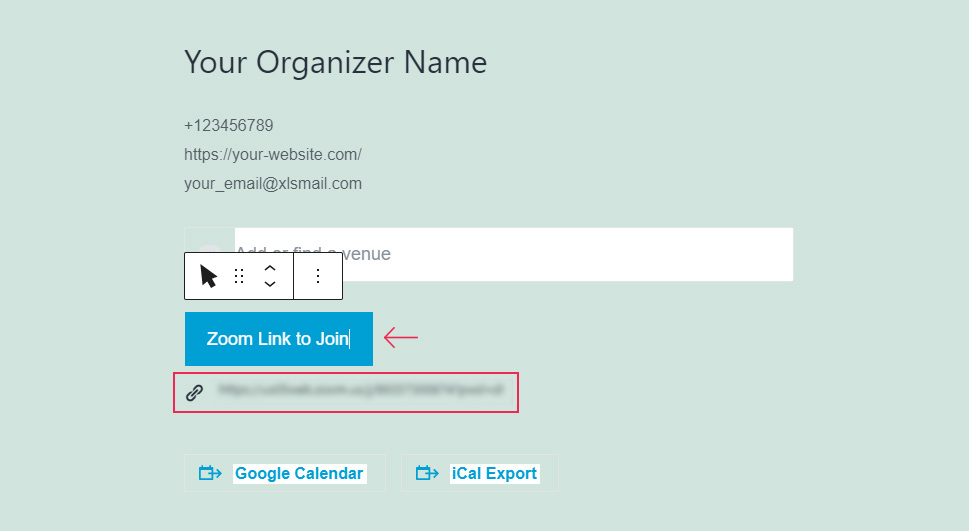
Now, there’s the Venue field available as well, but you can leave this field empty as your event is virtual, after all. Don’t forget to make it clear that your event is virtual in your description, though.
Last but not least, you will get to pick your event URL button text and paste the Zoom link (that you’ve previously copied) for the event invitation in the place of the website URL:
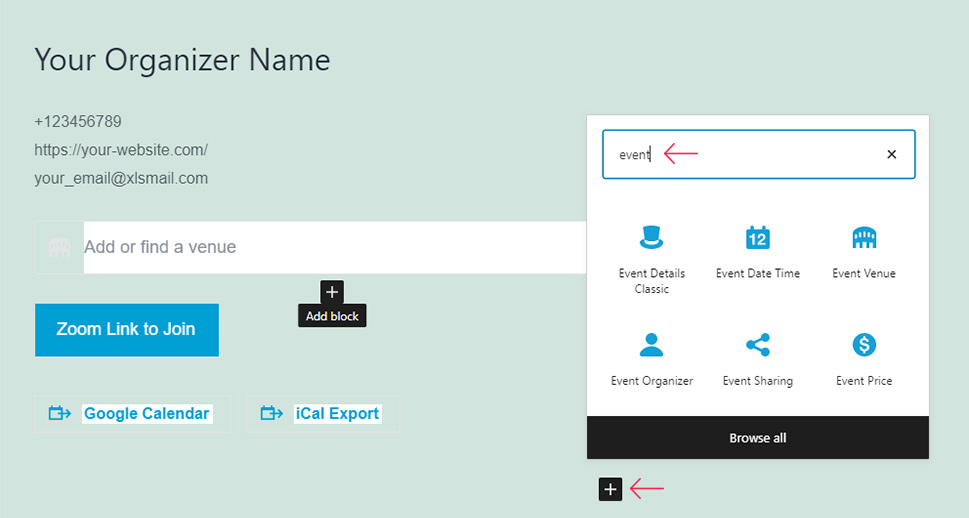
Since an event page is not that different from a standard WordPress page, this means you will be able to place any other items and event-related blocks on this page. To find and add more event blocks, simply hit the (+) icon and search for “events”.
Hit the Publish button (located in the upper right corner of the screen) when you’re done creating your event page.
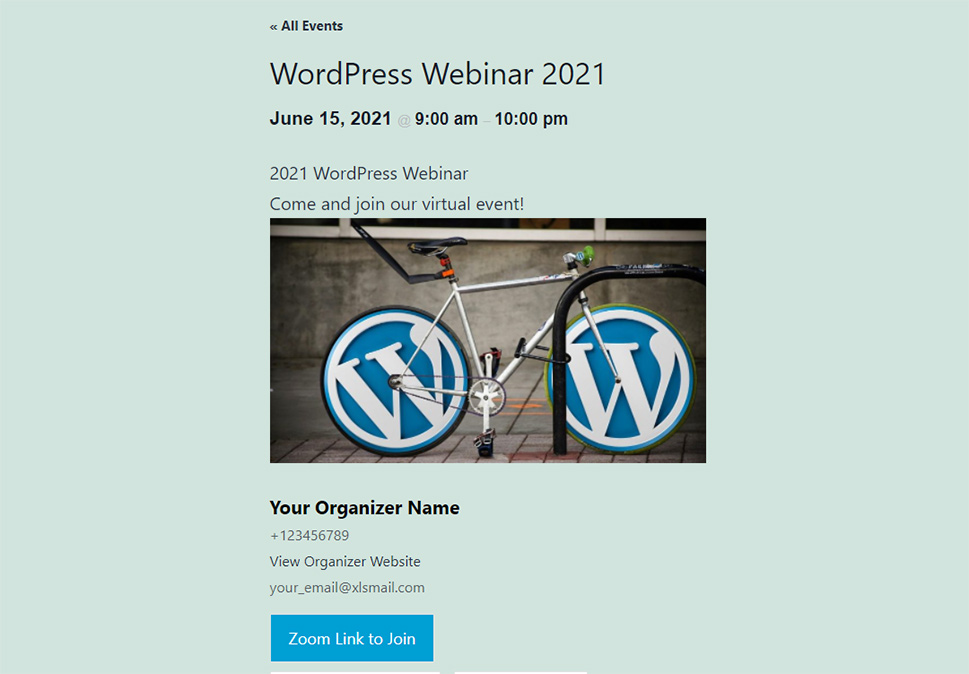
Go ahead and preview your event page to see it in action.
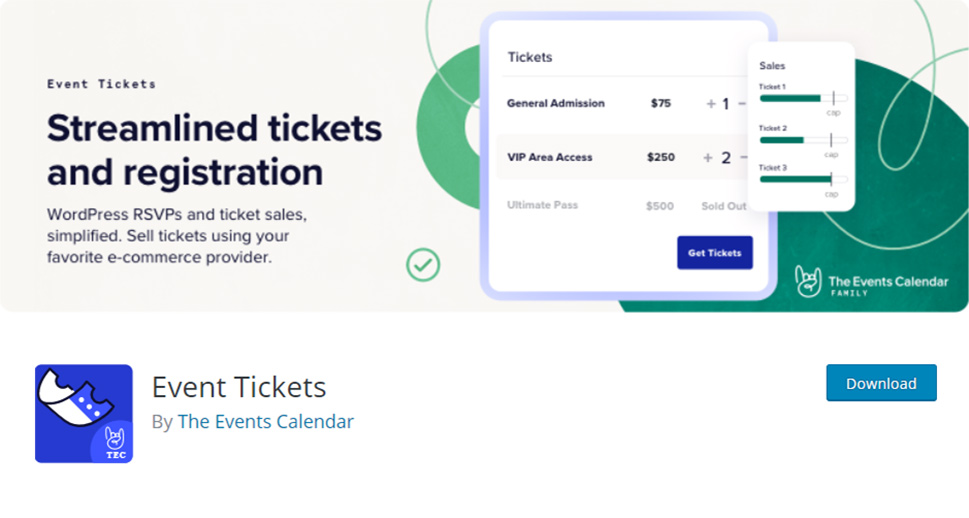
If you want, you can also add an RSVP/ticket option for people who want to join the event, though this isn’t necessary. Still, it can be useful in case you want to know how many people are attending the event before it starts – and it also brings you the ability to sell tickets to attendees.
To do this, you will need the Event Tickets plugin, a tool that serves as something of an addon to the Events Calendar plugin, and is also available for free.
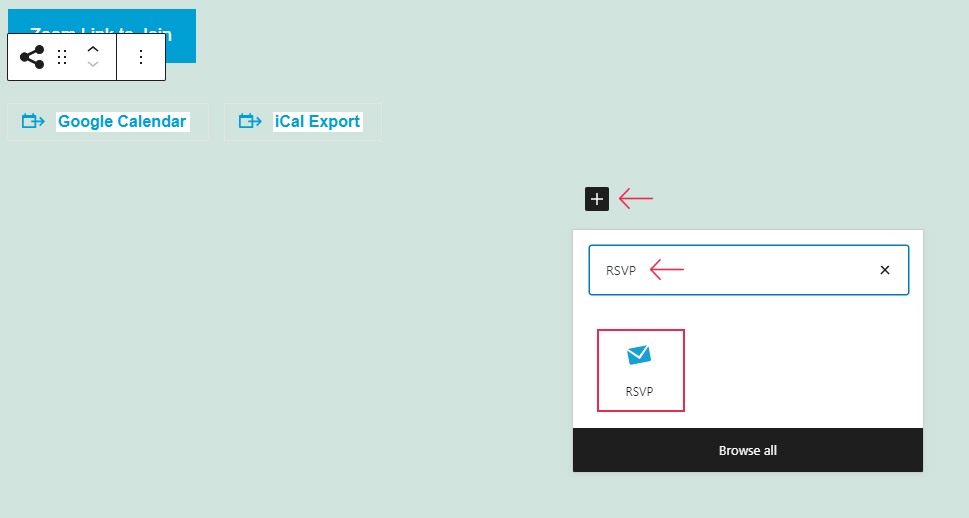
Then, access your event page again and find the RSVP and Tickets blocks. In case you’re not using Gutenberg, you can find and use them as shortcodes instead.
If you want to add the RSVP block, for example, simply search for it after hitting the (+) icon and add your block within the editor (the process is the same for the Tickets block).
After that, make sure to insert info about the RSVP capacity, duration of the event, and other options.
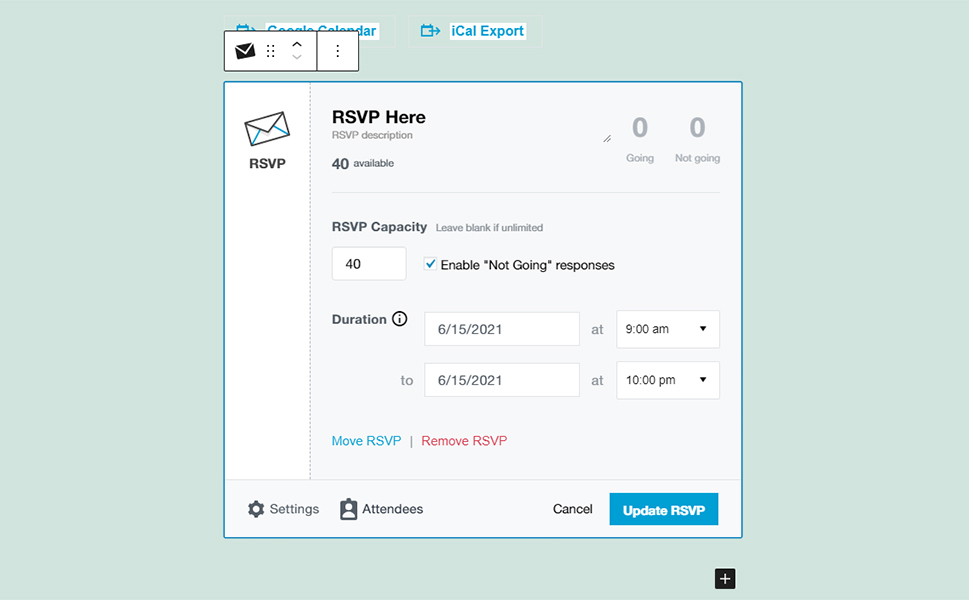
Finally, don’t forget to Update your page after you’re done.
Now, your event page will also have the RSVP button that will allow a user to add their own information and also RSVP for the virtual event itself.

Finally, just a couple of minutes prior to the beginning of your event, go to Zoom and hit the Start Meeting button.
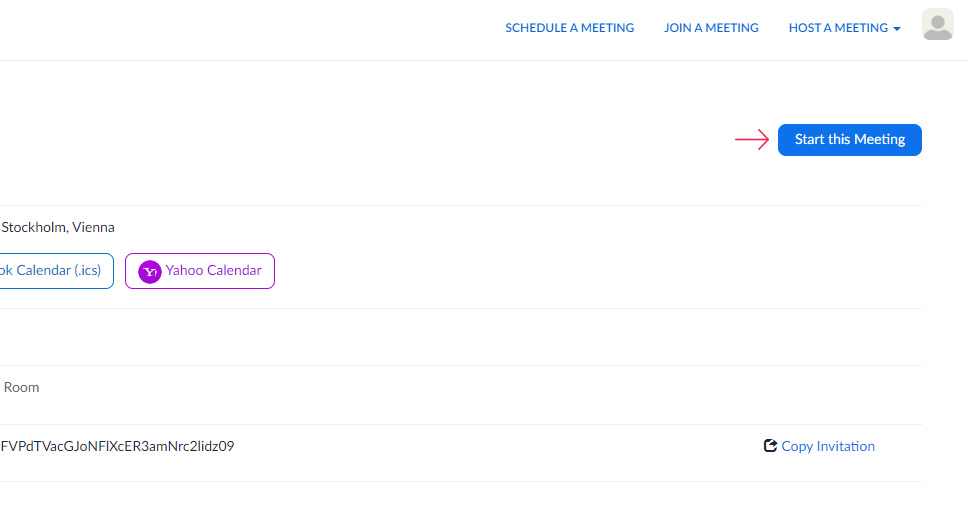
Now, each attendee that has clicked on the Zoom link (available on your event page) should be able to join your event automatically.
What’s also great about the Events Calendar plugin is that it also allows you to notify your attendees via an email just before the starting of the event.
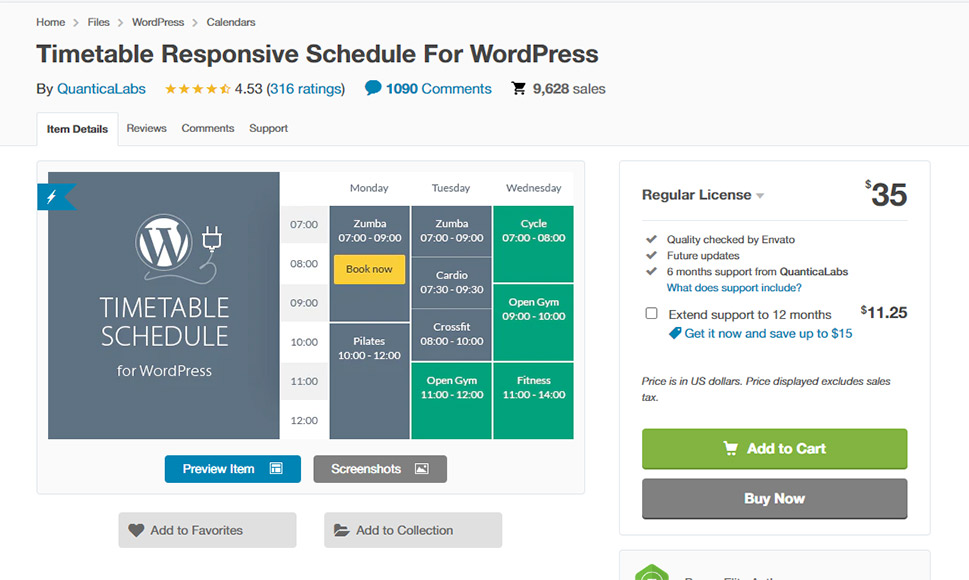
Another great option for setting up your virtual events, Timetable Responsive Schedule is a premium option available at CodeCanyon (for $35), though you can get it integrated free of charge if you get one of Qode’s WordPress themes with scheduling features. Aside from being extremely easy to use, it allows you to use the built-in Event Manager to create any kind of event as well as a so-called Event Occurrences shortcode to display a list of occurrences within one event. You will also be able to use the upcoming events widget, create a timetable using the plugin’s neat shortcode generator, and plenty more.
To learn how to create and customize events using the Timetable Responsive Schedule plugin, we recommend that you check out our comprehensive guide to timetable Responsive Schedule as it has every step explained down to the tiniest detail. Apart from helping you learn how to create a single event, here, you will also be able to learn how to create and customize event lists, set up the timetable columns to display the event timetable, and so on.
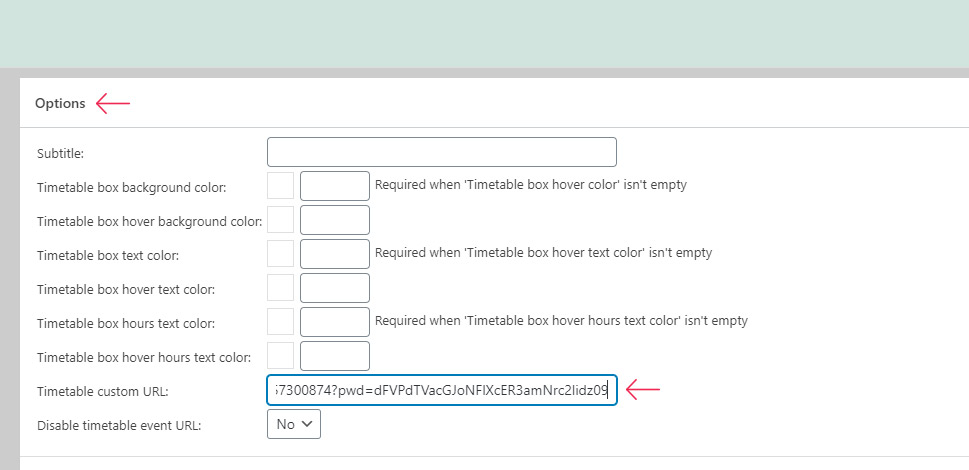
Now, just like we’ve explained in our guide, when a visitor clicks on your event in the timetable, it will automatically lead them to the corresponding event page. You can easily change that and add your own custom URL instead – in this case, the URL that leads to your Zoom call link. Simply find the Options toolbar in the event single’s backend and enter your Zoom URL in the “Timetable custom URL” field.
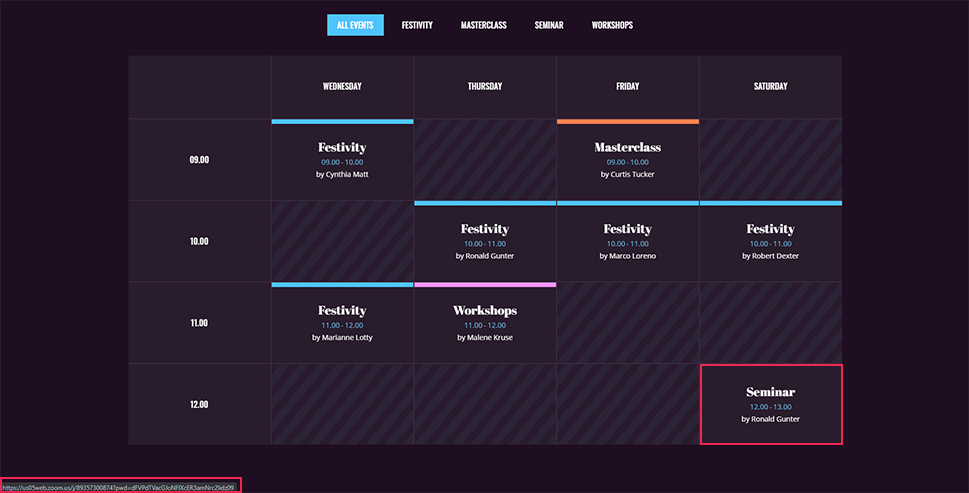
Update/Publish your event and you’re all set. Now your visitors will be able to access your Zoom event by simply clicking the link in the timetable.
Wrapping Things Up
There’s no doubt that WordPress is a great platform for creating and displaying any kind of virtual event, be it a simple conference call, a one-on-one meeting, or any type of online social outing. And thanks to many available video conference platforms like Zoom as well as different types of scheduling plugins for WordPress, with a bit of customization on your part, you can set up and host a virtual event and allow your site visitors to join with ease.
After selecting your desired conference platform for the event and generating the invite link, we recommend using either the Events Calendar or Timetable Responsive Schedule plugin to set up your event page in WordPress. Then, you can easily add a link that will lead users to the virtual event upon clicking. Both plugins are easy to use and come with some rather powerful and flexible options for displaying your upcoming events. Still, which option you will go for (both in terms of the plugin and the conference call service) is completely up to you. If you end up going with one of our recommended options, just make sure to follow our instructions carefully and you will be able to successfully host virtual events in no time.
