How to Create Custom Product Badges in WooCommerce

Using product badges is one of the best ways to effectively draw attention to specific products in your WooCommerce store. If you add a badge to your product page to indicate a sale, a discount, a limited-time offer, or to emphasize any other feature that may help make your products stand out (like best-selling, top-rated, and so on), you can only increase your chances of scoring more sales and conversions. Now, while this eEcommerce plugin is a highly powerful and scalable solution, it does not come with the option to add WooCommerce product badges out of the box. And even though there is an option for adding a sale price (an action that automatically inserts a calculated percent taken off from the regular price to the product image), there are really no other default badge options unless you buy a premium WooCommerce Badges extension. Luckily, there are many great WooCommerce badge management plugins available you can use to add this feature to your products with ease.
This time around, we will help you learn how to create custom WooCommerce product badges using the popular YITH WooCommerce Badge Management plugin. In addition, we will also share some of the best practices you can use to maximize the effectiveness of your product badges, so stay tuned as we talk about:
Qode Themes: Top Picks
View Collection


A YITH WooCommerce Badge Management plugin is an excellent choice if you wish to create custom badges and make your products look more inviting to your customers. This plugin is fully customizable and allows you to add unlimited textual badges and easily set their colors and position. If you want, you can also add image-based badges as well – there are four different badge images you can choose from.
While the core plugin is available for free, you can also upgrade to the premium version of YITH WooCommerce Badge Management (available for € 59.9 a year) to get access to features such as the ability to assign badges automatically to items that belong in recent, on sale, and featured categories, use category badges (allows you to create a badge for each product category), create and add advanced badges, use some additional styling options, and plenty more.
First things first, you need to install the plugin and activate it. Then, head to YITH >> Badge Management located in your WordPress admin dashboard.
This will open the “Settings” screen where you will be able to adjust some of the general badge options, including the ability to hide and/or override the “percentage taken off” sign (that automatically appears when a product is on sale) and hide or show badges in your sidebars and widgets.
Hit the Save Options button once you’re done with adjusting these settings.
Now, to create your badge, you should access the Badges >> Badge page. Then insert your badge title.
Afterward, you can customize your badge appearance in the Text Badge tab. In the Text Options area, you will get to add your text and choose the text color.
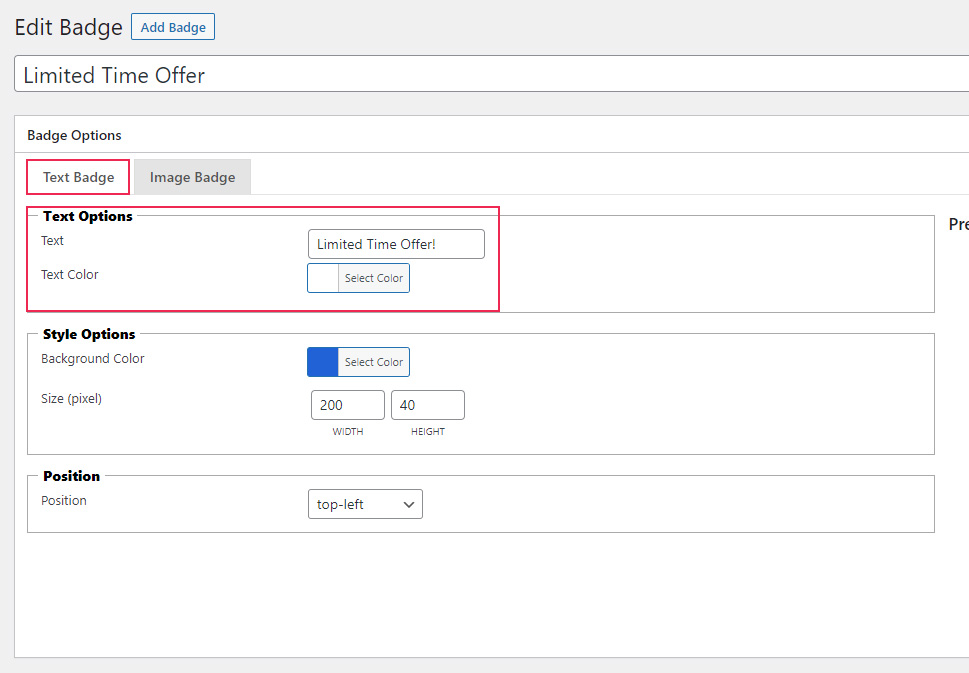
Next, you can use the Style Options field to set the background color for your badge as well as set its size (width and height).
Finally, you can choose the position of the badge relative to the picture of your product (top-left, top-right, bottom-left, or bottom-right).
Alternatively, you can opt for using one of the default badge images in the Image Badge tab.
Simply select the picture that best fits your offer and choose its position.
Once you’re done with creating your badge, make sure to hit the Publish/Update button.
To add a badge to your product, simply go to your product page and find a meta box in the right corner of your editing screen called Product Badge.
The name of your badge will appear in the dropdown, so simply find and select the badge you’ve previously created and hit Update/Publish.
You can go to your product page to see what your badge looks like in action.
Even though using badges on your WooCommerce products is effective in itself when it comes to boosting your sales and conversions, it certainly won’t hurt to go even further and implement some of the best practices when using badges on your WooCommerce store. Here are some tips that will help you truly make the most out of your product badges:
Use Your Product Badges Sensibly
The whole point of using product badges is to capture the attention of potential customers. Simply put, if you place product badges on all products available on your online store, you sort of beat the purpose of making individual products stand out. Also, by selecting only a few top products you want to draw special attention to at a time, you can easily switch things up in the future. So, just make sure to use the product badge feature wisely, and you will be on the right track to boosting those sales.
Keep Things Concise and Straight to the Point
While you may be tempted to go wild with the description of your discounts and/or special offers, keeping things simple can make you go a long way when it comes to making your products stand out. Stick to simple, eCommerce-friendly words that are easy to understand by potential consumers in your niche.
When they’re browsing through products, people want to find the best possible option fast. So, it’s needless to say that nobody wants to read product badge information that is overly long or complicated. Therefore, you should make sure to cut straight to the chase and don’t be afraid to use good old phrases like ‘limited-time offer” or “50 percent off” – phrases such as these are eye-catching and powerful enough to get your point across.
Add Badges to Specific Product Categories
If you have products that fall under any particular categories on your eCommerce store, adding category-specific badges to these types of products might be a great idea. For example, you may assign badges to products from best-selling, on-sale, new product categories, featured, or even more niche-specific categories (i.e. a category dedicated to silver earrings in a jewelry store). This will only help you capture the attention of as many customers as possible.
Make Sure Your Product Pages Looks Good, Too
This should go without saying, but when setting up product badges, you need to take care of all the other elements of your product page to ensure the best possible user experience and maximize the possibility of making sales. Just because you’re putting up a bargain doesn’t mean customers will add your product to the cart even if they can’t see any other value to it.
This means you should also have an attractive and accurate product description, offer more than one high-quality picture of your product from multiple angles (adding an image zoom effect is always a good idea), include product reviews from other satisfied customers, and even add videos (if they can help provide any additional info to those viewing your product).
Wrapping Things Up
As you could see from the steps we shared with you above, creating and customizing product badges in WooCommerce is as easy as it can get if you use the help of the right plugin. We think that the YITH WooCommerce Badge Management plugin is a great choice as it allows you to fully customize the text, color, and position of your textual badges for free. And you can always upgrade to the premium version of the plugin to get access to more advanced options. Of course, aside from making sure your product badges look attractive on your product pages, you should also implement some of the best practices when using them. So, try to keep things concise and straight to the point, do not hesitate to add your badges to different product categories, but make sure not to overdo them either. Finally, ensure that your product page design looks nothing short of perfect for the best possible customer experience, and you will see your sales increase in no time.
