How to Create a WordPress Image Zoom Effect

You’ve probably seen websites with the magnifying glass or zoom on images around the web, for instance on Amazon product pages, and you may have wondered how to add that neat feature to your WordPress site. If that’s the case, we’ve got good news for you. It’s fairly easy to create a WordPress image zoom effect if you do it with the help of a WordPress plugin.
Adding this type of feature to your website can be extremely convenient for your visitors as they will be able to inspect your products in full detail. This allows them to notice certain aspects that they otherwise wouldn’t be able to see if you only used regular size images to showcase your products. It’s not just product images, though. You may, for instance, want your visitors to be able to give a closer look at your portfolio images, too. The ability to zoom in your images is, therefore, a good UX practice and, potentially, a sales booster, too.
Without further ado, here’s how you can add a magnifying WordPress image zoom effect to your WordPress site with the WP Image Zoom plugin.
Installing and Configuring the WP Image Zoom Plugin
First and foremost, you need to install the plugin. Once you’re done with its installation and activation, head to the WP Image Zoom tab in your WordPress admin dashboard.
Opening this tab will allow you to easily set the plugin’s image zoom settings.
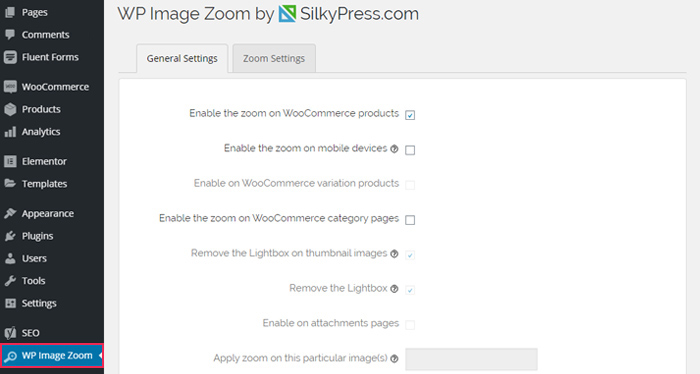
In the General Settings tab, you can enable zoom on WooCommerce products, WooCommerce category pages, and variation products. You can also set the zoom effect on mobile devices, remove the lightbox for more effortless zooming of your images, and so on. In addition, you get to enable zoom inside a lightbox if you wish to keep it, and even check out a list of supported lightboxes.

Make sure to click the Save Changes button once you set all the options according to your preferences.
Then, head to the Zoom Settings tab.
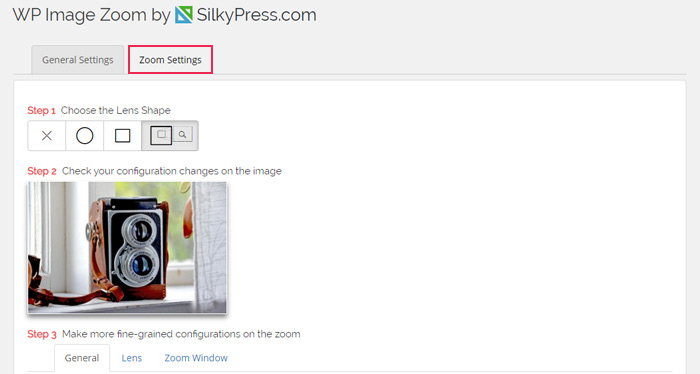
Just like the General Settings tab, the Zoom Settings tab is quite intuitive and comes with 4 simple steps that will allow you to add a zoom effect to your images.
Step 1 lets you choose the lens shape. Some of the available options include circle lens shape, square, and zoom window.
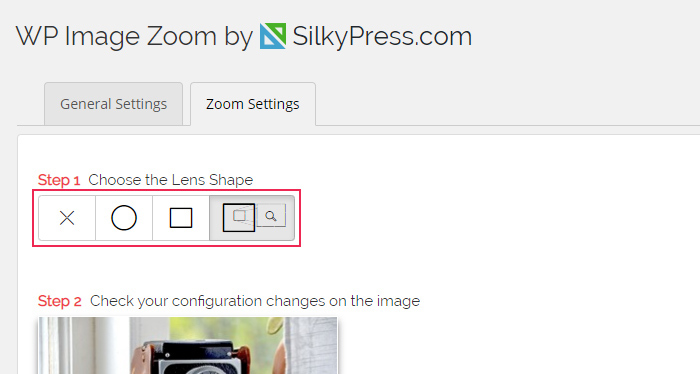
Next, you get to check your configuration changes by previewing the test image (the image comes together with the plugin) using the lens you picked. You can come back to this option and preview any further changes that you make in the other steps.
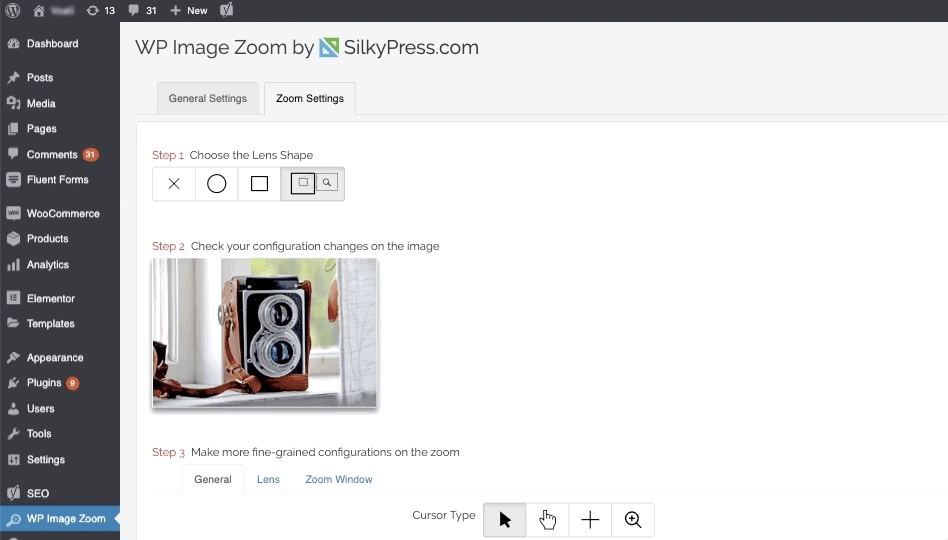
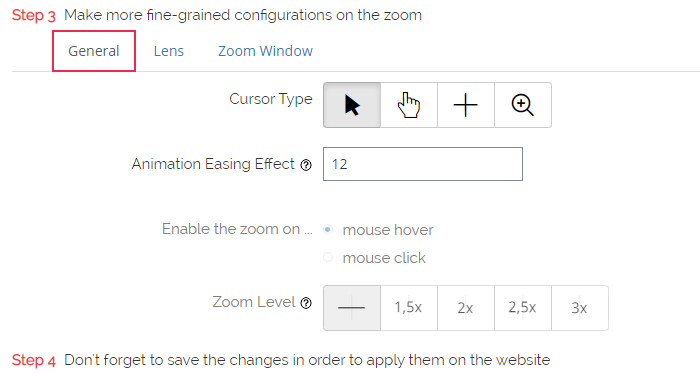
The third step allows you to set multiple options in its General tab. You get to choose the cursor type, define the animation easing effect, choose whether you want to enable the zoom on mouse hover or mouse click, and set the zoom level.
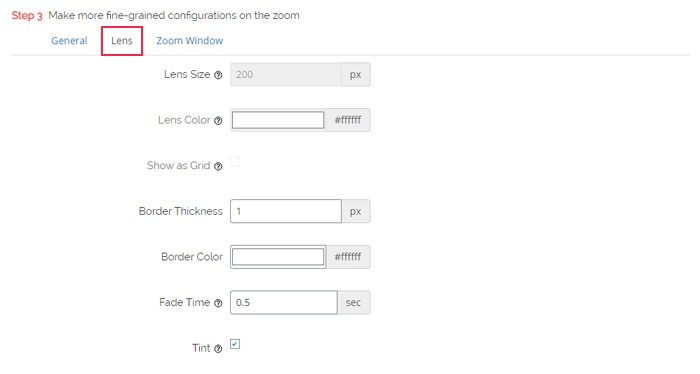
Then, click on the Lens tab. There, you will be able to set some additional options, including lens size, lens color, border thickness, border color, etc. However, you should note that you can use these settings only if you chose a circle or square lens in the first step.
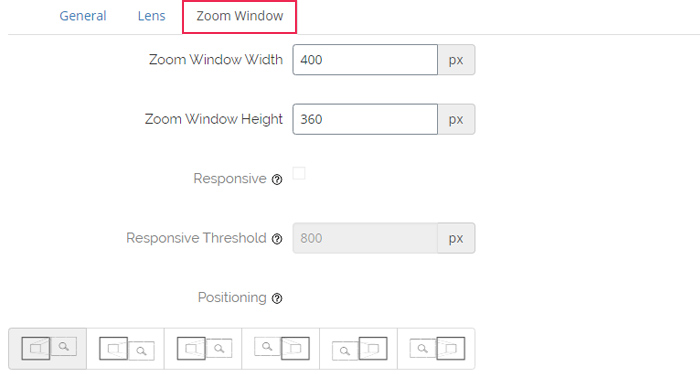
On the other hand, the Zoom Window tab can be used if you selected the Zoom Window lens shape. If you did, you will be able to set the zoom window width, zoom window height, the distance from the main image, and so on.
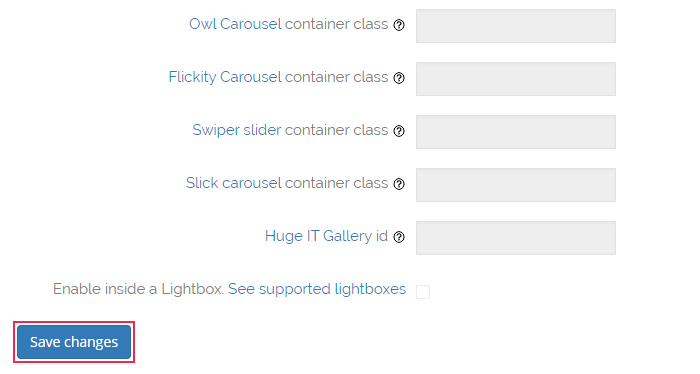
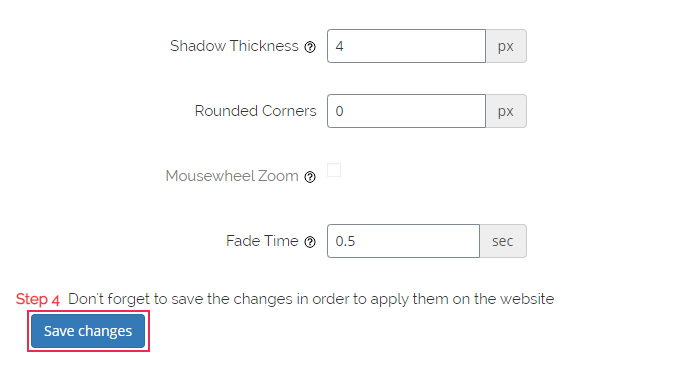
Once again, you should hit the Save Changes button for the settings to take effect.
And that’s it – your product images will now feature a magnifying zoom effect.


Adding a Zoom Effect to Your Images
After you have set up the plugin features according to your preferences, it’s time to add the zoom effect to your images, which you need to do manually for each image.
First, access the page or post where your image is published (by going to Pages > All Pages/Posts > All Posts), or, for adding the effect to a new image on post or page, create a new one (Pages/Posts > Add New).
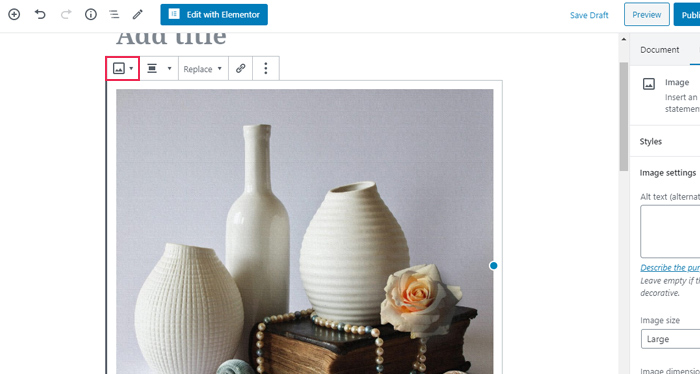
If you’re using the Gutenberg editor, after adding your image to your page or post (by clicking the plus sign and then choosing the Image block), click on the image in question and then select the image button located within the image block in the upper left corner.
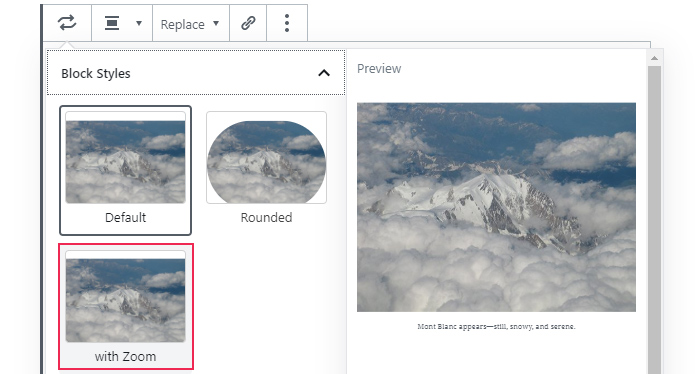
This will open a Block Styles drop-down. Simply select the style named With Zoom.
Finally, hit the Publish/Update button and go to your page or post to see the way your image looks like live.
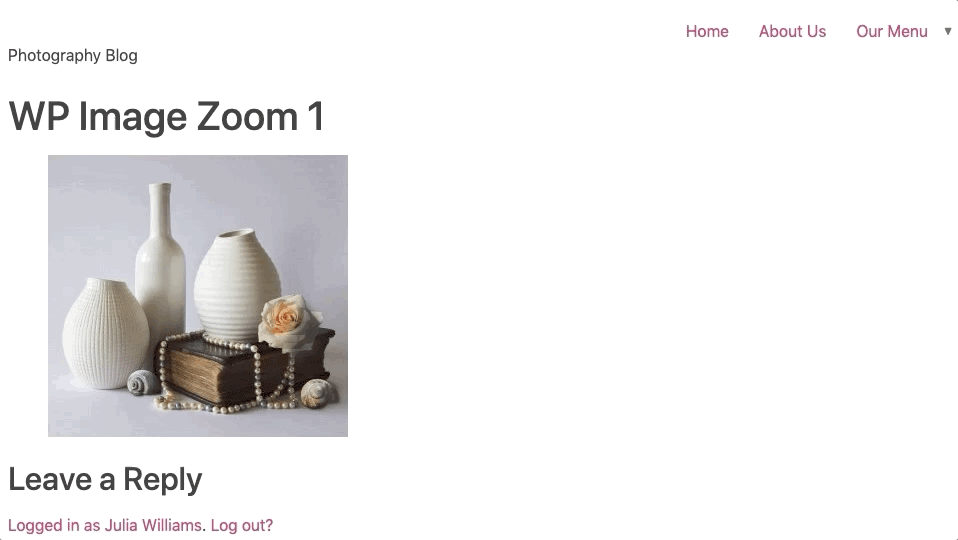
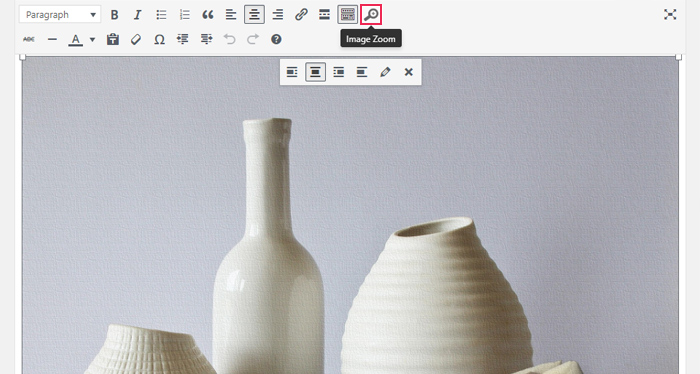
In the Classic editor, the process is very similar. After you add your image to a page or post, click on it and select the magnifying icon that you will see in the right corner of the editing toolbar. This will enable a magnifying effect on your image.
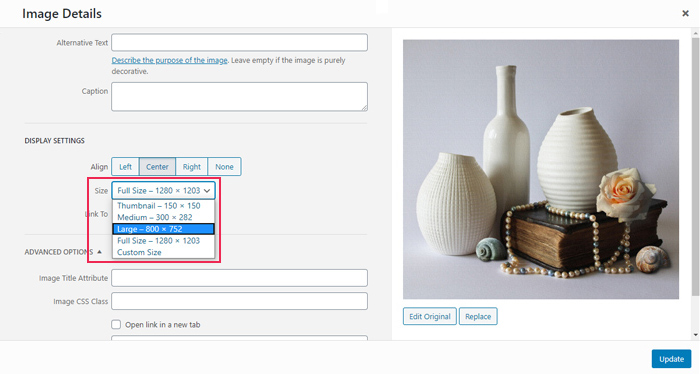
Note that the Classic editor allows you to add the zoom feature only to non-full size images, which is why you should select your picture and then click on the pencil icon (Edit) in order to change its size.
A new screen will appear, displaying the image details and allowing you to change certain image settings. You will also be able to change the image size here. After you select the size (any other size except for Full Size), click the Update button.
After you publish or update your page/post, go ahead and preview your changes once again.
Just one final note – this option only applies for the image you selected on that particular page or post, which means you need to enable the same option again for each image that you want to add the zoom effect to.
Conclusion
A magnifying zoom effect on images can be a great addition to an eCommerce store or any other website that wants to sell products. No matter what type of products you’re offering, your potential customers will surely be interested in examining them in as much detail as possible.
If you use a WordPress plugin like WP Image Zoom to add this feature to your images, you will be able to do so quickly and with ease. Just be careful to use high-quality pictures to ensure that the zoom feature looks impeccable and does its job well. Finally, since high-quality pictures can impact your website speed, you should also optimize your images for the web to reduce their size without jeopardizing their quality.
