How to Check Your WordPress Disk Usage

Every WordPress website occupies a certain amount of disk space that is supplied and maintained by the hosting provider. But, there is often a limit on how much disk space a website can use. Disk space is occupied by two things—WordPress files and the database. The former includes the WordPress core files, theme and plugin files, as well as any uploaded files (images, custom fonts, videos, and so on). The latter includes page and post data, plugins and themes settings, user information, and various types of metadata. Although disk space limit isn’t a problem when you’re starting out, by adding new content to your website or uploading files to your server, you will likely reach the disk space limit sooner or later.
When the disk space limit is reached, you won’t be able to add new content, and your website won’t be able to grow. When faced with this obstacle, most WordPress owners decide to buy additional storage space from their hosting providers or to move their website to a different host that offers more storage space. However, there is another way to tackle this issue—keep your disk usage optimized by removing unnecessary data. This will increase your website’s performance while cutting down on unnecessary expenses for improper storage space use.
Before you can start optimizing, you need to know how to check WordPress disk usage. And answering that question will be the focus of our article. We’ll introduce you to different methods you can use and share some general tips on optimizing WordPress disk usage. If you’d like to skip to any specific part of the article, just click on one of the links below:
Qode Themes: Top Picks
View Collection


The 4 ways of checking WordPress disk usage
It’s important to check WordPress disk usage from time to time so it doesn’t reach its limit with you unaware. And, now that you know what to look out for (inability to upload files), you’ll want to figure out how to run the actual check. In this article, we will introduce you to the four most frequently used ways for checking WordPress disk usage. You should examine them all to see which one suits you and is compatible with your type of hosting. With that being said, let’s begin.
The Site Health dashboard tool was introduced in the WordPress 5.2 update and it can display a lot of useful data regarding your website and database. This includes errors and potential improvements, a general overview of your website, its themes and plugins, the sizes of corresponding directories and database, as well as some server-related data. Alongside all that, it can be used to check the WordPress disk usage.
To access the Site Health tool, navigate to Tools > Site Health. Once there, you will see two tabs in the top section of your screen—Status and Info. Status will be opened by default and you should switch to the Info tab by clicking on it. Then look for the section called Directories and Sizes.
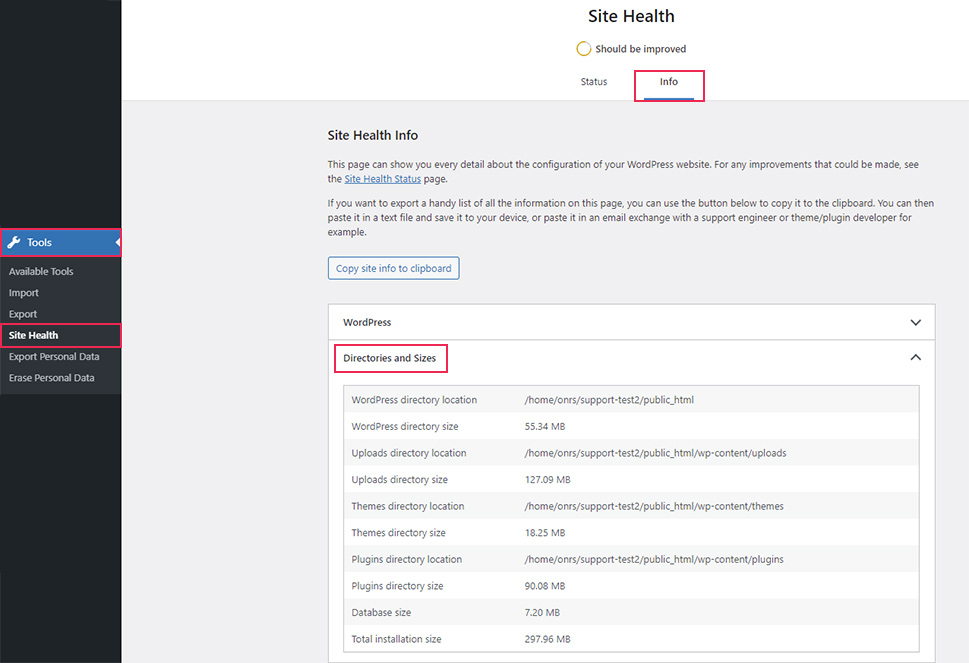
In this section, you will find the most important information regarding your disk usage. This includes the WordPress directory size as well as uploads, themes, and plugins directory sizes. You will also find the database size and the total size, which represents the sum of all the directory sizes we listed.
cPanel is a web hosting control panel that allows website owners to perform various website administration tasks within their browsers. This is done by using the graphical user interface (GUI) that cPanel provides. In this case, we will be taking advantage of the File Manager and phpMyAdmin applications integrated within cPanel. We will show you how to get a detailed overview of the size of your WordPress files and database tables using them.
-
Size of your WordPress files
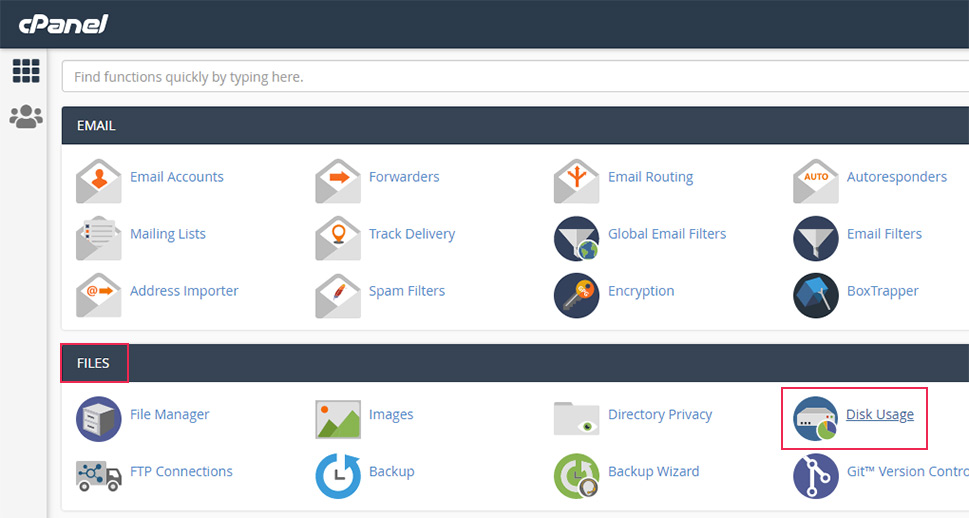
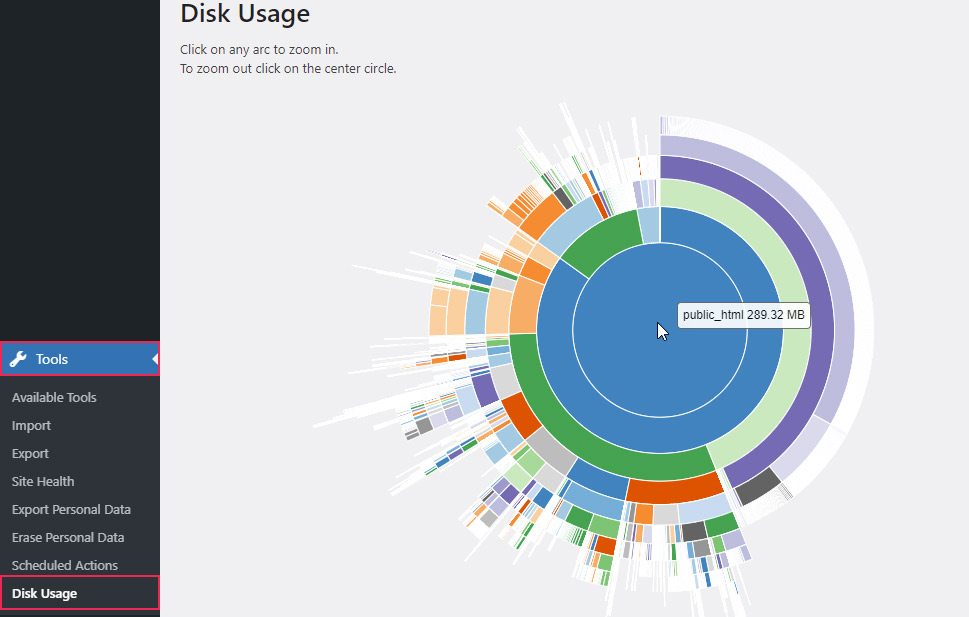
To find out the size of your WordPress files, log in to cPanel and click on the Disk Usage option, located in the Files section.
After waiting a bit, you will be able to see a list of all the directories currently on the server as well as their sizes in megabytes.
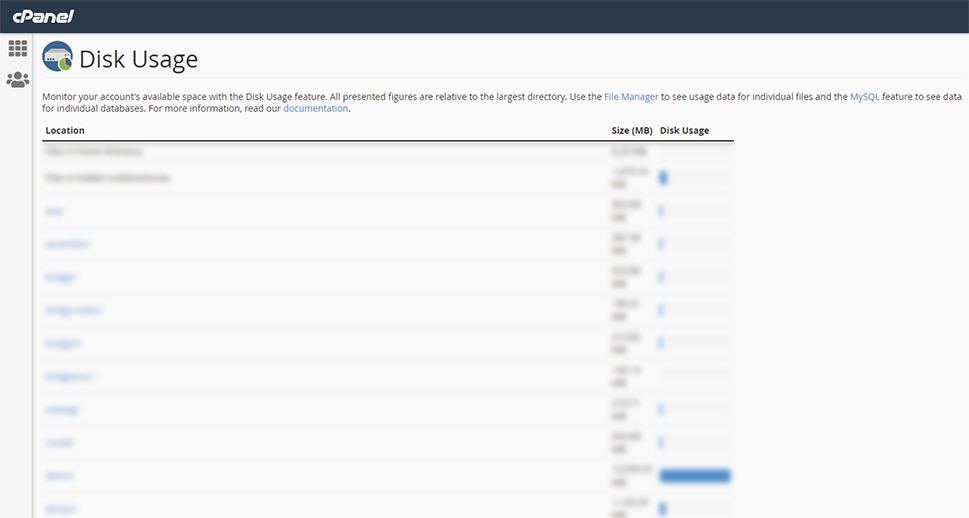
Locate your directory in that list and take a look at the size of all files and folders within it.
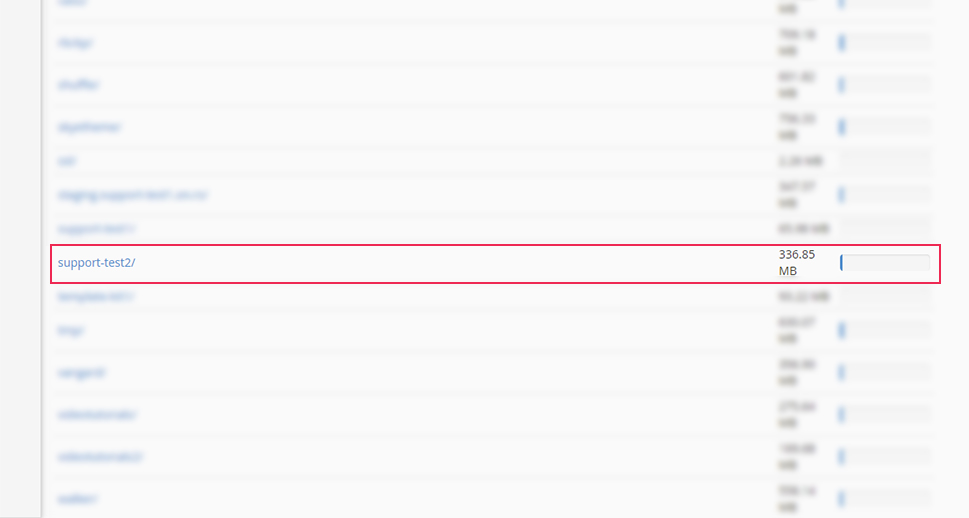
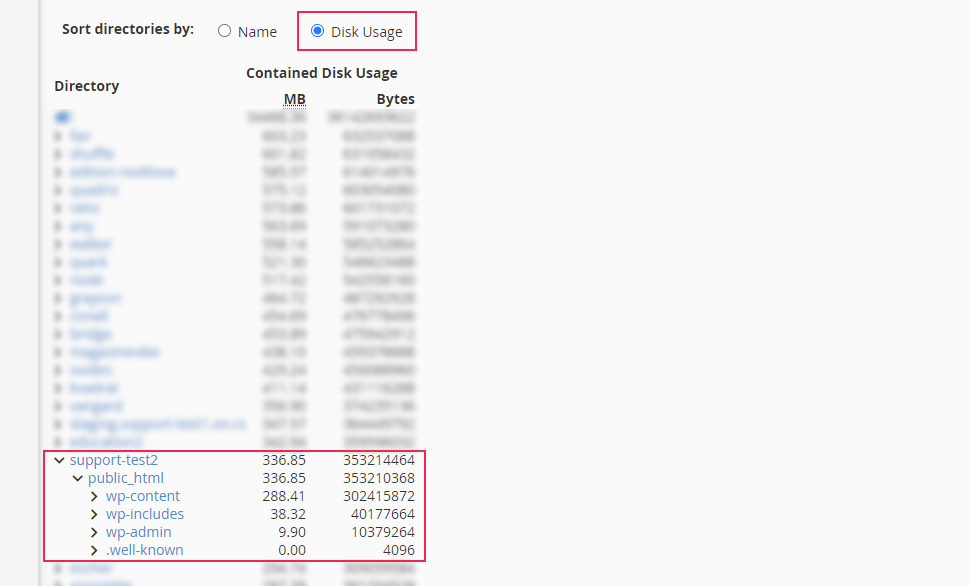
For a more granular report, scroll down to the section below the list. You will see a list of directories similar to the one found above. To locate the one you want easily, you can sort the directories by name or disk usage using the Sort directories by option. Once you’ve located your website directory, you will be able to see its size and, by opening the subfolders within it, you will be able to see their size as well.
-
Database size
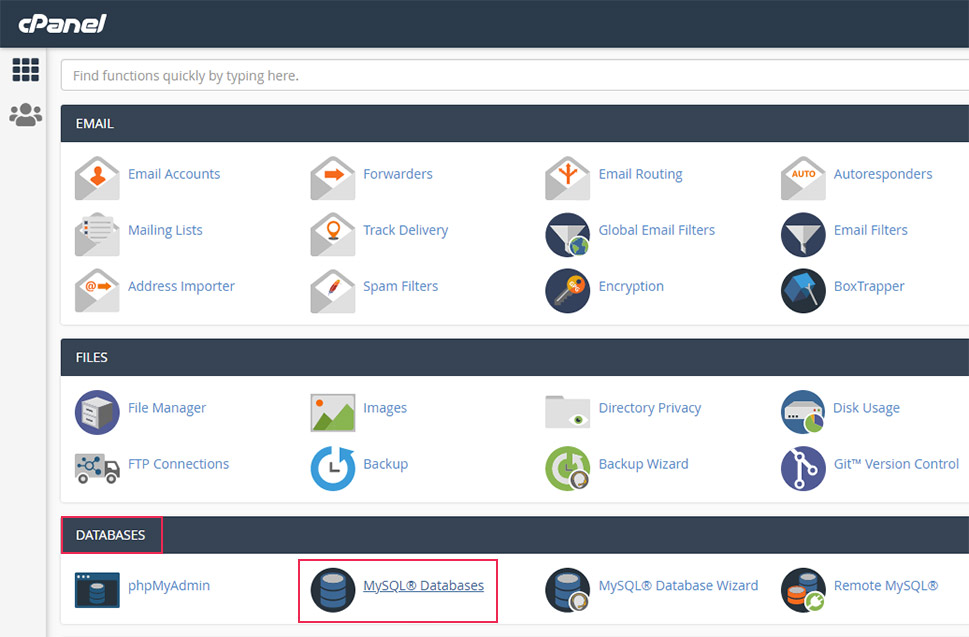
To find the database size in cPanel, return to the main window and click on the MySQL Databases option found in the Databases section.
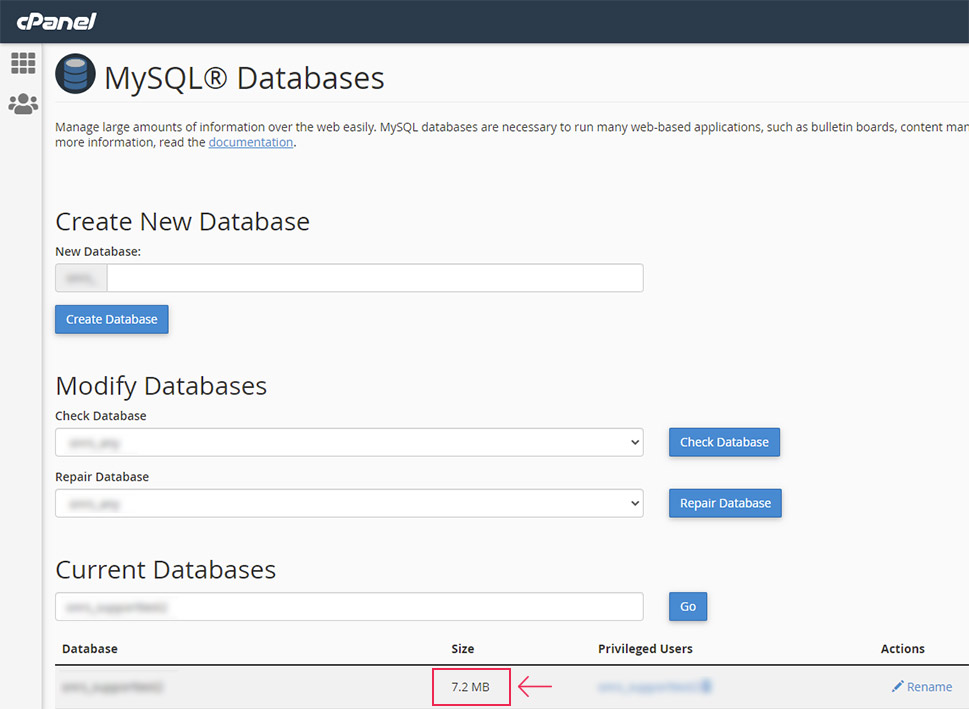
In the following window, locate the Current Databases section. Inside it, you will find a list of all your databases found on the server. To locate the one you want, use the search option. Type in the name of the database and click on the Go button. You will find its size displayed within the Size column.
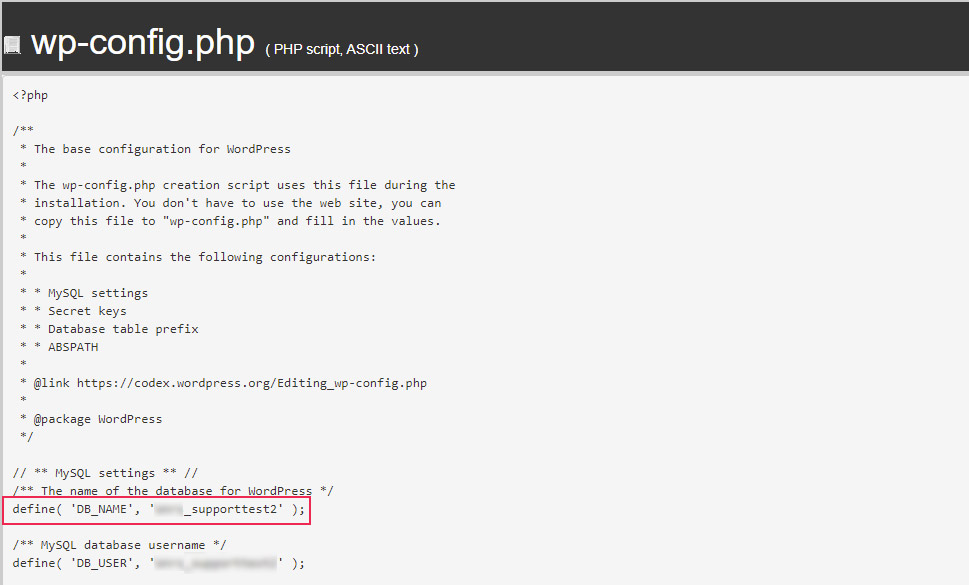
In case you aren’t sure what your database name is, you will need to figure it out before doing the steps mentioned above. To find your database name, you only need to examine your wp-config.php file. This file is located in the root WordPress directory, which is often called public_html.
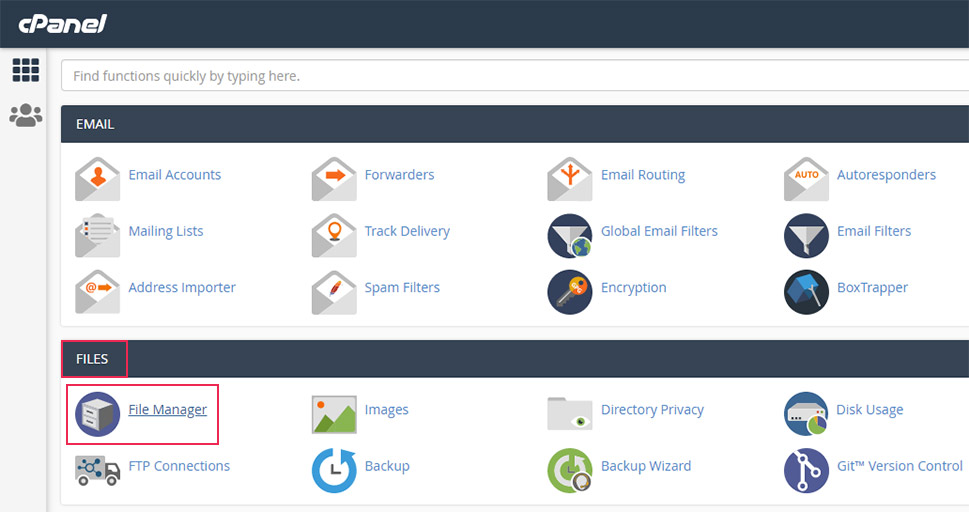
In case you need to find your database name first, return to the main cPanel window and click on the File Manager option located in the Files section.
Then, navigate to your root WordPress directory, find the wp-config.php file within, right-click on it, and select the View option.

Look for the following line near the top of the file:
define(‘DB_NAME’, ‘your_database_name’);
The placeholder we used (your_database_here) will be replaced with the name of your database.
Once you’ve figured out your database name, proceed as mentioned above.
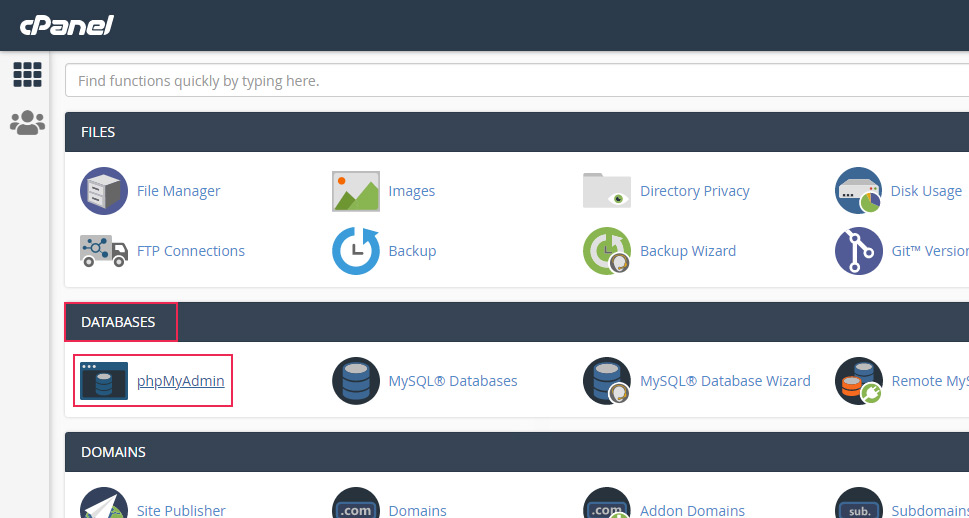
Similar to the WordPress directory sizes, you can get a more detailed overview of your database disk usage within cPanel, as well. To do so, you will need to access the phpMyAdmin application within cPanel.
Return to the main cPanel window and click on the phpMyAdmin option, also found within the Databases section.
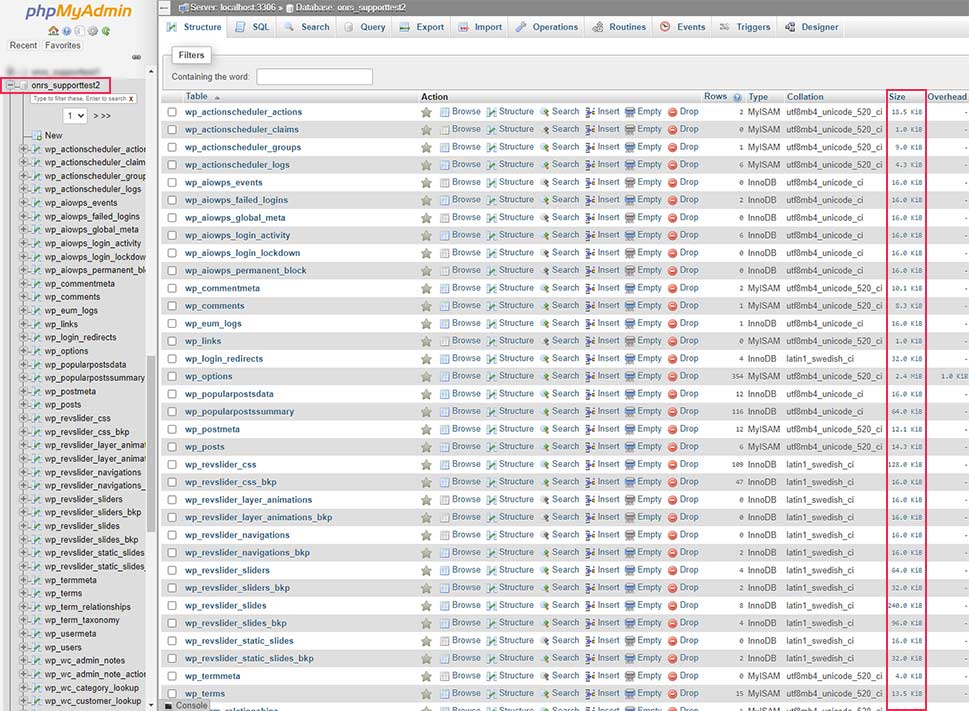
The phpMyAdmin application will open shortly after. Locate your database from the list of available databases on the left and click once to access it. You will see a list of all the tables within that database in the main section of your screen. Then, you only need to examine the Size column to figure the size of each corresponding table within your database.
There are a lot of WordPress plugins, and it isn’t hard to find ones that can be used to check your WordPress disk usage. Aspects of disk checking can be found across various optimization-related plugins, but there are also plugins specifically made to display an overview of your WordPress disk usage. In this section, we will showcase one of each category (you can find alternative plugins relatively easily by browsing the WordPress plugins repository).
-
Size of WordPress files
The Disk Usage Sunburst plugin is a simple and intuitive plugin for displaying the size of your WordPress files and folders in a sunburst chart. With it, you will get a detailed overview of the directory and file sizes, which will help you determine your optimization strategy.
After installing the plugin, navigate to Tools > Disk Usage where you will find that visual representation of the size of your WordPress files. You can hover over each section to see its size. By zooming in and out you can switch between a granular overview of a single directory and the whole root WordPress directory.
-
Database size
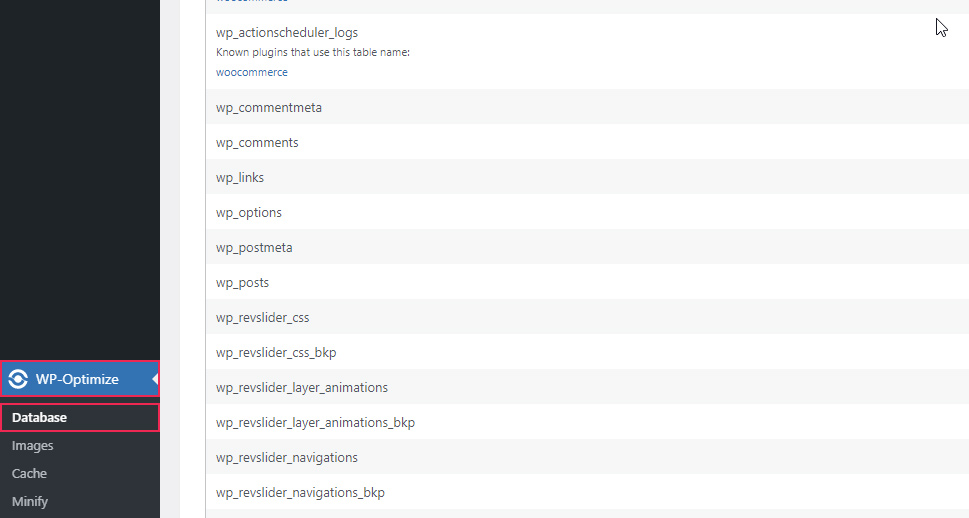
The WP-Optimize plugin is a very useful, multi-purpose performance optimization plugin. It mostly focuses on cleaning your database, optimizing images, and properly caching your pages. One of the side features in the database optimization section is a general overview of the sizes of your WordPress database tables, which is perfect for checking WordPress disk usage.
After installing the plugin, navigate to WP-Optimize > Database. In there, you will be able to find a list of possible actions for optimizing your database, an overview of your database tables, and possible scheduling options. This article will only focus on the general overview of your database tables. To access it, click on the Tables tab, found in the top section of your screen. Once you access it, you will be able to see a list of the tables within your database and their corresponding sizes, shown within the Data Size column.
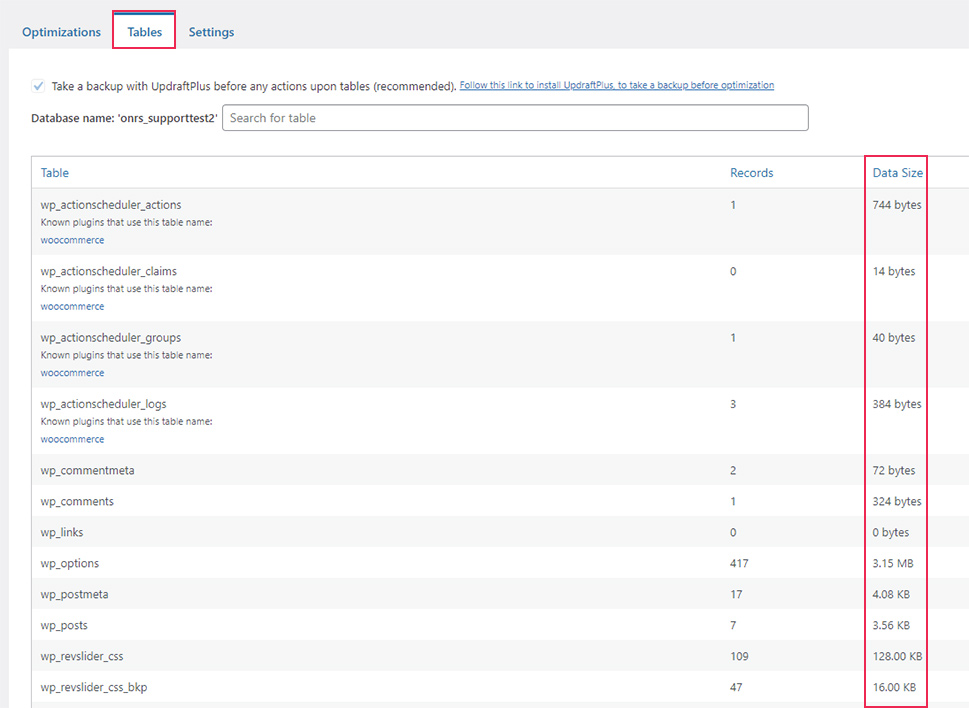
In the case you want to know the total size of all the data within your database, you only need to look at the bottom of the Data Size column.
Additionally, you might notice the Index Size column next to the Data Size column. Database indexes are data structures appended to each database table and they are used to quickly track certain data. In essence, finding and retrieving specific data from the database is much quicker when going through the indexes instead of going through every row of every database table. Sadly, this efficiency comes at a price of small additional storage space.
Therefore, if you only want to find out the total size of your database (representing the sum of your data and corresponding indexes), you can see it at the bottom of the screen, next to the Total size of database: label.
In the case you weren’t able to properly check your WordPress disk usage with the methods mentioned so far, you can always ask your hosting provider for help. They will help you by providing a detailed report regarding all the things that are taking up your storage space. If the report you get is too technical for you or you have a hard time making use of it, ask them for advice on how to reduce the WordPress disk usage, as well. They will surely give you some tips and pointers tailored to your site that will help you. We included some generally applicable space-saving tips in the following section.
You can do several things to optimize your WordPress disk usage. The ones we will cover in this section are the most commonly applied to various types of websites.
First of all, you should make sure to optimize all your images using either a WordPress plugin for image compression or some image optimization software. This involves optimizing the image sizes and format.
Apart from that, make sure to regenerate your images and remove any unused image sizes that could be a part of themes or plugins you no longer use. Without removing those registered image sizes, a copy of each of your images in the given image size could needlessly be taking up your storage space. Luckily, regenerating image sizes and removing any unnecessary ones can be easily done using the Regenerate Thumbnails plugin. Similarly, you should make sure to remove any unused media files from your website, as they could also represent a large portion of your database bloat.
Apart from that, you should remove additional website files, like old debug.log files that are no longer needed, or website backups that you can move to a different safe location outside your website server. Also, you should remove the directories of all themes and plugins that you don’t plan on using, as they are needlessly taking up storage space.
Finally, you should optimize your database. This includes, among other things, removing unnecessary database tables and relational data belonging to the plugins and themes you don’t use. Furthermore, you should remove unapproved, trashed, or spam comments as well as unnecessary post revisions, trashed, and auto-draft posts.
Final Thoughts
The process of maintaining a WordPress website can generate a lot of unnecessary things, which can accumulate and decrease the amount of storage space you have. Regularly checking your WordPress disk usage every couple of months and deleting unnecessary data can help improve your website while keeping the costs of maintaining it to a minimum. Luckily, WordPress disk checkups can be done relatively easily using any of the methods described in this article. If you followed the instructions closely, we are confident that you were able to find the information you needed with ease. Additionally, optimizing your website afterward will be just as easy with the tips we included. Since this is something that needs to be done regularly, we suggest bookmarking this article for future reference as well.
