How to Change the Language of Your WooCommerce Shop

The rise of fast and cheap internet access has changed everything, and continues to do so: over 2 billion people shop online at least some of the time. This growth keeps stimulating the development of online store solutions, including the one we wholeheartedly endorse: WooCommerce.
If you are reading this, you have probably set up a WooCommerce store and cater to an international audience. WordPress and WooCommerce both allow you to change the language of the store or the website itself – in several different ways. In this tutorial, we will be showing you how to do it. Here‘s what we‘ll be discussing:
WooCommerce will use the default language your WordPress website is set to. A premium solution for language settings for multilingual websites we can recommend is Weglot, but that‘s not the only option.
WordPress itself, as well as its theme files and plugins, have been translated to many languages, and you can choose between them. WooCommerce will use the language selected for your WordPress website automatically.
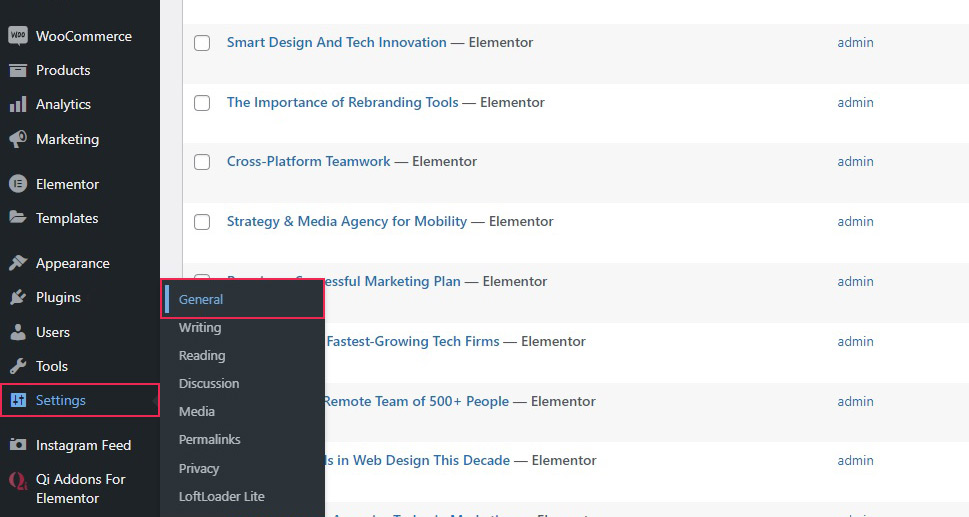
Choosing a WordPress language setting can be done by navigating to the Settings/General screen from your WordPress dashboard.
Once there, select any available language from the Site Language menu, and click Save Changes.
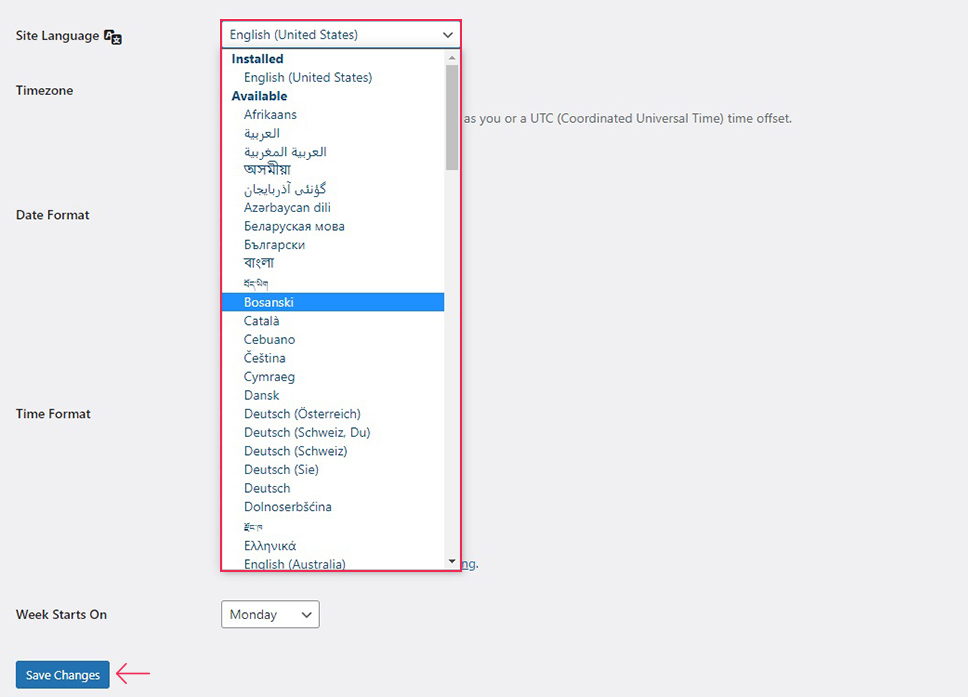
Your WordPress website‘s language will now be changed, and your WooCommerce store will also change languages automatically – provided a translation exists and that no bugs occur.
If the language you require is not available, you can always make a contribution to the WordPress community through the Translating WordPress page. There are also several ways of translating any WordPress plugin, including WooCommerce.
If your preferred WooCommerce or WordPress language is not available in the menu, the translation might still exist, and you can install it manually. You can download a language file from the WordPress translation teams page.
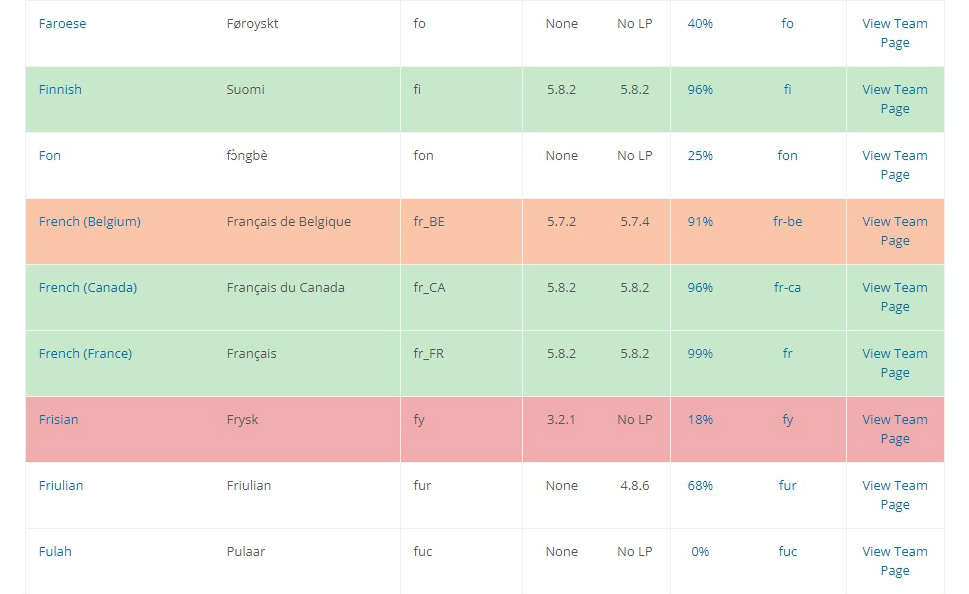
Once there, find a language you wish to install and click on the percentage number next to it to download the file you need.
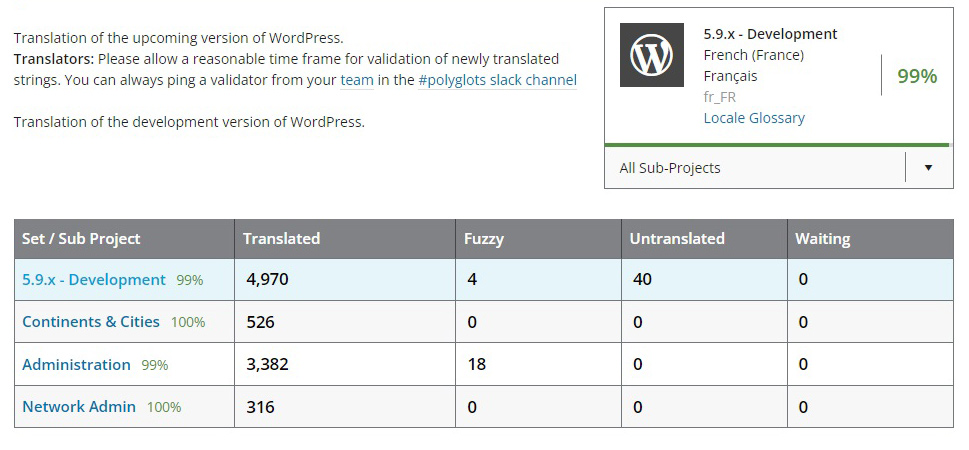
You will be taken to the language version‘s page. Find the Set/Sub Project column, and click the version number.
You will then be taken to the translations table screen, showing all the most recent changes to the translation. Scroll all the way down, and find the Export link. Make sure the as drop-down menu is set to Portable Object Message Catalog, and click the Export link.
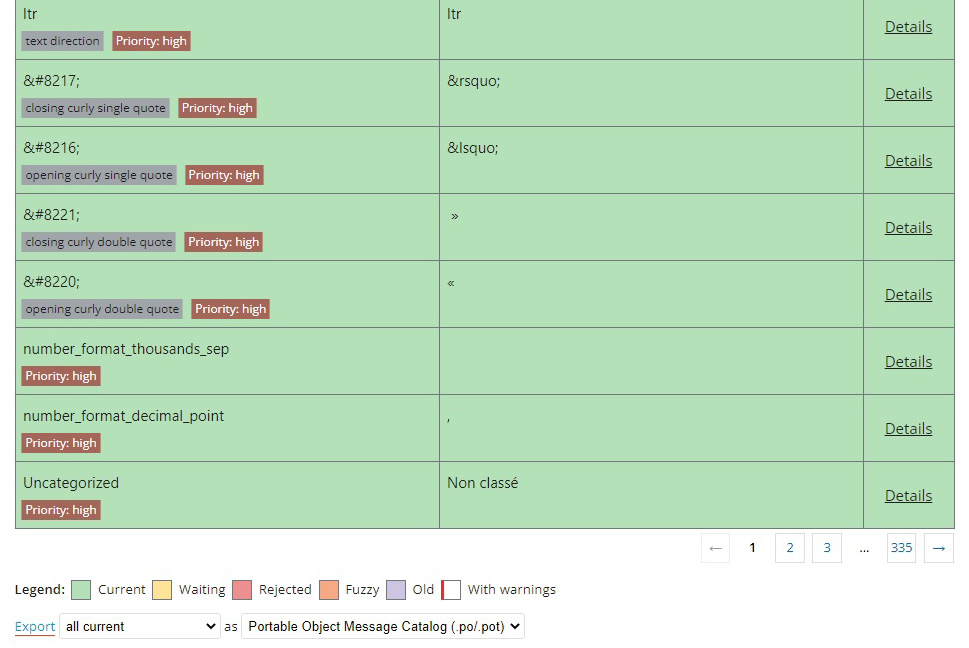
You will now have the translation file you need in your downloads folder. You will have to use FTP to upload the file to your website‘s wp-content/languages folder. If the folder does not exist, you will need to create it. Once your file is correctly uploaded, the language you require will appear in your Settings/General screen‘s Site Language menu.
Years ago, WooCommerce used to host its own language packs on GitHub – the version control software resource website. However, this is no longer the case. The development of WooCommerce as a WordPress plugin has led to WooCommerce language packs migrating to WordPress.org. You can see the status of each of these language packs on the WooCommerce plugin‘s translation page.
To update your WooCommerce plugin to its latest version, navigate to Dashboard/Updates from your WordPress dashboard.
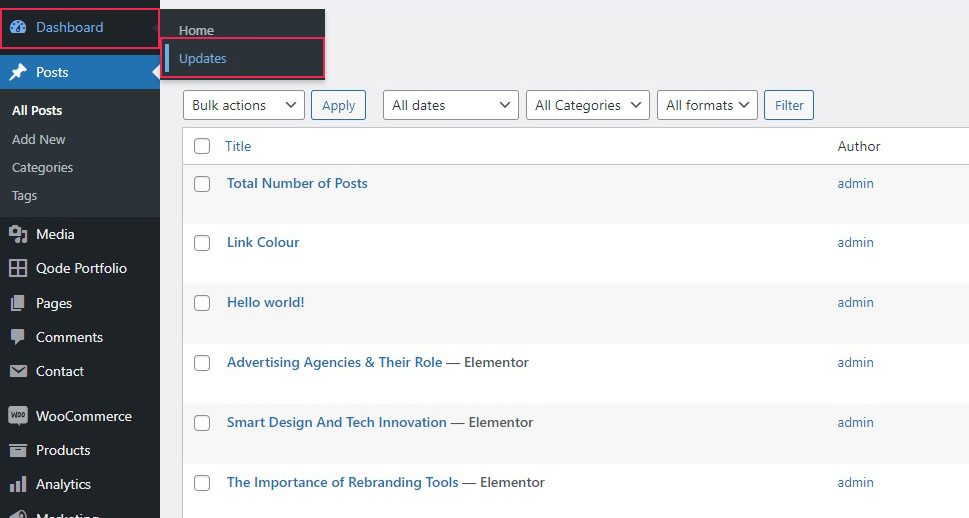
Find the Plugins section on the screen, select the WooCommerce plugin from the menu, and click the Update Plugins button.
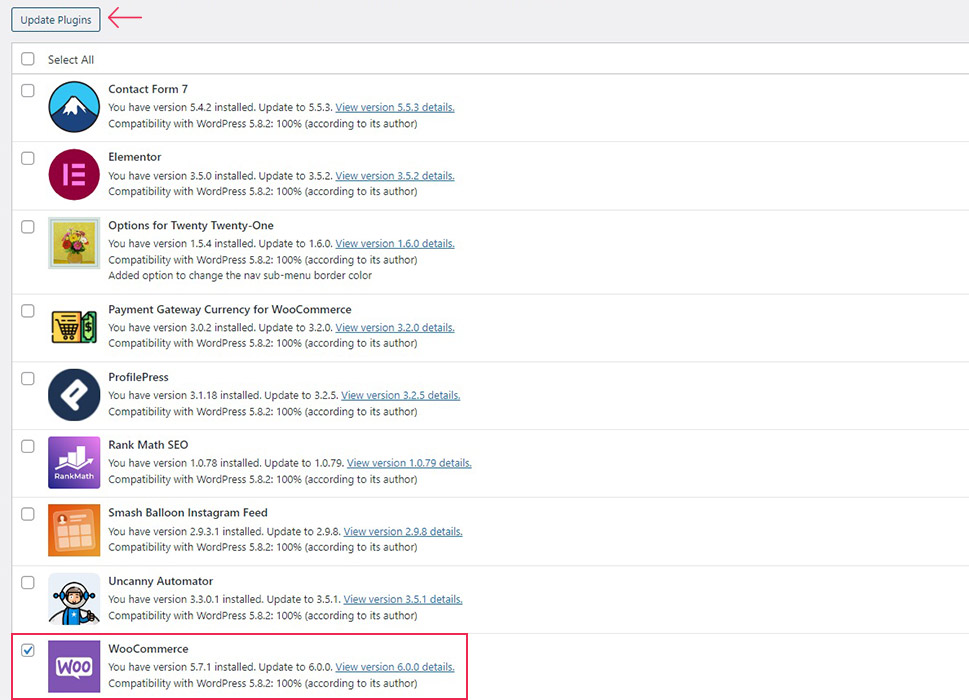
If an official translation for WordPress is available, an Update Translations button will be present on this screen. Click it to update all your WordPress (and, consequently, WooCommerce) language files.
To find a WooCommerce language pack manually, go to the plugin‘s translation page linked above and find a language, then click on the percentage value in the language‘s row in the table.
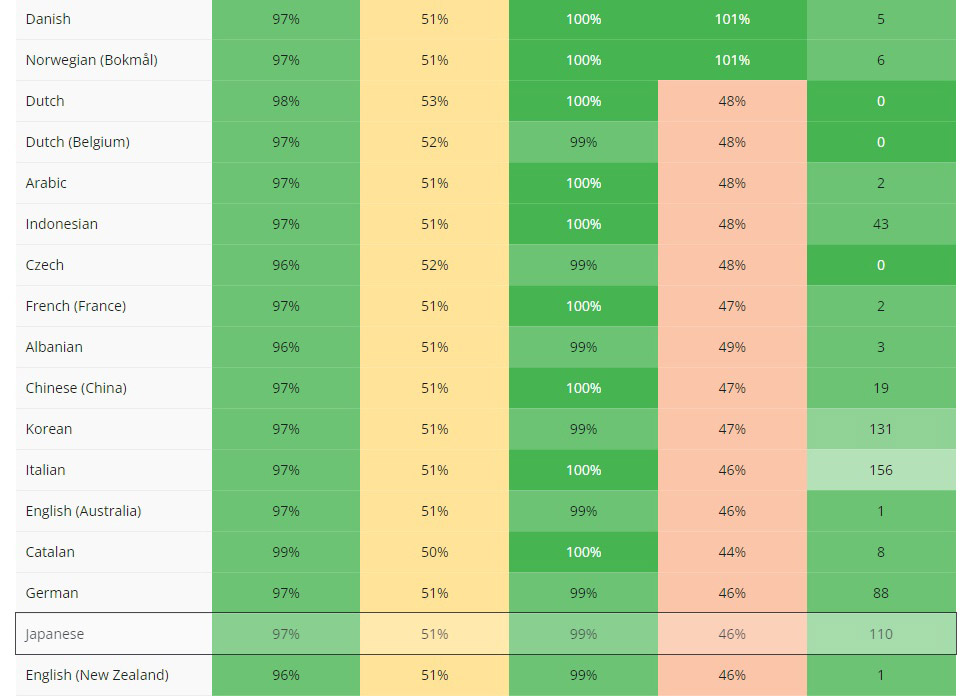
Scroll all the way down and locate the Export link. Follow the instructions in the previous section in order to export, download, and upload the language pack you need.
The instructions we have provided will let you set up your WooCommerce store just the way you want it, language-wise. But if all you want is to change the language of the website‘s interface (dashboard) for your staff, you can do it for them or have them do it by changing their user profile settings.
To do that, they will need to navigate to their profile using the dashboard. It is available at Users/Profile when they log in.
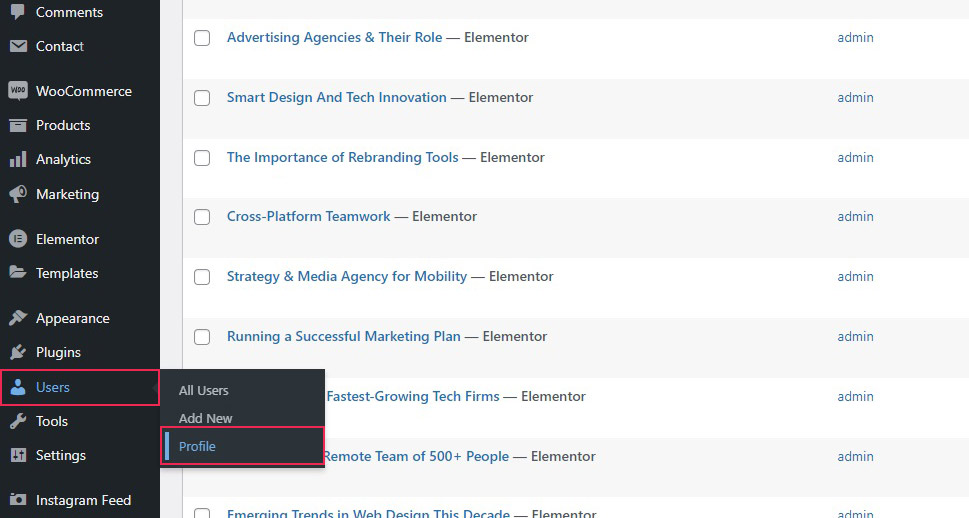
Once there, they should be able to find the Site Language menu on their profiles and select any language they like. The language menu has the language icon beside it.
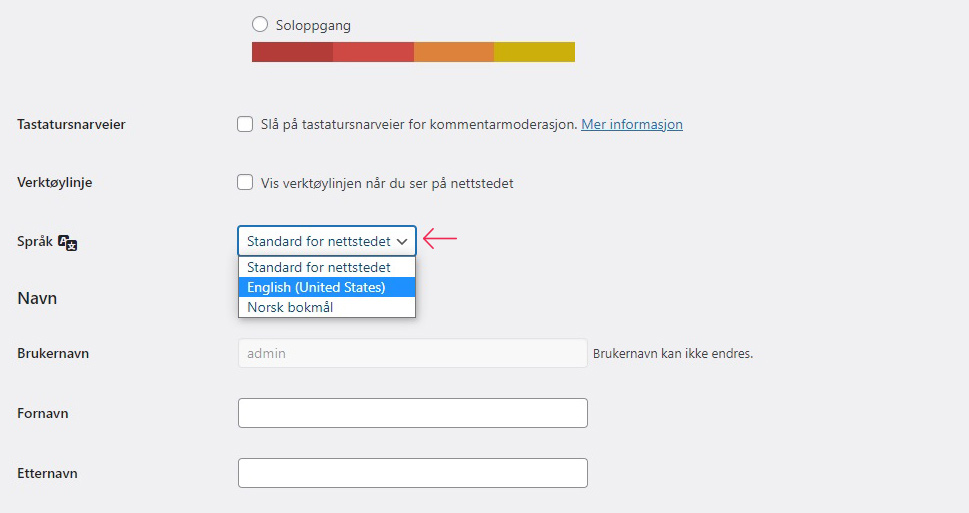
If the language menu does not appear or the language they like is not present in it, an admin needs to navigate to the Settings/General screen and select any language other than English (United States) and install it by clicking the Save Changes button. Alternatively, consult the section on installing a WordPress language manually above.
In Conclusion
As you can see, WooCommerce and WordPress are designed to work well with each other, and you can change the language of your website and WooCommerce, too, without too much trouble. You can change your WooCommerce language settings with just a few clicks of the mouse, whether you use WordPress‘s native capabilities or whether you choose to do it manually. Either way, this tutorial has you covered.


