How to Fix WordPress RSS Feed Errors

RSS feeds are a long-standing method of keeping track of the latest posts from your favorite blogs, news, or podcasts. As RSS feeds are supported by default in WordPress, users can put them to work on keeping tabs on their favorite websites, as well as promoting their own to others.
Even though it is relatively easy to implement a feed on your WordPress website, the possibilities for an RSS error occurring are high. This is predominantly because RSS feeds rely on an XML document that has a strict structure. Therefore, even the smallest mistake in the code can lead to the RSS feeds not showing content properly or at all.
Moreover, if you are using functionalities that rely on RSS feeds, you could experience issues across your whole website. As such, it is imperative to know how to fix WordPress RSS feed errors quickly and efficiently. To help you do that, we created this troubleshooting guide where we tackle the issue in a few easy-to-follow steps:
Before We Begin
Since there are a lot of possible RSS feed errors you can experience, we will approach all explanations thoroughly and methodically. The troubleshooting process we’ll be going through includes verifying if an error is present and determining which one it is. Then we can inspect the common reasons behind it, one by one, until we find the cause and fix it.
The first step in troubleshooting the error is determining whether an error was temporary or if it still persists. It’s worthwhile noting that you can also get an RSS error if you don’t have any published posts. Therefore, you should always verify whether the error is still present before going further with the troubleshooting process. In the following sections, we will cover the three things you need to check when looking for RSS errors.
Making Sure You Have Published a Post
The first thing you should do is make sure that you have at least one published, and publicly visible, post to show in the feed. Checking this is very simple, just navigate to Posts > All Posts and review the list of posts you find there. If you have already published a post, it will be located in the Published tab. If you haven’t published any, make sure to edit one and publish it manually now. Also, make sure it is publicly visible.

After publishing the post, reload your feed to see if the error is gone.
Clearing Browser Cache
To make sure the results you get from your investigation are valid, you should always clear your browser cache before reviewing the feed. We will explain how that’s done using the Chrome browser as an example.
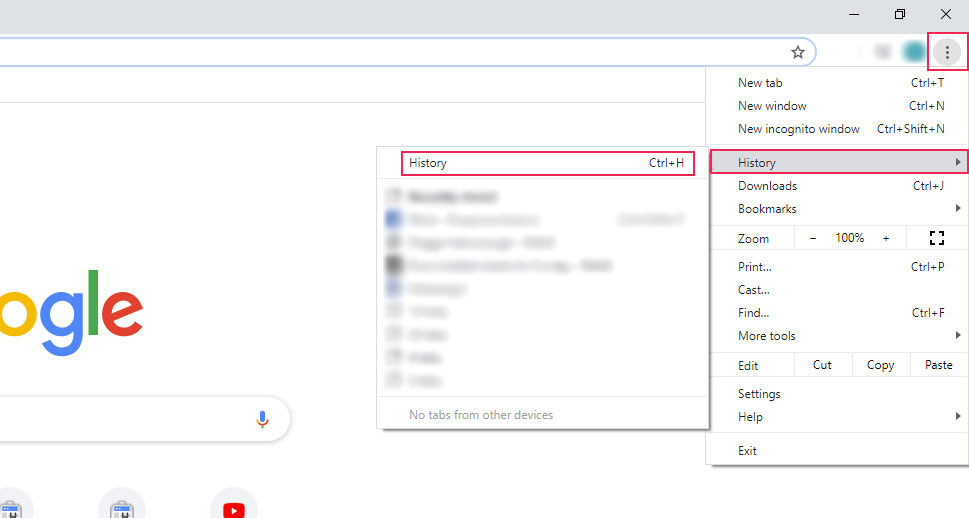
To clear the browser cache in Chrome, click the three dots in the top right corner of your screen. Then, hover over the History option in the menu that opens, and click on the second History option that appears. This will open the History page. Accessing the History page in Chrome can also be done manually by typing in chrome://history in the address bar.
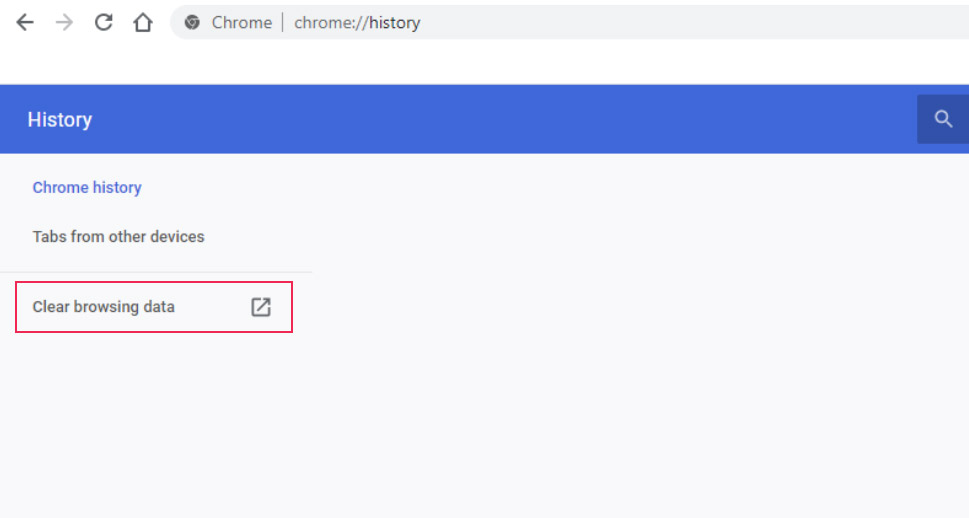
Once you’ve opened the History page, find and click on the Clear browsing data option on the left.
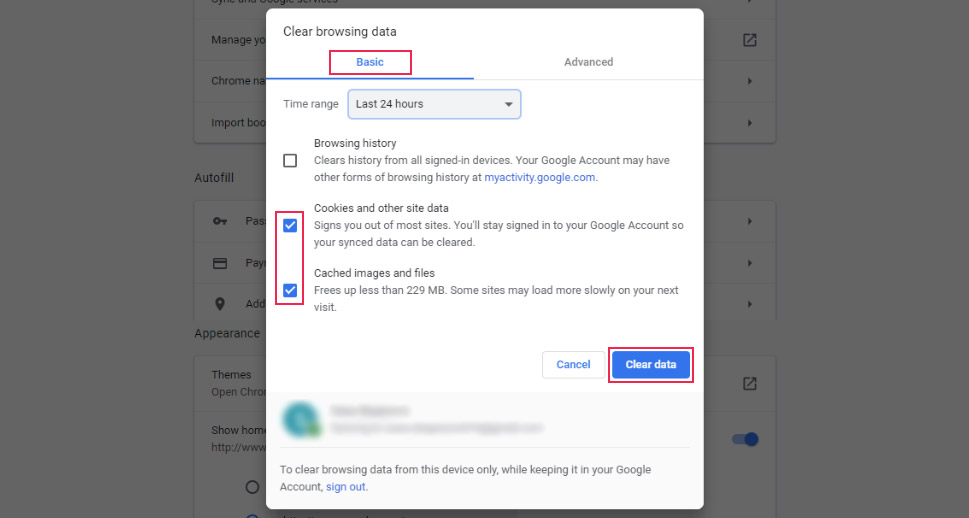
A popup window with two tabs—Basic and Advanced—will open. The Basic tab will be open by default. Use it to choose the time range and the type of data you wish to delete and click on the Clear data button when you’re ready. Alternatively, you can switch to the Advanced tab, which offers more control over what data you remove, for completing this step. Please note, while the Advanced tab will give you more options on what you wish to clear, it is recommended for advanced users only.
When you’re done clearing your browser cache, check your feed once more to see if the errors have disappeared.
Validating the Feed
The next step you need to make is confirming the validity of your website feed. This lets you check the status of your feed and learn more about any errors it currently has. Since validating the feed can be both useful and informative, we suggest performing it after each of the suggested solutions we’ll be covering below.
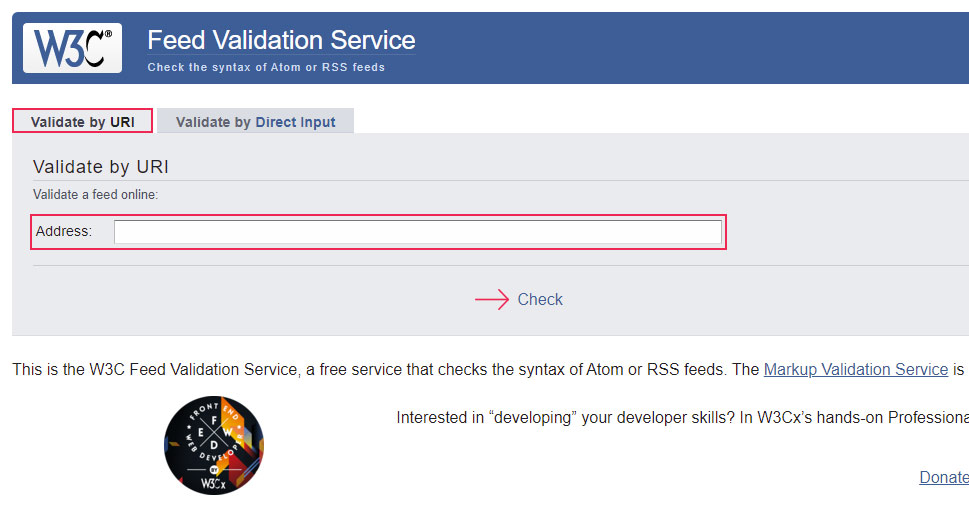
With that being said, you can check the validity of your feed by accessing a feed validation website. Then insert the URL of your feed in the Address field and click on the Check link.
After a bit of processing time, you will receive the validation result. If that result shows that your feed isn’t valid, it will also include a list of XML errors that you should look at and try to resolve. However, if the result indicates that your feed is valid, you will see a message similar to the one below.
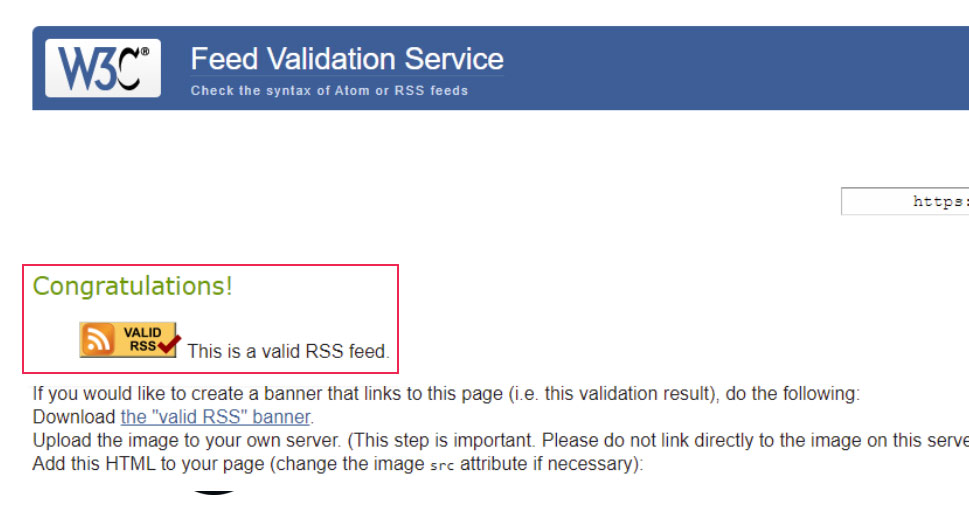
This is the result you should strive for, and it’s the one you’ll get when you resolve the RSS errors that are troubling you.
Qode Themes: Top Picks
View Collection


The most common reason for RSS feed errors in WordPress is various types of code formatting mistakes. If you previously made a custom RSS feed, you should carefully examine its code structure and make sure it was put together properly. As there are too many coding errors that could happen while creating a custom feed for us to cover now, we suggest you take the error result you get from feed validation and check it against the feed validator documentation. The directions on solving specific errors found in the documentation will help you troubleshoot and successfully fix your issue.
On the other hand, if you weren’t the one to create your custom RSS feed, the reason for the error could lie in some other piece of custom code. That custom code could be something you added or a part of your plugins and theme. In either case, you need to investigate.
You should inspect any code snippets that you added to the functions.php of your parent or child theme first. If you use a site-specific plugin for adding code snippets, you should inspect that instead. The best way to examine your files is using FTP.
When looking through your files, you should search for and remove any unnecessary blank lines in the code. This includes single or multiple whitespaces, linebreaks, or tabs within the code.
It’s also very important to remove any unnecessary blank lines from the beginning and the end of the code snippet, especially after the closing PHP tag (?>). The closing PHP tag shouldn’t be placed at the end of the file or followed by blank spaces. This is done to avoid the pluggable.php error that is, next to XML errors, often the reason causing RSS feed issues.
After cleaning up your code, you should review the RSS feed once more. Don’t forget to clear the browser cache and to re-test the validation of your feed. If any errors remain after this, proceed to the following troubleshooting step.
If you had no luck solving the WordPress RSS feed errors by inspecting your code snippets, you should check your plugins for conflict. This is done by disabling them and examining the outcome. It’s especially important to test your plugins if you are using some that create new RSS feeds or modify existing ones.
To disable your plugins, navigate to Plugins > Installed Plugins. On this page, you will be able to see a list of all your installed plugins. Then simply press the Deactivate button next to each plugin, one at a time, to disable them.
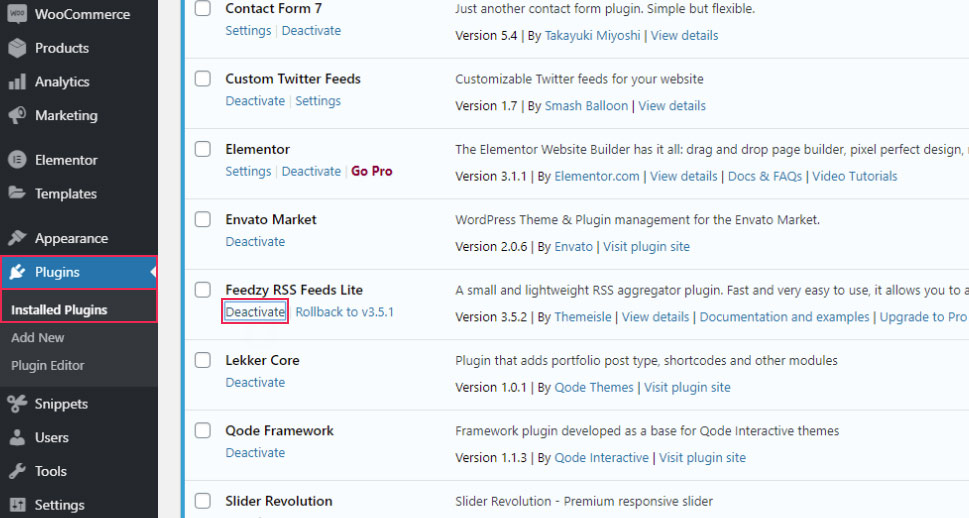
You should first disable any plugins that create or affect your RSS feeds, as they are the most likely to be causing the problem.
After deactivating each plugin, reload the feed to see if it still has errors. If the errors disappear, it means that the last plugin you deactivated was causing them. To solve this issue, you need to ask the plugin authors for additional help. It’s also a good idea to send them your error log, as well as the results of the validation test, so that they can pinpoint the source of the issue more easily.
Similarly to checking your plugins, you should investigate your current theme as it may be the cause behind the WordPress RSS feed errors you are having. To check it, you need to switch to a default theme and then review the feed. The main requirement for this step is having a default WordPress theme, such as Twenty Twenty-One, installed on your server.
Therefore, if you haven’t done so previously, make sure to find and install a default theme before proceeding. Then, navigate to Appearance > Themes and locate the default WordPress theme that you installed on your website. To switch from your current theme, hover over the default theme and press the Activate button.
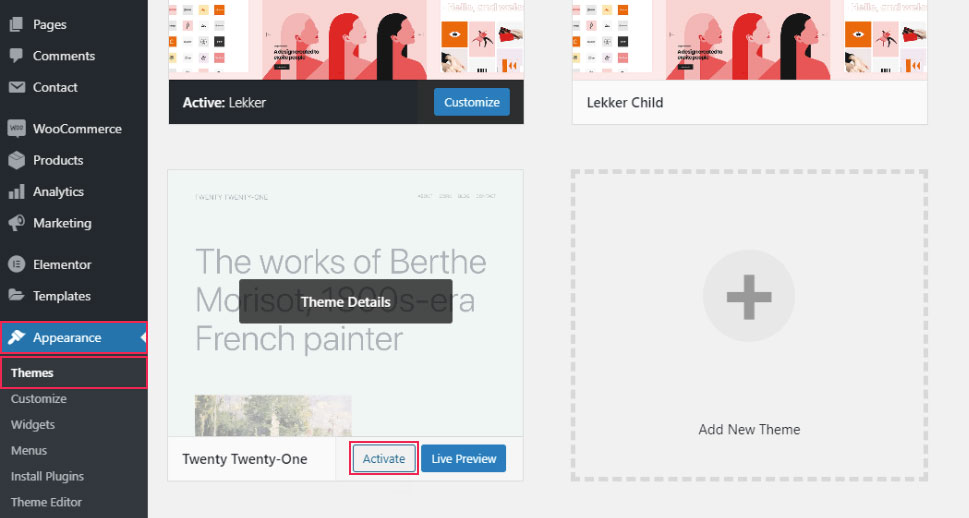
Once the default theme becomes active, you should reload your feed to see if the errors have disappeared. If the issue resolves itself after switching themes, it means that your current theme was causing the problem. Just as you would have done with a problematic plugin, you now need to address the theme’s authors for help. Don’t forget that supplying them with an error log and the results of your feed validation test will go a long way in solving the error quickly and efficiently.
Final Thoughts
RSS feeds are a very useful feature that can quickly turn troublesome when an error appears. Even though various errors can occur, all of them can be solved by being methodical in your troubleshooting efforts. You just need to follow the approach we outlined in this article, as we are confident your RSS error will be gone in a flash. And, as RSS feeds can play a big role in website marketing and content exposure, we suggest bookmarking this article for future use.
