How to Fix pluggable.php Errors in WordPress

There are a lot of errors you can run into with WordPress, but one of the more puzzling ones is the so-called Pluggable.php error. It can happen in various instances, mostly when activating a theme or plugin. The error is quite rare, but it comes with severe consequences when it happens. It causes your site to break, leaving you with a white screen and unable to access your site’s frontend or backend. If you have enabled error logging, you might see a message like this on the screen:
Warning: Cannot modify header information – headers already sent by (output started at your-site-url/wp-content/plugins/plugin-name/modules/file-name.php:52) in your-site-url/wp-includes/pluggable.php on line 963.
Odd messages like this as well as the inability to access your site can frighten any WordPress user, particularly a less experienced one. Luckily, this error isn’t as grave as might seem at first glance. We will show you how you can solve it with relative ease. However, as some steps include editing core WordPress files, it is important to backup your website completely before proceeding.
Enabling the Error Log
Plugins and themes add a lot of custom code that interacts with core WordPress functions, often overriding them. Moreover, you can insert custom code snippets for added functionality. However, all code is prone to errors. Some errors can be hard to recognize but they could have an immense impact on your website. Code errors can cause common WordPress errors, which include the Pluggable.php error. Therefore to solve this issue, you should first enable the error logging to determine which code snippets were faulty.
You can do this by connecting to your server using your FTP credentials and navigating to the root WordPress directory (often called public_html). Right-click on the wp-config.php file and select the View/Edit option in the dropdown.

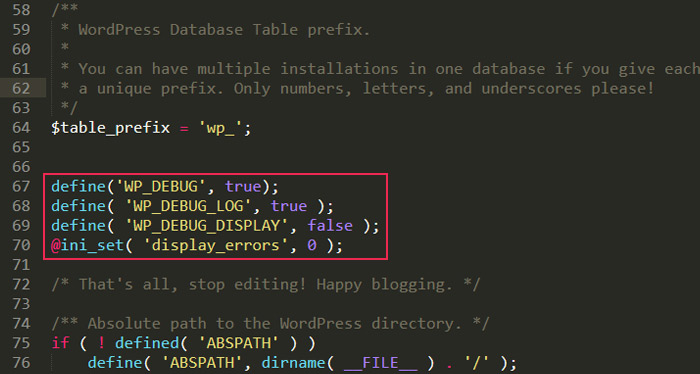
Open the file with a text editor and insert this line of code:
define ('WP_DEBUG', true);
above the /* That’s all, stop editing! Happy blogging. */.
If you discover that your wp-config.php file already has this code but in the form define (‘WP_DEBUG’, false); then you only need to change false into true.
This line of code serves to show all error messages directly on your website. However, if you don’t want your visitors to be able to see these errors, add the following three lines of code at the same place in the file.
define ('WP_DEBUG_LOG', true);
define ('WP_DEBUG_DISPLAY', false);
@ini_set ('display_errors', 0);
These three lines disable the error messages from showing and printing on the screen. Instead, they are placed inside a file called debug.log, located in the wp-content directory (the path will be your-site/wp-content/debug.log).
After you edit the file, save the changes you made, and upload the edited file to your root WordPress directory. This will override the wp-config.php currently found on your server.
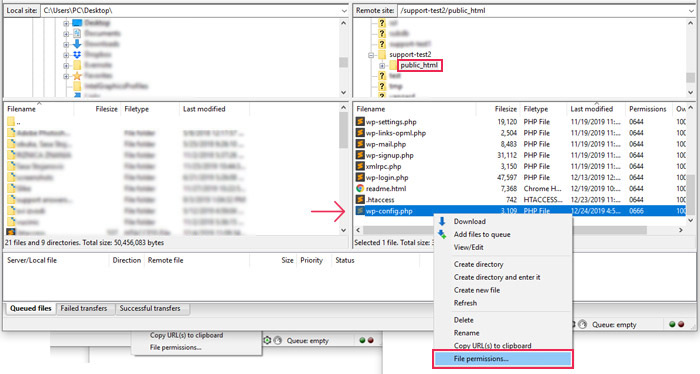
If your wp-config.php file doesn’t allow editing, you need to temporarily change its permissions. To do so, locate your wp-config.php file inside the root WordPress directory, right-click it, and select File permissions in the dropdown.
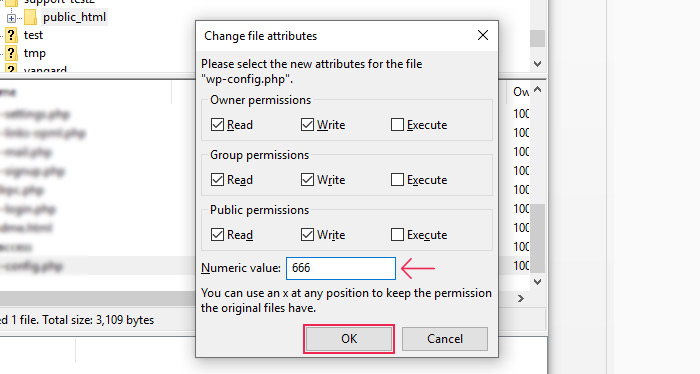
Find the Numeric Value field and type in either 644 or 666. Then, click on the OK button.
After changing the permissions, add the error logging code, as mentioned above. After retrieving the debug.log file, change the wp-config.php file permissions to either 440 and 400, which are the suggested permissions for that file only.
Reviewing the Error Log
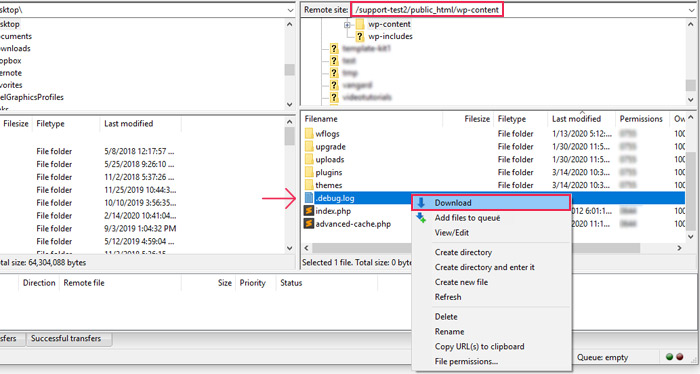
After enabling error logging, you can either review the error messages on the frontend of your site or download your debug.log file via FTP and then open it using a text editor.
When you start examining the log, you should keep in mind that error messages referencing the pluggable.php error can come in many forms. But, most often, they look like this:
Warning: Cannot modify header information – headers already sent by (output started at your-site-url/html/wp-content/plugins/plugin-name/inc/common/modules/options.php:103) in your-site-url/html/wp-includes/pluggable.php on line 1268.
Since the pluggable.php file was often referenced at the end of these error messages, it resulted in the error being named after it. In the past, some sources even advised solving the error by editing that file. However, we must stress that the pluggable.php file is part of the WordPress Core files and shouldn’t be edited! Luckily, the error messages also state which of the plugin or theme files conflicts with the pluggable.php file and on which line of code. This information is located inside the regular brackets. This is the most important part of the error message. In the example we provided above, that part was the following:
(output started at your-site-url/html/wp-content/plugins/plugin-name/inc/common/modules/options.php:103) This error snippet tells you that the file you should look for has a path: /wp-content/plugins/plugin-name/inc/common/modules/options.php, while the error is located in the 103rd line of code.
From this, we can conclude that the error in this example was due to a faulty line of code in one of the plugins. In the same way, a line of code in one of your theme’s files can be at fault.
Example:
Warning: Cannot modify header information – headers already sent by (output started at …/wp-content/themes/theme-name/includes/navigation-menu/menu.php:75) in …/wp-includes/pluggable.php on line 1251
For this error message, the file you should look at has the path /wp-content/themes/theme-name/includes/navigation-menu/menu.php and the error can be found at the 75th line of code.
Finally, we should mention that despite the name, the pluggable.php file isn’t always the WordPress core file that is in conflict. However, the error messages will look similar and their interpretation will remain the same.
Example:
Warning: Cannot modify header information – headers already sent by (output started at site-name/public_html/wp-content/plugins/plugin-name/widgets/special-widget/special-widget.php:123) in site-name/public_html/wp-includes/functions.php on line 6029
This error message states that the conflict is caused by the WordPress core file functions.php. Nevertheless, you should navigate to the path mentioned just before the file:
/wp-content/plugins/plugin-name/widgets/special-widget/special-widget.php
and look for an error at the 123rd line of code.
As such, the pluggable.php error is also referred to as the Headers already sent by error. Essentially, this error occurs when a new function is unable to complete its programmed override of a default WordPress function. The new function could be the work of a plugin, theme, or custom code. That doesn’t necessarily mean that you installed a faulty theme or plugin; sometimes WordPress Core updates can conflict with older coding standards.
This is why we recommend that you use the error log to locate the file that’s in conflict with the WordPress Core and edit it instead of the Core’s pluggable.php file. Frequently, the error is caused simply by an unnecessary blank space in the plugin’s or theme’s code.
Now that you understand how to interpret the error messages you’re likely to get, we can proceed to examine possible solutions for this error.
Deactivating the Plugin or Theme
Plugin or theme deactivation can be a viable temporary solution for this error. It will let you regain control of your site, both frontend, and backend. Afterward, you can either try to tackle the code error yourself or reach out to the plugin or theme authors for guidance.
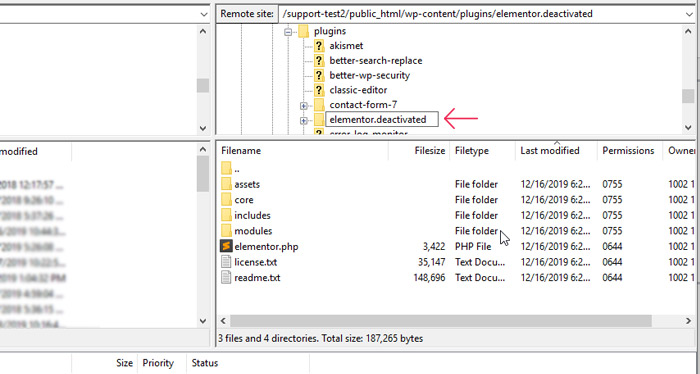
If the debugging process has indicated an error inside one of your plugins, you should deactivate it. To do so, connect to your server with your FTP credentials first. Locate your root WordPress directory, often called public_html, and then navigate to wp-content/plugins. Find the folder of the plugin mentioned in the error message (we used Elementor as an example), right-click it, and select the Rename option.

Rename the plugin directory. We suggest keeping the original plugin name and adding some text to it that clarifies what was done (plugin-name.old or plugin-name.deactivated, for example).
Then, try to access your website once more, and make sure to check both the frontend and backend.
If the error messages you got pointed you towards your current theme, you will need to deactivate it.
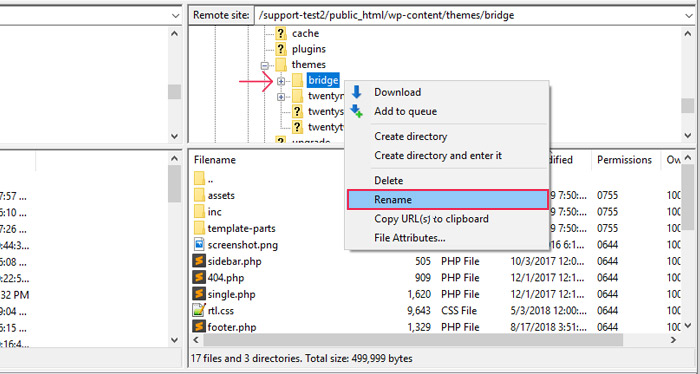
To do so, connect to your server using your FTP credentials and find the root WordPress directory (often called public_html). Then navigate to /wp-content/themes/, right-click on your current theme’s folder, and select the Rename option.
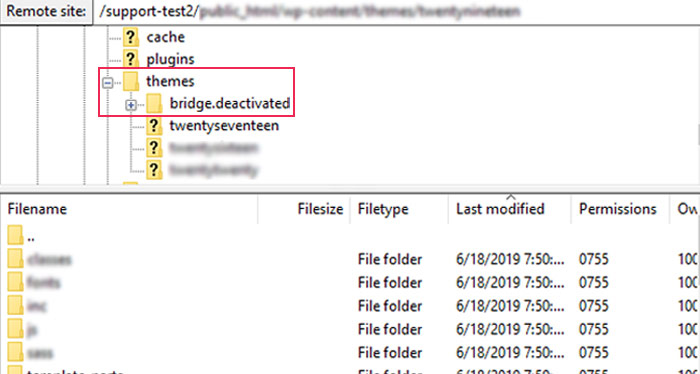
Rename the theme the same way you would rename the plugin—by adding explanatory text to its name (e.g. theme-name.old or theme-name.deactivated). This will deactivate your current theme and activate a default WordPress theme instead. Afterward, try to access your website and your admin dashboard.
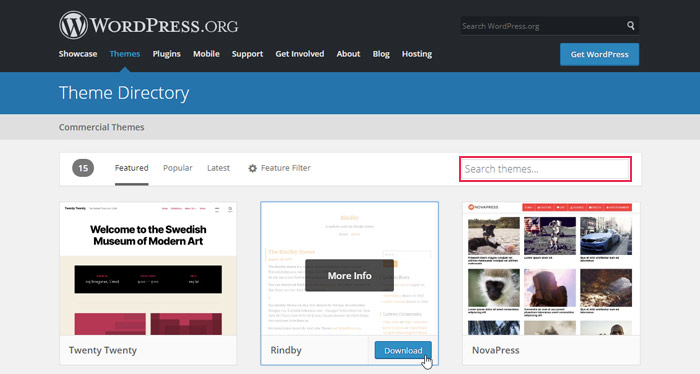
For all users that don’t have a default WordPress theme already installed, there is an added step. Navigate to the WordPress default theme repository, find a theme, and download it. Use the search filter, if you need help finding a specific default theme.
After downloading your chosen theme, look for a theme-name.zip file (theme-name being the actual name of the theme) in your Downloads folder.
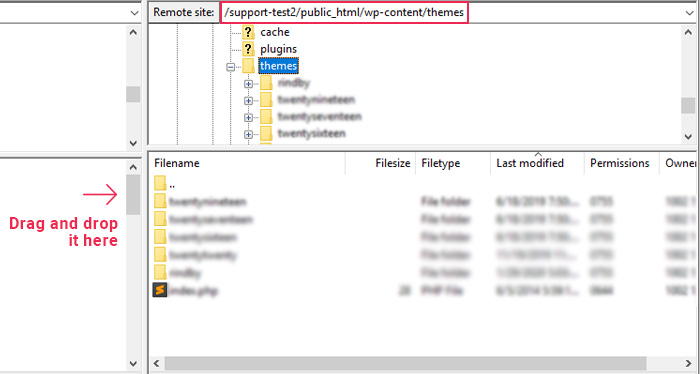
After you locate it, unzip it. Connect to your server using your FTP credentials and find your root WordPress directory. Then proceed to your-site-url/wp-content/themes/.
Drag and drop the unzipped theme-name folder in your themes directory and wait for it to upload.
Make sure not to put the folder inside any other theme folders!
After acquiring a default theme you can proceed to deactivate your currently active theme as described in the section above.
When you’ve deactivated the theme, you should be able to regain control over your site. Check whether that is the case by reloading its frontend and then try logging in to the dashboard to access the backend.
Editing the Code
If the plugin or theme that you previously deactivated is crucial for your site development and you want it back, then you will have to make some code edits to properly solve the issue. If you aren’t familiar with coding, you can always ask the plugin or theme developers for assistance. Describe the issue to them as clearly as you can to avoid misunderstandings. Also, don’t forget to include the error log you obtained in a previous step.
However, for users that decide to tackle this issue on their own, in this section, we will provide some advice to help you. In most cases, the issue is caused by unnecessary blank spaces in the code. Specifically, this can be a single whitespace, tab, linebreak, multiple newlines/linebreaks, or any combination thereof. So, to solve this error, you need to remove any unnecessary characters in the file that your error log has pinpointed. Depending on the number of characters you need to remove, the error can be on the exact line of code indicated in the error log or across several lines before or after it (in case of multiple linebreaks).
We’re going to show you two examples of how you can solve the pluggable.php error.
Example 1:
-
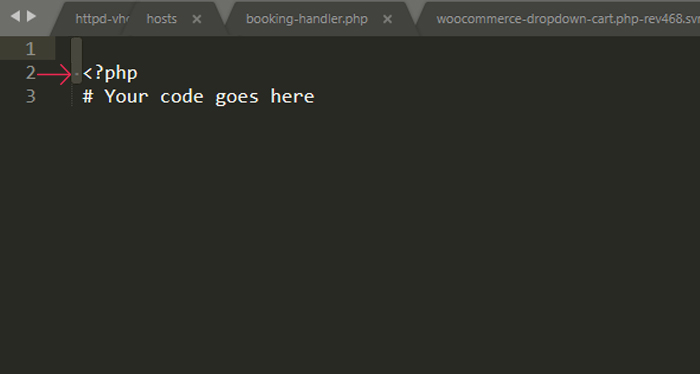
Space and/or newline before the opening <?php tag
You should remove any blank spaces, newlines, or a mix of both that appear before the first opening <?php tag of your file (marked on the screenshot).
Example 2:
-
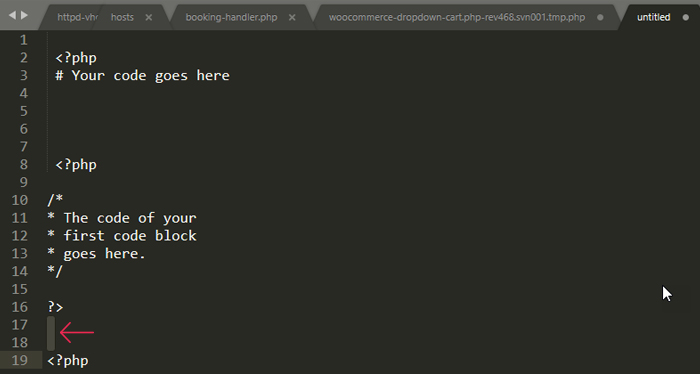
Multiple lines or a mix of lines and other whitespace characters between the closing ?> tag of one code block and the opening <?php tag the following code block
You should remove any blank spaces that appear between the two PHP coding blocks in your malfunctioning file, as marked on the screenshot.
Additionally, if you’ll be working with code, we suggest you follow a recommended coding practice that should help you keep the Headers already sent by errors to a minimum. Namely, with files that only contain PHP code, you should omit the closing ?> tag, to decrease the chances of the pluggable.php error occurring.
Final Thoughts
Pluggable.php errors, also known as Headers already sent by errors, can be caused by plugin or theme conflicts with core WordPress files or redundant spaces in your code. Hopefully, this article has equipped with knowledge on how to troubleshoot this error. The steps we showed you will help you regain control over your previously broken website. Additionally, if you work with code, you should now be aware that even something small like an unnecessary blank space can have a huge impact on the functioning of your site. Therefore, be sure to carefully approach any site modifications. And, even though the pluggable.php error is quite rare, it can still re-appear. As such, we hope you will bookmark this article to be fully prepared if it does.
