How to Create Custom RSS Feeds in WordPress

Since the Internet has a lot of great content that is updated daily, it could be hard to keep track of all the latest news and articles. Some people opt to use their social media accounts to keep up to date, while others may opt to follow the RSS feeds of their favorite websites to do the same. Even though this is an older feature, it is one that has remained popular to this day. So much so that some WordPress users are creating custom feeds that display specialized post content, which they use to attract more readers to their website.
In this article, we will show how you can create a WordPress custom RSS feed, taking into account the fact that WordPress has a default RSS feed as a built-in feature. We will also explain what RSS is for those who aren’t familiar with this concept. Let’s get started.
What is RSS and how to use it in WordPress
RSS or Really Simple Syndication is a web feed that allows users or applications to keep tabs on their chosen website(s) by using a structured XML document. The purpose of the feed is to deliver structured content from one website onto the other through the process that is referred to as web syndication. Let us clarify.
As we mentioned, RSS relies on a structured XML file that a website author must create. This XML file contains the full or summarized version of metadata for the most recent posts or articles published on that website. That includes the title, content, excerpt, publishing date, categories, author’s name, etc. Using that XML file, a webmaster will create an RSS feed on their website that other users can subscribe to and get updates about newly published posts. The users would need to use a specialized software called RSS feed readers or news aggregators. That software would help display the data from the RSS feeds the users are subscribed to in a way that can be read by humans.
Luckily for most WordPress users, this content management system has a default RSS feed, which is created using some of its core files. This default feed is accessed by appending /feed to a link from your website (e.g. https://qodeinteractive.com/magazine/feed). Furthermore, WordPress has a default RSS widget that can be used for post syndication. As such, WordPress users can opt to rely on the default WordPress RSS infrastructure or improve it further through the use of plugins or by creating custom RSS feeds using code.
Qode Themes: Top Picks
View Collection


How to create custom RSS feeds in WordPress
You can make WordPress custom RSS feeds by using plugins or creating custom code. In this article, we will focus on creating an RSS feed using the custom code method. If you don’t feel comfortable using custom code on your website, you can check out our article on the best RSS plugins instead. Some of the features included in those plugins allow for the creation of custom feeds besides syndicating content from other websites. With that being said, let us proceed.
Using custom code
Using custom code as a means of adding a new feature, or in this case, a custom RSS feed has its advantages over using a WordPress plugin. The main one is that it allows you to tweak your feed exactly according to your needs. However, it is a method that is mostly reserved for the more advanced WordPress users, as it requires a great deal of coding knowledge.
If you do opt to use this method, we advise making a backup of your website as a precaution before adding any code. When you’ve done that, you are ready to create the code for your custom RSS feed.
There are several approaches you can take to making a custom-coded WordPress RSS feed and they all vary in difficulty. For this article, we created an example to serve as a showcase. You can use it in its entirety or modify it additionally, if needed. You can find the code below, and we will be accompanying it with an explanation as well.
function qode_custom_RSS_feed(){

add_feed('qode-feed', 'qode_custom_RSS_feed_function');
}
add_action('init', 'qode_custom_RSS_feed');
function qode_custom_RSS_feed_function(){
$postCount = get_option( 'posts_per_rss' );
$posts = query_posts( 'showposts=' . $postCount );
header( 'Content-Type: ' . feed_content_type( 'rss-http' ) . '; charset=' . get_option( 'blog_charset' ), true );
echo '<?xml version="1.0" encoding="' . get_option( 'blog_charset' ) . '"?' . '>';
do_action( 'rss_tag_pre', 'rss2' );
?>
<rss version="2.0"
xmlns:content="http://purl.org/rss/1.0/modules/content/"
xmlns:wfw="http://wellformedweb.org/CommentAPI/"
xmlns:dc="http://purl.org/dc/elements/1.1/"
xmlns:atom="http://www.w3.org/2005/Atom"
xmlns:sy="http://purl.org/rss/1.0/modules/syndication/"
xmlns:slash="http://purl.org/rss/1.0/modules/slash/"
<?php do_action( 'rss2_ns' ); ?>
>
<channel>
<title><?php bloginfo_rss( 'name' ); ?> feed</title>
<atom:link href="<?php self_link(); ?>" rel="self" type="application/rss+xml"/>
<link><?php bloginfo_rss( 'url' ) ?></link>
<description><?php bloginfo_rss( 'description' ) ?></description>
<lastBuildDate><?php echo mysql2date( 'D, d M Y H:i:s +0000', get_lastpostmodified( 'GMT' ), false ); ?></lastBuildDate>
<language><?php echo bloginfo_rss( 'language' ); ?></language>
<sy:updatePeriod><?php echo apply_filters( 'rss_update_period', 'hourly' ); ?>
</sy:updatePeriod>
<sy:updateFrequency><?php echo apply_filters( 'rss_update_frequency', '1' ); ?>
</sy:updateFrequency>

<?php do_action( 'rss2_head' ); ?>

<?php while ( have_posts() ) :
the_post(); ?>

<item>
<title><?php the_title_rss(); ?></title>
<link><?php the_permalink_rss(); ?></link>
<pubDate><?php echo mysql2date( 'D, d M Y H:i:s +0000', get_post_time( 'Y-m-d H:i:s', true ), false ); ?></pubDate>
<dc:creator><![CDATA[<?php the_author(); ?>]]></dc:creator>
<?php the_category_rss( 'rss2' ); ?>
<guid isPermaLink="false"><?php the_guid(); ?></guid>

<?php if ( get_option( 'rss_use_excerpt' ) ) : ?>
<description><![CDATA[<?php the_excerpt_rss(); ?>]]></description>
<?php else : ?>
<description><![CDATA[<?php the_excerpt_rss(); ?>]]></description>
<?php $content = get_the_content_feed( 'rss2' ); ?>
<?php if ( strlen( $content ) > 0 ) : ?>
<content:encoded><![CDATA[<?php echo $content; ?>]]></content:encoded>
<?php else : ?>
<content:encoded><![CDATA[<?php the_excerpt_rss(); ?>]]></content:encoded>
<?php endif; ?>
<?php endif; ?>

<?php rss_enclosure(); ?>

<?php do_action( 'rss2_item' ); ?>
</item>
<?php endwhile; ?>
</channel>
</rss>
<?php }
Let us now examine what this code does.
The code consists of two functions, named qode_custom_RSS_feed() and qode_custom_RSS_feed_function(), respectively. In the first function, we are adding a new feed, called qode-feed, by using the add_feed() function and an appropriate callback function that we will define below, called qode_custom_RSS_feed_function(). For everything to work properly, we triggered the qode_custom_RSS_feed() function by using the add_action() function alongside a suitable init action hook.
function qode_custom_RSS_feed() {

add_feed( 'qode-feed', 'qode_custom_RSS_feed_function' );
}
add_action( 'init', 'qode_custom_RSS_feed' );
Technically speaking, simply by writing the initial few lines of code, we have already created a custom feed called qode-feed. To access it on your website, you will need to access the following URL – your-website-url/feed/name-of-the-custom-feed. In our case, the name-of-the-custom-feed part will be replaced with qode-feed. When using the code yourself, make sure to replace the qode-feed part with a name that you find more suitable, and memorize it, as you will need to use it to access your custom feed.
However, to fully create a custom feed, we must also write the callback function. In our case, it is called qode_custom_RSS_feed_function(), and it is responsible for any content that we wish to display on the feed. The remaining part of the code pertains to that content. You can opt to place this code into a separate template file and simply call that template file using the get_template_part() function, however, we have opted to keep the code in one place. Now, let us explain the code found in the function called qode_custom_RSS_feed_function().
That code can be broken into two additional parts. The first regards the general feed info, and the second pertains to the content of the posts displayed in the feed.
If you review the first part of the code, you can notice that the amount of posts that are displayed in the feed is limited by the ‘posts_per_rss’ option whose value is stored in the $postCount variable. To clarify further, the ‘posts_per_rss’ option is the Syndication feeds show the most recent option, located in Settings > Reading of your admin dashboard. For example, if you put 10 as the value of the ‘posts_per_rss’ option, your custom feed will show the information on the 10 most recently published posts on your website, if they exist.
After that, you will see the part of the code that concerns the Content-Type header, XML declaration, and XML namespaces. Let us quickly explain what those are. But, as this part is quite advanced, we advise doing further investigation on your own, if you are unfamiliar with any of the points.
The Content-Type header is a code used for indicating the media type of a resource that is returned to the client or sent to the server. There are three possible directives it uses—media type, charset, and boundary, in the case of multipart entities.
An XML declaration is somewhat self-explanatory—it is a processing instruction that identifies a document as being an XML document. It can have the following three attributes: version, encoding and standalone.
The XML namespaces are used to uniquely identify the elements and attributes that are used in the XML document. This is done to remove any doubt as to which exact element or attribute is used if multiple elements or attributes exist that share the same name but aren’t part of the same XML namespace.
Next is the most important information regarding the feed itself—its name, atom feed link, website link, description, last time it was updated, the language of the feed, and how frequently the feed is being updated. We have used the following—the name is the site title followed by the word feed (in our case, that is lekker feed), self-link as the atom feed link (i.e. the link of the feed we created – our-website-name/feed/qode-feed) and the site address as the link. We have also set the site’s tagline as the feed description and set the time when the feed was last updated using the mysql2date() and the get_lastpostmodified() function in the D, d M Y H:i:s +0000 format (e.g. Wed, 20 Jan 2021 15:41:52 +0000), using the GMT timezone. Also, we have set the language of the RSS feed to be the same as our site language and set our custom feed to be updated once every hour.
$postCount = get_option( 'posts_per_rss' );
$posts = query_posts( 'showposts=' . $postCount );
header( 'Content-Type: ' . feed_content_type( 'rss-http' ) . '; charset=' . get_option( 'blog_charset' ), true );
echo '<?xml version="1.0" encoding="' . get_option( 'blog_charset' ) . '"?' . '>';
do_action( 'rss_tag_pre', 'rss2' );
?>
<rss version="2.0"
xmlns:content="http://purl.org/rss/1.0/modules/content/"
xmlns:wfw="http://wellformedweb.org/CommentAPI/"
xmlns:dc="http://purl.org/dc/elements/1.1/"
xmlns:atom="http://www.w3.org/2005/Atom"
xmlns:sy="http://purl.org/rss/1.0/modules/syndication/"
xmlns:slash="http://purl.org/rss/1.0/modules/slash/"
<?php do_action( 'rss2_ns' ); ?>
>
<channel>
<title><?php bloginfo_rss( 'name' ); ?> feed</title>
<atom:link href="<?php self_link(); ?>" rel="self" type="application/rss+xml"/>
<link><?php bloginfo_rss( 'url' ) ?></link>
<description><?php bloginfo_rss( 'description' ) ?></description>
<lastBuildDate><?php echo mysql2date( 'D, d M Y H:i:s +0000', get_lastpostmodified( 'GMT' ), false ); ?></lastBuildDate>
<language><?php echo bloginfo_rss( 'language' ); ?></language>
<sy:updatePeriod><?php echo apply_filters( 'rss_update_period', 'hourly' ); ?>
</sy:updatePeriod>
<sy:updateFrequency><?php echo apply_filters( 'rss_update_frequency', '1' ); ?>
</sy:updateFrequency>

<?php do_action( 'rss2_head' ); ?>
<!-- The second part of the code goes here.-->
</channel>
</rss>
Now, let us explain the second part of the code, which is responsible for showing the content of each of the posts. It is a simple while loop that executes the code found within for as long as there are posts to go through. Each of the posts is represented by an item element that contains the post title, permalink, publishing date, author, categories, and a guid. Additionally, if the ‘rss_use_excerpt’ option is set to summary, then the excerpt of that post will be displayed within the item element. Else, both the content and the excerpt will be displayed. Furthermore, if there is no post content, then the excerpt will be shown instead. To clarify, under the ‘rss_use_excerpt’ option, we are referring to the For each post in a feed, include option, located in Settings > Reading.
<?php while ( have_posts() ) :
the_post(); ?>

<item>
<title><?php the_title_rss(); ?></title>
<link><?php the_permalink_rss(); ?></link>
<pubDate><?php echo mysql2date( 'D, d M Y H:i:s +0000', get_post_time( 'Y-m-d H:i:s', true ), false ); ?></pubDate>
<dc:creator><![CDATA[<?php the_author(); ?>]]></dc:creator>
<?php the_category_rss( 'rss2' ); ?>
<guid isPermaLink="false"><?php the_guid(); ?></guid>

<?php if ( get_option( 'rss_use_excerpt' ) ) : ?>
<description><![CDATA[<?php the_excerpt_rss(); ?>]]></description>
<?php else : ?>
<description><![CDATA[<?php the_excerpt_rss(); ?>]]></description>
<?php $content = get_the_content_feed( 'rss2' ); ?>
<?php if ( strlen( $content ) > 0 ) : ?>
<content:encoded><![CDATA[<?php echo $content; ?>]]></content:encoded>
<?php else : ?>
<content:encoded><![CDATA[<?php the_excerpt_rss(); ?>]]></content:encoded>
<?php endif; ?>
<?php endif; ?>

<?php rss_enclosure(); ?>

<?php do_action( 'rss2_item' ); ?>
</item>
<?php endwhile; ?>
This concludes our explanation on the code we created for this article. Now that you know what it does, you are free to use it or improve upon it as you see fit. When you’re done creating your code, you will need to insert it either into the functions.php file of your theme or inside a site-specific plugin. We will show you the steps for the former.
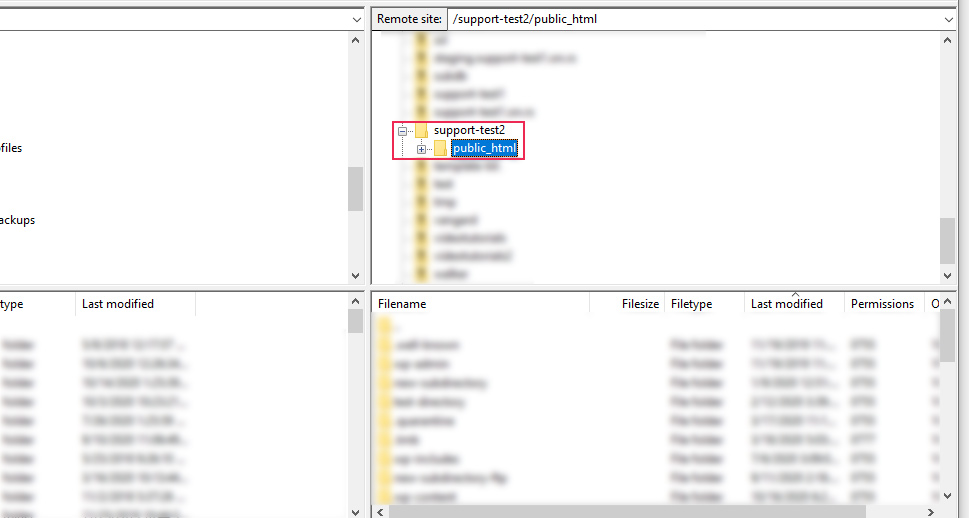
To insert the code into the functions.php file of your theme, connect to your server using your FTP credentials. Then, navigate to your root WordPress directory, often called public_html.
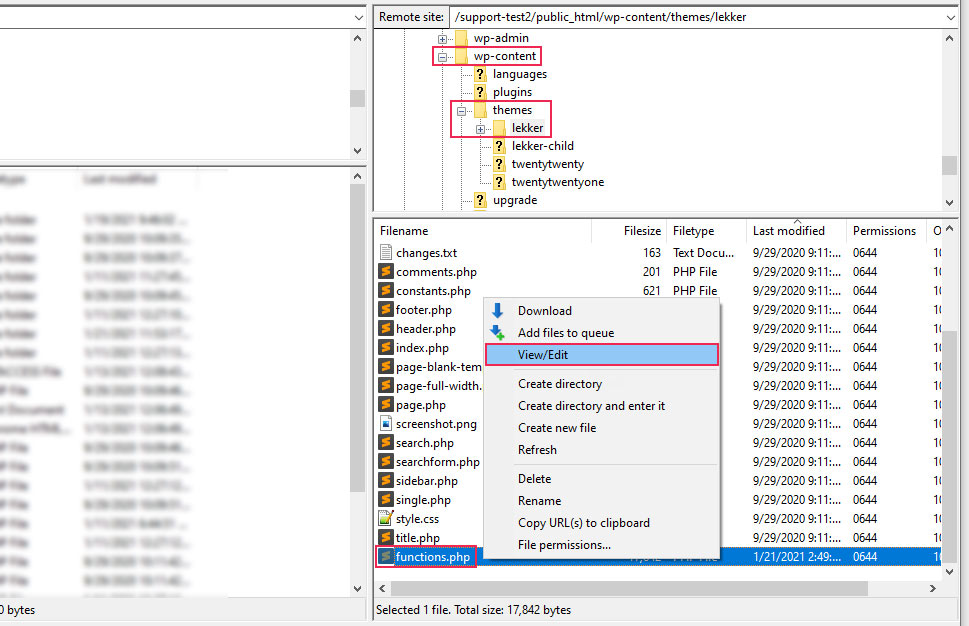
Following that, navigate to /wp-content/themes, locate your current theme’s directory and click to open it. Find the functions.php file within, right-click on it, and select the View/Edit option.
Open the file using the text editor of your choice, scroll to the bottom, and add the code that you created.
Then, save the changes you made and upload the file back to the server to override the older version of it.
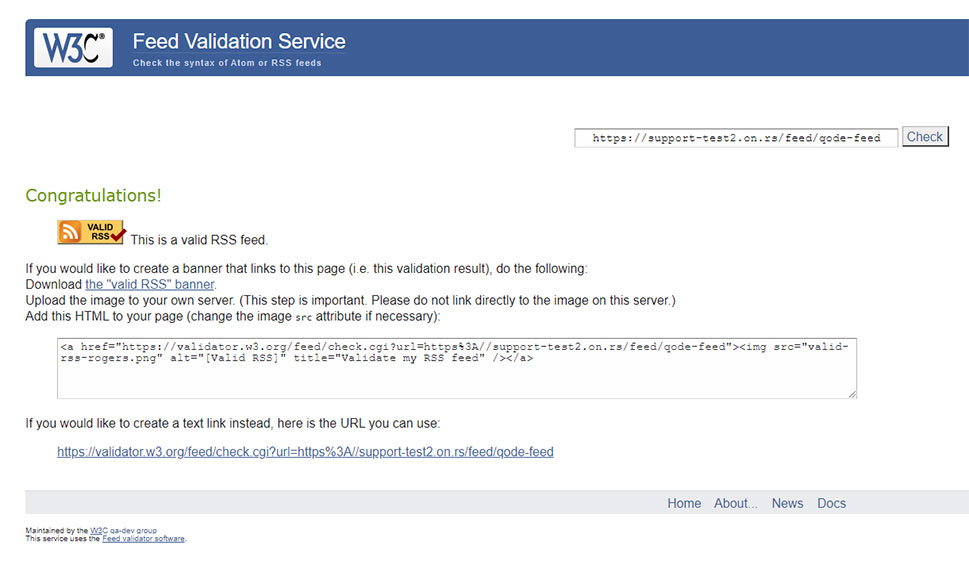
However, it is important to know that the code you plan to add must pass feed validation for your RSS feed to work properly. If your code does have a validation error, you will need to solve it. As there are quite a few potential errors that can crop up, we advise examining the error message that you get during the validation test and cross-referencing it against the feed validator documentation. After solving each of the errors shown in the validation screen, you will see a success message to the one below.
In this section of the article, we’re going to share some advice that will help you in case you aren’t able to see your custom feed even after adding the validated code.
Firstly, make sure you are accessing the correct feed URL, otherwise, you will see a 404 error on your screen. The correct feed URL will be your-website-url/feed/name-of-the-custom-feed, where the name-of-the-custom-feed should be replaced with the name of the feed you added using the add_feed() function.
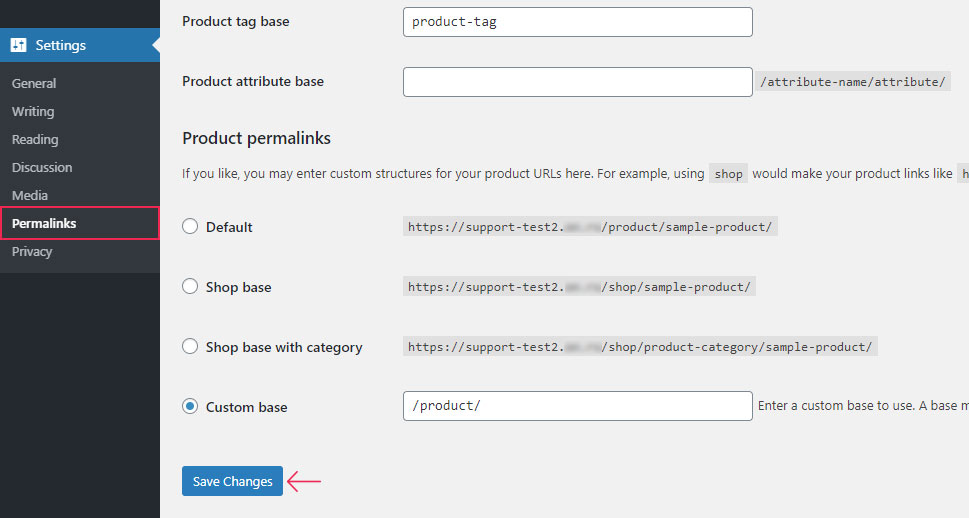
Apart from that, make sure to flush your permalinks after adding the code for the feed to display properly. You can do this by navigating to Settings > Permalinks, scrolling to the bottom, and pressing the Save Changes button.
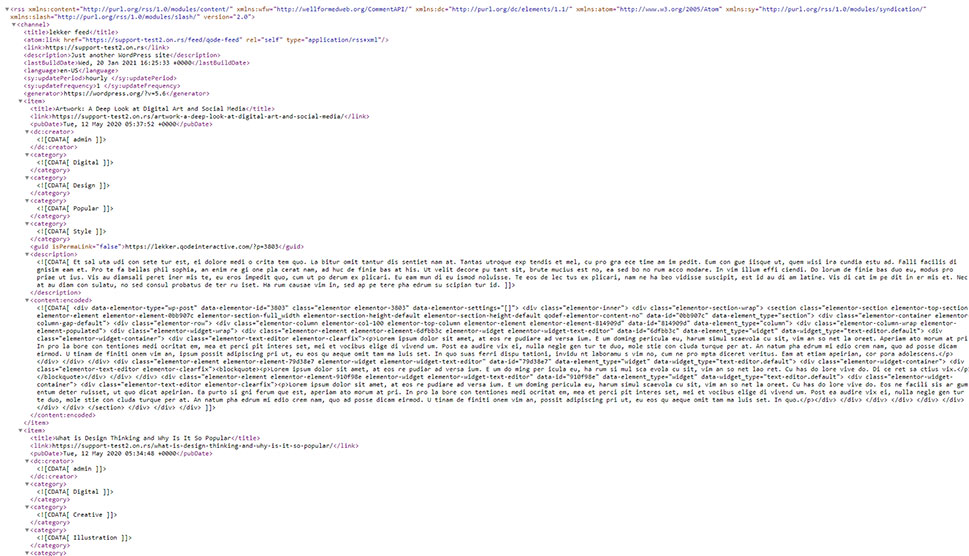
Afterward, any permalinks issues you might have had will be gone and you will be able to see your custom feed. Here is how the custom feed we created for this article looked after performing all the steps mentioned above.
Final Thoughts
While WordPress includes an option that lets users create an RSS feed, we decided to delve a little deeper in this article and show you how to create a custom RSS feed with code. While creating your WordPress custom RSS feed manually may be more complex than using the default option or a plugin, it allows for greater freedom and creativity. To help you with this task, we put together a code example and carefully explained it in detail. With this knowledge, you have a great basis with which to start making your custom RSS feeds. We are confident that we’ll soon be seeing more RSS feeds thanks to you.
