A Complete Guide to WooCommerce Tax Settings

Taxes, as the adage goes, are one of the two things that are inevitable in life. Trying to escape from taxes usually doesn’t end well, which is why it’s better to think about them on time. If you’re thinking about starting an online store with WordPress, checking out tax responsibilities would only be the first step. The second would be to find a way to add them to your workflow in the least disruptive way you can.
For people who use WooCommerce to power their WordPress online store, the platform has given you a couple of choices to take care of taxes as part of your WooCommerce accounting. In this article, we’ll guide you through WooCommerce tax settings using the native option.
We’ll cover:
eCommerce WordPress Themes
View Collection


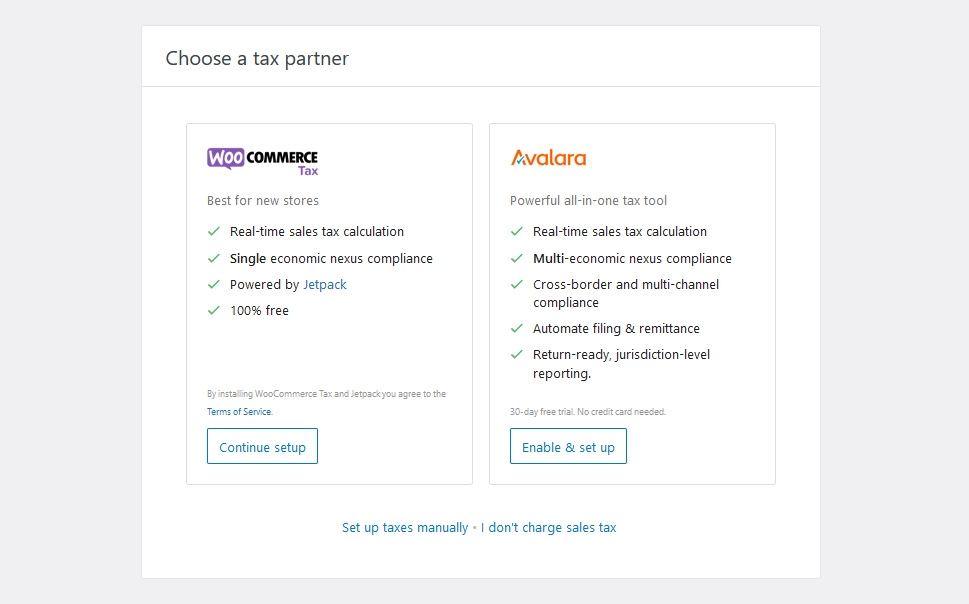
WooCommerce will give you several choices when it comes to setting up taxes with it. The options will be available to you when you navigate to WooCommerce > Home and choose the Set up tax prompt. The four options you’ll have include:
-
Use WooCommerce’s tax extension,
-
Start a thirty-day trial for Avalara’s tax service,
-
Set up taxes manually,
-
Forgo setting up taxes as you don’t charge sales tax.
Choosing a tax partner will automate the process. However, you should note that tax automation isn’t available for all countries and territories. If your store’s located in one of them, you will have to set up the taxes manually.
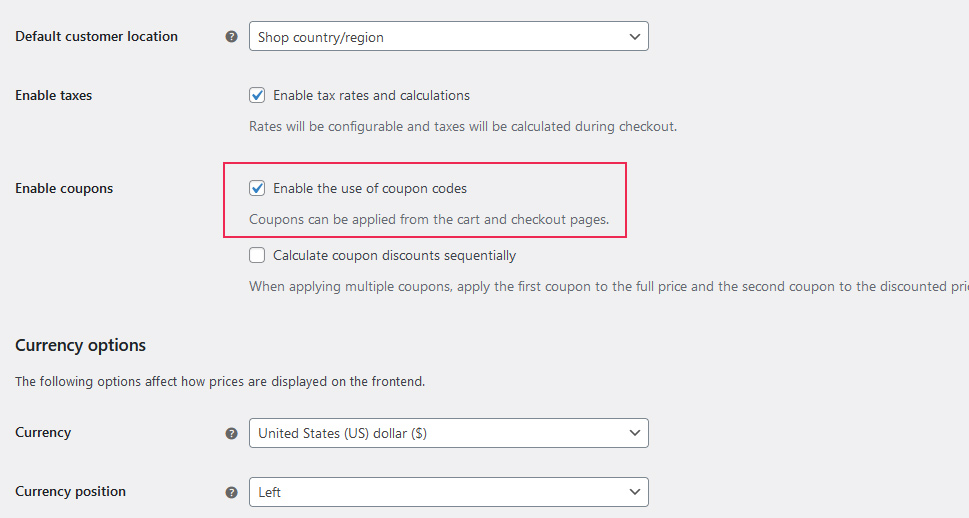
The first thing you’ll notice if you skip making any choices regarding taxation during the setup of the plugin is that, out of the box, it doesn’t have any tax options available. Taxes are enabled separately in WooCommerce. To get access to them, navigate to WooCommerce > Settings > General, and under General Options make sure you check the box next to Enable tax rates and calculations.
After enabling the tax rates and calculations, a new card will appear in the settings in between the products and the shipping cards. That’s where you’ll be able to set tax options and rates manually. We’ll head over there next, at WooCommerce > Settings > Tax, in a second.
Before we do, it’s important to remind you that the store address options you set could play a role in the tax and shipping rates that you charge.
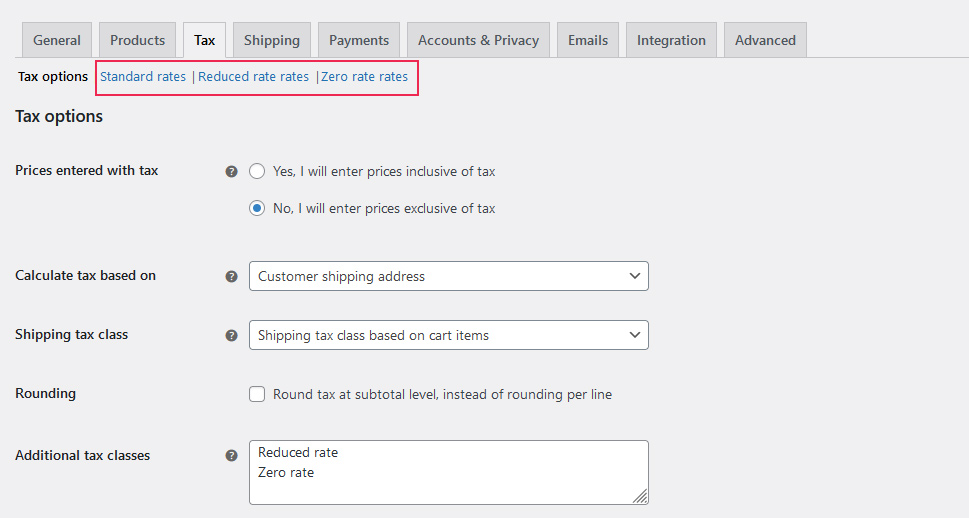
Prices Entered with Tax
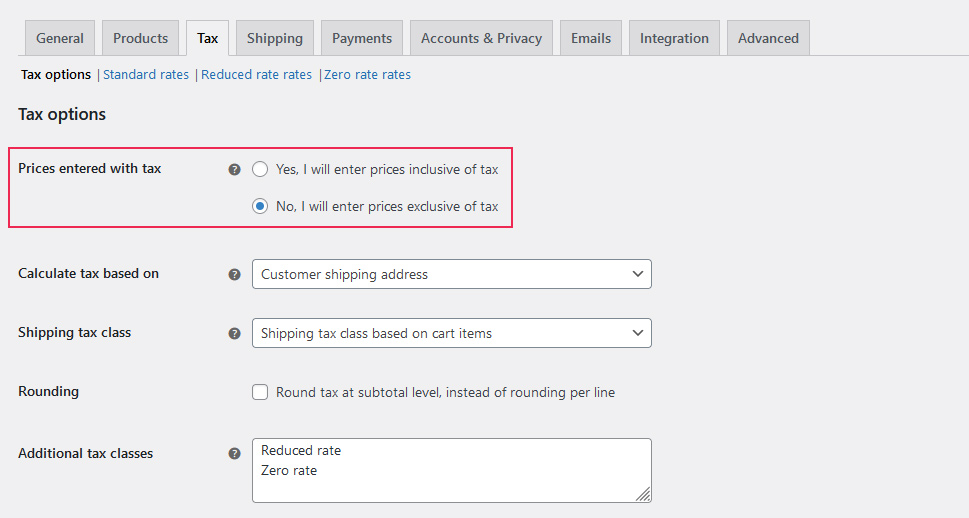
The first tax option you’ll see is Prices entered with tax. It allows you to choose whether the prices you’ll be entering for your products include or exclude tax.
If they include it, the price you put in will be shown to the people to whom you charge taxes. Those that are exempt – if they’re outside of your country, for example – will have the price you set reduced by the tax rate you’ll set later on.
If you choose to exclude taxes from the prices you enter into WooCommerce, taxes will be applied in the checkout when appropriate – based on the rules you set. Keep in mind that if you decide to change it later on, old products will not be updated.
Calculate Tax Based On
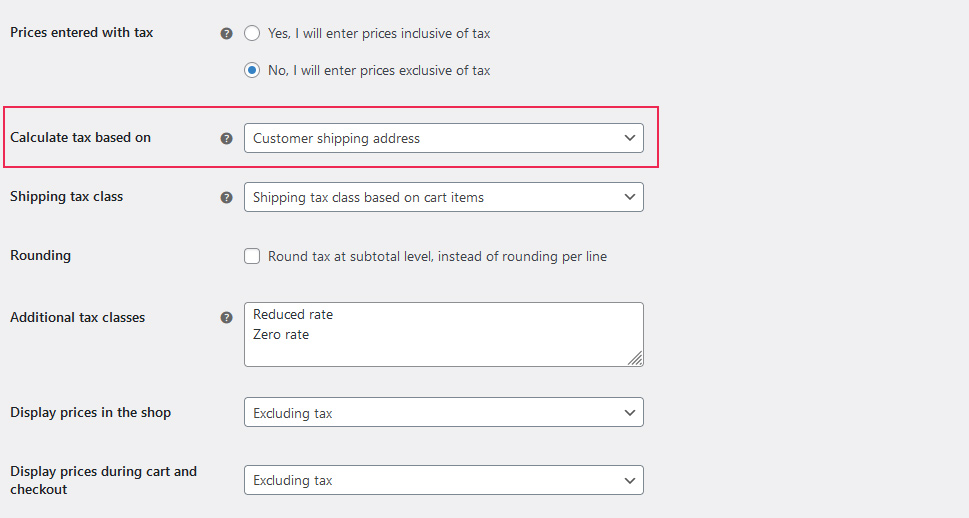
The Calculate tax based on options let you choose which address you want WooCommerce to use for calculating the tax rate. You have three options at your disposal – the customer’s shipping address, their billing address, and your store address.
Shipping Tax Class
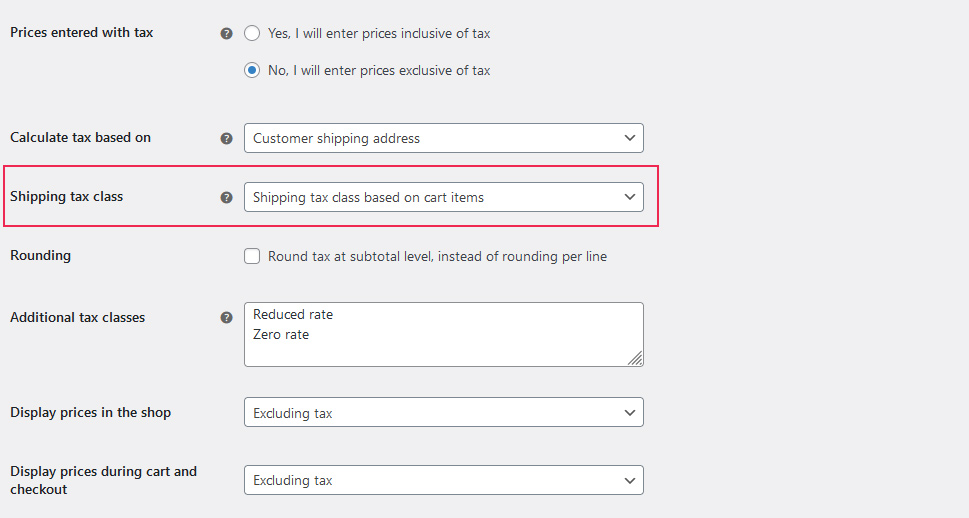
Shipping tax can be based on the items in your cart, or on other rules, you have to define as additional tax classes. In this option, you’ll get to choose whether you want the shipping tax class to be inherited from the items in your cart, or you want to set a shipping tax class for all the items.
Rounding
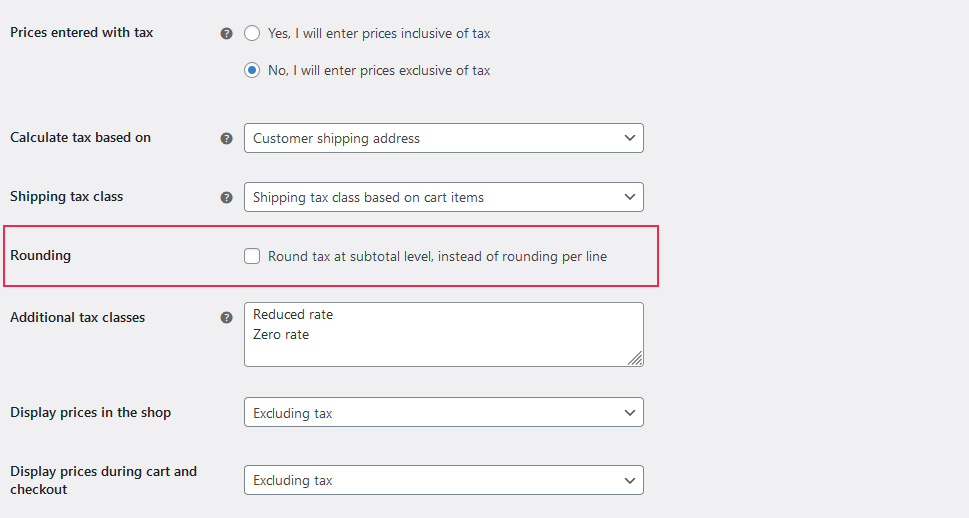
If there’s rounding that needs to be done, this toggle lets you choose where you want it to occur. Leave it unchecked, and rounding will happen per line. Check it, and the tax will be rounded at the subtotal level.
Additional Tax Classes
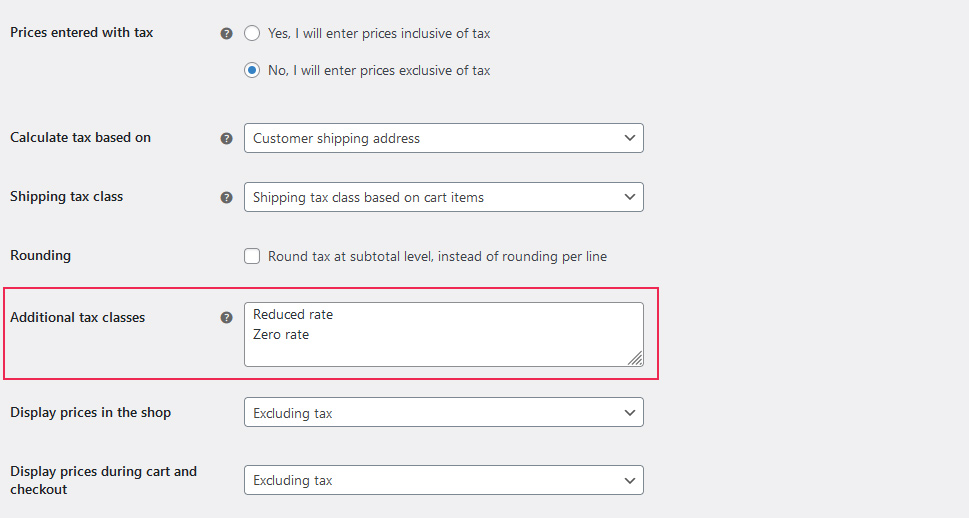
With this setting, you can create the tax classes that appear in the menu at the top of the Tax page, next to the tax options. The Standard tax rate is there by default. WooCommerce comes with Reduced and Zero rates, but you can delete them and create classes that you name however you’d like – just do it before you set the classes. We’ll cover that shortly.
Creating additional tax classes is a handy way to control how many taxes you want to apply to your products. If there’s any reason that a tax rate might deviate from the standard, you should consider creating an additional tax rate for it. Later on, when adding products to your store, you can assign it the tax class of your choice.
Display Prices Options
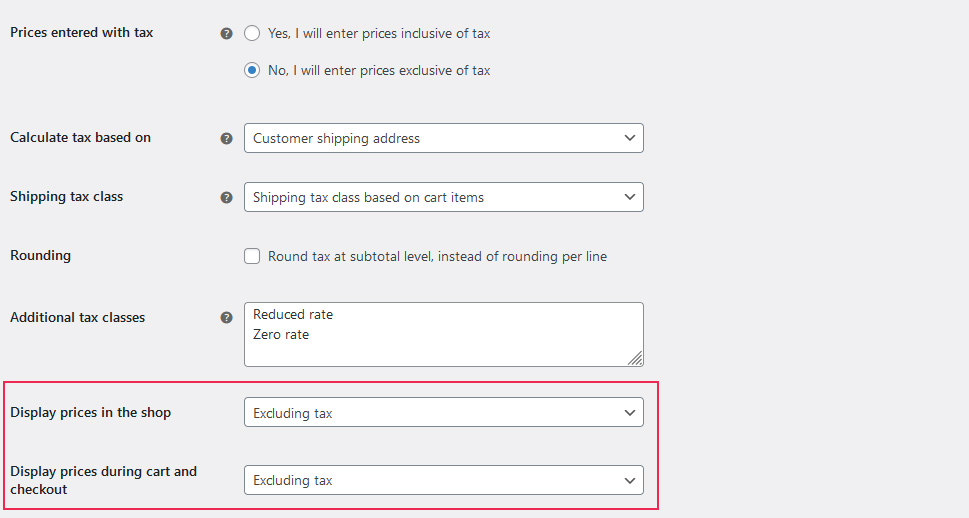
The following two options allow you to set how you want your prices to be displayed in the shop and when they’re in the cart and at checkout. The options you have at your disposal are to include or to exclude taxes.
WooCommerce recommends that you set these options in line with what you chose under Prices entered with tax. If the prices were inclusive of tax, then set to display them including the tax, and vice versa. WooCommerce advises this because, if you don’t, a rounding error might occur.
Price Display Suffix
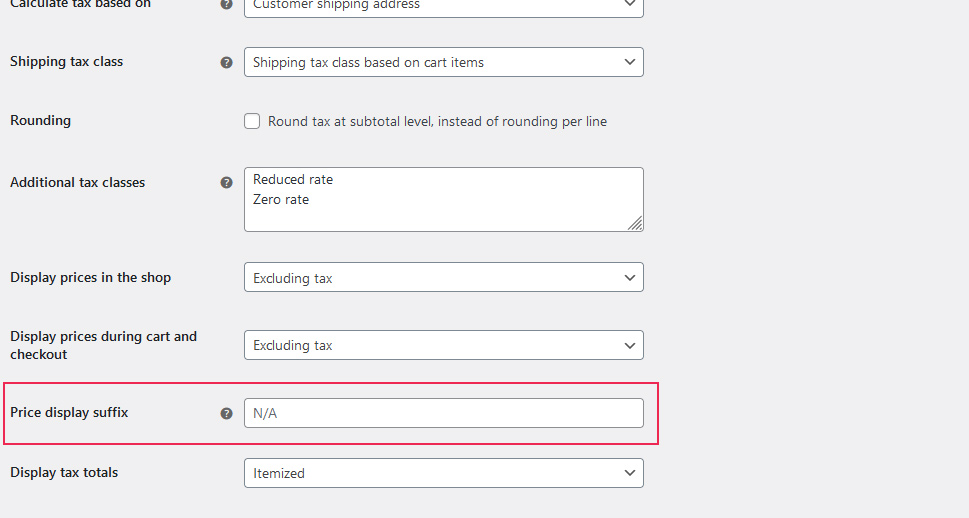
This option lets you choose the words that will appear with your prices, such as “incl. tax.” For variable products, this functionality is turned off.
Display Tax Totals
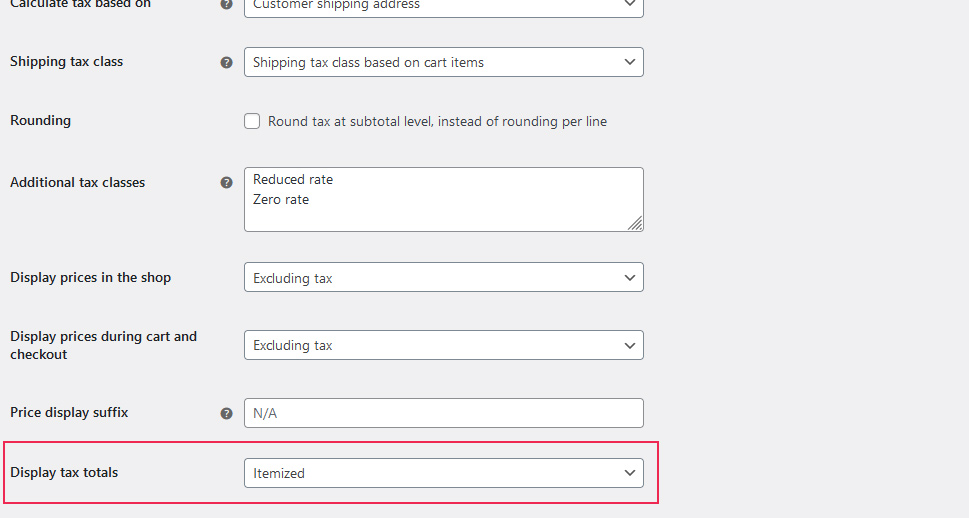
The final option lets you choose how you want to display tax totals – as a single total or itemized. After you’ve set that option, and all the rest to your liking, click on the Save Changes button and move on to set specific tax rates.
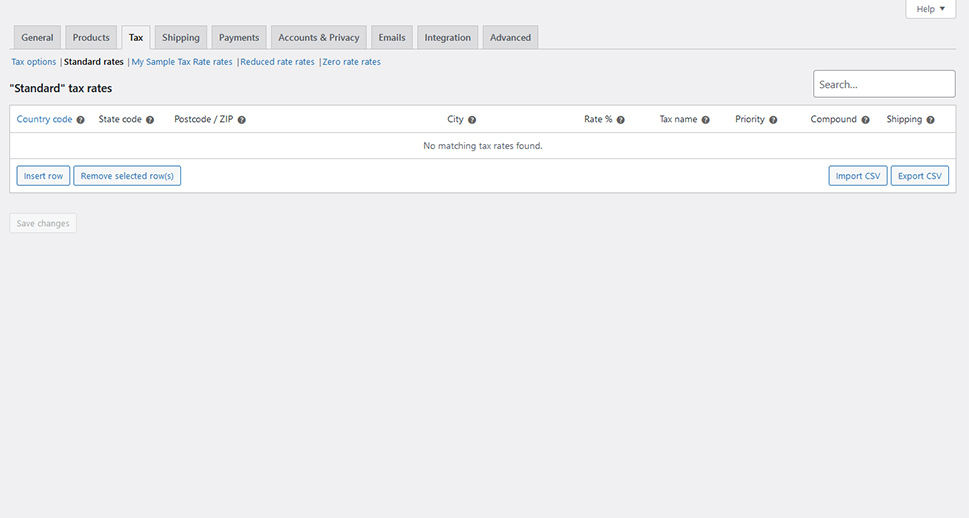
When you want to edit one of the tax classes you’ve created in the tax option, head to the top of the page and click on the tax class you want to modify. There, you’ll find a table with fields for the country code, state code, postcode or ZIP, city, tax rate, tax name, priority, compound, and shipping. The options allow you to insert rows, delete rows, and export and import tax rates via a CSV file.
Filling Out the Geographic Information
These rates can apply to multiple cases depending on the settings you choose. Under Country code, you need to add a two-digit country code, such as “UK,” if the tax is to be applied to people who shop from that country. If you want a global tax, simply leave this field empty. The state code works in the same way as the country code.
Under ZIP and postcodes, you can add postal and ZIP codes as conditions for the tax to apply. Again, leaving the field empty means that the tax applies to all ZIP and postal codes. You can also use ranges in this option. For cities, you can include a single city, multiple cities separated by semicolons, or leave the field blank to apply to all cities.
Filling Out the Tax Options
The rate field lets you add the tax rate up to four decimal places. You should talk with an accountant or a financial advisor to find out which tax rates you need to apply. You can name tax rates if you want and set their priority – something you have to do if you have multiple taxes affecting the same area.
Choose whether the tax rate is compound, which means it applies on top of other tax rates, and you’ll be left with one final option, to set whether the tax applies to shipping. Repeat the process as many times as you need to cover all the cases that might come up in your business. Again, it would be best to consult someone who understands taxes and duties, as this isn’t something you’d want to mess with.
Let’s Wrap It Up!
When you’re thinking about all the things you’ll need for your online store’s bookkeeping, make sure that you place proper tax charging and accounting as your top priority. Failing to do so can have a severe negative effect on your business and setting everything up doesn’t have to be that hard.
With WooCommerce tax settings, creating taxation rules is easy, even though it might become a little tedious if there are too many rules you’d like to add. Still, it’s a free option that’s available to anyone who wants to use WooCommerce, plus it works well and is well documented.
