What is a WordPress Mega Menu and How to Add It to Your Site

Mega menus can be quite a useful addition to multi-layered websites that have a lot of content and require a rich type of navigation. They can help you improve your website’s performance and overall user experience, in turn increasing the potential for more conversions. If you feel like this type of menu structure can also be of use to you, then read on as we explore the benefits of creating a WordPress mega menu and show how to add one to your website.
Here’s what we will be covering:
A WordPress mega menu is a drop-down, expandable type of navigation menu that appears when users hover over or click on an item in the menu bar. Most often, all related topics in this two-dimensional type of menu layout are grouped into categories for an easier browsing experience. The navigational content can be arranged both horizontally and vertically, and it can also be split into sections.
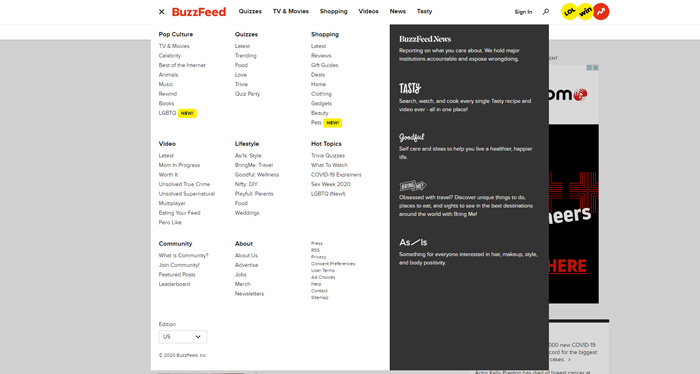
A good example of a mega menu that opens on a click can be found on Buzzfeed’s website. Once a user clicks on the menu opener in the corner, a detailed mega menu will appear, uncovering menu items and sub-items grouped into different categories, such as Shopping, Lifestyle, Pop Culture, etc.
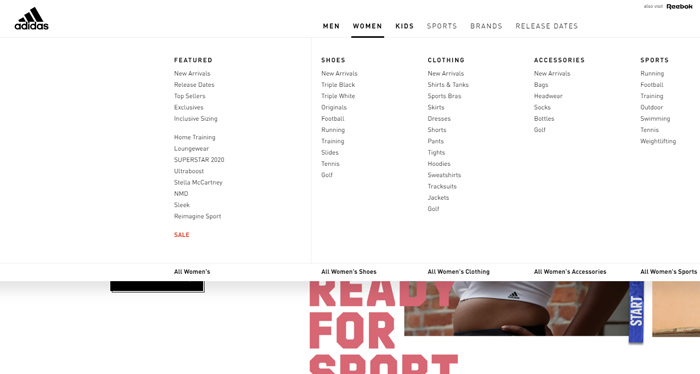
The Adidas Official Website Australia has a great example of a standard horizontal mega menu. Hovering over top-level navigation bar items (men, women, kids, etc.) triggers a dropdown with horizontally-arranged menu items. These items are further grouped into categories for better getting around, such as shoes, clothing, accessories, and so on.
Mega menus can even include rich-media types that further define or complement the content behind these menu links, like images or videos.
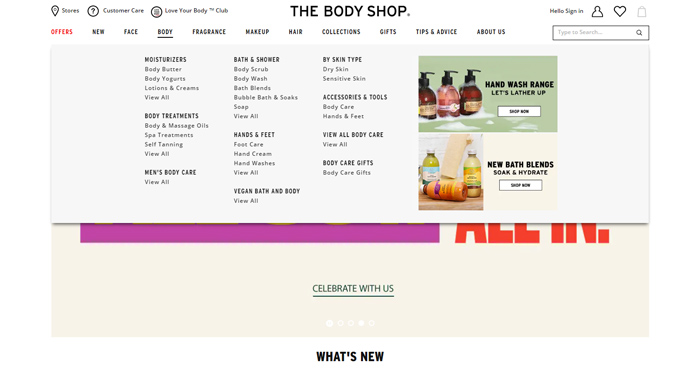
The Body Shop’s website features a good example of using rich media in the mega menu, specifically the clickable banners with images and CTAs.
Not only does a mega menu allow users a more detailed and better organized site navigation, but it is also a perfect opportunity to hint to certain areas of your website that would otherwise take a bit longer to find. As a result, users will be able to explore different pages of your website more quickly and efficiently, which can only lead to more conversions and less abandoned sessions.
So, without further ado, let’s see how you can add a mega menu in WordPress. We will show you an easy way to do it with the help of a Max Mega Menu plugin, and later, we’ll also explain how you can create a mega menu if you’re using one of Qode WordPress themes.
Even though mega menus can be extremely useful and help visitors navigate a website more easily, the fact of the matter is that not every website needs one. We’ll go right ahead and say it – you shouldn’t add a mega menu only because it seems like a cool thing to do.
One of the main advantages of using a mega menu is that it allows you to display multiple links at once, all with the goal of making the navigation process faster, easier, and more user-friendly as a whole. So, if you’re a big shop or a retail site with a lot of category items, or you offer a huge list of services and you think displaying them all in a mega menu would benefit your potential customers (and of course, your business), then by all means, you should add one. But if your website doesn’t have that many links, then basic top-level menu navigation (for pages like Home, About, and Contact) with a few additional sub-items for your inner pages will more than likely be enough.
When adding a mega menu to WordPress, we recommend using the Max Mega Menu plugin because it’s quite easy to set up and use.
First and foremost, you need to install the plugin and then activate it.
Once you’re done with the installation and activation process, you will see that a new menu item has been added to your WordPress admin, called Mega Menu. Click on it to access the plugin’s General Settings.
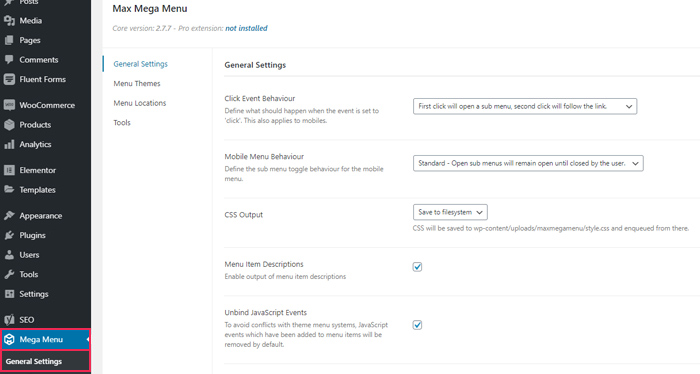
Here, the plugin allows you to set certain options according to your preferences. The first thing you can define is the Click Event Behavior (i.e. what happens after the first and the second click on the menu). In the same way, you can set the Mobile Menu Behavior, (or the behavior of a submenu toggle on your mobile), decide where to save a CSS Output, enable output of Menu Item Descriptions, and so on.
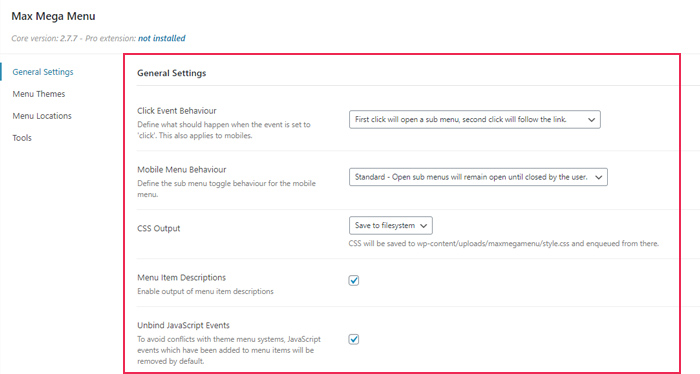
When you’re done setting these, you can move on to setting the menu colors. This is an important step, because your mega menu colors should match the navigation menu container of your WordPress theme.
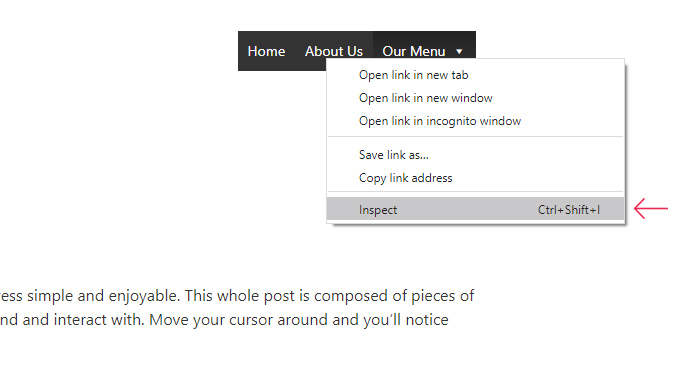
Getting the exact colors used in your theme’s menu container is simple – just right-click the navigation menu in your browser and then click Inspect.
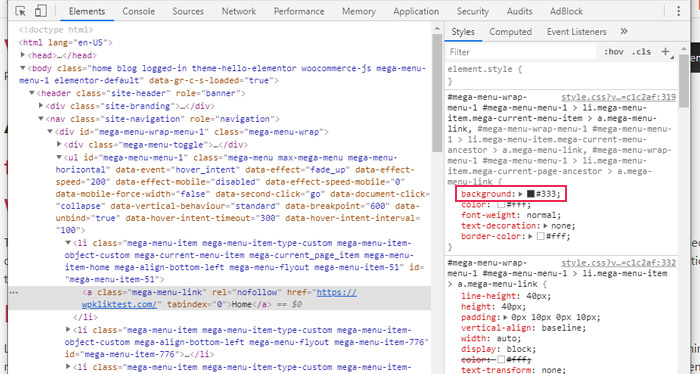
Then, simply copy the color hex code for the menu background and paste it in a simple text file so that you can use it later.
Then go back to the Max Mega Menu plugin settings page. Click the Menu Themes screen and then select the tab called Menu Bar.
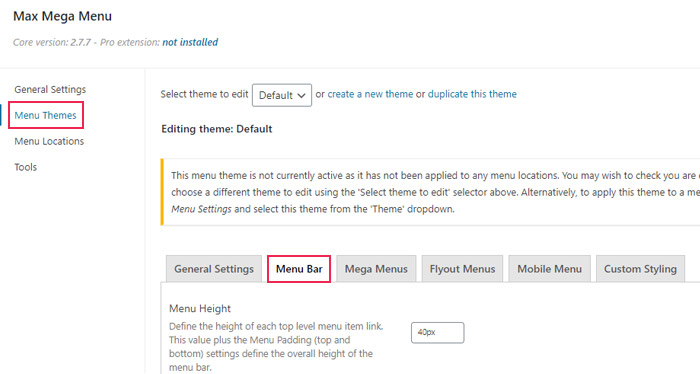
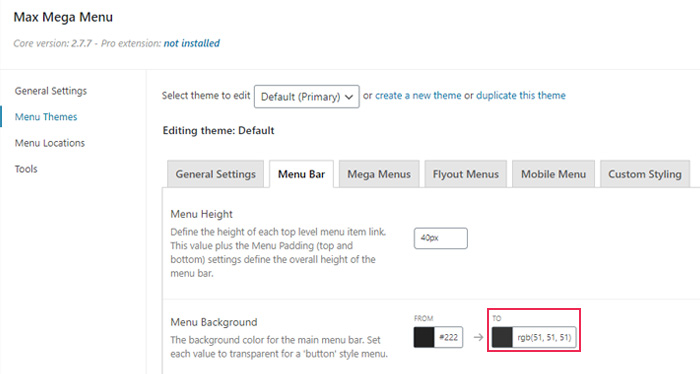
Then, replace the background color for the main menu bar.
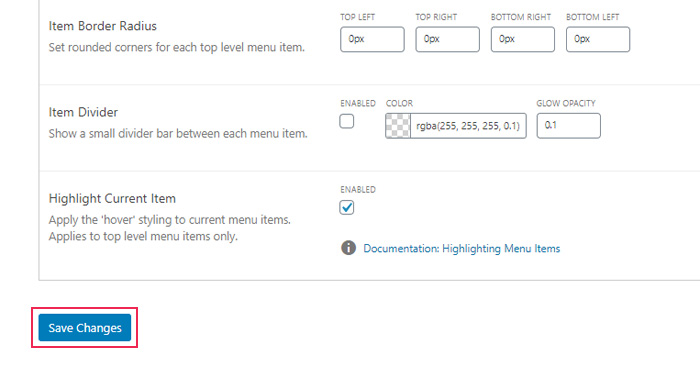
After you’re done, make sure to click on Save Changes.
Once you’re finished with customizing the plugin settings, you can start creating your mega menu.
Head to Appearance > Menus and add a navigation menu together with all its top-level menu items and sub-items.
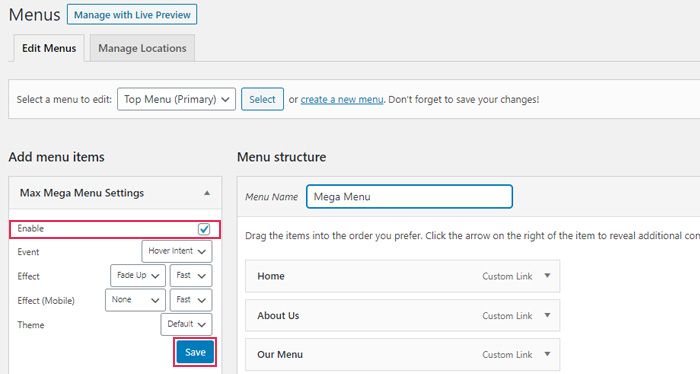
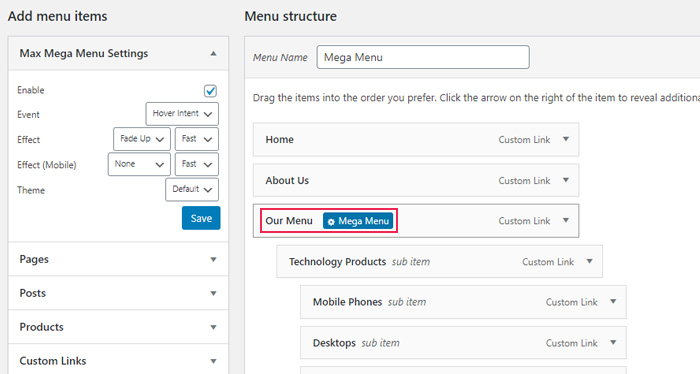
You will notice that a new option has appeared in the Menus screen after a Max Mega Menu plugin installation, called Max Mega Menu Settings.
Next, you should enable your mega menu by marking the box located under the Max Mega Menu Settings dropdown and hit Save.
Once you hover over a menu item, you will see that a Mega Menu button has appeared on the tab, right next to its title.
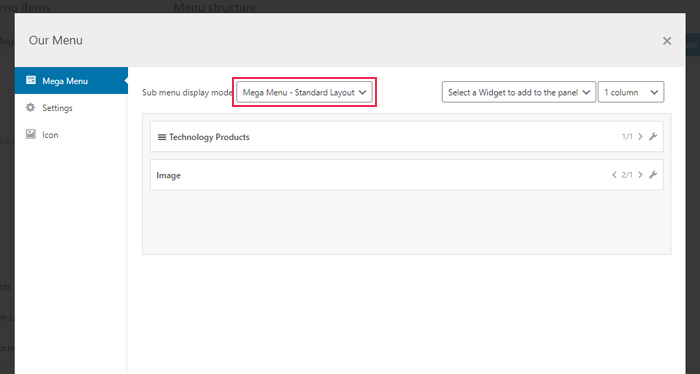
Clicking on this button will make a new popup appear with additional options for the menu item. If you’d like, here you can change the sub menu display mode (Flyout, Standard and Grid Layout).
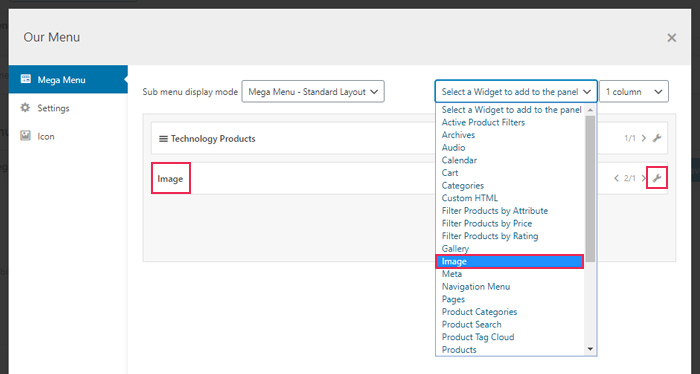
Also, you will be able to add any widgets to your menu by selecting a widget type from the dropdown, and then adding it by using the wrench icon (for example – an image, a gallery, an audio file, etc.).
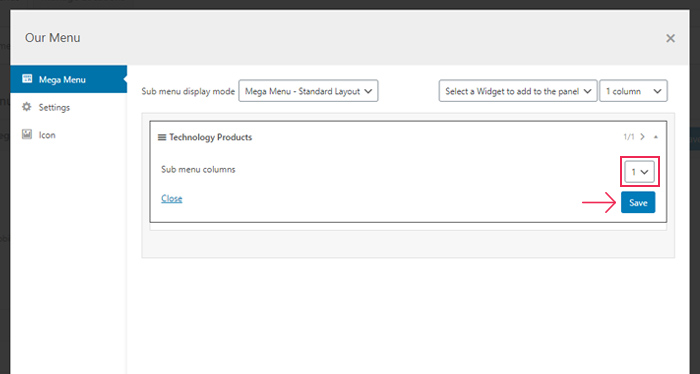
Additionally, you can select the number of sub-menu columns you wish to have.
To store your widget settings, click the Save button.
Close the popup when you’re done, save your menu, and then visit your site to check out the appearance of your mega menu.
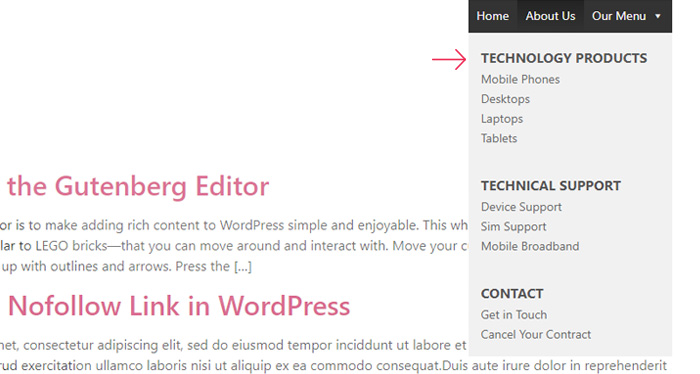
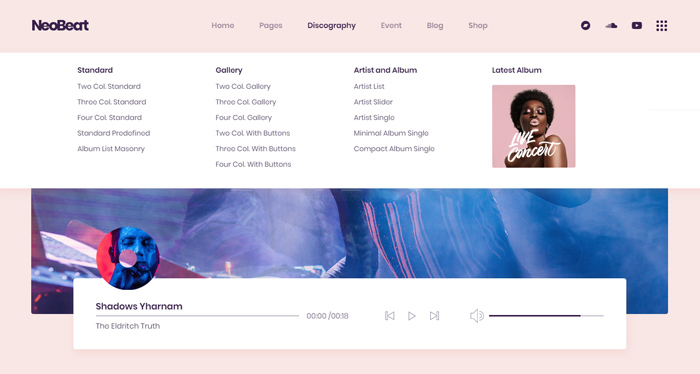
If you’re using one of Qode Interactive‘s themes, you’ll be pleased to hear they come with the mega menu functionality integrated.
To add a mega menu in Qode themes, once again, you need to go to Appearance > Menus and create your navigation menu, top-level items, and sub-items first.
For each top-level item that you wish to add a mega menu for, you need to click on the menu item name to open its options, and then select the wide option in the Type dropdown.
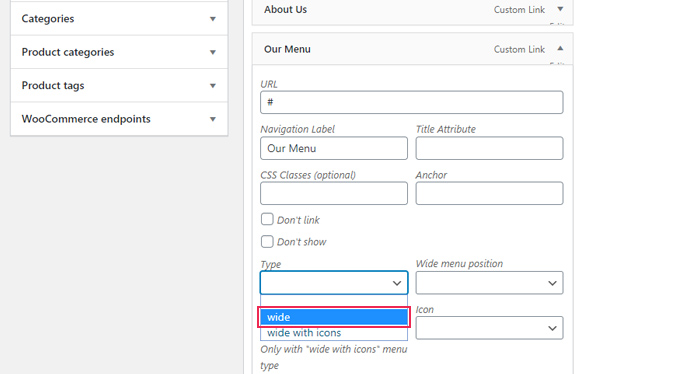
If you want to add the mega menu navigation system to every top-level item, you need to change the same setting to Wide on each item individually. In other words, there’s no one universal option, but rather each top-level item has to be set multiple times, in the exact same way.
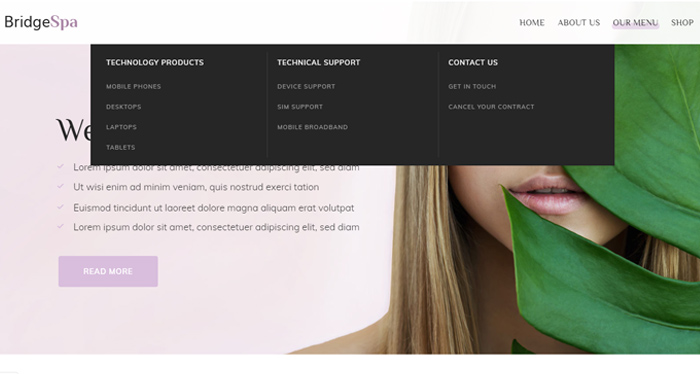
And that’s essentially how you add a mega menu if you’re using one of our WordPress themes. Once you’ve clicked on Save Menu, you can go to your live page to check out the appearance of your mega menu.
Conclusion
A mega menu is a very useful website navigation system that can greatly improve your website’s UX. If you have a complex website that contains a large number of pages and product categories, we highly recommend installing a Max Mega Menu plugin. This plugin will help you build multi-column mega menus and even allow you to add some striking widgets to go along with your menu items. Finally, if you’re using (or plan to use) one of Qode Interactive themes and also need to create a mega menu for your site, you’ll find that it’s quite simple to do – even without the help of a plugin.


